
Inbox
The Inbox Message node sends a message to a contact's Inbox. The Inbox lives in one of two places: inside your app, where the Dengage SDK shows the message, or on your own server, where your backend pulls the message through the Dengage API. You can use the node in both One-Time and Recurring flow campaigns.
This page covers only the settings inside the Inbox Message node: content, delivery application, tags, expiry, and priority. To create the campaign, schedule it, and select the audience, see One-Time Flow Campaigns or Recurring Flow Campaigns.
Key terms
| Term | Meaning |
|---|---|
| SDK application | An iOS, Android, or Web application that includes the Dengage SDK. The SDK stores and displays Inbox messages inside the app. |
| Custom Inbox application | Any app or backend you register in Dengage to receive Inbox messages server to server through the API. You build the inbox screen yourself. See Custom Inbox application. |
| Inbox Message content | The message itself (title, text, image, button). You create it in Content → Inbox Message and reuse it in one or more campaigns. |
| Delivery path | The route a message takes to the contact: either the SDK path or the Custom Inbox path. |
Prerequisites
Before you add an Inbox Message node, check the following:
- You have created the Inbox content in Content → Inbox Message and its status is Published. Content in Draft status appears in the list, but you cannot select it. Publish the content first.
- You have set up the application you want to deliver to, either as an SDK application or as a Custom Inbox application.
Add the node to the flow
- On the flow canvas, open the Actions panel.
- Drag the Inbox node onto the canvas. It sits next to Email, SMS, Push, In-App, and On-Site.
- Connect the node after the Audience node, or after any Decision or Wait node in your flow.
- Double-click the node to open it.
You can also start from the content side. In Content → Inbox Message, open the row menu of an approved message and select Create Campaign. The campaign builder opens with your content already selected.
The node has two steps: 1. Content and 2. Settings.
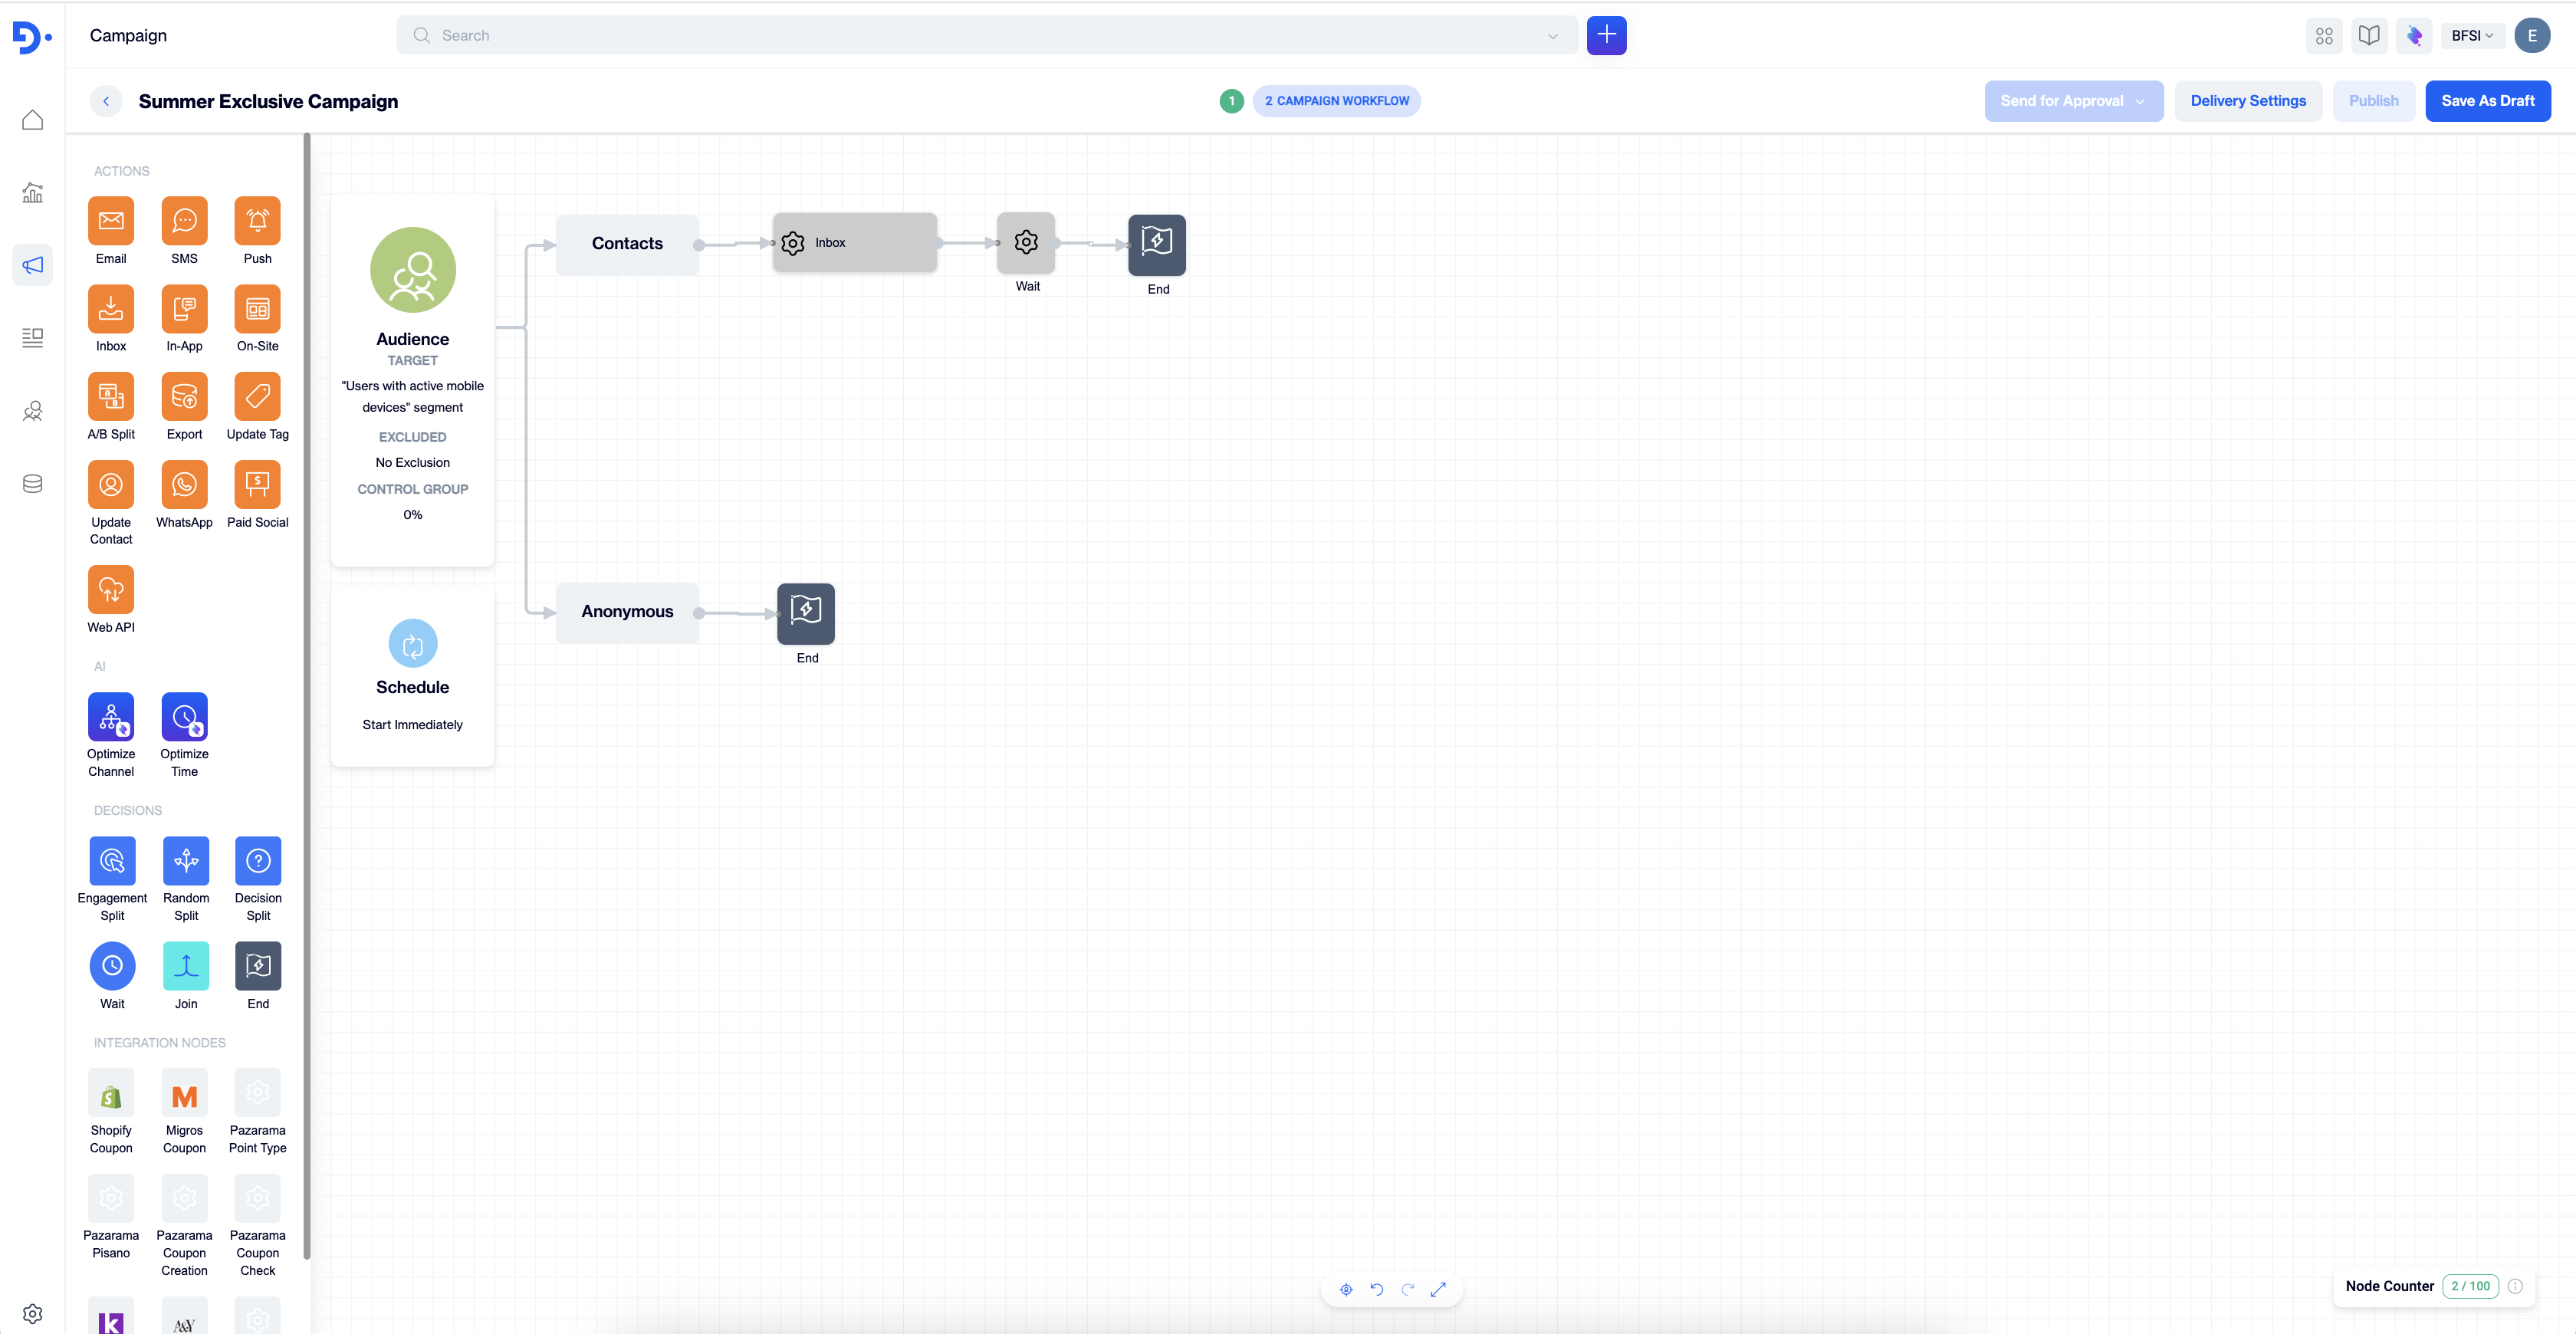
Inbox Message node on the flow canvas
Step 1: Select the content
| Element | Description |
|---|---|
| Node Name | Enter a descriptive name. Named nodes are easier to tell apart in flows with several messages. |
| Content drawer | Select a published Inbox Message. You can also create new content from the drawer without leaving the flow. |
| Select Application | Choose where the message goes: your iOS, Android, or Web applications (SDK), or your Custom Inbox applications (API). |
One node, one delivery pathYou cannot select SDK applications and Custom Inbox applications in the same node. Each node delivers through one path only. To send the same message through both paths, add a second Inbox Message node.
Why the audience count can changeThe audience count depends on the applications you select. Custom Inbox applications count one message per contact. SDK applications count one message per device, using each contact's most recently active device.
Select Next to open the settings step.
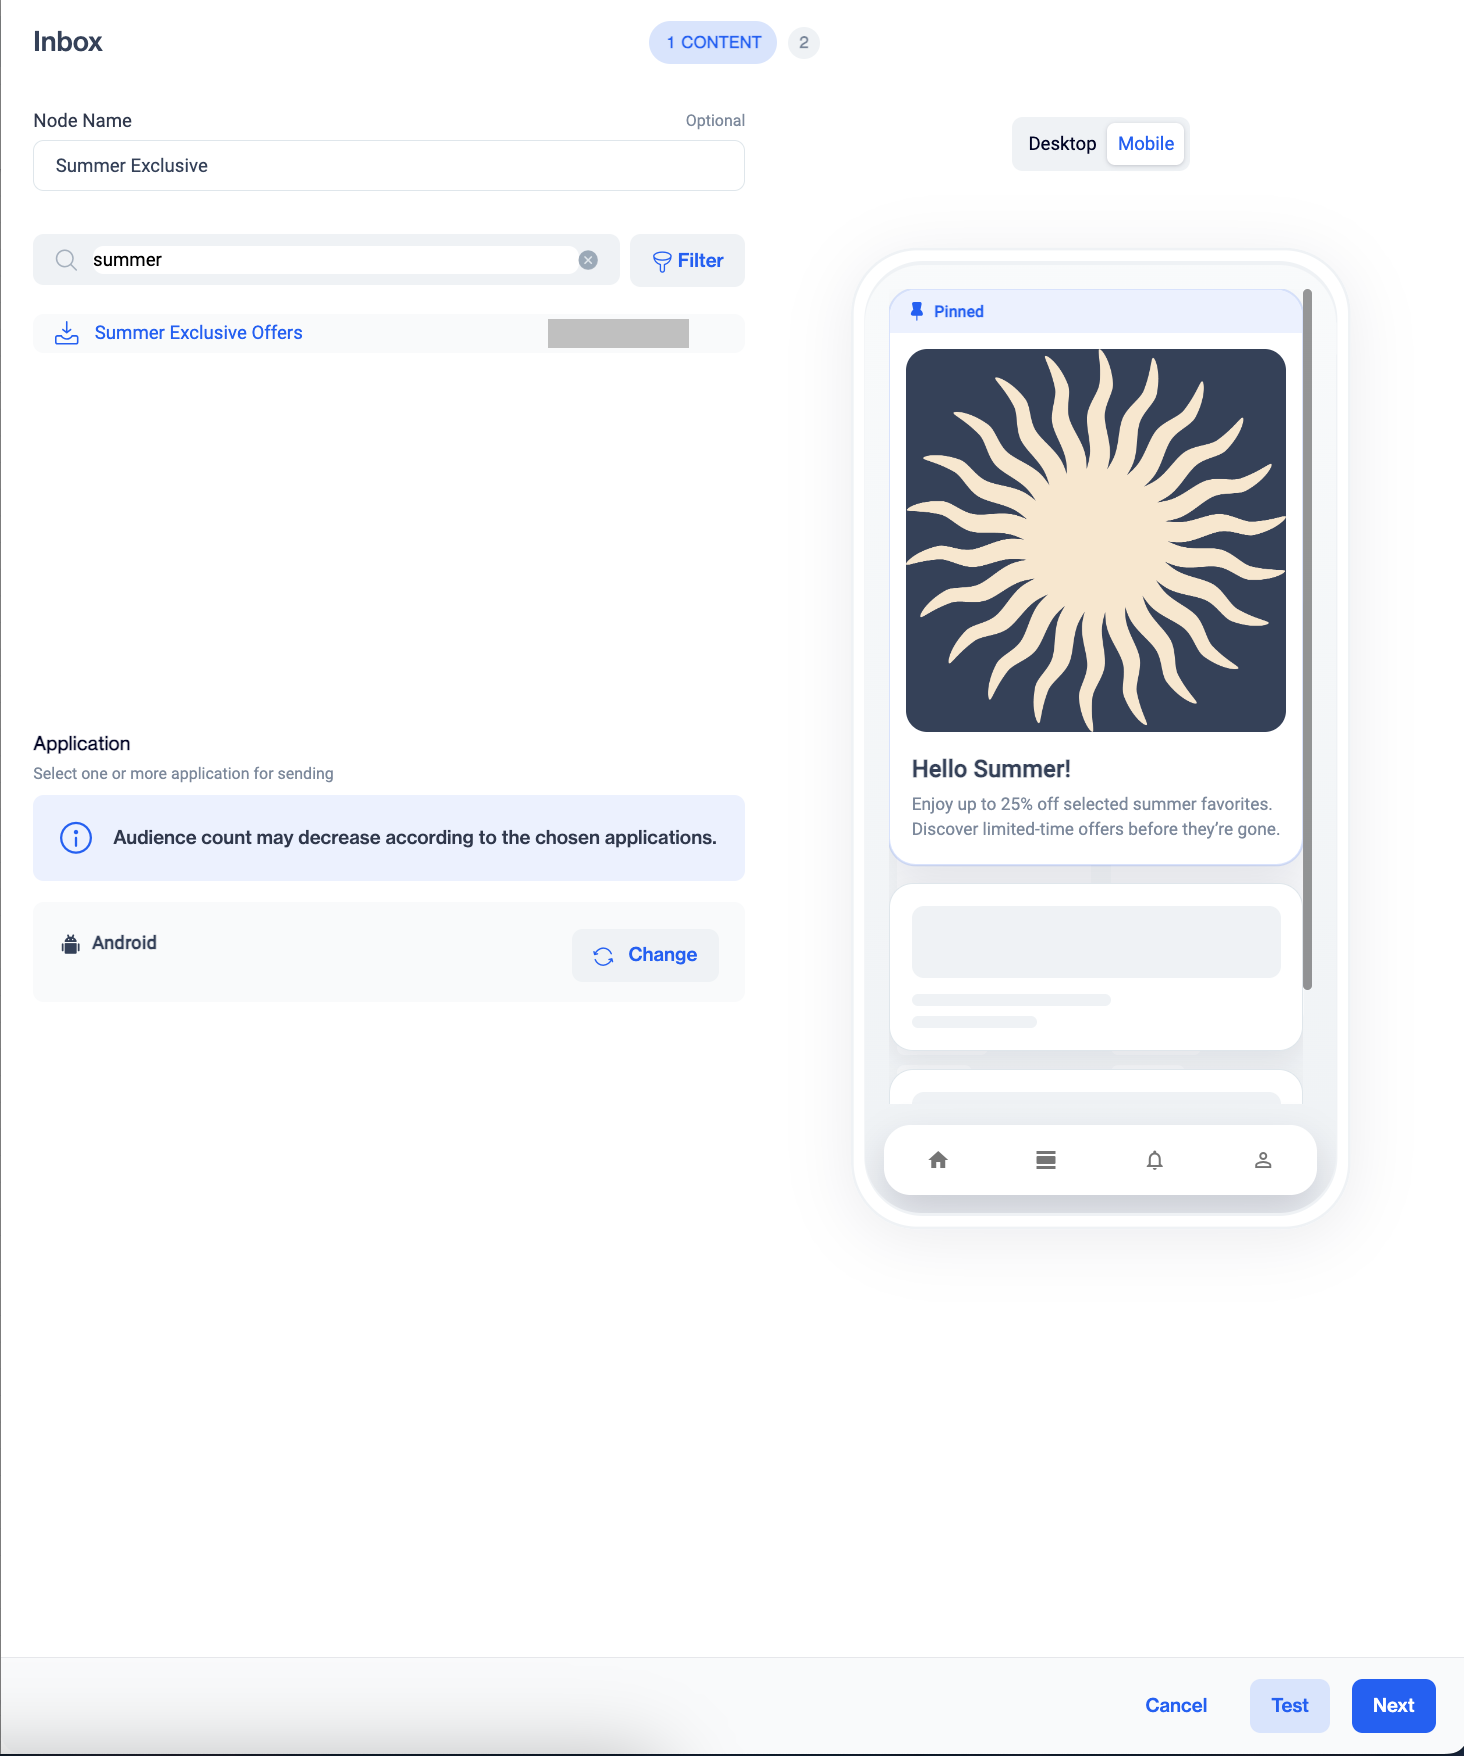
Inbox Content
Step 2: Configure the settings
| Setting | Default | Description |
|---|---|---|
| Tags | None | Tags belong to the node, not to the content. Use them to group or filter sends in reporting. |
| Expiry | 7 days (168 hours) | Choose a duration ("Remove from inbox in X days/hours") or a fixed date ("Remove from inbox on [date]"). The maximum is 7 days (168 hours). |
| Priority | None | Set a priority level from 1 to 5. Higher priority messages appear above lower priority messages in the Inbox. |
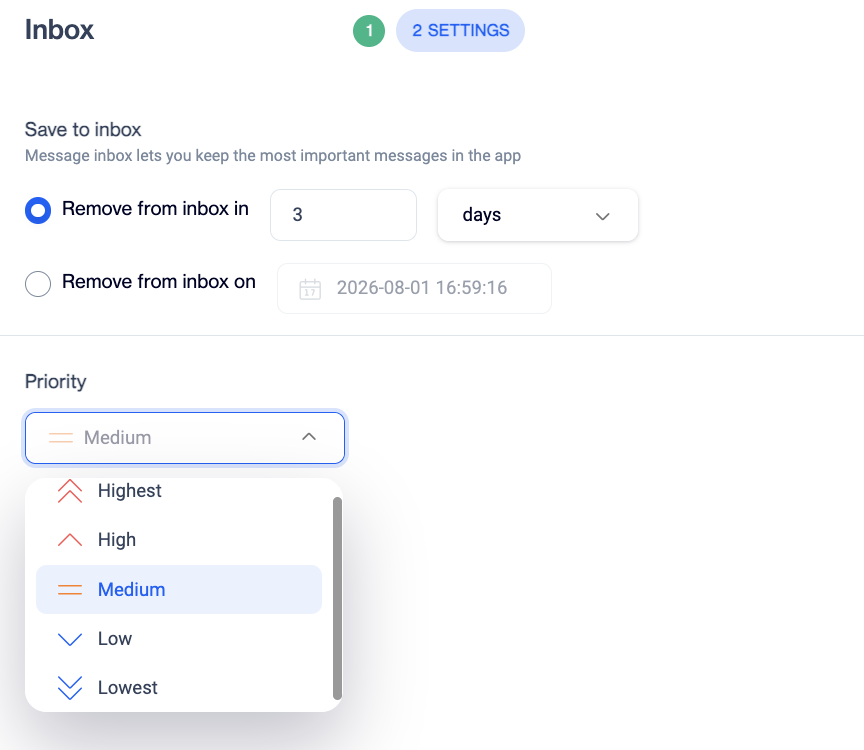
Inbox Message node, Settings step
Supported features
| Feature | What it does in this node |
|---|---|
| Content Version | Lets you pick a specific version of the content. |
| Multi-language | Sends each contact the language version that matches their language field. |
| Content Preview | Shows the message as it appears on a device before you save. |
| Test Sending | Sends the message to yourself or a test list. |
| Drop Condition | Skips contacts who no longer match a rule when the node runs. |
| Google Analytics | Adds tracking parameters to links in the message. |
| Blackout | Holds the send during the quiet hours you set in campaign delivery settings. |
| Priority | Orders the message in the Inbox (see the table above). |
| Random Split | Works with the Random Split node to send different content to random groups. |
| Decision Split | Works with the Decision Split node to branch on contact data or behaviour. |
Not supported
| Feature | Why it does not apply |
|---|---|
| Hourly Capping and Frequency Capping | Inbox messages do not count towards send limits. |
| Skip Permission | Inbox messages do not require an opt-in permission. |
| A/B Testing | Use two Inbox Message nodes behind a Random Split node instead. |
| Optimize Channel and Optimize Time | These AI nodes choose between push, SMS, and email; Inbox is not one of the options. |
| Transactional Sending | Inbox messages go out only through flow campaigns. |
| Marketing Send Logs | Inbox sends appear in Inbox Analytics, not in the send logs. |
| Engagement Split | Inbox opens are not an engagement signal for this node. |
| Conversion | Conversion tracking does not attribute to Inbox messages. |
Test and save
- Select Test to send the message to yourself or to a test list. The test uses the selected content and settings exactly as configured, so test before you publish.
- Select Save to close the node.
- Complete the rest of the flow. Every path must end with an End node.
- Publish the campaign. See One-Time or Recurring Flow Campaigns for the publishing steps.
Use more than one Inbox Message nodeA flow can contain several Inbox Message nodes. Combine them with Wait and Decision nodes to build sequences. Example: Inbox Message, then Wait 2 days, then Decision Split (opened), then a follow-up Inbox Message to contacts who did not open.
Example: a welcome notice
A team wants to greet new app users with a single Inbox message and no follow-up logic.
- In a one-time campaign, drag the Inbox node after the Audience node.
- Select the Welcome Message content and name the node Welcome Notice.
- Open Select Application and choose your iOS, Android, or Web application.
- Open the Settings step and set an Expiry of up to 7 days (168 hours).
- Connect the node directly to an End node.
- Select Test to check the message on a test device, then select Save and publish.
The complete flow is Audience, then Inbox Message, then End. A single standalone send needs no Wait or Decision nodes. After you publish, the message appears in each contact's Inbox until the expiry you set. To follow results, see Inbox Analytics.
Troubleshooting
| Symptom | Likely cause and fix |
|---|---|
| Content is visible but you cannot select it | The content is still in Draft. Open it in Content → Inbox Message and approve it. |
| Application list is empty or missing an app | You have not set up the application as an SDK application or as a Custom Inbox application. Set it up first. |
| You need both SDK and Custom Inbox paths | One node supports one path. Add a second Inbox Message node for the other path. |
Updated about 1 month ago