
SMS/MMS
The SMS node sends a text message to every contact that reaches it in a flow. It is the action node you use to deliver SMS content in both One-Time and Recurring flow campaigns.
This page covers only what is specific to the SMS node — selecting content, sending options, and contact extension. For creating the campaign, scheduling, and selecting the audience, see One-Time Flow Campaigns or Recurring Flow Campaigns.
Prerequisites
Before adding an SMS node, make sure that:
- The SMS content you want to send has been created and published in Content → SMS. Contents still in Draft state cannot be selected — publish the content first.
- Your audience contacts have mobile (GSM) numbers and SMS permission. Contacts without permission are skipped automatically at send time unless your delivery settings say otherwise.
Add the node to the flow
- On the flow canvas, drag the SMS node from the Actions panel onto the canvas. The node is named SMS Send automatically, and a Wait node is attached after it so you can chain follow-up steps.
- Connect the node after the Audience node (or after any decision/wait node in your flow).
- Double-click the node to configure it. Configuration has two steps: 1 – Content and 2 – Settings.
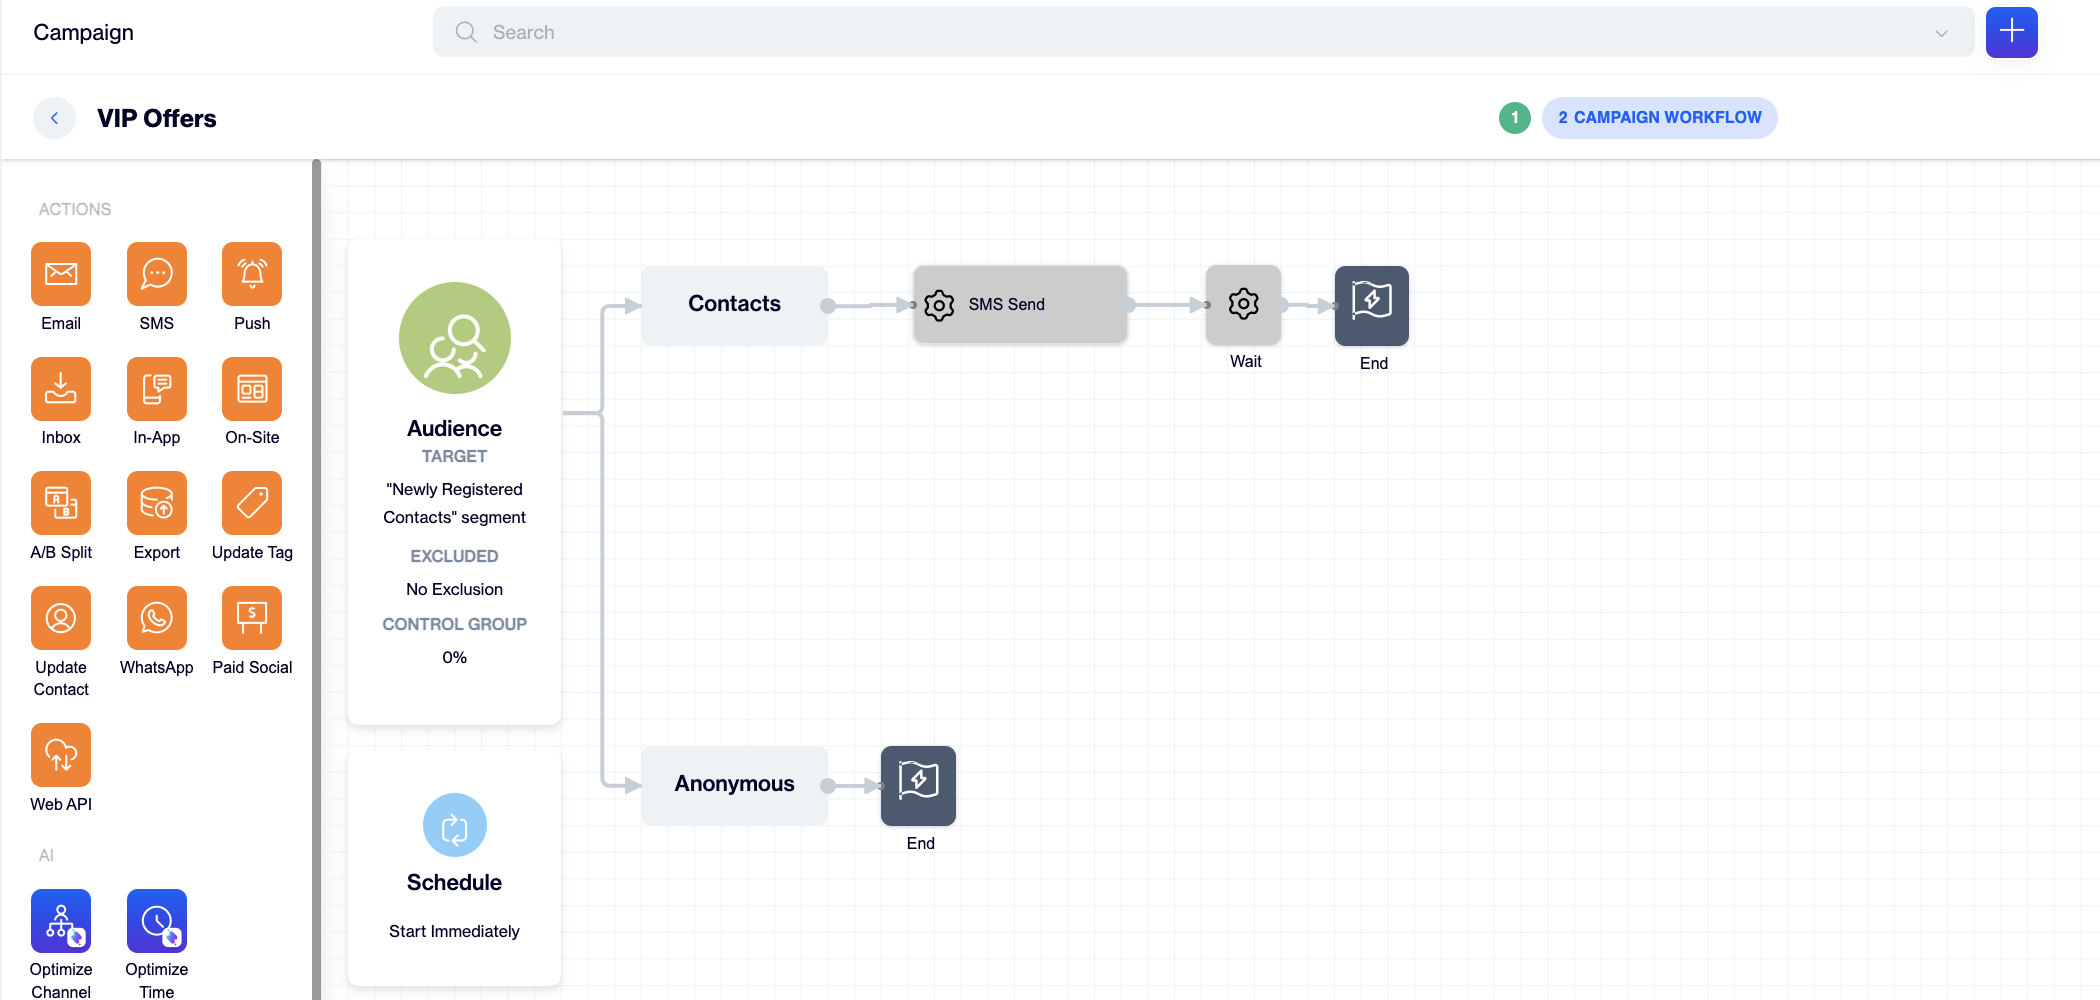
SMS - Flow Campaign
Step 1 — Select the content
| Element | Description |
|---|---|
| Node Name (optional) | Give the node a descriptive name (for example Flash Sale SMS). Named nodes are much easier to tell apart in multi-message flows and in Flow Analytics. |
| Search | Find content by name across all folders. |
| Filter | Narrow the list by date range, by creation date or by update date. |
| Content list | Contents are organized in the same folders as in Content → SMS. Click a folder to expand it and select a content. |
| + (New content) | Create a new SMS content without leaving the flow. |
| ✏️ (Edit) | Open the selected content in the editor to make changes. |
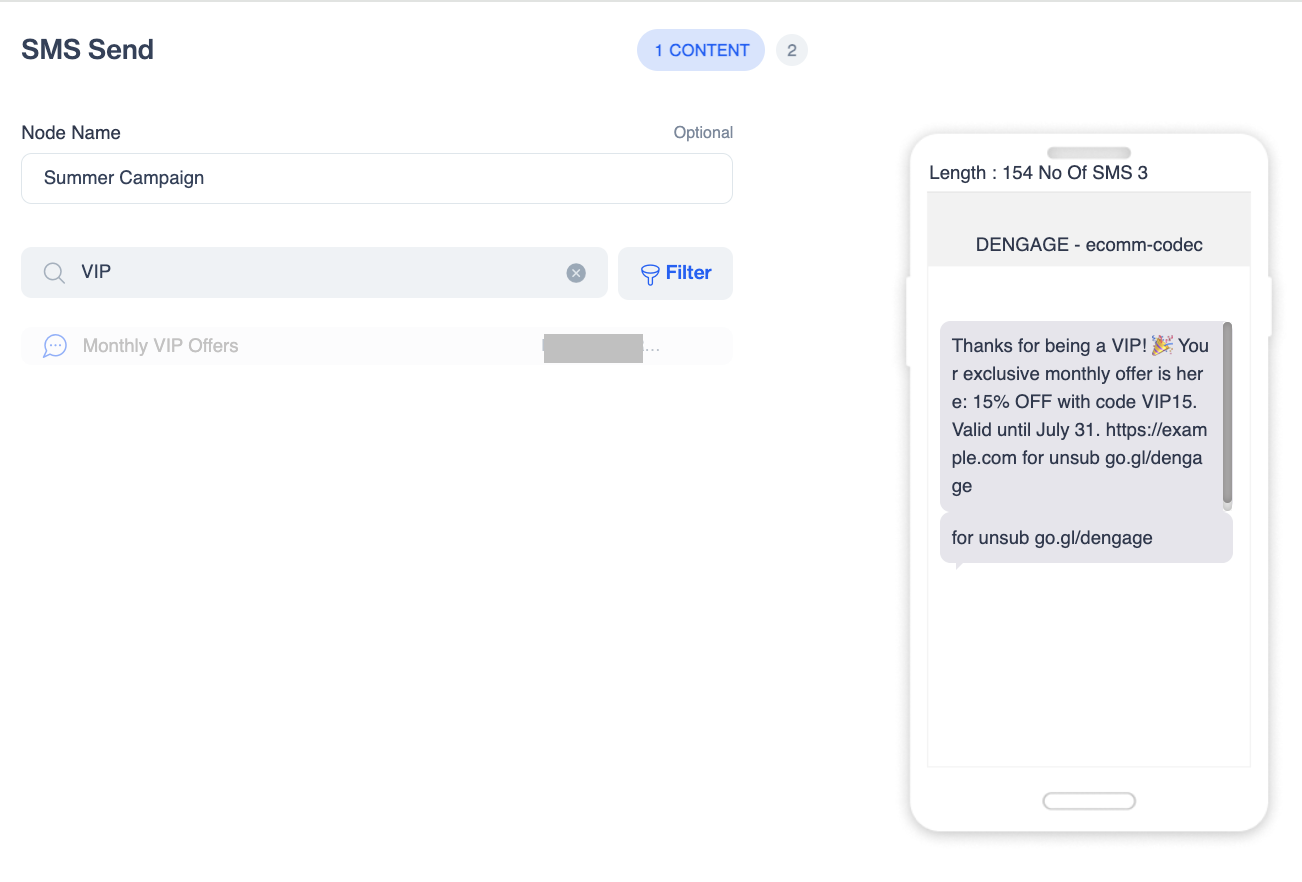
SMS Send Node - Content
When you select a content, the right panel shows a phone preview of the message with:
- Sender name — the originator the message will be sent from.
- Message text — including personalization placeholders (for example
{%=$Contact.name%}) exactly as they will be resolved per contact. - Length and SMS count — the character count and how many SMS parts the message will be billed as (for example
Length: 243 · No Of SMS: 4). Check this before sending — personalization values, special characters, and Unicode letters can increase the number of parts per contact.
Click Next to continue to the settings step.
Step 2 — Configure the settings
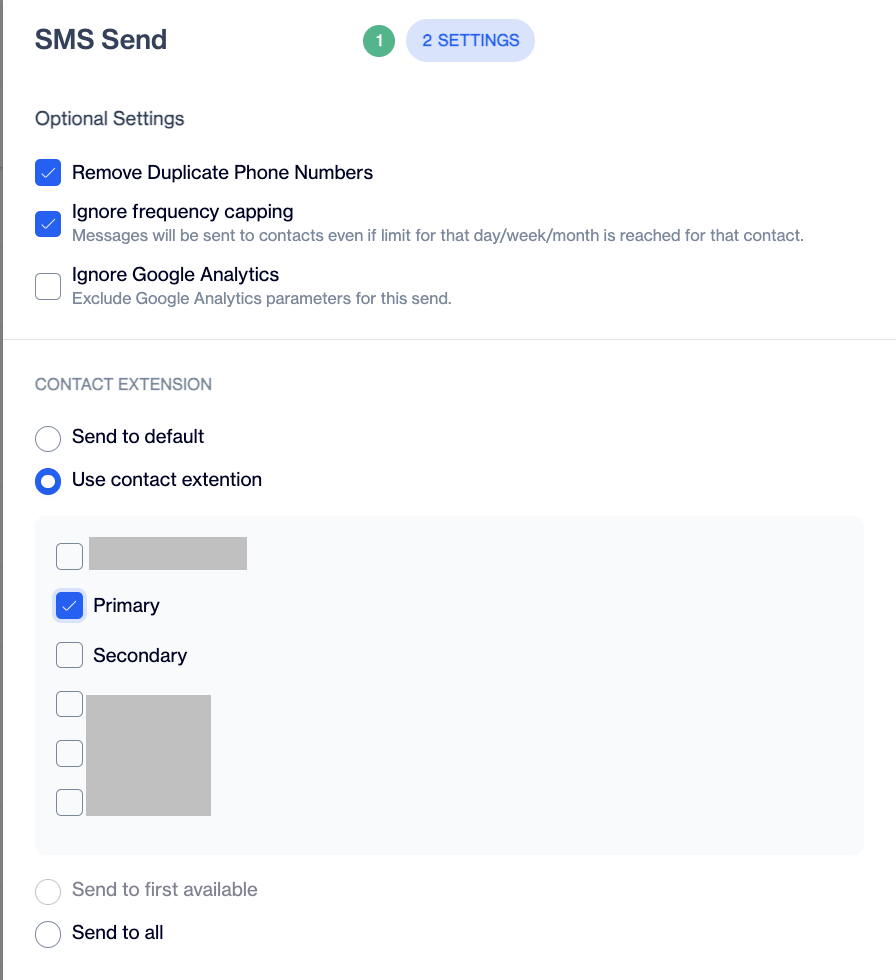
SMS Node - Settings
| Setting | Default | Description |
|---|---|---|
| Remove Duplicate Phone Numbers | On | If the same phone number appears more than once in the audience, it receives the message only once. |
| Ignore frequency capping | Off | Sends the message even if the contact has reached the daily/weekly/monthly message limit defined in frequency capping. Use only for messages that must always be delivered. |
| Ignore Google Analytics | Off | Excludes Google Analytics (UTM) parameters from the links in this send. |
| Contact Extension | Send to default | Controls which of a contact's phone numbers receives the message — see below. |
Contact Extension
A contact can store more than one phone number using contact extension attributes (for example a primary and a secondary number, or numbers collected per brand).For a comprehensive guide on configuring this feature, please visit the Configuring Contact Extensions page.
- Send to default — the message goes to the contact's primary phone number. This is the right choice for most campaigns.
- Use contact extension — select one or more extension attributes from the list, then choose:
- Send to first available — the message goes to the first selected attribute that has a value for that contact.
- Send to all — the message goes to every selected number the contact has.
If you choose Use contact extension, you must tick at least one attribute — otherwise the node shows the warning "Please select a contact extension" and cannot be saved or tested.
Test and save
-
Click Test. The Test SMS Template window opens with an example message rendered for a real contact from your audience — personalization placeholders are filled with that contact's actual values, and the final length/SMS count is shown. Click Show Another to preview a different contact, and Send Test SMS to deliver the test to the example number. Always test before publishing.
-
Click Save to close the node.
-
Complete the rest of the flow — every path must end with an End node — then publish as described in One-Time or Recurring Flow Campaigns.
An SMS node is not limited to one per flow. Combine it with Wait and Decision Nodes to build sequences, or with other channel nodes to build cross-channel journeys — for example: Email → Wait 1 day → Engagement Split (opened?) → SMS to non-openers.
Example: a flash sale with an SMS follow-up
A marketer is running a 48-hour flash sale and wants to reach contacts who miss the email announcement:
- In a one-time campaign, drag the Email node after the Audience node and select the Flash Sale Announcement content.
- Add a Wait node (1 day), then an Engagement Split checking opened Flash Sale Announcement.
- On the "No" branch, drag an SMS node, name it
Flash Sale SMS, and select the Flash Sale SMS content — a short message with the contact's name, the discount code, and a shortened link to the sale page. - Keep the defaults on the settings step: duplicate removal on, contact extension on Send to default; close both branches with End nodes.
- Click Test on the SMS node, check the rendered message and SMS count for a few contacts with Show Another, save, and publish.
Contacts who miss the email still get the offer before the sale ends — and because the SMS node deduplicates phone numbers, nobody receives the same promotion twice.
Troubleshooting
| Symptom | Likely cause |
|---|---|
| A content is visible but cannot be selected | It is still in Draft — open it in Content → SMS and publish it. |
| "Please select a contact extension" warning | Use contact extension is selected but no attribute is ticked — tick at least one, or switch back to Send to default. |
| The message arrives split into several SMS, or costs more than expected | The content exceeds one SMS part — check the Length / No Of SMS value in the preview; long personalization values and special characters increase it. |
| A contact received the same SMS twice | The contact appears with two different phone numbers, Send to all is selected, or Remove Duplicate Phone Numbers was turned off. |
| Some contacts did not receive the message | They have no SMS permission or no valid mobile number, or they hit frequency capping and Ignore frequency capping was off. |
The test message starts with [Test] | This is expected — the tag marks test sends and is not added in the real campaign. |
Updated 2 months ago