
One-Time Flow Campaigns
A one-time campaign sends a message to your target audience once, at a time you choose — immediately, or at a scheduled date and time. Use it for announcements, promotions, product launches, and any send that doesn't repeat.
If your campaign needs to run repeatedly on a schedule, or be started by an external system, use a Recurring Flow Campaign instead.
One-time campaigns are built on the Flow canvas and work the same way for every channel: Email, SMS/MMS/RCS, Push, Inbox, In-App, Onsite, and WhatsApp. This page covers the steps that are common to all channels.
How One-Time Campaigns Work
A one-time campaign sends once. Here is what happens after you publish:
- The campaign waits for its start time. If you chose Now, it starts right away. If you chose Scheduled, it starts at the date and time you set.
- The audience is checked at send time. The platform looks at your segment, table, or tag when the campaign starts — not when you created it. So a contact who joined the segment yesterday is included, and a contact who left it is not.
- The send list is prepared. Excluded contacts are removed. The control group is set aside — they get nothing, so you can compare results later. If duplicate removal is on, each address gets only one message.
- Contacts move through the flow one by one. Each contact starts at the Audience node and follows the arrows. A one-time campaign can still have more than one message — for example, send → wait 2 days → send a follow-up. "One-time" means each contact goes through the flow once.
- Every send is checked first. Before each message, the platform checks the contact's permission, frequency capping, and blackout hours. If a contact fails a check, only that contact is skipped — everyone else still gets the message.
- The campaign finishes. When all contacts reach the End node, the campaign is complete. It won't run again — to resend, duplicate the campaign.
Prerequisites
Before you start, make sure that:
- The channel you want to send from is set up for your account (for example, email domain/DNS, SMS sender, push SDK, or WhatsApp Business account).
- The content you want to send has been created in Content for that channel, or you are ready to create it during setup.
- Your target audience exists as a segment, table, or tag. See Segments if you need to create one.
- Your user role has permission to create and publish campaigns.
Step 1 — Create the campaign
- In the panel, go to Campaigns → Flow Campaigns.
- Click New.
- Select One-Time Campaign.
Step 2 — Enter campaign info
| Field | Description |
|---|---|
| Name | Enter a unique name for your campaign. Use a naming convention your team can search later (for example 2026-07_summer-sale_email). |
| Folder | Click Change Folder to store the campaign in the right folder. |
| Tags | Add tags to categorize the campaign (for example promo, q3). Tags make campaigns easier to filter in the Overview list and in reports. |
| Description | A short summary of the campaign's purpose and goal. |
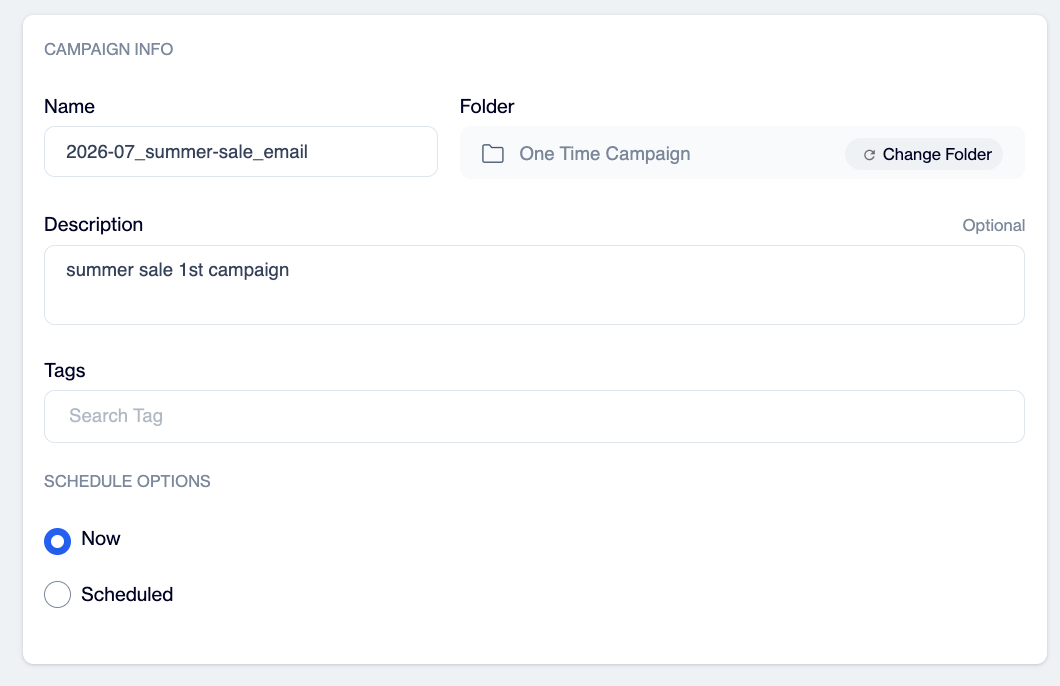
One-Time Campaign Info
Step 3 — Set the schedule
Choose when the campaign is sent:
- Now — the campaign is sent immediately after you finalize and publish the setup.
- Scheduled — pick a specific date and time with the calendar and time picker. The campaign is sent automatically at that time.
Step 4 — Select the audience
Double-click the Audience node on the canvas and choose who receives the campaign:
| Source | Description |
|---|---|
| Segment | A custom segment built on your own criteria. |
| Predefined Segment | Ready-made segments provided by the platform (for example recent clickers or unreachable contacts). |
| Table | Target contacts stored in a specific data table. |
| Remote Segment | Target using an external/remote data source. |
| Tag | Target contacts that carry a specific tag. |
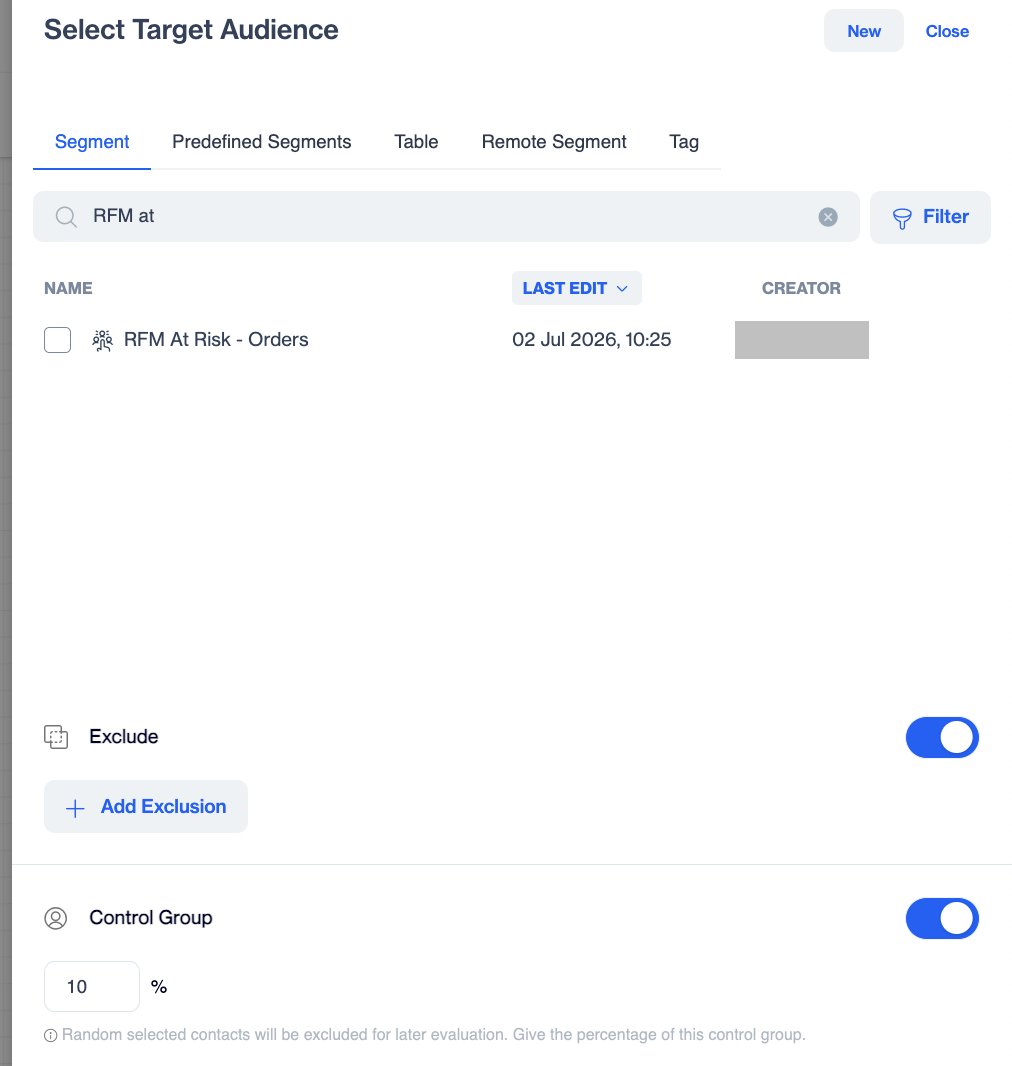
Audience Selection
You can refine the audience with:
- Exclude — remove specific groups (for example, contacts who already purchased) from the target.
- Control Group — set aside a percentage of the audience that will not receive the campaign, so you can measure the campaign's true impact by comparison.
Combine multiple segments
When your source is Segment, you are not limited to a single segment. Multi-segment selection lets you select and combine multiple existing segments directly in the Audience node, without creating a new segment:
- In the Segment Selection modal, select multiple existing segments from the segment list.
- Choose how the selected segments are combined — AND (contacts must belong to all selected segments) or OR (contacts must belong to at least one selected segment).
- Review the combined audience under Selected Segments, then click Save to apply it to the campaign.
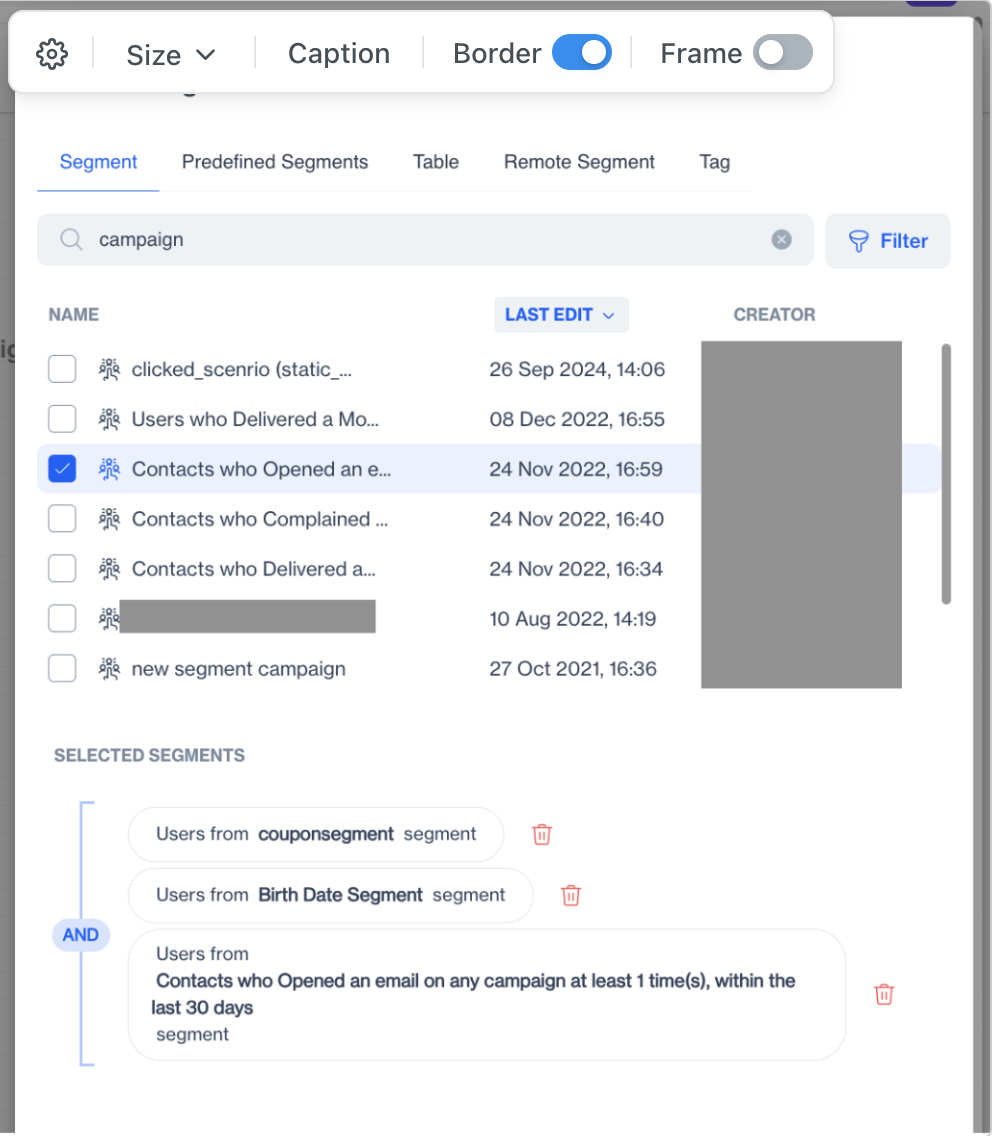
Multi Segment Selection
5 — Add the channel node and select content
- From the actions panel, drag the node for your channel onto the canvas and connect it after the Audience node. The node is named automatically (for example Email Send).
- Double-click the node and select the content to send. Use the search bar to find content by name, or filter by creation and last-update date.
- Preview the content before continuing, and send a test to yourself or a test list.
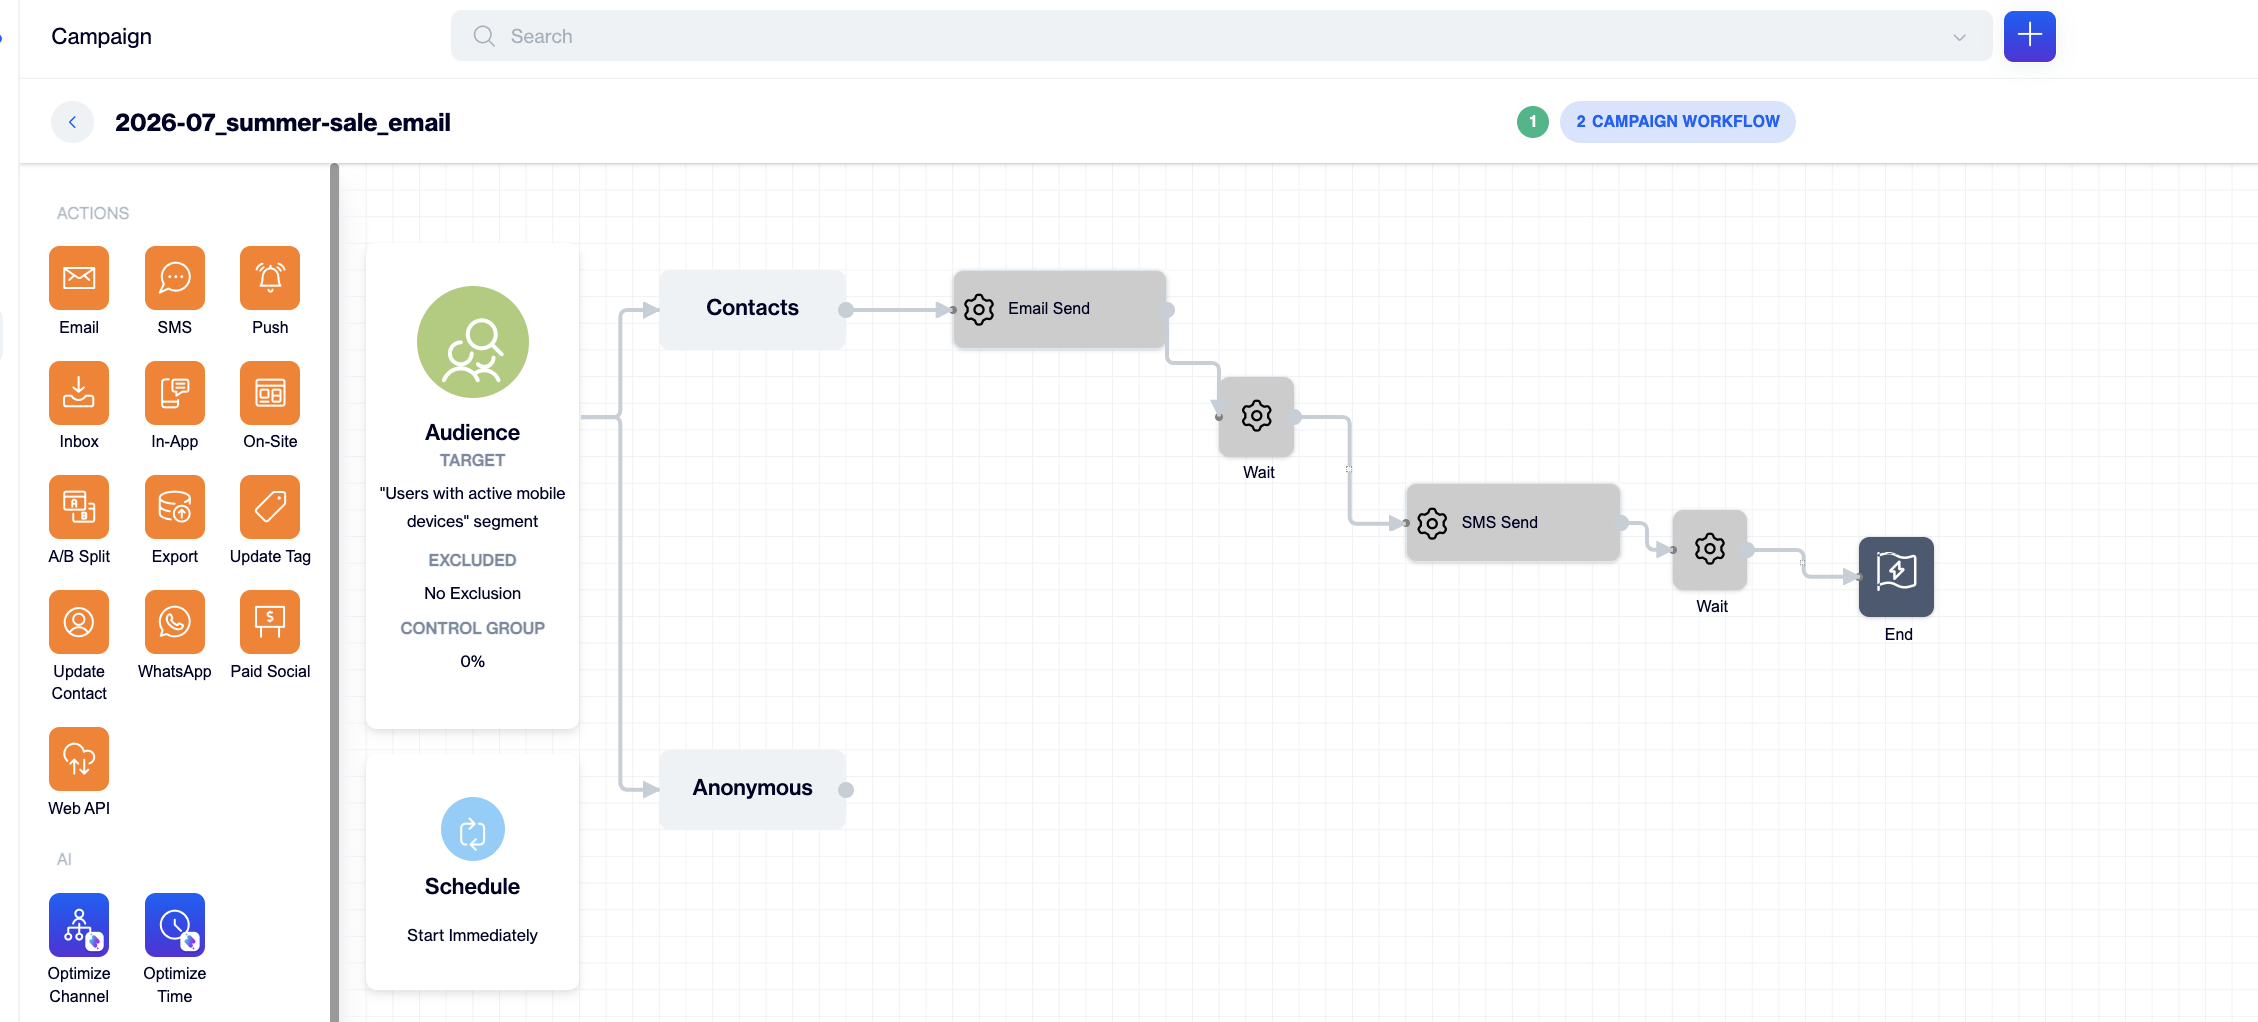
Add Action Nodes
Channel-specific options — such as email tracking and IP pool, SMS sender settings, or in-app display rules — are configured on the node.
A one-time campaign is not limited to a single message. You can add more nodes after the send node — for example a Wait node followed by a second message, or a Decision Node to branch by behavior.
Step 6 — Configure optional settings
Each channel node has its own optional settings — for example duplicate removal, tracking, frequency capping override, or contact extension. Which settings are available depends on the channel.
Step 7 — Close the flow
Every path in the flow must finish with an End node. Connect the End node after your last action node. If a branch has no next action (for example, contacts that don't meet a decision condition), close that branch with an End node as well.
Step 8 — Test and publish
- Review the flow on the canvas — every node connected, every path closed.
- Always send a test before publishing, using your test list.
- Click Save, then publish the campaign.
- If the schedule is Now, sending starts immediately.
- If Scheduled, the campaign shows as scheduled in the Flow Campaigns Overview list and sends automatically at the set time.
After sending, results appear in the campaign's report. See Campaign Report and your channel's detailed report.
Example: a scheduled promotion
A retailer wants to announce a summer sale by email on Thursday at 10:00:
- Create a One-Time Campaign named
2026-07_summer-sale_email. - Schedule: Scheduled → Thursday 10:00.
- Audience: Segment Active Customers (last 90 days); Exclude segment Purchased Sale Items; Control Group 5%.
- Drag the Email node, select the Summer Sale email content, send a test to the marketing test list.
- Add an End node, click Save, and publish.
On Thursday at 10:00 the email goes to 95% of the audience; the 5% control group receives nothing, so next week the team can compare purchase rates between the two groups in the report
Updated 3 months ago