
Automated Sendable Contact Import
The Automated Sendable Contact Import feature lets you automatically create a new, dynamic sendable contact table every time a file is uploaded. This is different from a regular Automated Flow, which can only update existing tables. With Automated Sendable Contact Import, the system creates a new table directly from the uploaded file.
- Table Name: Generated from the file name, followed by the upload date.
- Column Names: Taken directly from the headers in the uploaded file.
This is useful when you want every file to create its own table instead of updating an existing one.
For example, if you regularly drop a new contact list to FTP, each file will become a brand-new sendable contact table, ready for sending campaigns.
File Name Rules
The uploaded file must follow these rules:
- Maximum length: 50 characters
- Allowed characters: only lowercase letters (a-z), numbers (0-9), and the underscore (_)
- Must start with a letter: cannot start with a number
- Must not start with: sys_ or sys
- All letters must be lowercase
How to Create
To set up an Automated Sendable Contact Import, open Automated Flows and click New. Choose Automated Sendable Contact Import from the two available options.
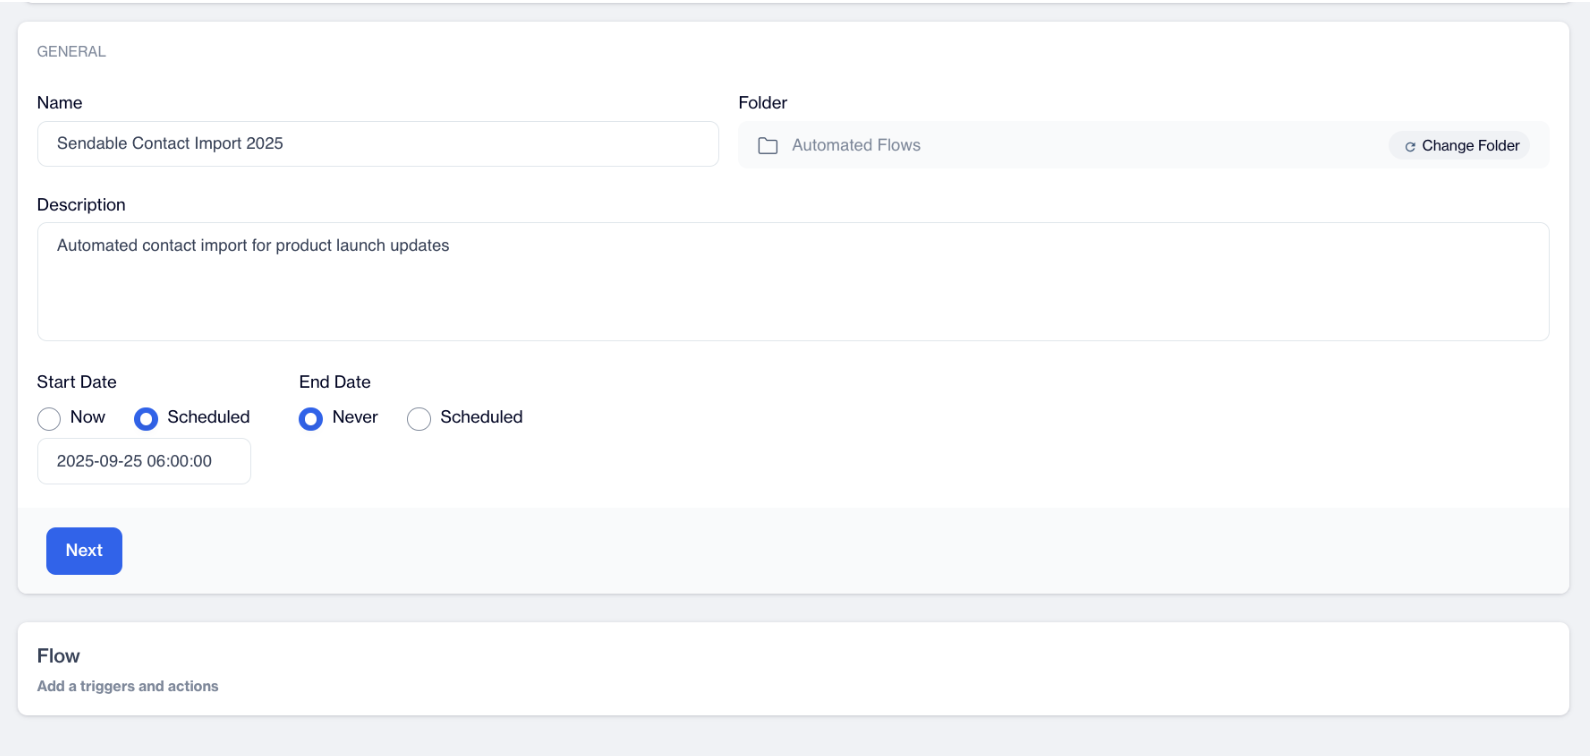
In the General tab, enter a clear Name so users can easily identify the purpose of this import. Select the Folder where the flow will be stored and, if needed, add a short Description explaining why it was created. Set the Start Date to Now or schedule it for a specific time. Choose an End Date of Never or set a schedule if you want the flow to stop at a certain date.
After completing the general details, move to the Flow tab to configure the file settings. Here, provide the FTP User (for example, ecomm_test) and the Directory where the file will be dropped. Each automation must have its own unique directory folder in the FTP location to avoid conflicts-do not reuse the same folder name for different automations. Choose the Encoding (default is UTF-8), decide whether to enable Zip for compressed files, and set the Delimiter (you can leave it as Auto Detect). For date values, either keep the Date Column Format on Auto Detect or define a custom format if required. Finally, set the Fail import if percentage, which stops the import if too many rows contain invalid data.
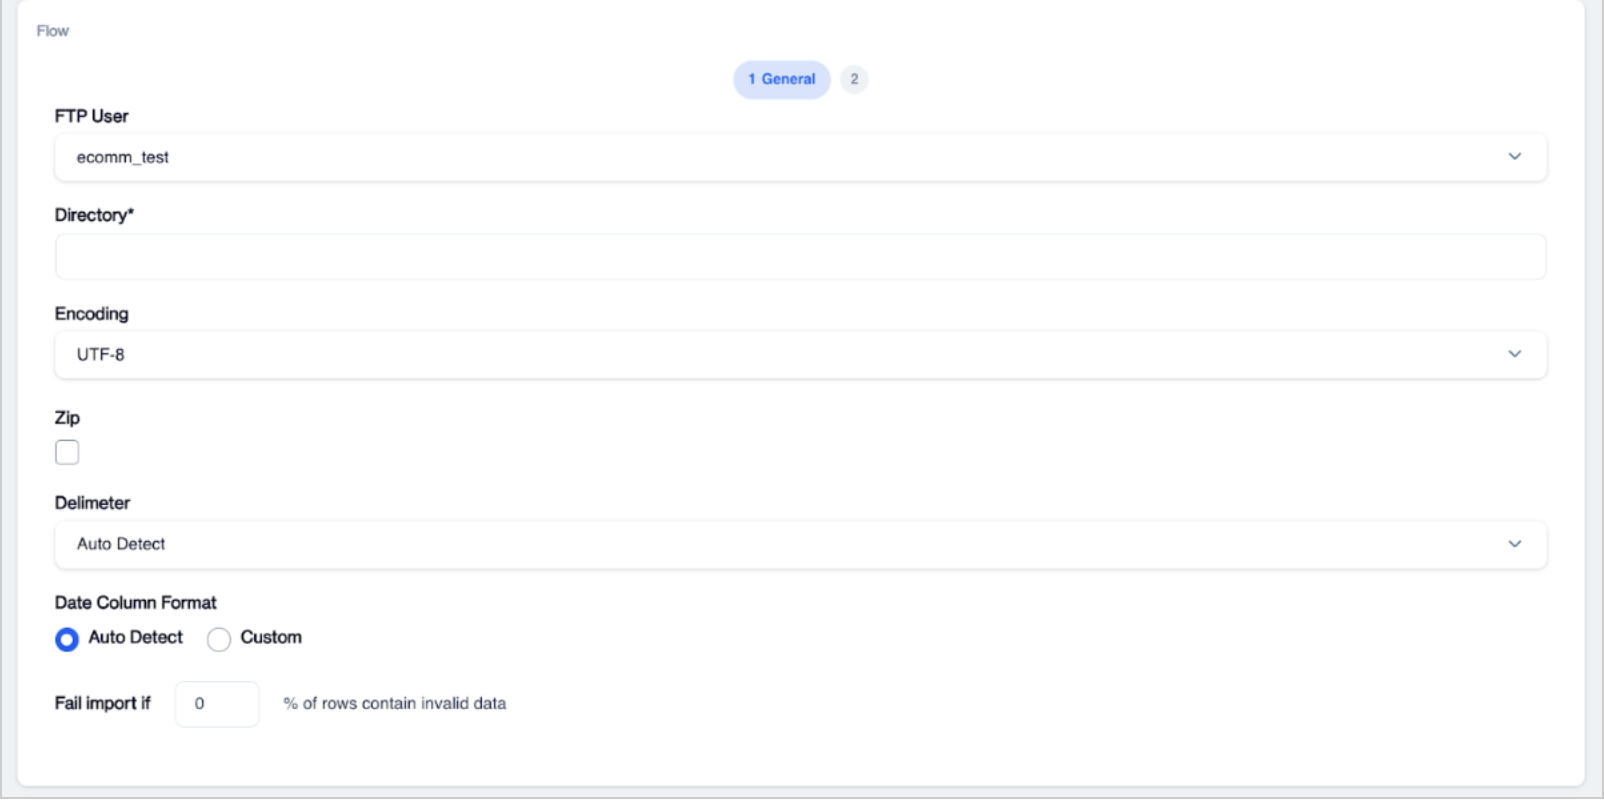
Flow
Once this is complete, click Next to continue.
Mapping
After configuring the Flow tab, the Mapping tab will appear. The system automatically creates table columns based on the headers in your file, for example, if the file contains five columns, the table will also have five columns. In this step, you need to match each column to the correct contact fields used for sending campaigns, including contact_key, email, or gsm. This is important because the column names in your file might be different from the standard contact field names.
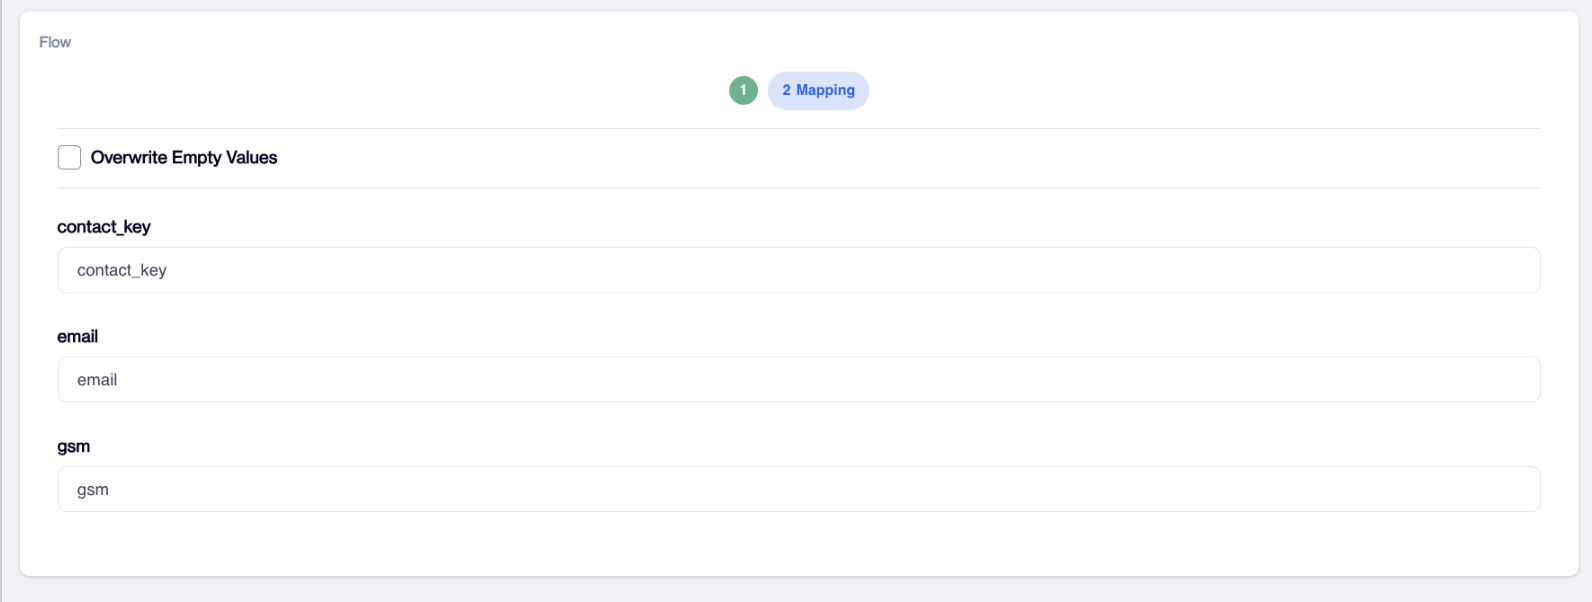
Mapping
You can also use the Overwrite Empty Values option if you want to replace existing values with blanks when data is missing.
Key Difference from Automated Flow
- Automated Flow: Works only with existing tables and can update them.
- Automated Sendable Contact Import: Creates a brand-new sendable contact table each time a file is uploaded.
Use Case Example
Suppose you drop a file into a specific FTP directory every week. Instead of updating the same table, you want the system to create a new table each time with the file's name and upload date. Because this table is a sendable contact table, you can immediately use it for email or SMS campaigns containing user data.
This feature applies only to sendable contact tables, not to sendable token tables.
Updated 3 months ago