
Zip to Campaign
Zip to Campaign allows you to create and trigger email campaigns by simply uploading a single ZIP file. Instead of manually creating content, defining campaigns, and uploading audience data separately, you can package everything together and let the system handle the rest.
Previously, you could trigger campaigns by uploading a ZIP file and providing audience data through FTP. With Zip to Campaign, you can now also create the campaign directly from the ZIP file making the process faster and more flexible.
How to Access
Zip to Campaign is accessed through your automation flows in the admin panel.
Go to Data Space > Automated Flows to create a new flow or open an existing one where Zip to Campaign will be configured. This is the entry point where you prepare the flow that will later process your ZIP files from FTP.
How to Use
Step 1: Create and Activate an Automated Flow
To use Zip to Campaign, you need to configure an automated flow that will process the ZIP file once it is uploaded to FTP.
Start by configuring your automated flow in Data Space > Automated Flows and ensure it includes the required components.
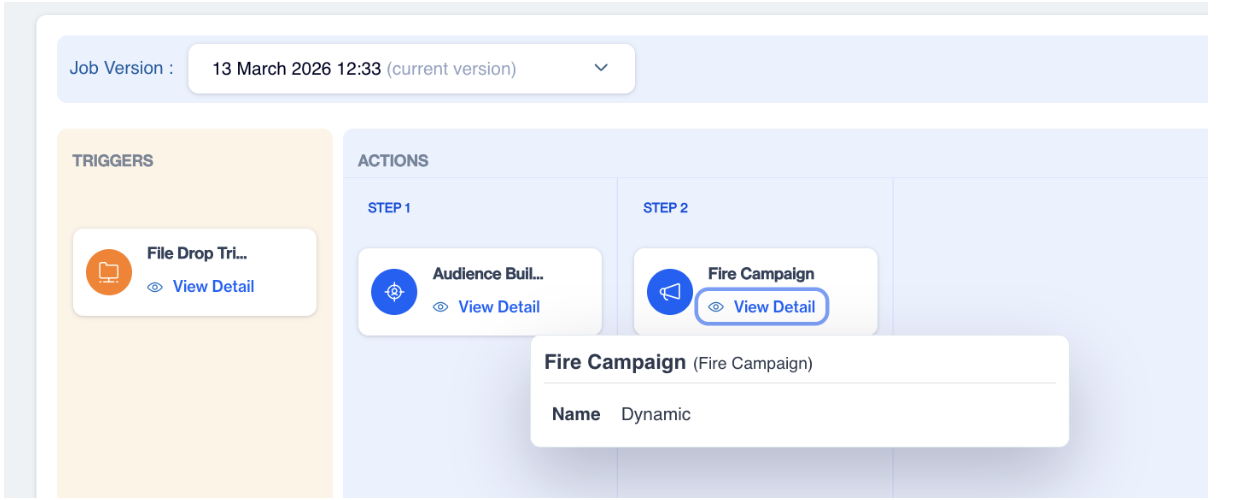
Automated Flow > Fire Campaign
File Drop Trigger
When configuring the File Drop Trigger, you must select an FTP user and define a directory. Each automated flow should use its own dedicated directory under the FTP to avoid conflicts. You also need to define File Headers, which must match the column names in your audience file (for example: contact_key, first_name, last_name).
In addition, the ZIP file you upload must be password-protected, and this password should be used when creating the ZIP.
Audience Builder
Next, configure the Audience Builder. In this step, you must select the “Create from File” option so the system can build the audience directly from the CSV file included in the ZIP package.
Fire Campaign
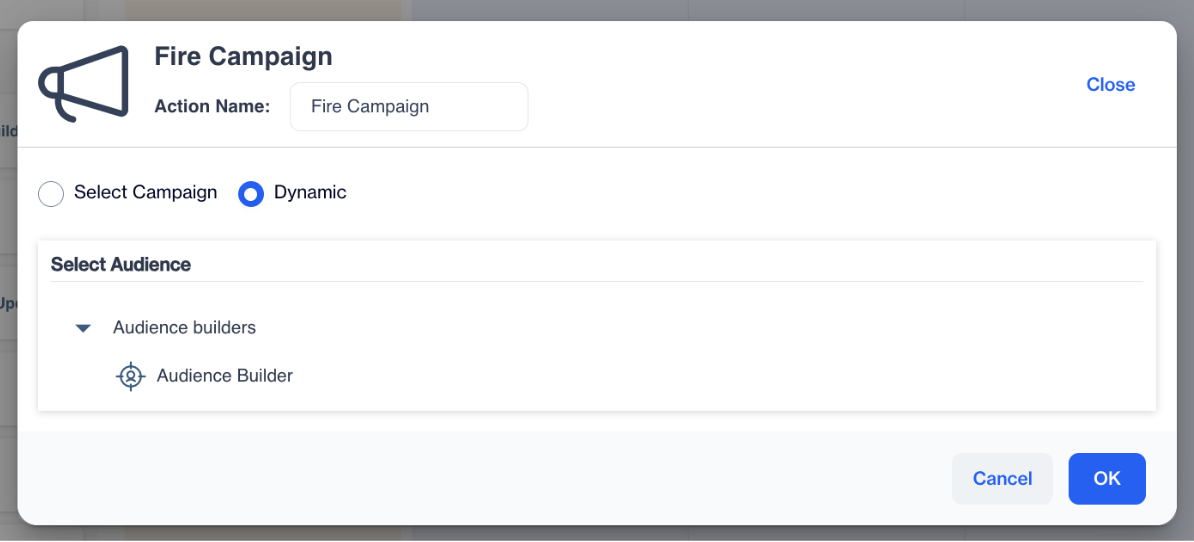
Fire Campaign
After that, configure the Fire Campaign and select the Dynamic option. When Dynamic is selected, the campaign will be created and triggered directly based on the ZIP file you uploaded, allowing the flow to use the data and definitions provided within the ZIP package.
After adding all the required components in the automated flow, click the Next button to review the configuration summary. Once you have verified all the details, click the Save button to complete and activate the flow.
Step 2: Prepare Your ZIP File
After the flow is active, prepare the ZIP file that you will upload to FTP. The ZIP must follow a specific structure and include the required files.
Your ZIP file should contain:
- job.json: defines the campaign details such as name, subject, sender information, and language settings
- Audience.csv: contains the audience data (who will receive the campaign)
- content/ : contains the email content (HTML) and related assets such as images
For multilingual campaigns, create separate folders for each language inside the content folder.
The job.json file is included inside the ZIP and defines how the campaign should run. It contains details such as campaign name, sender information, email subject, and language configuration.
When creating the ZIP file, use the “Add to Archive” option and enter the same password that you defined in the File Drop Trigger configuration in your automated flow. This password must match exactly, as the system uses it to extract and process the ZIP file.
Step 3: Upload the ZIP File to FTP
Once your ZIP file is ready, upload it to your FTP environment.
You must place the ZIP file inside the directory that you defined in the File Drop Trigger configuration. This directory is monitored by the system, and only files placed in this location will be processed by the corresponding automated flow.
After you drop the ZIP file into the correct directory, the system will automatically detect it, extract its contents using the provided password, and trigger the campaign based on your flow setup.
Use Case
A marketing team wants to send a daily promotional email without manually creating a new campaign each time. Instead of repeating the same steps in the panel, they prepare a ZIP file that includes the campaign definition (job.json), updated audience data (audience.csv), and email content.
They upload this ZIP file to the FTP directory linked to their automated flow. The system automatically detects the file, creates or updates the campaign based on the job.json, builds the audience from the CSV file, and sends the email.
This allows the team to run recurring campaigns quickly and consistently by only updating and uploading a single ZIP file each time.
Updated 3 months ago