
Push/Web Push
The Push node sends a mobile push or web push notification to the contacts in a flow campaign. After you place the node on the canvas, its name changes to Push Send. You can use the node in both One-Time and Recurring flow campaigns.
This page covers only the settings inside the Push Send node: content, application, optional settings, expiry, and inbox options. To create the campaign, schedule it, and select the audience, see One-Time Flow Campaigns or Recurring Flow Campaigns.
Key terms
| Term | Meaning |
|---|---|
| Push Send | The name that the Push node takes after you place it on the canvas. |
| Push content | The notification itself (title, text, image, buttons). You create it in the Content section and reuse it in one or more campaigns. |
| Application | An iOS, Android, or Web application that you registered in Dengage to receive push notifications. |
| Token | A unique identifier that a device or browser receives when a contact allows push notifications. Dengage uses tokens to deliver notifications. |
| Anonymous contact | A device or browser that has a token but is not yet matched to a known contact. |
| Expiry | The period during which the system retries delivery to a device or browser that is offline. |
Prerequisites
Before you add a Push node, check the following:
- You have created the push content that you want to send.
- You have set up at least one iOS, Android, or Web application in your account.
- You have a flow campaign open on the Campaign Workflow step, with the audience defined.
Add the node to the flow
- On the flow canvas, open the Actions panel.
- Drag the Push node onto the canvas. It sits next to Email, SMS, Inbox, In-App, and On-Site.
- The node name changes to Push Send, and a connected Wait node appears. Keep the Wait node if you plan a follow-up step, or delete it.
- Double-click Push Send to open it.
The node has two steps: 1. Content and 2. Settings.
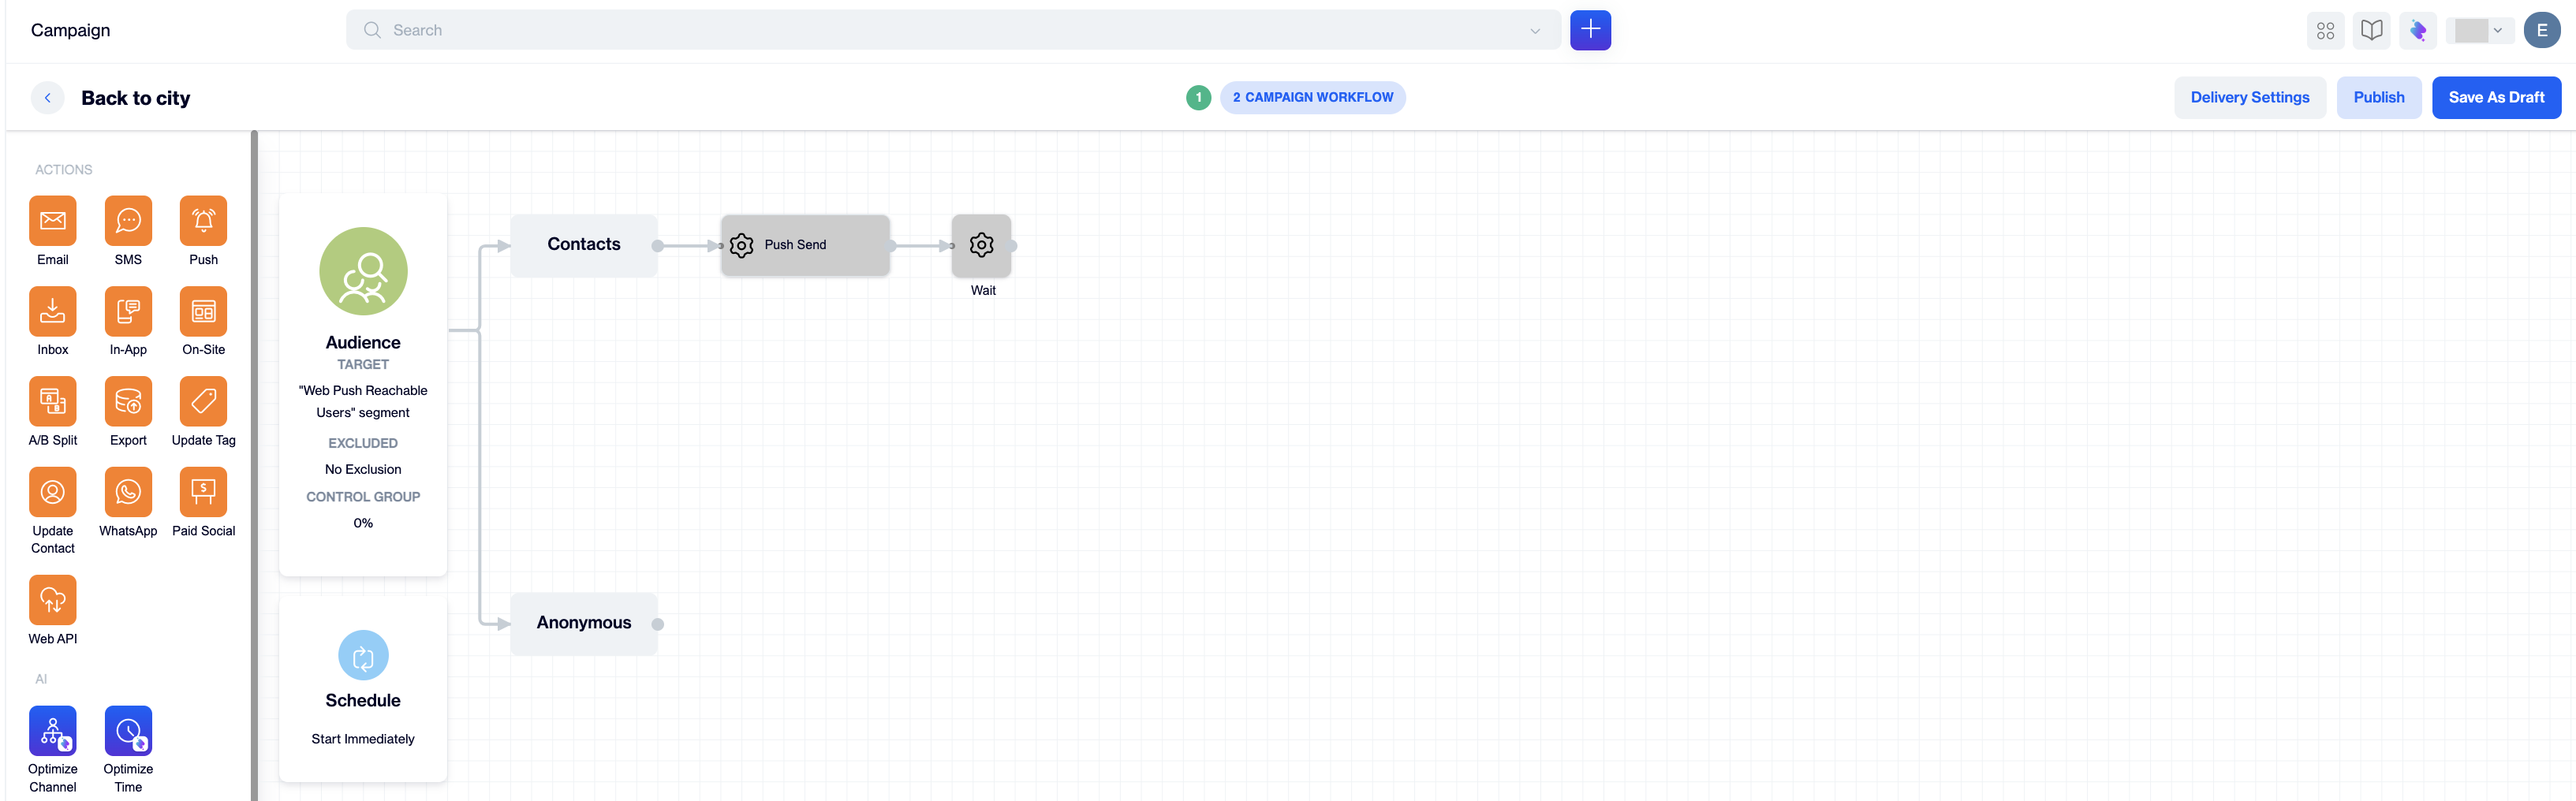
Push Send node on the flow canvas
Step 1: Select the content
| Element | Description |
|---|---|
| Node Name | Optional. Enter a descriptive name. Named nodes are easier to tell apart in flows with several messages. |
| Search and Filter | Type a keyword to find push content by name. Select Filter to filter the list by last update date or creation date. |
| Content list | Select the push content to send. |
| Select Application | Choose one or more applications that receive the notification. |
Why the audience count can changeThe audience count depends on the applications you select. Only contacts who use the selected applications receive the notification, so the count can decrease.
Select Next to open the settings step. The node requires both a content item and an application before it continues.
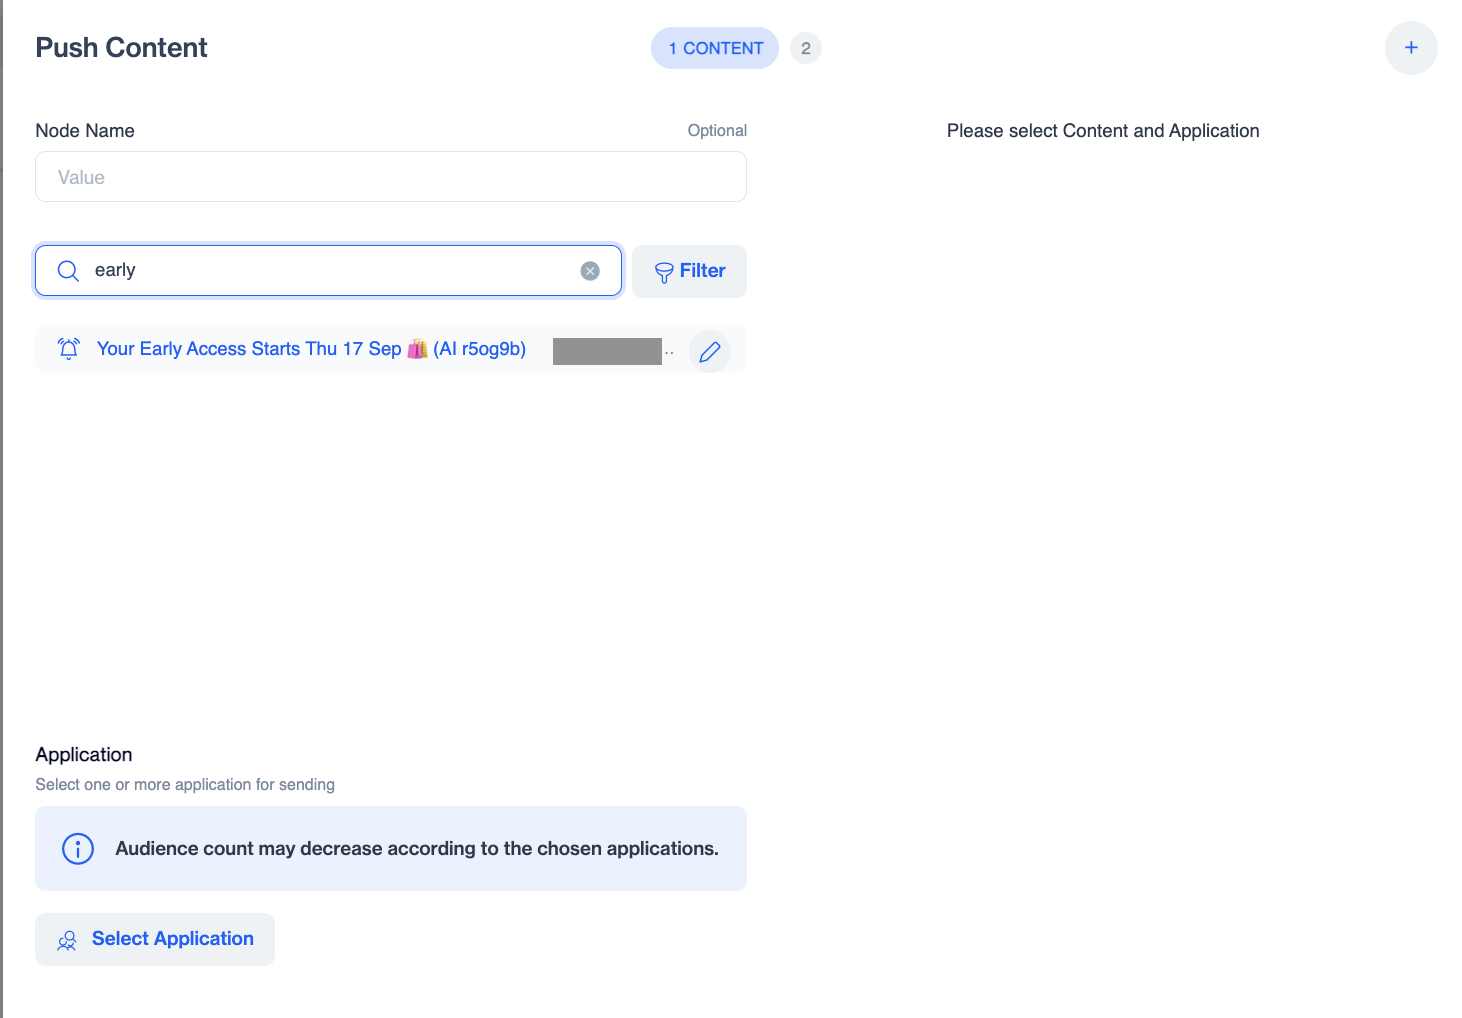
Push Send node, Content step
Step 2: Configure the settings
| Setting | Default | Description |
|---|---|---|
| Ignore frequency capping | Off | Sends to contacts even if they reached their daily, weekly, or monthly message limit. See Frequency Capping. |
| Only select recently used tokens of registered contacts | On | Sends only to the tokens that each registered contact used most recently. This improves delivery rates. |
| Ignore Google Analytics | Off | Excludes Google Analytics parameters from this send. |
| Messages expire in | 12 Hours | Sets how long the system retries delivery when a device or browser is offline. The maximum is 28 days. |
| Save to inbox: Remove from inbox in | 3 days | Keeps the message in the app inbox for the period that you enter, then removes it. |
| Save to inbox: Remove from inbox on | Not selected | Removes the message from the app inbox on the date and time that you choose. |
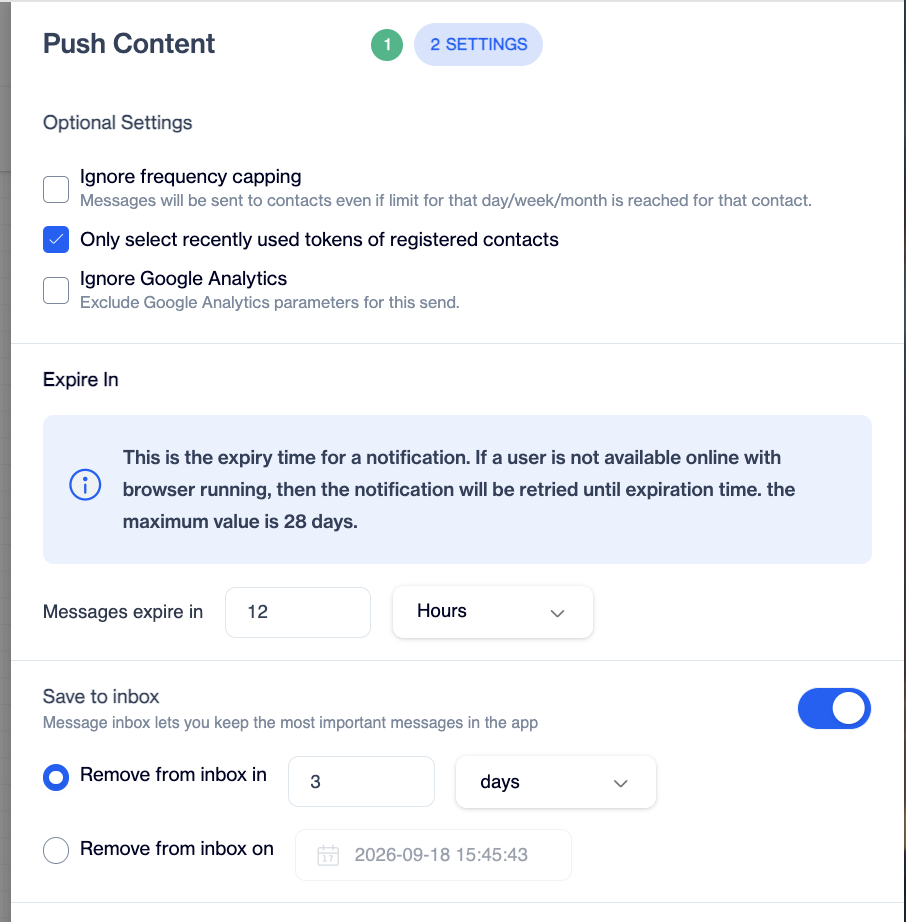
Push Send node, Settings step
Supported features
| Feature | What it does in this node |
|---|---|
| Test Sending | Sends the notification to a test device before you publish. |
| Frequency Capping | Applies your send limits to this node. Select Ignore frequency capping to bypass them for one send. |
| Google Analytics | Adds UTM parameters to links in the notification. Set them in Delivery Settings. |
| Hourly Capping | Limits how many notifications go out per hour. Set it in Delivery Settings. |
| Conversion Tracking | Attributes conversions to the campaign. Set it in Delivery Settings. |
| Drop Condition | Skips contacts who no longer match a rule when the node runs. Set it in Delivery Settings. |
| Save to inbox | Keeps a copy of the notification in the app inbox. |
| Optimize Time | Works with the Optimize Time node to send in the time slot when each contact is most likely to engage. One-Time campaigns only. |
Test and save
- Select Test to send the notification to a test device. The test uses the selected content and settings exactly as configured, so test before you publish.
- Select Save to close the node.
- Complete the rest of the flow. Every path must end with an End node, including the anonymous contacts output of Push Send.
- Publish the campaign. See One-Time or Recurring Flow Campaigns for the publishing steps.
Use more than one Push Send nodeA flow can contain several Push Send nodes. Combine them with Wait and Decision nodes to build sequences. Example: Push Send, then Wait 2 days, then a follow-up Push Send.
Example: a weekend sale announcement
A team wants to announce a weekend sale to app users with a single notification and no follow-up logic.
- In a one-time campaign, drag the Push node after the Audience node.
- Select the Weekend Sale content and name the node Sale Announcement.
- Open Select Application and choose your iOS and Android applications.
- Open the Settings step and set Messages expire in to 2 days, so that offline devices receive the notification only while the sale is active.
- Connect the outputs of the node to End nodes.
- Select Test to check the notification on a test device, then select Save and publish.
The complete flow is Audience, then Push Send, then End. A single standalone send needs no Wait or Decision nodes. To follow results, see Push / Web Push Analytics.
Troubleshooting
| Symptom | Likely cause and fix |
|---|---|
| You cannot continue from the Content step | The node needs both a content item and an application. Select both, then select Next. |
| The audience count drops after you select an application | Only contacts who use the selected applications are counted. Add the other applications if you want to reach them. |
| Some contacts do not receive the notification | The contacts reached their frequency capping limit. Select Ignore frequency capping only if this send must bypass the limit. |
| An offline device never receives the notification | The expiry period ended before the device came online. Increase Messages expire in, up to 28 days. |
Updated 22 days ago