
Wait
The Wait node pauses contacts at a point in your campaign flow. Contacts stay at the node until the wait ends, then move to the next node. Use it to give people time to react to a message before you send the next one.
The Wait node offers two wait types:
- Duration holds each contact for a set number of minutes, hours, or days.
- Wait Until holds contacts until a specific date and time.
-
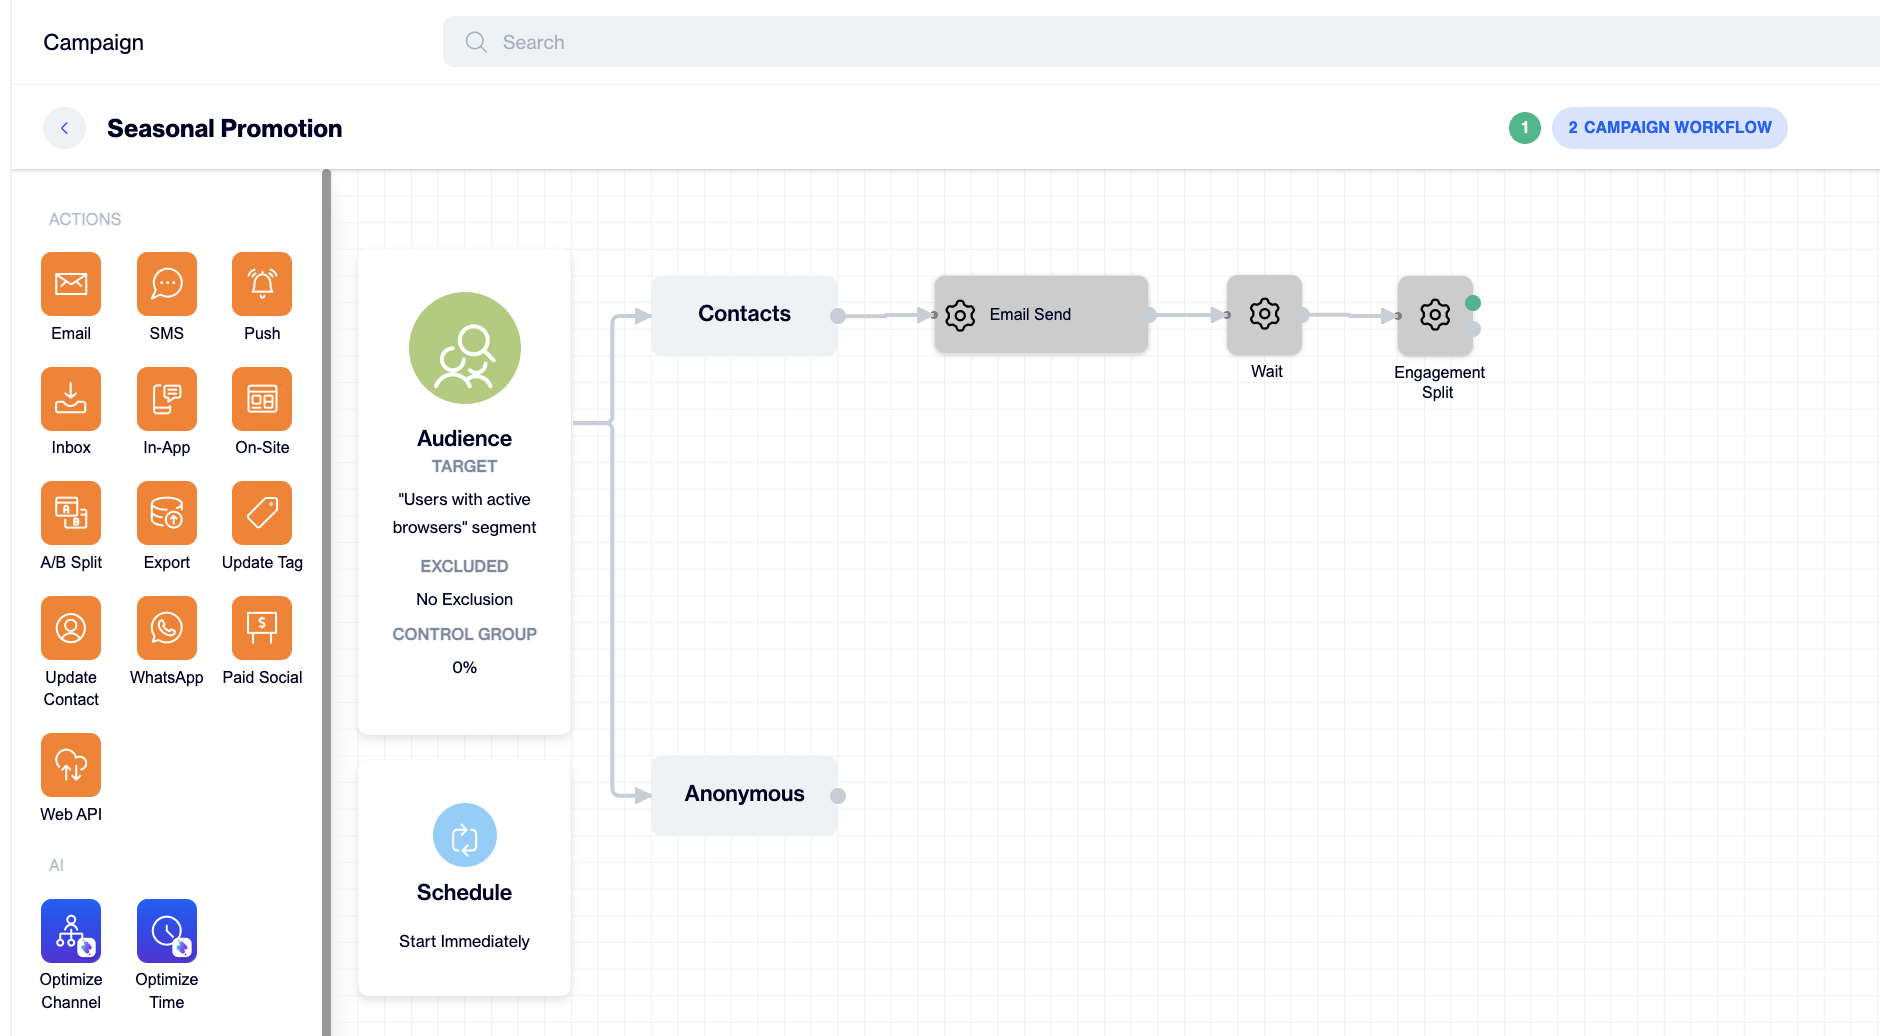
A Wait node between a send node and an Engagement Split node
When to use the Wait node
| Goal | Wait type | Example |
|---|---|---|
| Give contacts time to open or click before you check engagement | Duration | Email, then Wait 1 day, then Engagement Split |
| Space out messages in a series | Duration | Welcome email, then Wait 3 days, then tips email |
| Send a quick follow-up on another channel | Duration | Push, then Wait 30 minutes, then SMS |
| Start the next step at a fixed moment | Wait Until | Teaser email, then Wait until 27 Nov 09:00, then sale launch email |
Before you begin
- Create or open a flow campaign. Go to Campaigns, create a One Time Campaign or a recurring campaign, fill in Campaign Info, and click Next to open the Campaign Workflow canvas.
- Place the node that comes before the wait, for example an Email or Push node.
- Each flow supports up to 100 nodes. The Node Counter at the bottom right of the canvas shows your usage. Every Wait node counts as one node.
Get a Wait node in your flow
A Wait node reaches the canvas in one of two ways.
Automatic Wait node after a send node
When you drag one of these nodes onto the canvas, a Wait node appears to its right, already connected:
- SMS
- Push
- Inbox
- In-App
- On-Site
- A/B Split
The automatic Wait node is gray and labeled Wait until you configure it. Double-click it to open the Wait dialog and set the delay. If the next step needs no delay, hover over the Wait node, click the red delete icon, and connect the send node to the next node directly.
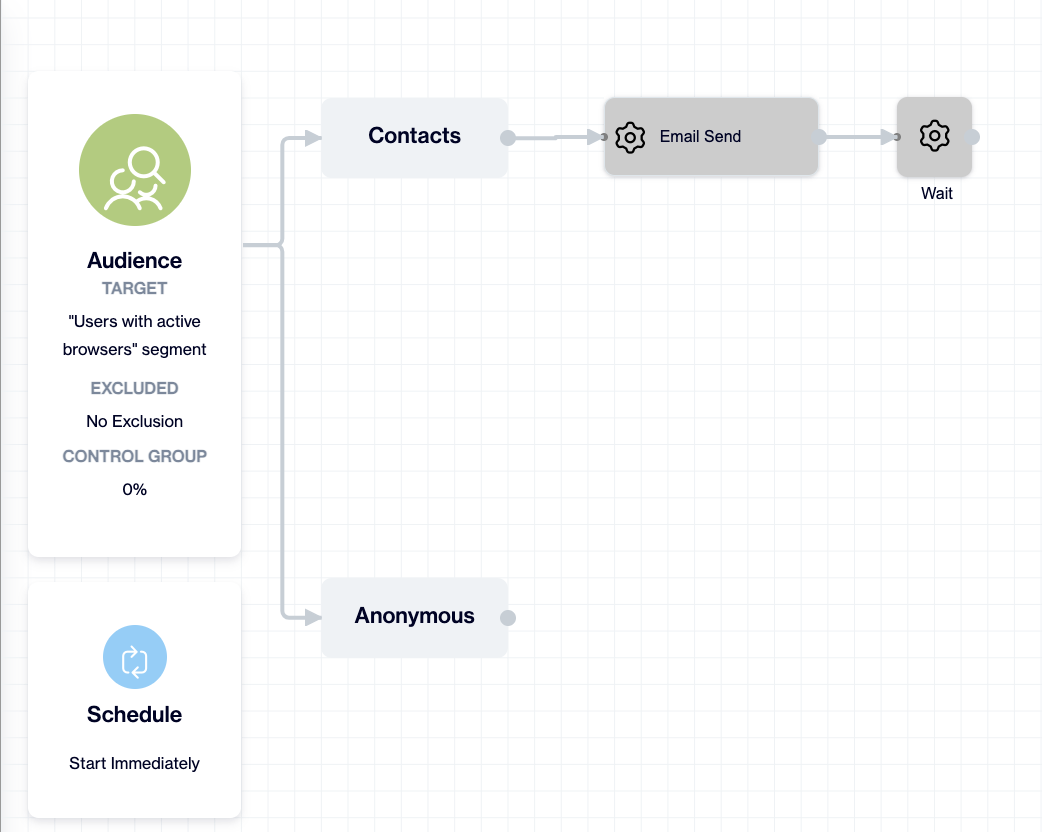
The canvas adds a connected Wait node when you drop a send node.
Add a Wait node manually
Other nodes, such as Update Tag, do not bring a Wait node with them. To add a delay after one of these nodes:
- In the left panel of the canvas, find the Decisions group.
- Drag the Wait node onto the canvas.
- Drag a connection from the output port of the previous node to the input port on the left side of the Wait node.
- Double-click the Wait node. The Wait dialog opens.
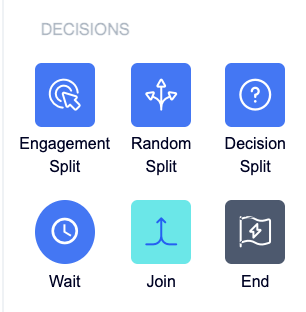
The Wait node in the Decisions group of the node panel.
Set a Duration wait
Choose Duration when every contact waits the same amount of time. The wait starts for each contact at the moment that contact reaches the node.
- In the Wait dialog, select Duration. This option is selected by default.
- In the Wait field, enter the number of units. The default value is 1. Enter a whole number greater than 0.
- Open the unit dropdown and select Minute, Hour, or Day. The default unit is Hour.
- Click Save.
The node label on the canvas updates to show the delay, for example Wait 3 days.
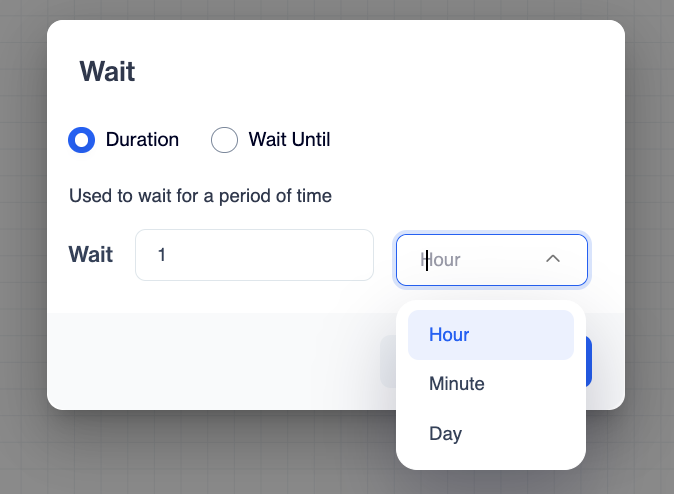
The three time units for a Duration wait.
Set a Wait Until date
Choose Wait Until when the next step must start at a fixed date and time, such as an event, a holiday, or a sale launch. All contacts at the node move forward at that moment.
- In the Wait dialog, select Wait Until.
- Click the Select date field. A calendar opens.
- Select the date. Use the arrows at the top of the calendar to change the month or year.
- Select the hour and the minute in the time panel. The time panel uses the 24-hour format.
- Check the value in the field. It appears as year, month, day, and time, for example 2026-11-27 09:00. To remove the value and start again, click the clear icon in the field.
- Click Save.
The node label on the canvas updates to show the date, for example Wait until 27 Nov 09:00.
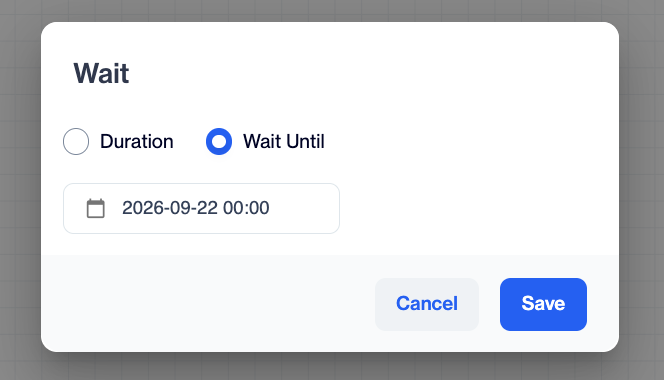
Select the date first, then the hour and minute.
NoteChoose a date and time that is later than the campaign start. Contacts cannot wait for a moment that has already passed.
Read the Wait node on the canvas
| What you see | What it means |
|---|---|
| Gray node with a gear icon, labeled Wait | The node has no settings yet. Double-click it to configure it. |
| Blue node with a clock icon, labeled Wait 3 days | A Duration wait is saved. |
| Blue node with a clock icon, labeled Wait until 27 Nov 09:00 | A Wait Until date is saved. |
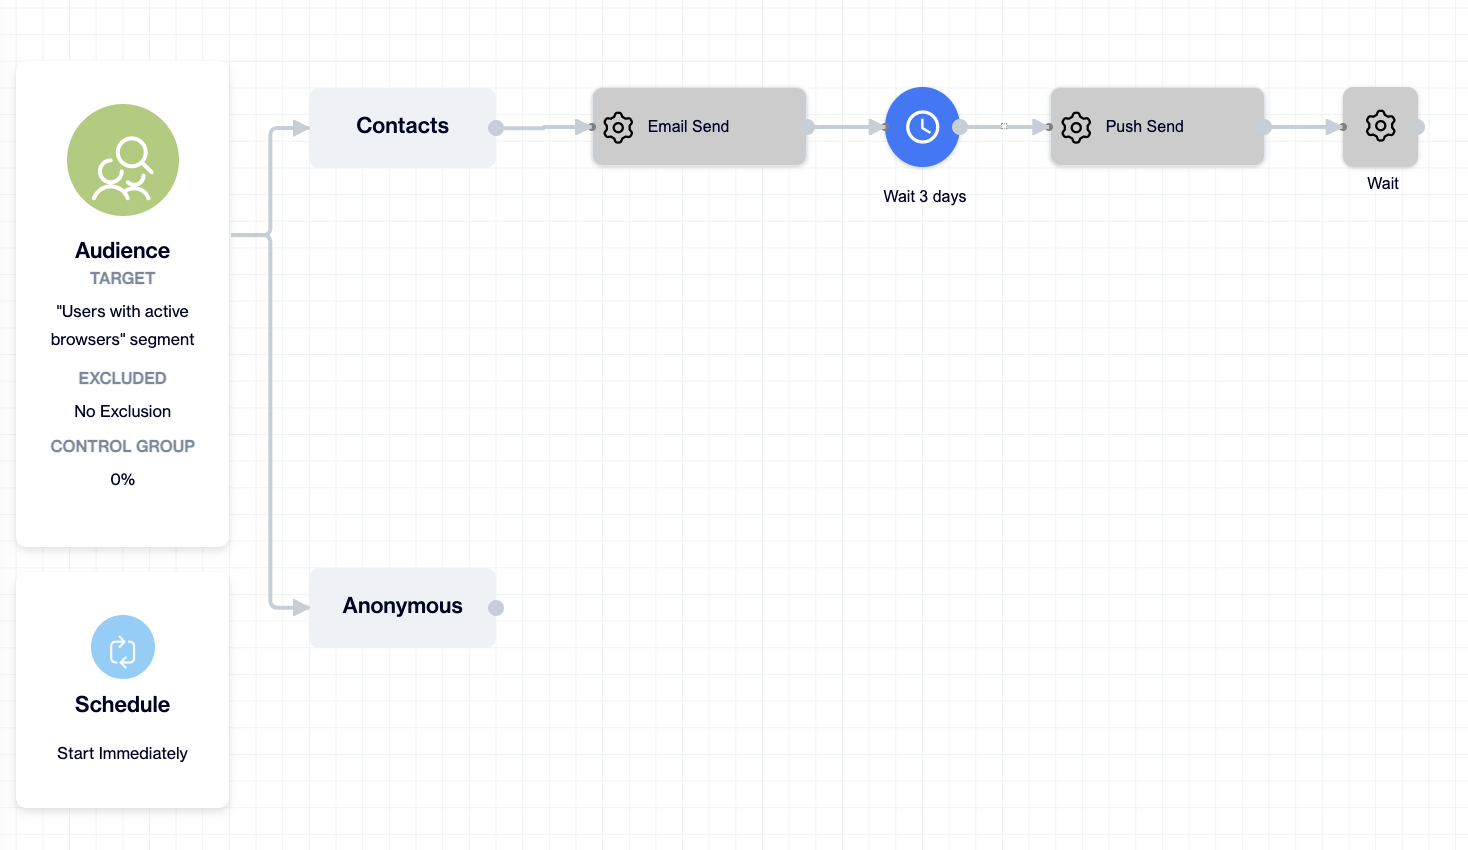
An unconfigured Wait node next to a configured one.
Continue the flow after the Wait node
The Wait node has one output. Drag a connection from the output port on the right side of the node to the next node. Common next steps:
- A send node such as Email, SMS, Push, or WhatsApp, to deliver the next message.
- An Engagement Split node, to branch contacts by how they reacted to the earlier message.
- A Decision Split node, to branch contacts by their latest data after the wait.
- An End node, to close the path.
Edit or delete a Wait node
- Edit: Double-click the node, change the settings, and click Save. The dialog opens with your saved values.
- Duplicate: Hover over the node and click the gray duplicate icon to copy the node.
- Discard changes: Click Cancel or press Esc. The node keeps its previous settings.
- Delete: Hover over the node and click the red delete icon. Reconnect the nodes before and after it so the flow stays complete.
Keyboard tips
- Press Tab to move between the options, fields, and buttons in the Wait dialog.
- In the Wait field, type the number or press the up and down arrow keys to change the value.
- In the unit dropdown, type to filter the list, then press Enter to select.
- Press Esc to close the dialog without saving.
Example: follow up with contacts who did not open
- Add an Email node and connect it to the Audience node.
- Double-click the Wait node that the canvas added after the Email node. Select Duration, enter 2, select Day, and click Save.
- Add an Engagement Split node, connect it to the Wait node, and filter on Email Open.
- Connect the path for contacts who did not open to a Push node with a reminder.
- Close each path with an End node.
The two-day wait gives contacts time to open the email, so the split measures real engagement.
Best practices
- Match the wait to the channel. People react to push and SMS within minutes or hours. Email often needs one to three days.
- Configure the Wait node before every Engagement Split node. Send nodes come with a Wait node. Set a real delay on it. Without a wait, the split checks engagement before contacts have time to react.
- Do not leave automatic Wait nodes unconfigured. Set a delay on each gray Wait node, or delete it if the path needs no delay.
- Use Wait Until for shared moments. Launches, events, and deadlines happen at one time for everyone. Use Duration when timing depends on each contact.
- Check the arrival time of the next message. A 12-hour wait after an evening send delivers the next message early in the morning. Review your Blackout Interval and Frequency Capping settings together with your waits.
- Keep total flow length in mind. Add up all waits on a path to see how long a contact stays in the campaign.
- Read the labels. Review the node labels on the canvas before you publish to confirm every delay.
Troubleshooting
| Issue | Cause | Solution |
|---|---|---|
| The message "Wait period cannot be empty" appears when you click Save. | The Wait field is empty or set to 0. | Click OK, enter a whole number greater than 0, and click Save again. |
| The node is still gray and labeled Wait. | The settings are not saved. | Double-click the node, complete the settings, and click Save. |
| The dialog closed and your changes are gone. | You pressed Esc or clicked Cancel. | Open the dialog again, enter the values, and click Save. |
| A Wait node appears that you did not add. | The canvas adds a Wait node after every send node and A/B Split node. | Double-click it to set a delay, or delete it if the path needs no delay. |
| The next message arrives at an unexpected hour. | A Duration wait counts from the moment each contact reaches the node. | Adjust the duration, or use Wait Until with an exact time. |
Frequently asked questions
What is the difference between Duration and Wait Until?
Duration is relative. Each contact waits the same amount of time from the moment they reach the node. Wait Until is absolute. All contacts move forward at the same date and time.
Can I use more than one Wait node in a flow?
Yes. Add a Wait node at every point where you need a pause. Wait nodes do not count toward the Node Counter limit.
Can I wait for weeks or months?
The units are Minute, Hour, and Day. For longer waits, enter the number of days. For example, enter 14 and select Day for a two-week wait.
Does the Wait node send anything?
No. The node only holds contacts. Sending starts again at the next send node.
Where do I place the Wait node?
Place it right after the node where the delay begins. Send nodes and the A/B Split node already come with a connected Wait node. After other nodes, add one from the Decisions group.
Updated 25 days ago