Import section is used to manually upload data to Dengage CDMP.
How To Import Data
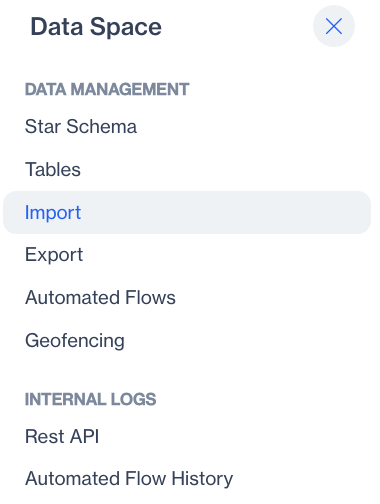
Click on Data Space > Data Management > Import to access the manual import functionality of CDMP.
DataSpace > Import
The Import listing screen will appear as shown below.
Overview of Import Section
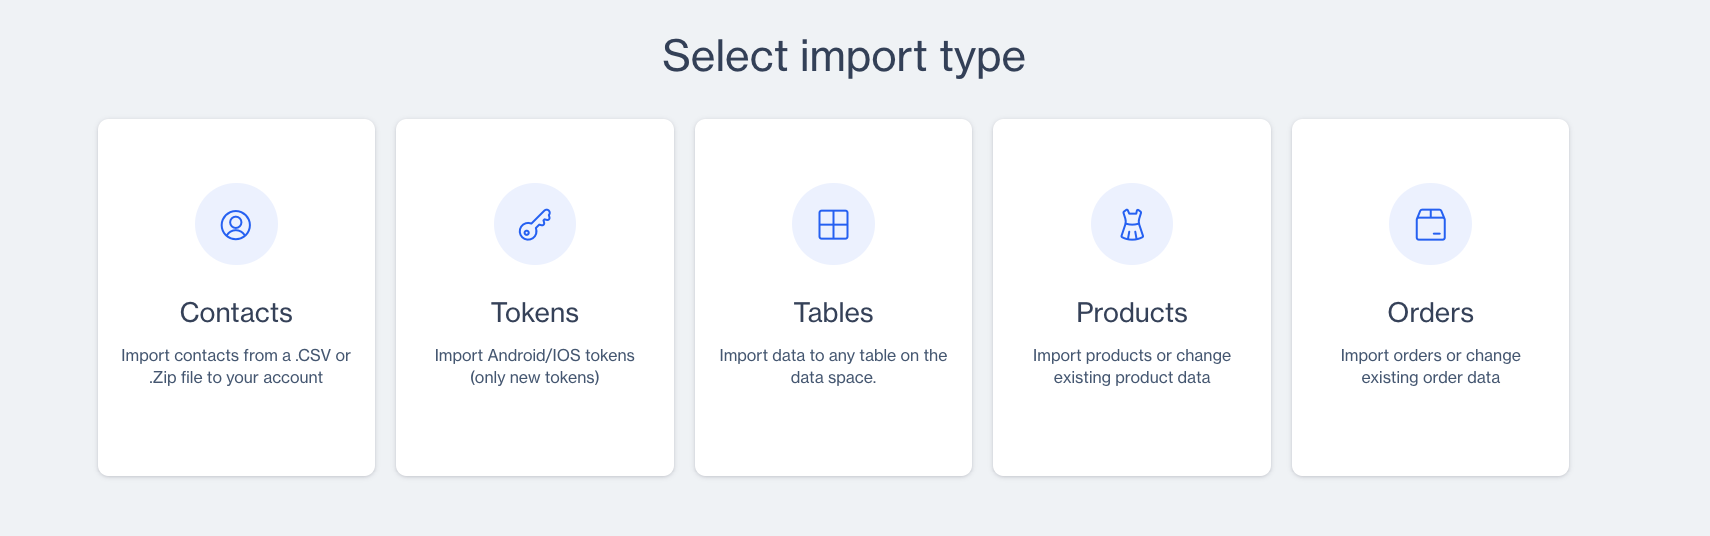
1️⃣ +New Button:
Types Of Data Import
This button allows users to initiate the import process for various types of data:
(1) Contacts: This option enables users to import contact information into their account. Contacts can include details such as names, email addresses, phone numbers, and any other relevant information. Importing contacts is crucial for businesses and organizations to maintain communication and engagement with their audience.
(2) Tokens: With this option, users can import tokens related to Android or iOS devices. Tokens are unique identifiers associated with individual devices, often used for push notifications or other forms of targeted messaging. Importing tokens allows businesses to reach their mobile app users effectively.
(3) Tables: This option allows users to import structured data into any table within their data space. Tables can contain various types of information, such as sales data, customer feedback, or product inventory.
(4) ProductsThe Products Import option allows users to import new products or update existing product data. This is designed specifically for e-commerce accounts to manage product data efficiently.
(5) Orders The Orders Import option is used to import or update order data for e-commerce accounts. It feeds information into Orders and Order Details tables, ensuring all transaction data is stored accurately.
📘
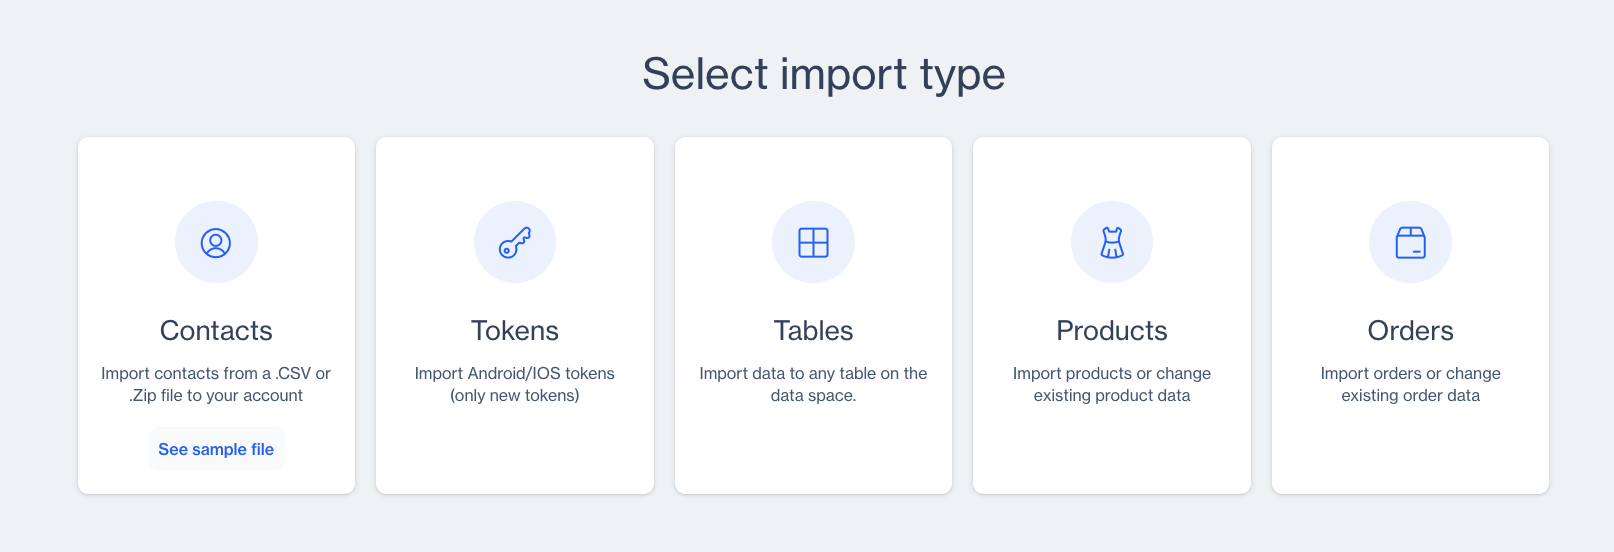
Sample File Downloads for Import Preparation
Sample File Option Display
The Dengage platform enhances the data import process by offering downloadable sample files for contacts, tokens, and tables. These files act as templates, helping users properly structure and format their data prior to importation. By using these sample files, users can ensure that their data is consistent and correctly formatted, leading to smoother and more successful data imports. The sample files provide valuable guidance and reference points, facilitating accurate data entry and maintaining data integrity.
2️⃣ Search Bar: Users can utilize this feature to search for specific data imports within the platform.
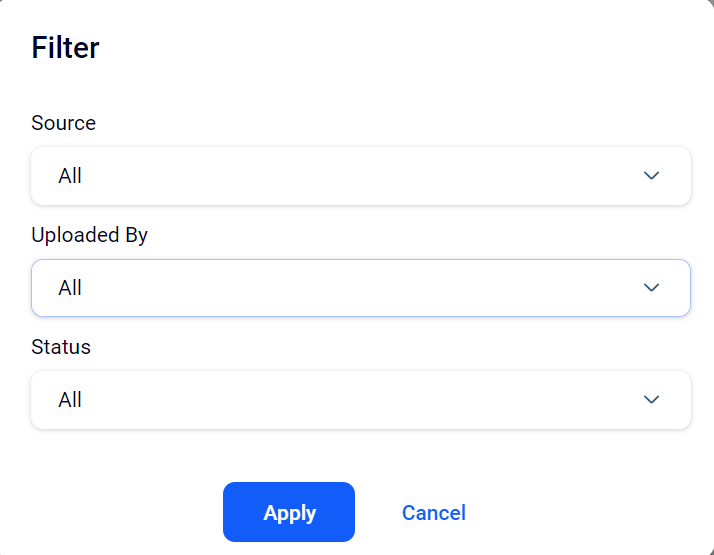
3️⃣ Filter Section:
Filter Options Display
Source:
This filter allows users to sort imported data based on its source. The options typically include:
"User": Data manually imported by a user.
"Automation": Data imported automatically by a system or a process.
"All": Shows all imported data regardless of its source
Uploaded By:
This section displays the name of the user who uploaded the data. It helps users identify who imported specific data sets into the system.
Status:
This filter categorizes the status of each data import. The status options usually include:
"Not Started": Indicates that the import process has not yet begun.
"In Progress": Shows that the import process is currently ongoing.
"Completed": Indicates that the import process has been successfully finished.
"Error": Indicates that there was an issue or error during the import process, preventing it from completing successfully.
All : This "All" option allows users to view all imported data regardless of its status, providing them with a comprehensive overview of all data imports without filtering based on their current status
Apply
Once you have made your selections, simply click on the "Apply" button to implement the chosen filters.
4️⃣ Log View
The "Log View" section presents a table containing various columns that provide information about previously imported data files.
CREATED AT:This column displays the date and time when each data import was initiated or created. It helps users track the timeline of data imports.
SOURCE: This column indicates the origin or source of the imported data. It might specify whether the data was imported by a user or through an automated process.
NAME: In this column, the name given to each data import is displayed. This name could be provided by the user during the import process to help identify or categorize the data.
CREATED BY: Here, the name of the user who initiated or performed the data import is shown. It provides accountability by indicating who is responsible for each data import.
STATUS: This column displays the current status of the data import process. It typically indicates whether the import process is not started, in progress, completed, or encountered an error.
SUCCESS: In this column, the number of successful entries during the data import process is shown. It helps users assess the completeness and accuracy of the imported data.
ERROR: The number of errors encountered during the data import process is displayed in this column. It alerts users to any issues or discrepancies that occurred during the import.
WARNING: Here, the number of warnings encountered during the data import process is shown. Warnings may indicate potential issues or inconsistencies in the imported data that users should review or address.
How to Upload a File
After selecting one of the available options, a section will appear offering two methods for importing data. Choose the method that best suits your needs.
File Upload
1️⃣ Drag and Drop
Users can drag and drop files directly into the designated area.
2️⃣ Select from Browser
Users can browse their files and select the desired files for import.
🚧
Important Warnings
Maximum File Size: The maximum allowed size for the imported file is 100 MB. Files exceeding this size may not be accepted for import.
File Format Requirement: The imported file must be in either .csv or .zip format. Other formats will not be accepted for import.
Overview the Imported File
Once a file is imported, the overview section offers a comprehensive view consisting of two main sections. This layout helps you easily navigate and assess the details of the imported data.
Overview of an Imported File
1️⃣ Imported Files: This section lists the imported files along with specific details:
Number of Rows: Displays the total number of rows contained within the CSV or ZIP file.
Import Name: Indicates the name assigned to the import process.
Uploaded File: Shows the name of the file that was uploaded.
Show Preview: Allows users to preview the contents of the uploaded file before finalizing the import.
Change File: Provides an option to change the uploaded file if needed, allowing users to upload a different file for import.
2️⃣ Details: On the same page, users can access various settings to customize their data import process:
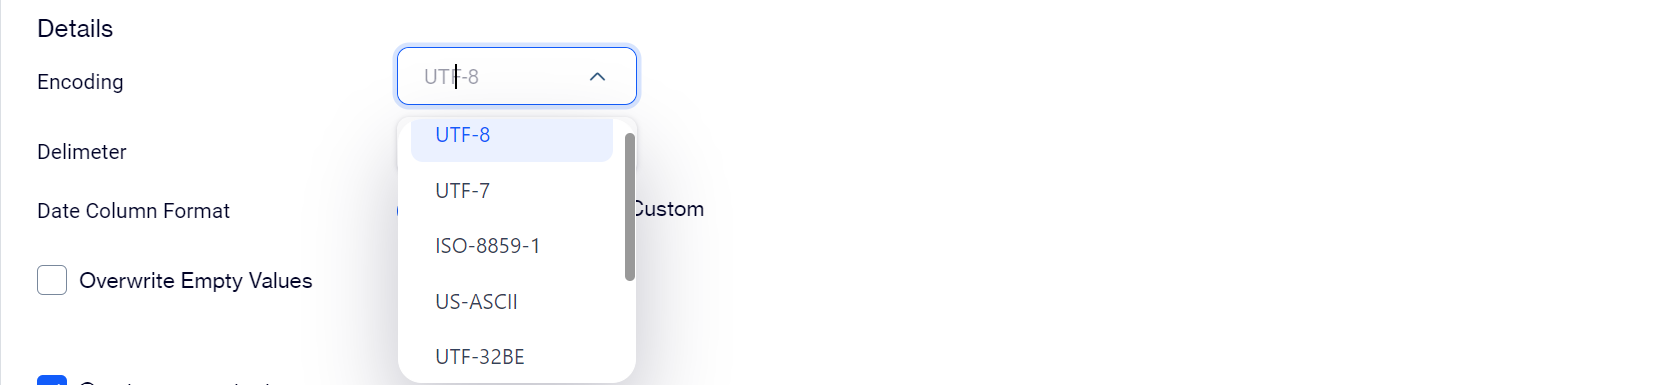
Encoding: Users can specify the character encoding format for the imported data file, ensuring compatibility and accurate representation of text characters.
Encoding Options
UTF-8: Unicode Transformation Format 8-bit is a variable-width character encoding capable of encoding all 1,112,064 valid character code points in Unicode.
UTF-7: Unicode Transformation Format 7-bit is a character encoding scheme that allows for the encoding of Unicode characters in a form that can be used in a 7-bit transport protocol.
ISO-8859-1: Also known as Latin-1, ISO-8859-1 is a single-byte character encoding of the Latin alphabet, used by default in HTML and HTTP.
USASC-II: United States ASCII is a character encoding standard for electronic communication in the United States, including text messaging and email.
UTF-32BE:'UTF-32BE' as the encoding option ensures consistent representation of Unicode characters with the most significant byte stored first in memory.
UTF-32: Unicode Transformation Format 32-bit is similar to UTF-32BE but allows for different byte orders.
UTF-16BE: Unicode Transformation Format 16-bit Big Endian is a fixed-width character encoding capable of encoding all Unicode code points using two bytes per character.
UTF-16: Unicode Transformation Format 16-bit is similar to UTF-16BE but allows for different byte orders.
Delimiter: Users can define the delimiter used to separate fields within the imported file, such as commas, semicolon, or vertical bar, aiding in proper data parsing.
Delimiter Options
Auto Detect: The "Auto Detect" feature enhances convenience by automatically determining the appropriate delimiter based on the file's content, simplifying the import process for users
Comma (,): Comma delimiter is commonly used in CSV files. It separates values by inserting a comma between each data field. For example, a CSV file might have data organized like this: "John,Doe,30,New York".
Semicolon (;): Some systems or regions prefer using semicolons as delimiters instead of commas. This delimiter serves the same purpose as a comma but uses a semicolon to separate values. For instance: "John;Doe;30;New York".
Vertical bar (|): Also known as a pipe symbol, the vertical bar delimiter is another option for separating values. It's commonly used in database exports and other data formats. For example: "John|Doe|30|New York".
Date Column Format: Users can choose how date columns in the imported file are formatted:
Auto Detect: Automatically detects the date format based on the data in the file.
Custom: Allows users to specify a custom date format if the auto-detection is insufficient or if the date format varies.
Format Given for Date Column
❗️
Error: Invalid Format
The custom date format you entered is invalid and cannot be processed. Please make sure that the format complies with the standard date formatting rules.
Valid Format💯
Here are some valid date formats that users can utilize $Note$ Weather I should put some table here or these images are enough
d: The day of the month, from 1 through 31.
dd : The day of the month, from 01 through 31.
ddd: The abbreviated name of the day of the week.
dddd:The full name of the day of the week.
f :The tenths of a second in a date and time value.
ff:The hundredths of a second in a date and time value.
fff:The milliseconds in a date and time value.
ffff:The ten thousandths of a second in a date and time value.
fffff:The hundred thousandths of a second in a date and time value.
ffffff :The millionths of a second in a date and time value.
fffffff:The ten millionths of a second in a date and time value.
F :If non-zero, the tenths of a second in a date and time value.
FF :If non-zero, the hundredths of a second in a date and time value.
FFF:If non-zero, the milliseconds in a date and time value.
FFFF :If non-zero, the ten thousandths of a second in a date and time value.
FFFFF :If non-zero, the hundred thousandths of a second in a date and time value.
FFFFFF:If non-zero, the millionths of a second in a date and time value.
FFFFFFF:If non-zero, the ten millionths of a second in a date and time value.
g, gg:The period or era.
hh :The hour, using a 12-hour clock from 01 to 12.
HH:The hour, using a 24-hour clock from 00 to 23.
m:The minute, from 0 through 59.
mm:The minute, from 00 through 59.
M:The month, from 1 through 12.
MM:The month, from 01 through 12.
MMM:The abbreviated name of the month.
MMMM:The full name of the month.
s:The second, from 0 through 59.
ss:The second, from 00 through 59.
t:The first character of the AM/PM designator.
tt:The AM/PM designator.
y:The year, from 0 to 99.
yy:The year, from 00 to 99.
yyy:The year, with a minimum of three digits.
yyyy:The year as a four-digit number.
yyyyy :The year as a five-digit number.
zz:Hours offset from UTC, with a leading zero for a single-digit value.
zzz:Hours and minutes offset from UTC
Overwrite Empty Values: This option allows users to specify whether empty values should be overwritten during the import process, ensuring data consistency and avoiding duplication.
📘
Create and Update Existing Contacts
Create New Contacts: Users can enable this option to create new contacts based on the imported data, adding them to the existing contacts list.
Update Existing Contacts: Enabling this option allows users to update existing contacts with any new information provided in the imported data, ensuring data accuracy and keeping contact records up to date.
3️⃣ Next: Once you have completed your tasks on this page, click the "Next" button to proceed to the mapping overview section.
Import Data into Contacts
After selecting New Import > Contacts and uploading your file, a screen will appear allowing you to match the columns in your file with those in the master_contact table.
Column Matching of file to master_contact table
🚧
Import Actions In the Mapping Section For Table Import
Import Action: Allows to control how the data is imported into the target table.
Insert: This option allows users to insert new rows into the target table. Any new data that is not already present in the table will be added as new entries.
Update: Selecting this option enables users to update existing rows in the target table based on the imported data.
Insert and Update: This option combines the functionalities of both Insert and Update actions.
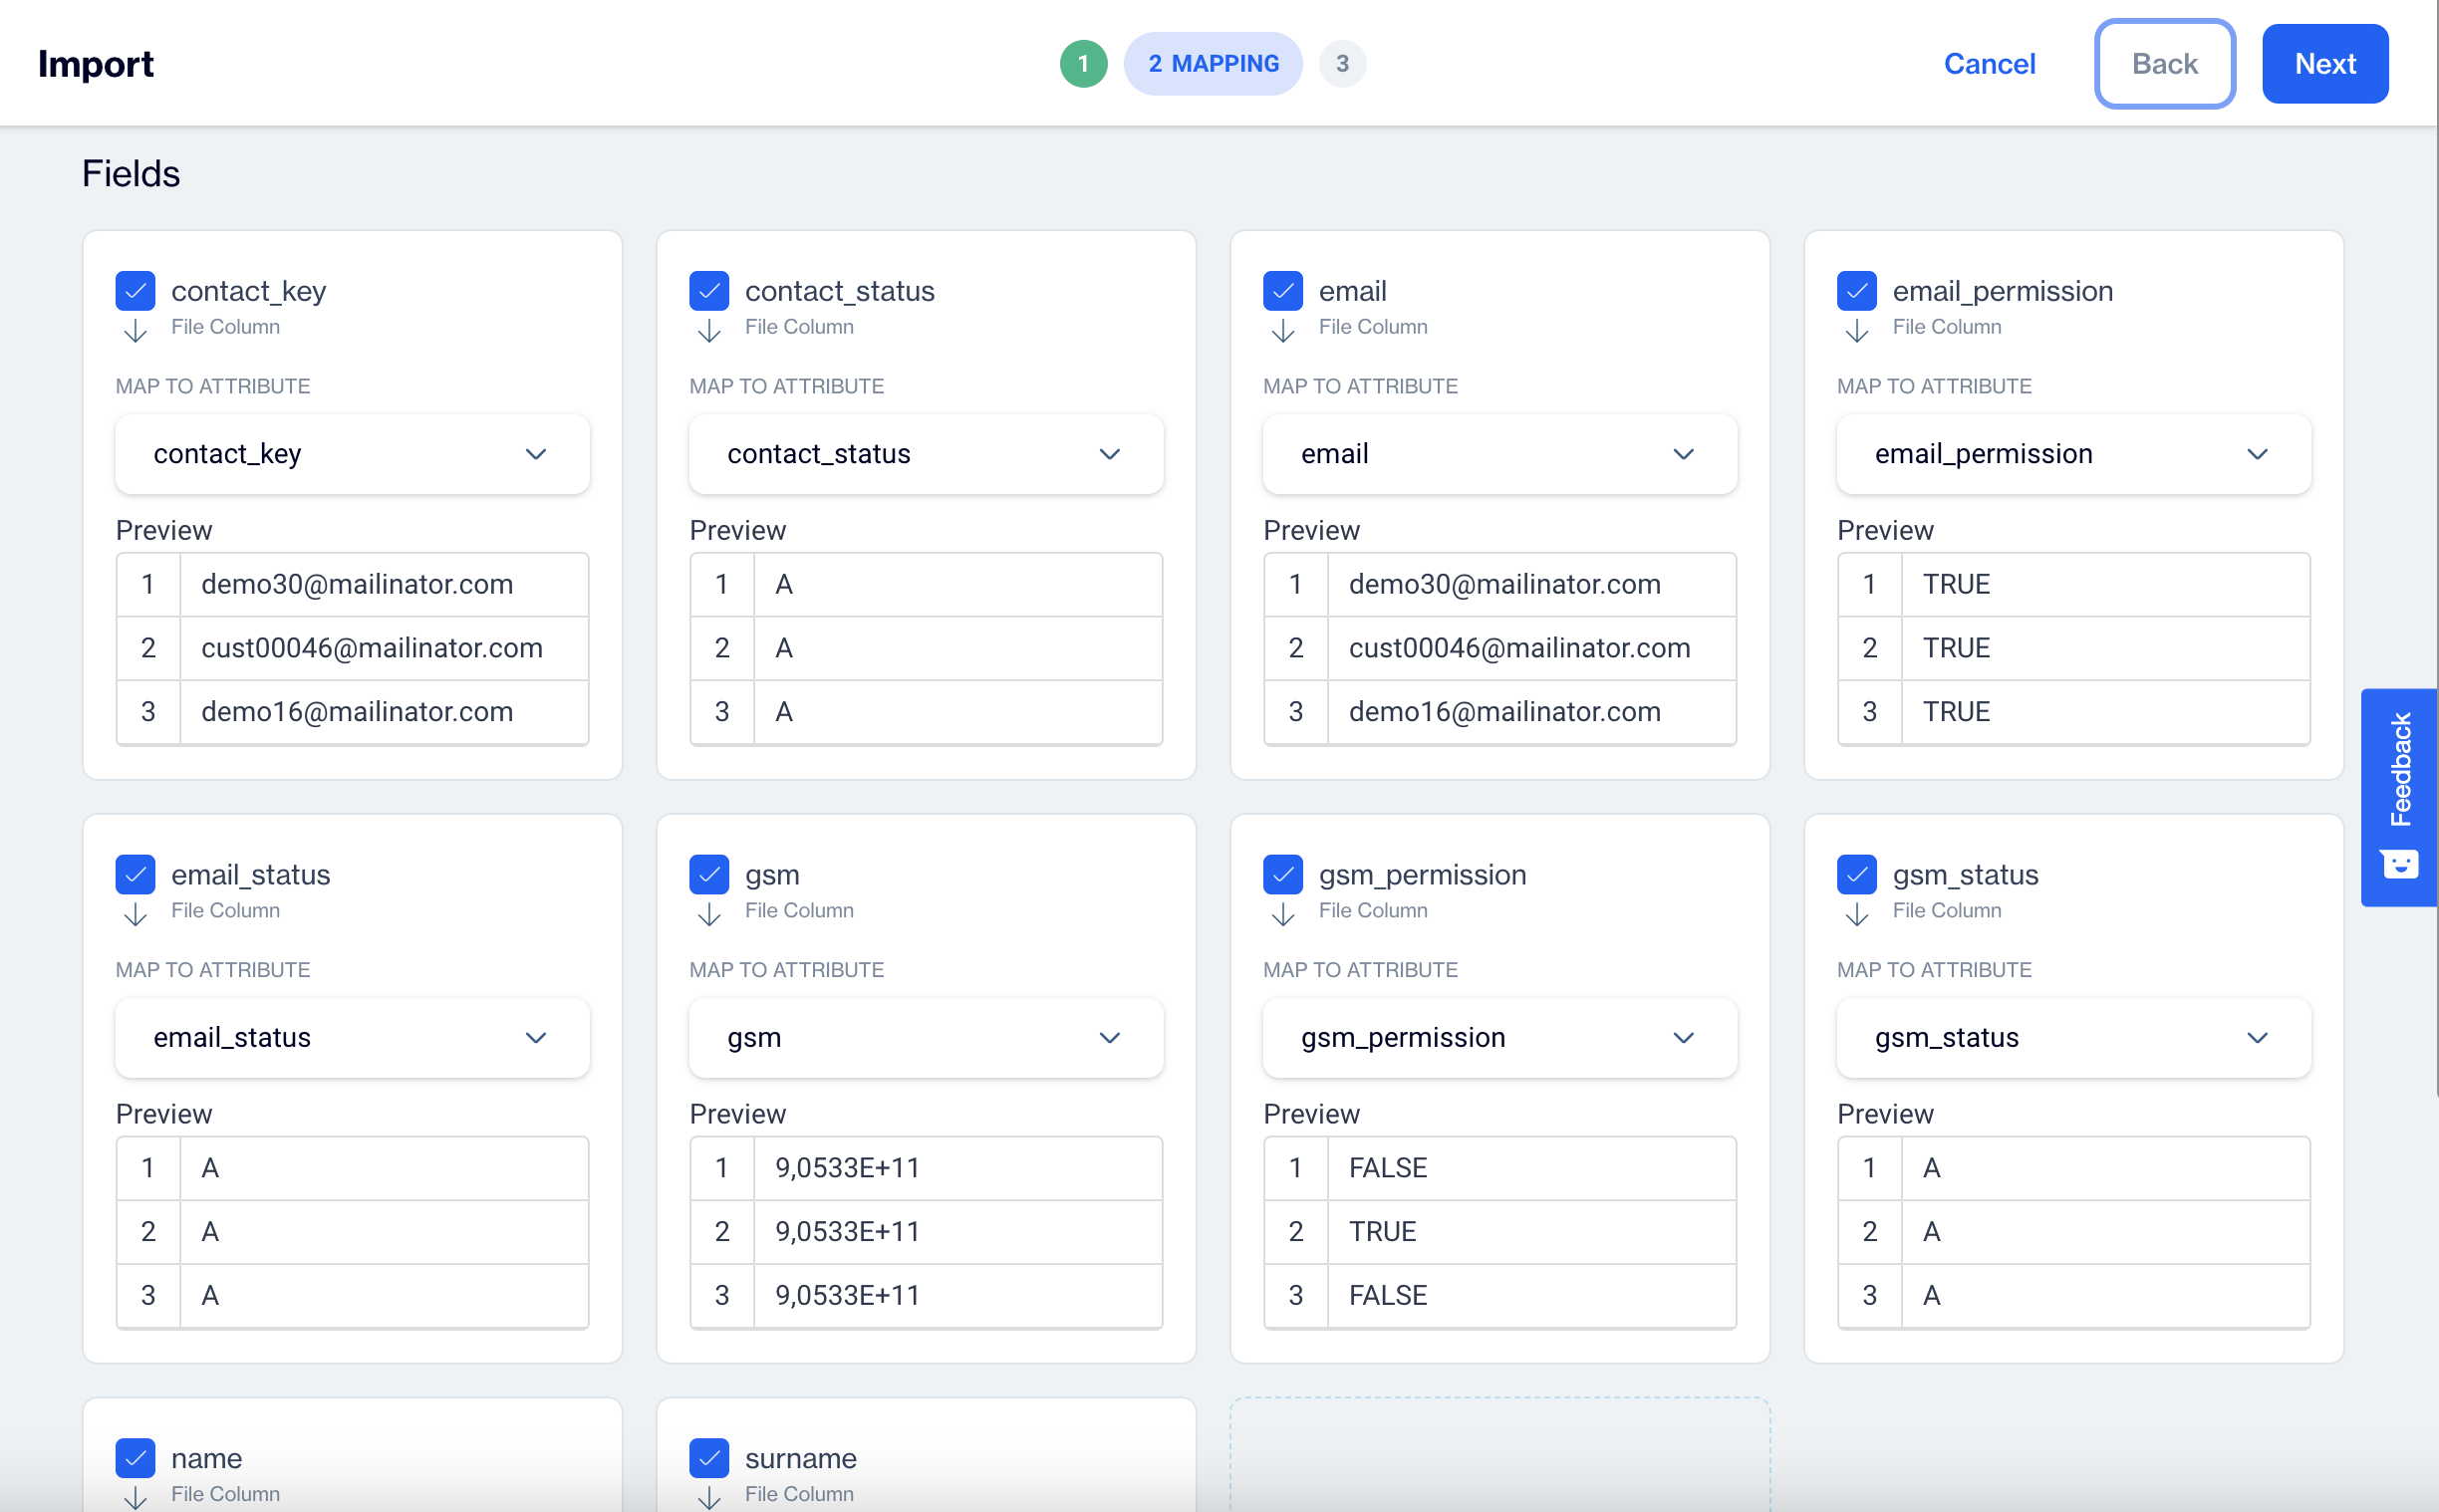
1️⃣ Overview of Fields Section:
Column Mapping
(1) Disable Specific Fields: Users have the option to disable specific file columns using checkboxes in this mapping section. This allows for fine-tuning the import process according to user preferences.
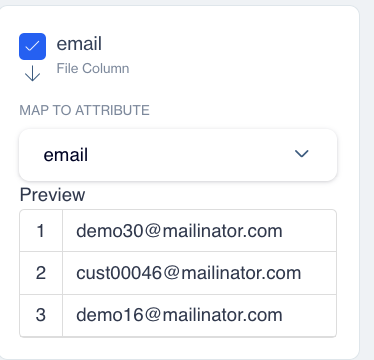
(2) Map To Attribute: Users can map out fields from the imported file to different columns in their database or system. This enables proper alignment of data for accurate import.
(3) Preview Columns: Users can preview the columns in the imported file to ensure they are correctly filled with the desired values in their database.
👍
Column Matching
You must match each column from your file to the corresponding columns in the master_contact table. If you unselect a checkbox, it means you do not want to update that particular column. Use the "Map To Column" option to select which column of the master_contact table this file column should be mapped to.
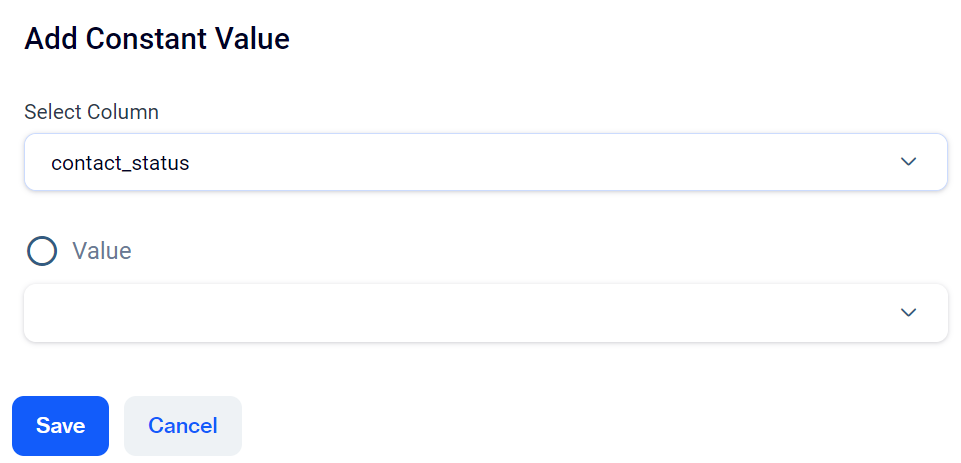
2️⃣ Adding Constant Column: In addition to column in the uploaded file, you can also assign constant values to specific columns in the destination table while importing this file. For example, in the scenario below, the user assigns a specific value to the email_permission column, likely updating the master_contact via the Contacts option.
Add Constant Columns and Set Entry Values
Add Constant Columns: Users have the option to include additional columns with constant values during the mapping process. This allows for the insertion of consistent data across all records for a specific field.
Entry Value: The entry value for constant columns may vary depending on the data type of the column.
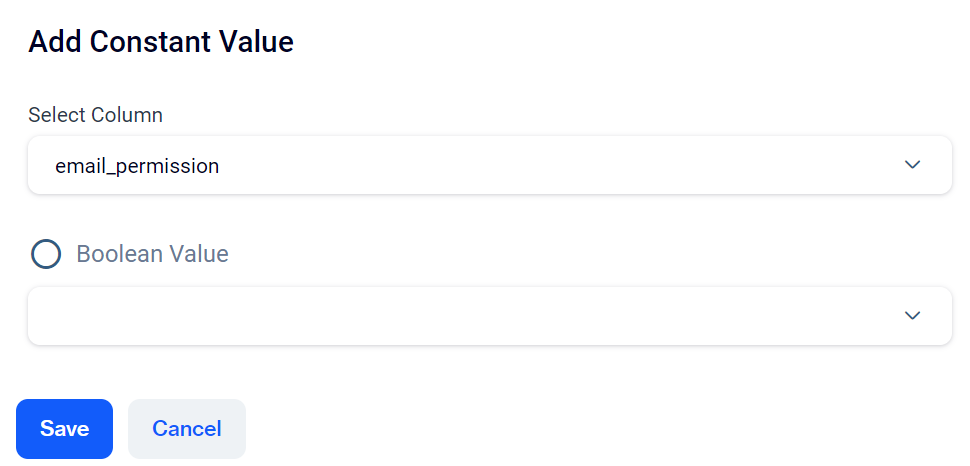
🚧
Constant Column Values Based on Data Types
Include Constant Columns with Custom Entry Values
Include Constant Columns with Custom Entry Values
These features allow users to customize constant column values according to the data type of each column, ensuring accurate and consistent data importation.
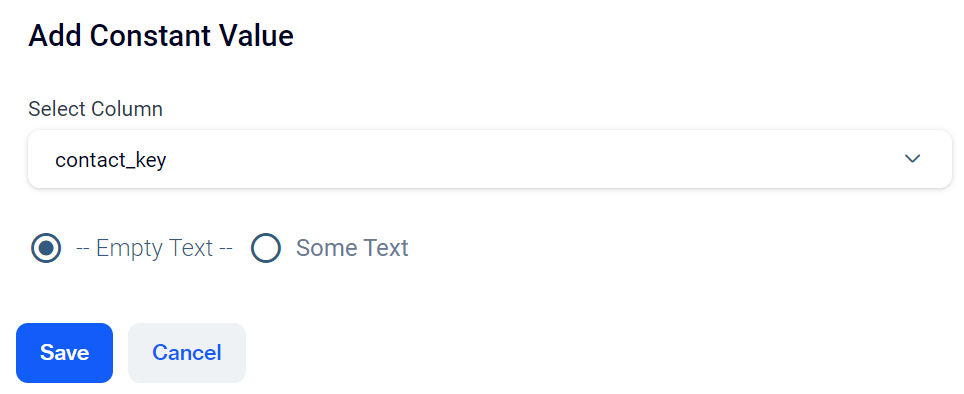
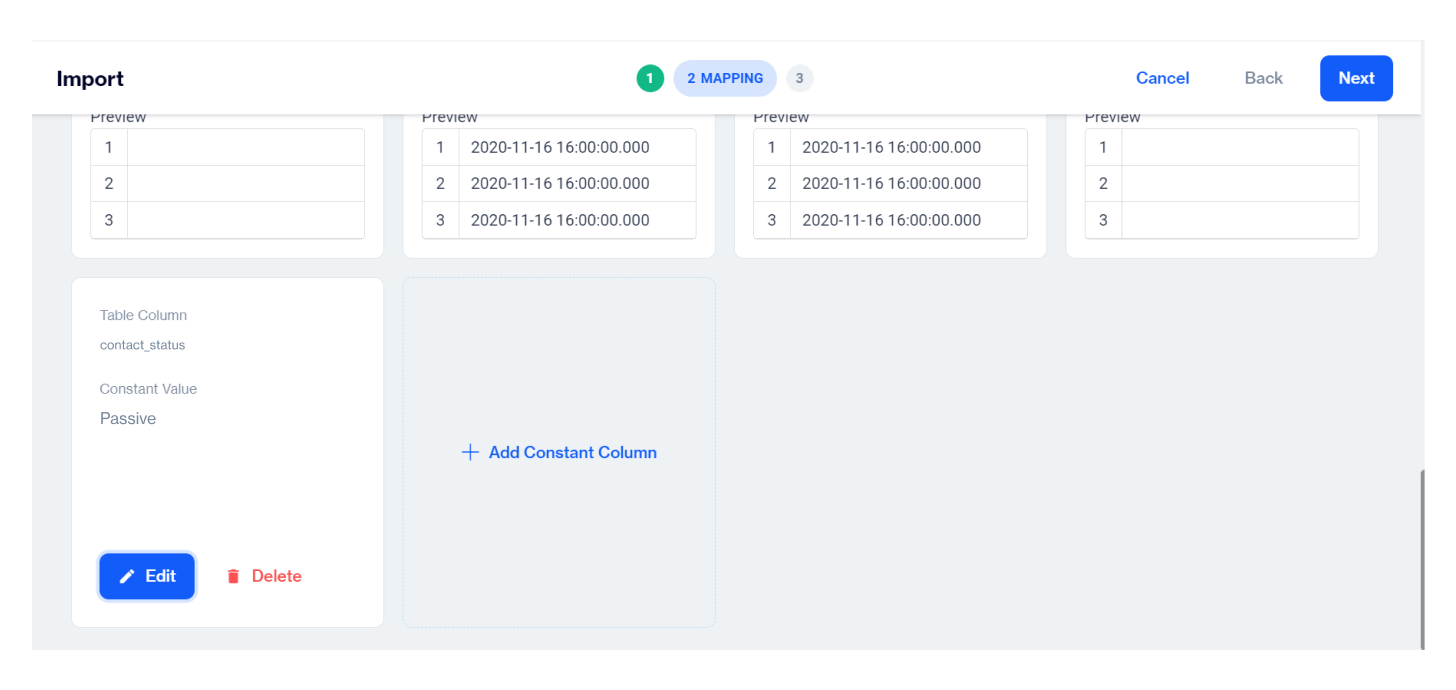
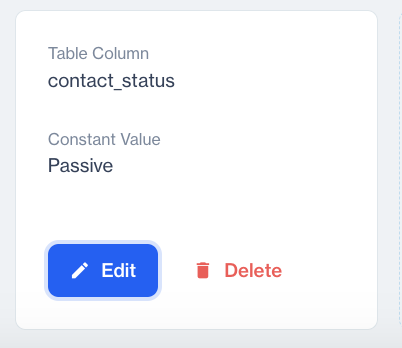
3️⃣ Save : When you select the "Save" option, a column will be created that includes the following options:
Configure Mapping
Add a Constant Value for contact_key
(1)Table Column: Users can specify an existing table column to map the imported field to.
(2)Constant Value: Users can input a constant value to be applied to all records in this column.
(3)Edit: Users can edit the mapping settings for this column.
(4)Delete: Allows users to remove the newly created column if it is no longer needed.
3️⃣ Next: Once the user is done, they simply click on the "Next" button for Tagging process. Please see Tags
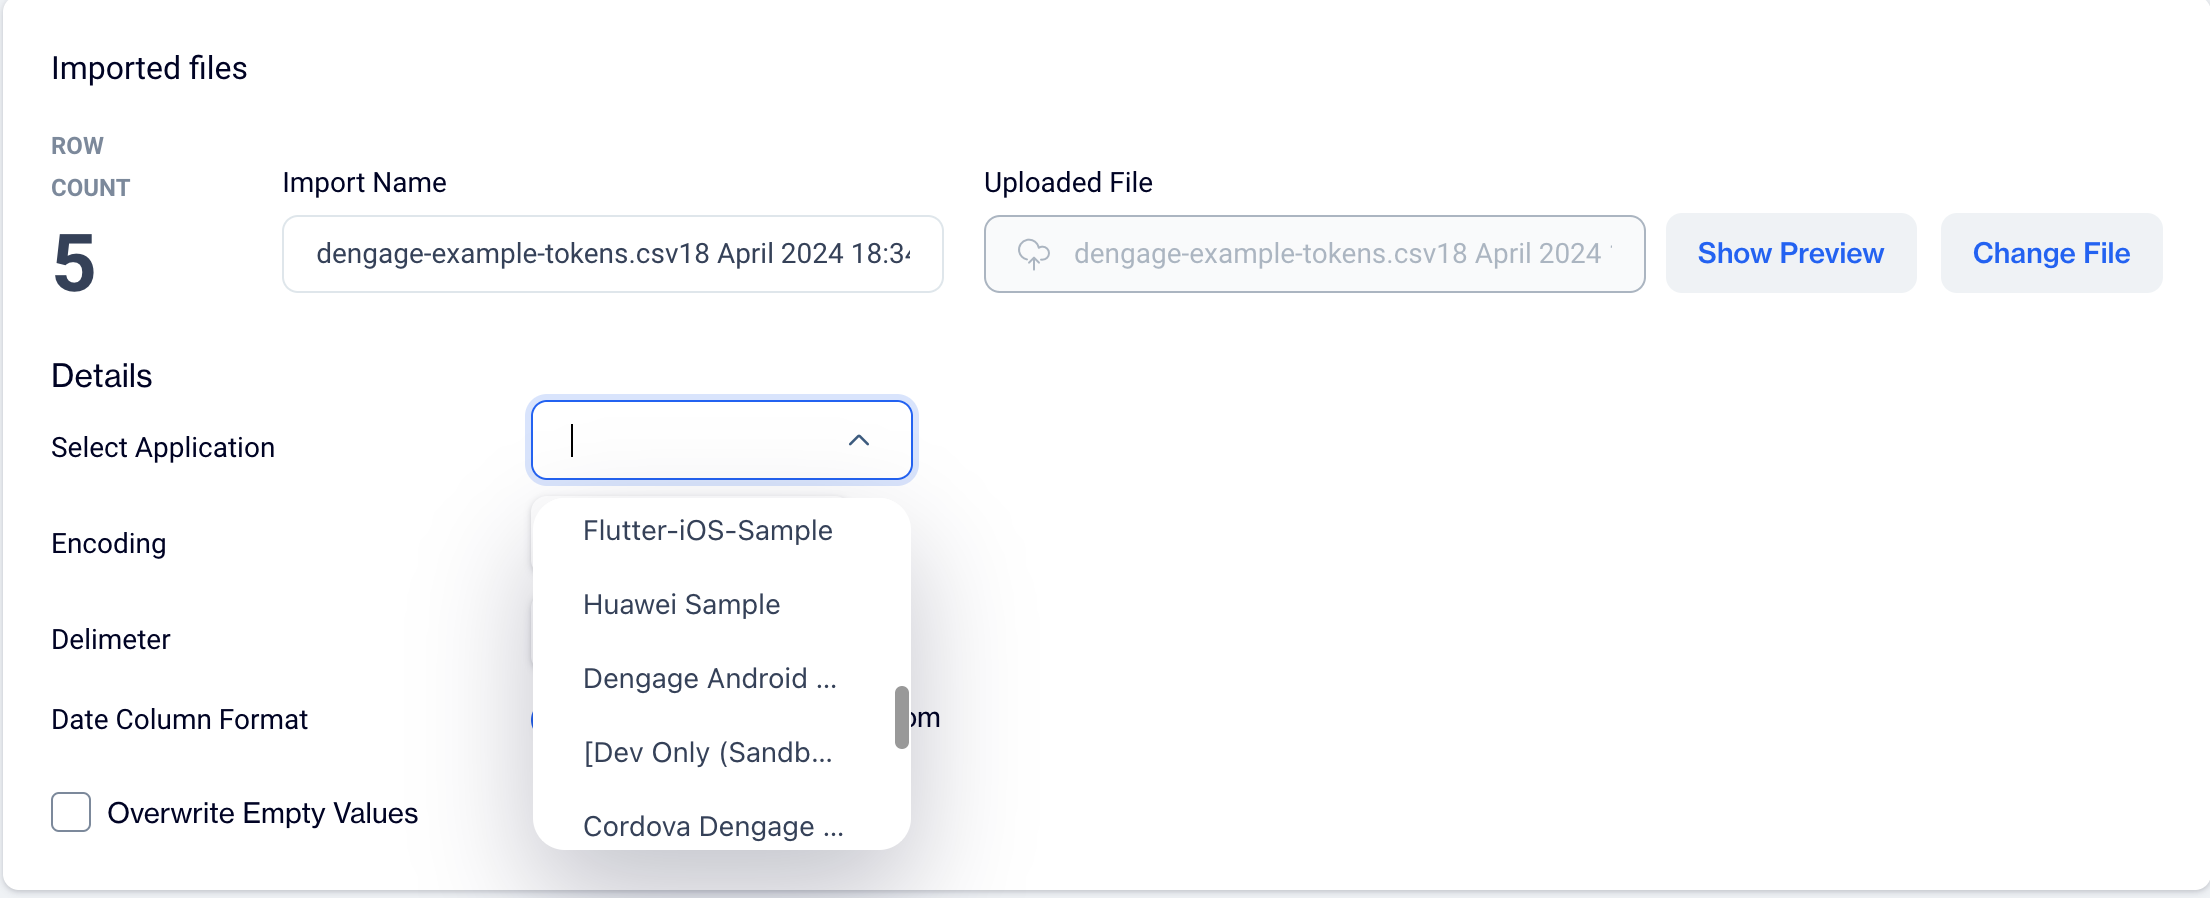
Import Data into Token Table
Importing tokens into Dengage CDMP follows the same steps as importing contacts. However, after uploading your token file, you must select a Mobile Application for which the tokens are to be uploaded.
Import Tokens
Please select an application from those already defined under Settings > Applications to import tokens for.
The remainder of the import process is identical to that of importing contacts.
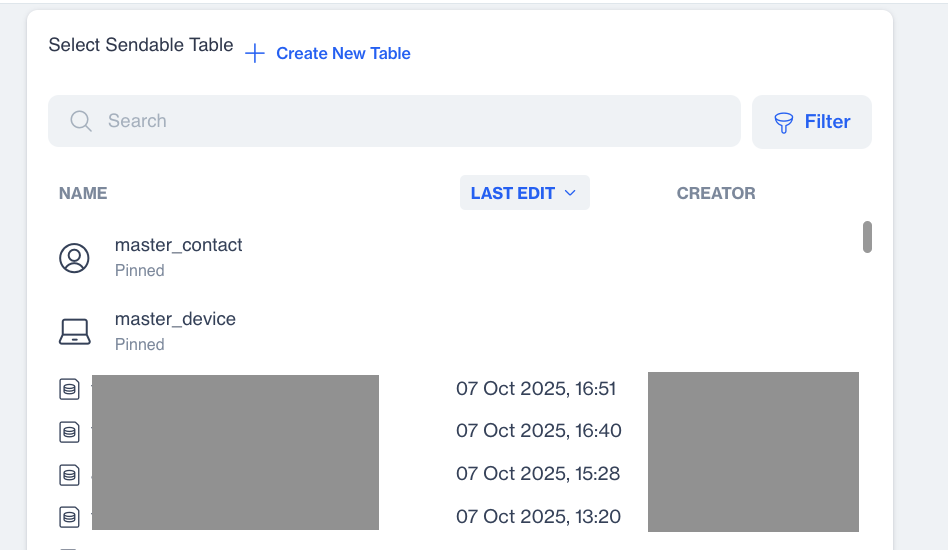
Import Data into an Existing Table
Importing data to an existing table, other than the contacts and tokens tables, involves an additional step at Step 2 where you must either select an existing table or create a new table.
Select Target Table to Import
1️⃣ Table Selection: Users can select the tables they want to import.
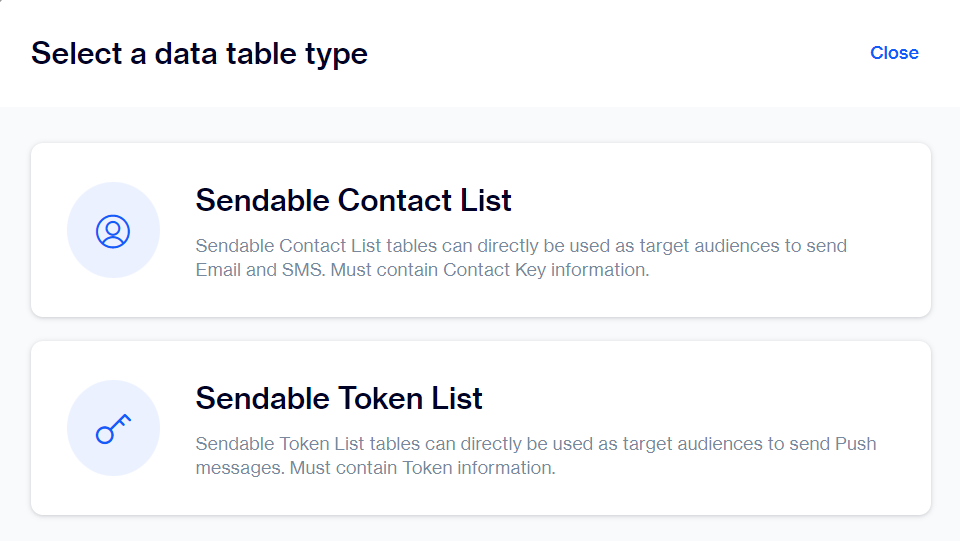
2️⃣ + Create New Table: Users have the option to create new tables such as "Sendable Contact List" or "Sendable Token List" for further processing or storage.
Table Types
Explore section CreateTable to explore how to initiate further steps.
3️⃣Search Option: Users can utilize the search functionality to quickly find and select the desired table.
4️⃣Filter Options
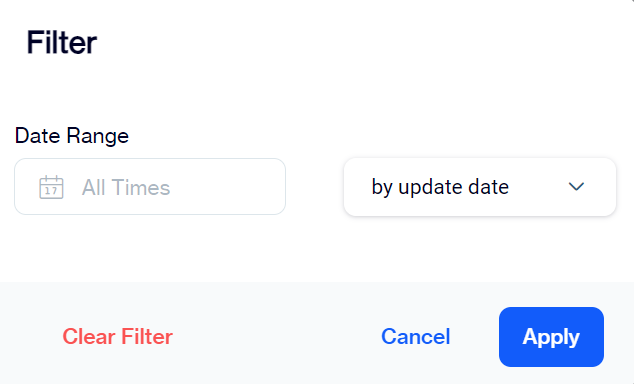
Filter Options
Date Range: Users can specify a date range to filter the tables based on their update or creation dates.
Filter by Update Date or Creation Date: Users can choose whether to filter the tables based on their update date or creation date.
Apply Filter: Users can apply the specified filter criteria to filter the tables accordingly.
Clear Filter: Users can clear the applied filter criteria to reset the table view.
5️⃣Next: Users can click on the "Next" button to advance to the next section of Tagging process. Please see Tags
🚧
Importing actions while importing to an existing table
The only different steps of importing data into an existing table is to select Import options.
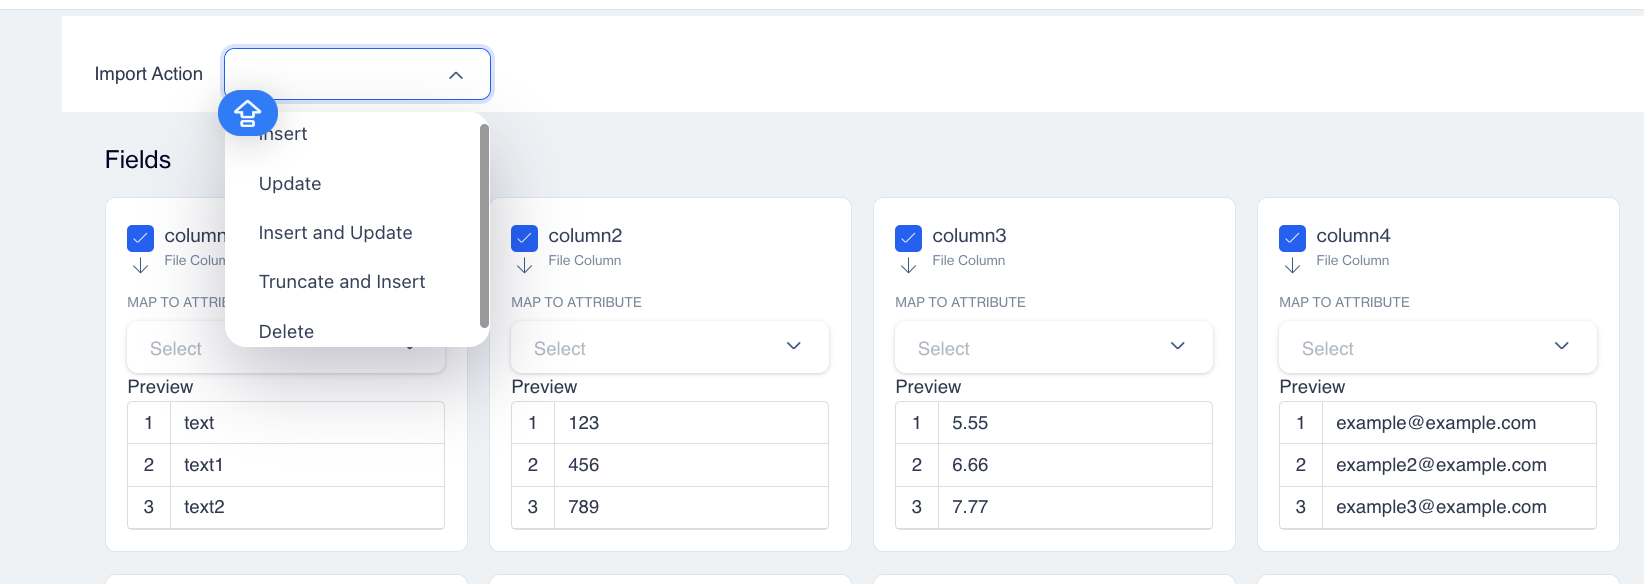
Import Actions
Import Actions
(1) Insert: This option only inserts new records into the table. Ensure your table has a primary column, and map this primary column to a corresponding column in your file.
(2) Update: This option updates existing records based on the primary key of your table. You must map this primary column to a column in your file.
(3) Insert and Update (Upsert): This option updates existing data and inserts new records. Your table must have a primary column, which should be mapped to a column in your file.
(4) Truncate and Insert: This action deletes all existing records and replaces them with the data in your file. Be aware that this action cannot be reversed.
(5) Delete: Records will be deleted based on matches with the primary key of your table. Your table must have a primary column, and you must map this primary column to a column in your file.
Import Data into Products or Orders
The Products & Orders import type is designed specifically for e-commerce accounts. It allows you to import products and order data or update existing records. This data is essential for segmentation, personalization, and dynamic content creation.
In e-commerce accounts, four dedicated tables are available:
Orders table
Order Details table
Product table
Product Variant table
These tables store key information about products and customer transactions. Data must be provided either through backend integrations or by uploading files.
Products Import
Use this option to import new products or update existing product data.
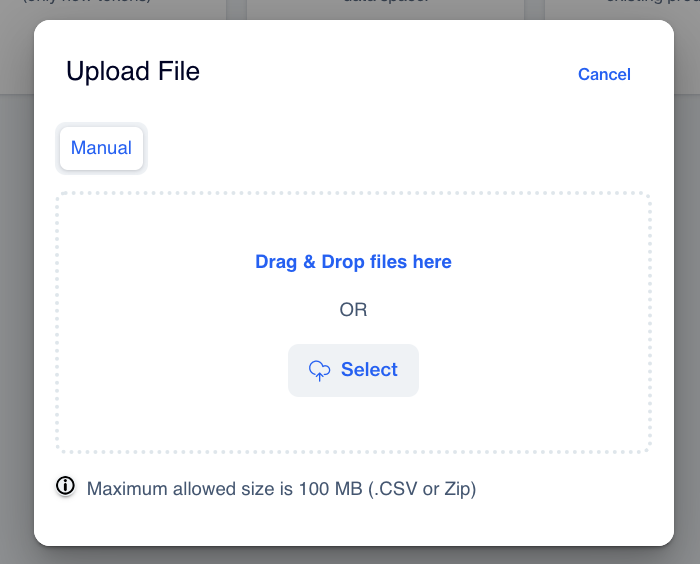
When you click Products as the import type, the following upload options are displayed:
Upload File
Drag & Drop files, or click Select to browse.
Maximum allowed size is 100 MB (accepted formats: .CSV or .ZIP).
Manual
Enter data directly in the provided fields.
Cancel
Exit the import screen without uploading.
To check the required format at any time, click See Sample File to download the sample templates. Two sample types are available: Product and Product Variant.
You can download these sample files before selecting/uploading your file to ensure your data matches the expected format.
The system automatically detects which table to update:
If the file contains a Product Variant ID, data is uploaded to the Product Variant table.
If no Product Variant ID is present, data is uploaded to the Product table.
Use Cases & Examples
1. Segmentation
Product data enables more detailed audience targeting:
Orders contain product IDs but not detailed product attributes such as category or brand.
By linking orders to the Product table, you can create segments like:
"Customers who purchased from Category X"
"Customers who bought products from Brand Y"
2. Product Box Content
Product data is essential for Product Box, which lets you insert product details directly into your messages.
Example: Product Recommendations Suppose you have a send list with two columns:
contact_key - the user
recommended_product_id - the product to recommend
When sending, contact_key identifies the user and recommended_product_id is available as $Current.recommended_product_id in your content.
You can then use a lookup to pull extra details (like product title, URL, or image) from the Product table to create dynamic, personalized messages.
Orders Import
The Orders import option is used to feed data into the Orders and Order Details tables.
While Products Import updates the Product and Product Variant tables, Orders Import updates order-related tables.
The system decides where to place the data:
If the file contains a Product ID, the records are uploaded to the Order Details table.
If there is no Product ID, the records are uploaded to the Orders table.
This setup ensures that high-level order information and detailed product-level order information are stored correctly for segmentation, reporting, and personalization.
Import Process
The Import process is identical for both Products and Orders. When you upload a file, the screen contains two tabs: Details and Mapping.
Details Tab
This tab shows upload information and settings.
Target Table - the table where the file will be imported (e.g., product, product_variant, orders, or order_details).
Encoding - select the file encoding (default is UTF-8).
Delimiter - choose how columns are separated (Auto Detect or custom).
Date Column Format - Auto Detect or Custom.
Overwrite Empty Values - check to let empty values overwrite existing data.
Mapping Tab
This tab lists the available fields from your file.
Tick the fields you want to import.
Choose an Import Action before starting.
Import Actions
Select how the platform should handle your data:
Insert - Add new records only.
Update - Update existing records only.
Insert and Update - Add new records and update matching ones.
Truncate and Insert - Delete all current data in the target table, then insert the new records.
Delete - Remove records that match the data in the file.
After configuring your mapping and selecting the desired action, click Start Import to begin processing the file.
How to Manage Tags
Manage Tag
The Tag Management Section provides various options for managing tags associated with audiences
👉
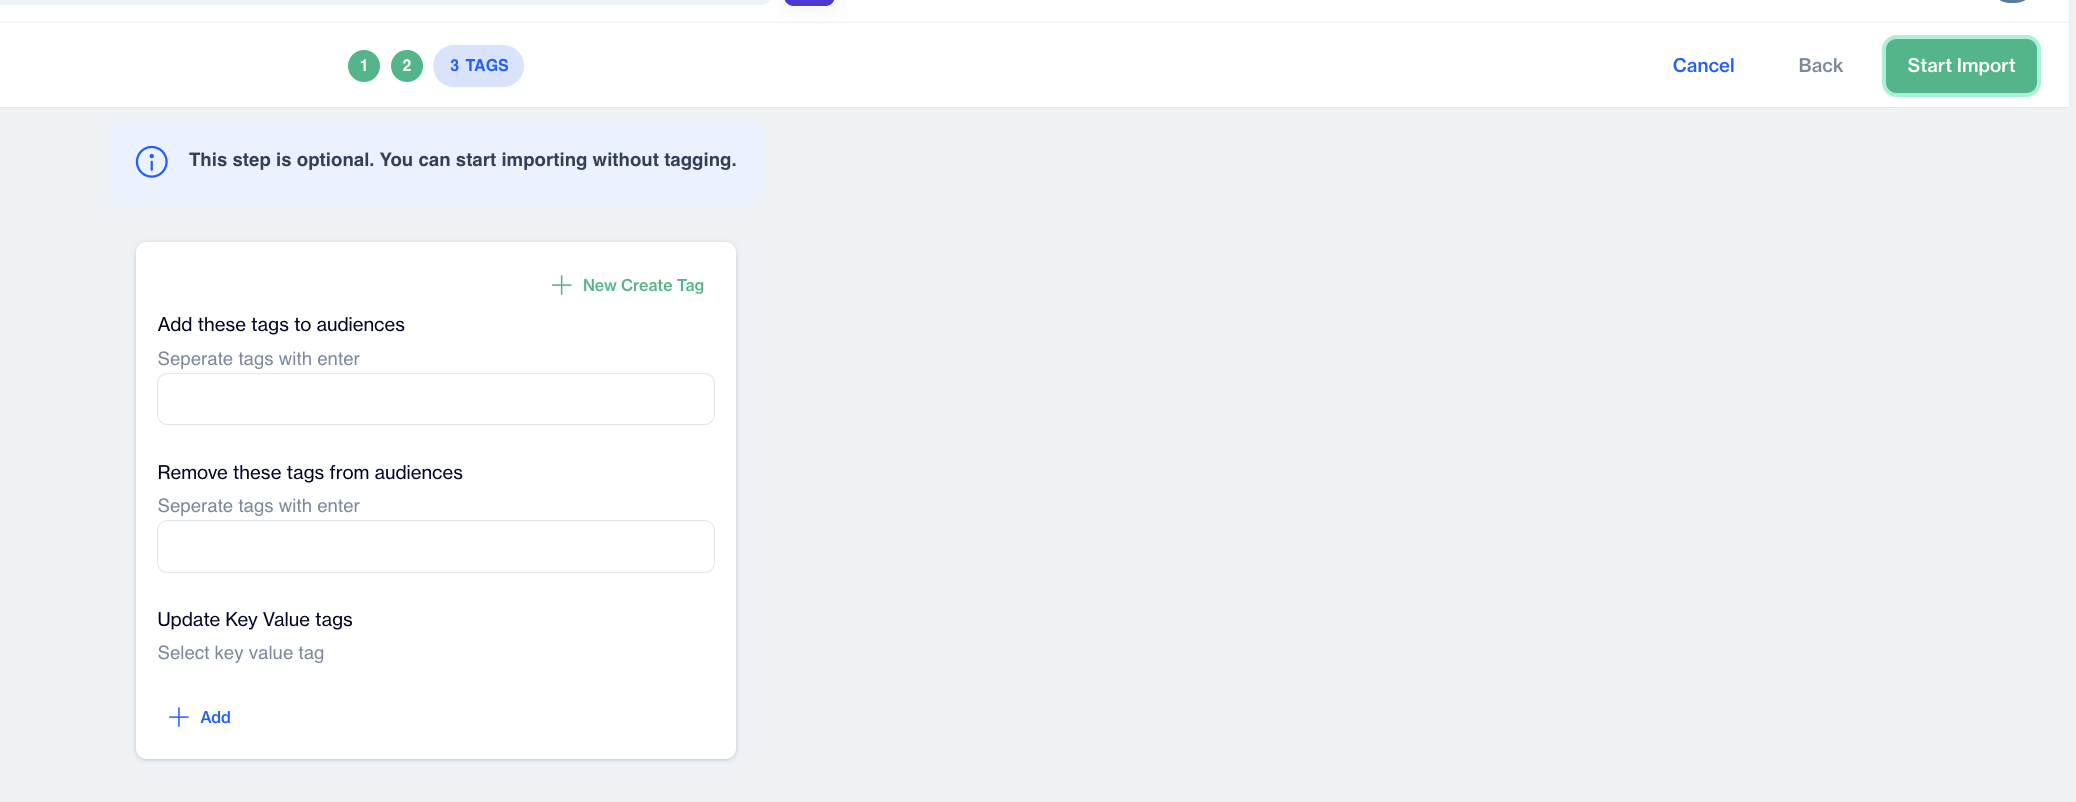
Importing without Tagging
The tag section is optional, allowing users to proceed with importing without tagging.
1️⃣ Add Tags to Audiences: Users can add tags to audiences by entering them into the designated field. Tags should be separated by pressing the "Enter" key after each tag entry.
2️⃣ Remove Tags from Audiences: To remove tags from audiences, users can list the tags they wish to remove in the provided field. Each tag should be separated by pressing the "Enter" key after its entry.
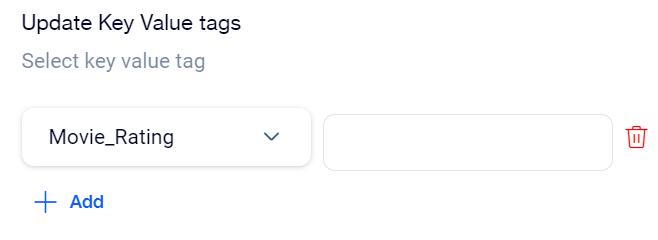
3️⃣ Update Key Value Tags
+Add : User can add a new key value tag, users can update its properties as needed.
Update Key Value Tags
Select Key Value Tag: Users can choose the key value tag they wish to update from the available options.
Delete Key Value Tag: Users can remove unnecessary key value tags from the list.
Add Description: Optionally, users can provide a description for the key value tag to provide additional context or information
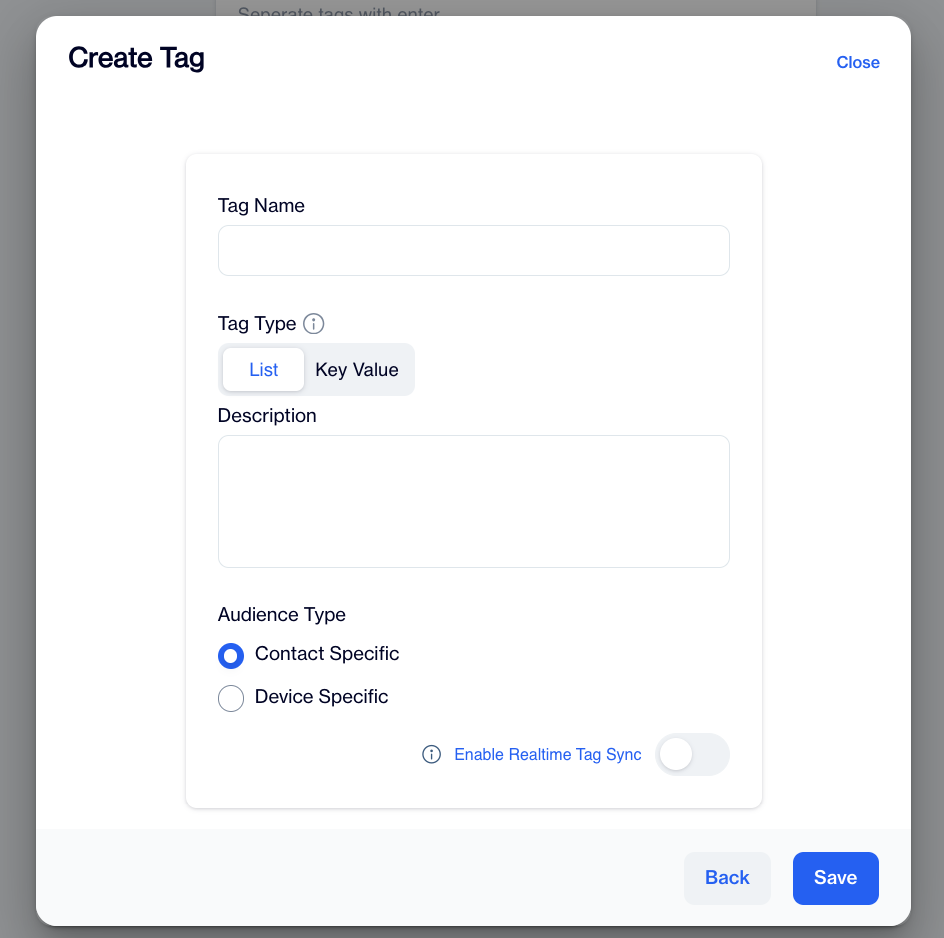
4️⃣ Create New Tag
Customize Tag Properties
Tag Name
Users should specify the name of the new tag they want to create.
Tag Type
List Tags
Allows users to create tags that represent a list of values.
Key Value
Enables users to create tags with a Value Type.
Users can specify the value type for Key Value tags, such as Integer, Phone, Decimal, Email, Date, DateTime, or Boolean.
Description
Users can provide a description for the new tag to provide additional context or information.
Audience Type
Users can specify whether the tag is.
Contact-specific tags are associated with individual users
Device-specific tags are linked to particular devices.
Enable Real-Time Tag Sync
Users have the option to enable real-time tag synchronization for the new tag, allowing for immediate updates across relevant systems or platforms
Save
After customizing tag properties, click the "Save" button to create the tag with the specified settings.
5️⃣ Start Import: After completing the mapping process, users can proceed to finalize the import file section by clicking on the "Start Import" button. This action initiates the import process, where the system begins to process and import the mapped data from the selected file into the specified destination
Check the Result of Import Process
The main page of the import process displays the results of imports like below. This is the log of imports and you can check what happened with the import process easily.
Log of Import Processes
(1) Status Column: Indicates the current state of the import job with possible states including Error, Completed, and Not Started:
Error indicates an issue with the file, preventing any import action.
Completed suggests the file processing is finished, though there may be some errors and warnings. You can download these by clicking on specific items.
Not Started shows that the file process has not begun, or was interrupted. You can resume the process by clicking on it.
(2) Error Column: Displays the count of errors encountered during file processing. Click on this item to download and review the errors. Rows with errors will not be added to the database.
(3) Warning Column: Shows the number of warnings during file processing. Clicking on this item allows you to download and examine the warnings. Rows with warnings will be committed to the database, but the affected columns will not be updated.