
Email Builder
The Email Builder is Dengage's drag and drop email design tool. It lets you create engaging, responsive email content without writing any code, and it automatically protects your work with autosave while you design.
This guide covers the full workflow: creating a new email, choosing a starting point, designing with content blocks, structuring layouts with rows, adjusting email settings, previewing and testing, publishing, and recovering unsaved work.
Create a New Email
- Navigate to Content > Marketing > Email.
- Click the New button.
- Select Email Builder as the content type.
- Choose a template from the Template Gallery, pick one of your Saved Templates, or start with Blank Content.
- Enter a Name (required) and select a Folder for your content. Click Change Folder to store it in a different location. You can also add an optional Description.
- Click Next to open the Email Builder.
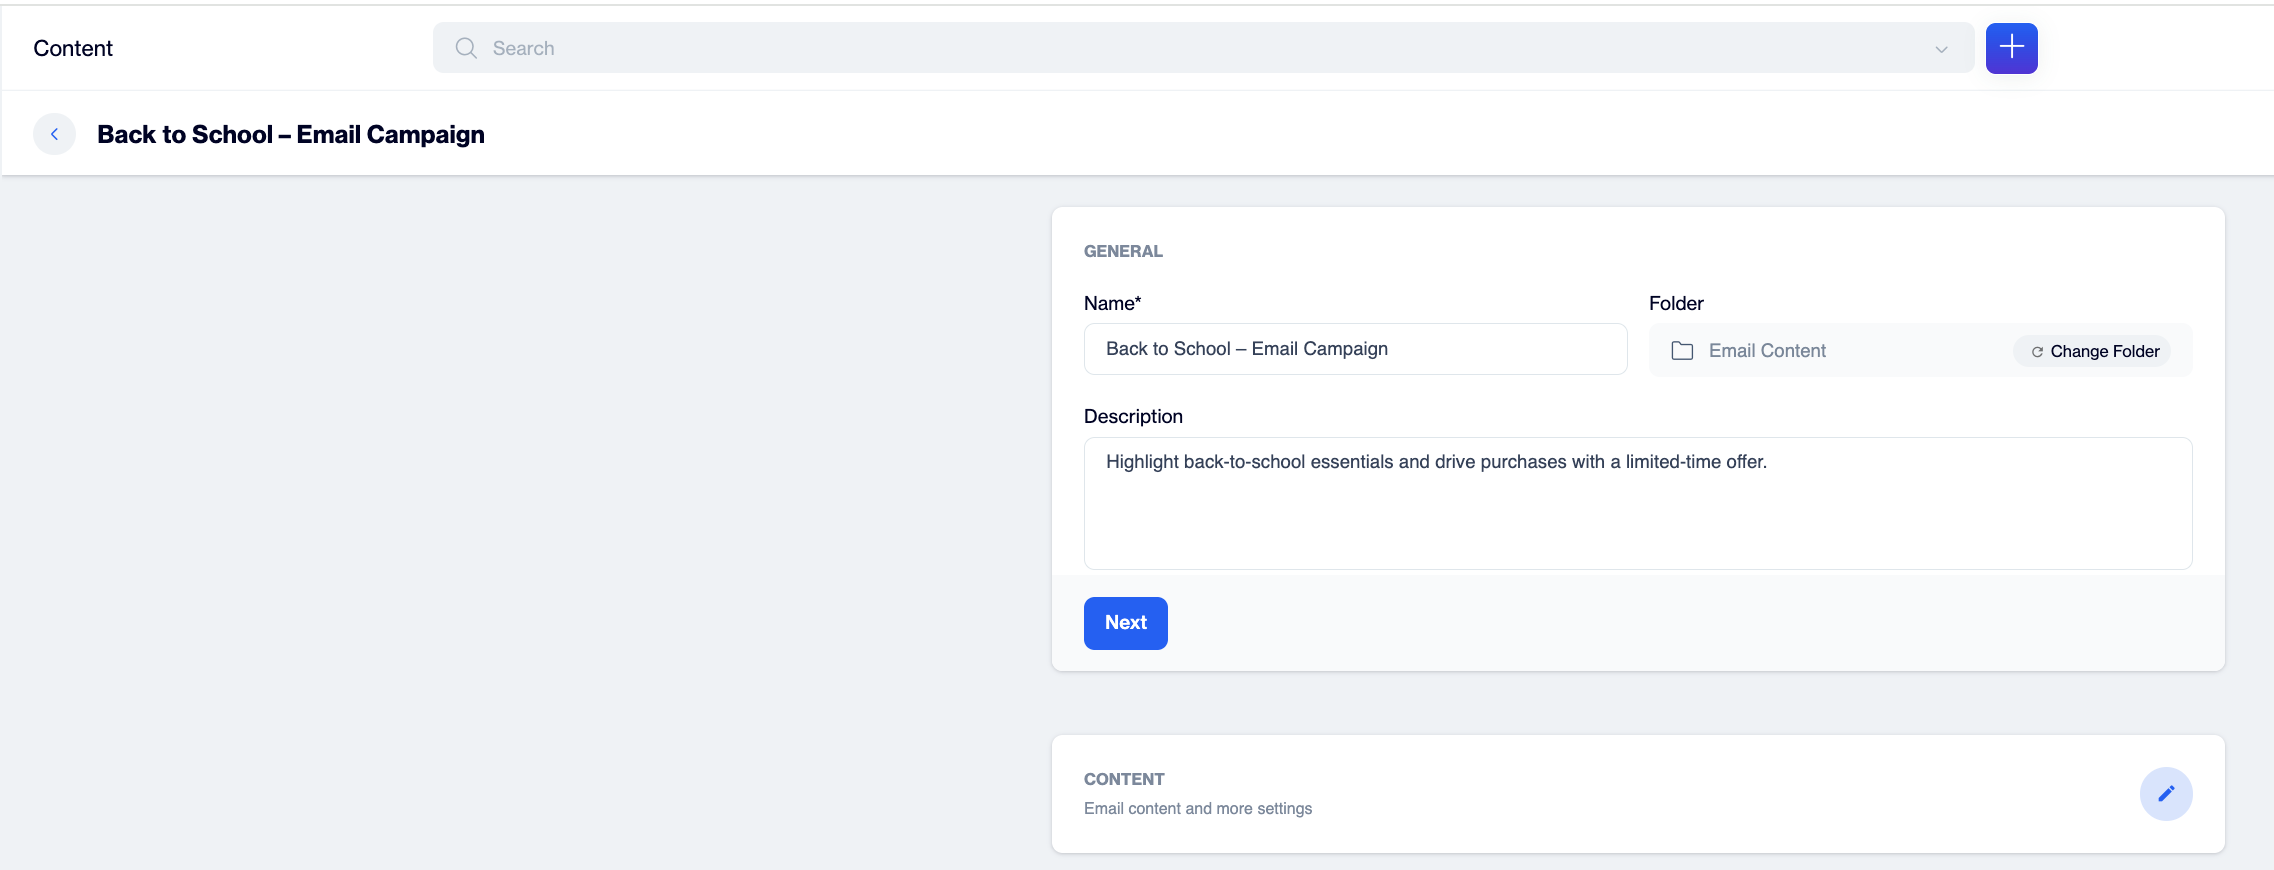
General section, showing the Name, Folder and Description fields and the Next button
NoteIf you have unsaved work from a previous session, this screen asks whether you want to continue where you left off. See Autosave and Draft Recovery below.
Choose a Starting Point
Template Gallery
The Template Gallery offers a rich library of pre-designed, fully editable templates so you do not have to start from scratch. Hover over any template to see two options: View Template to inspect its design and structure, or Use to select it. Templates are organized into four categories:
- Industry: Templates tailored for different sectors, such as E-commerce, Finance, Retail, Travel, Education, Health & Wellness, Software & Technology, Fashion, Real Estate, Beauty & Personal Care, and many more.
- Seasonal & Holidays: Timely designs for annual events, such as Christmas, New Year, Black Friday, Cyber Monday, Valentine's Day, Ramadan, Easter, Mother's Day, Father's Day, Back to School, and many more.
- Usage & Campaign Types: Goal oriented templates for everyday campaigns, such as Newsletters, Product Launches, Announcements, Events, Webinars, Weekend Sales, Re-Engagement, Surveys, Fundraising, and more.
- Automated: Templates built for recurring or system triggered messages, such as Welcome Emails, Thank You Emails, Order Confirmations, Abandoned Cart, Password Reset, Notifications, Transactional Updates, and more.
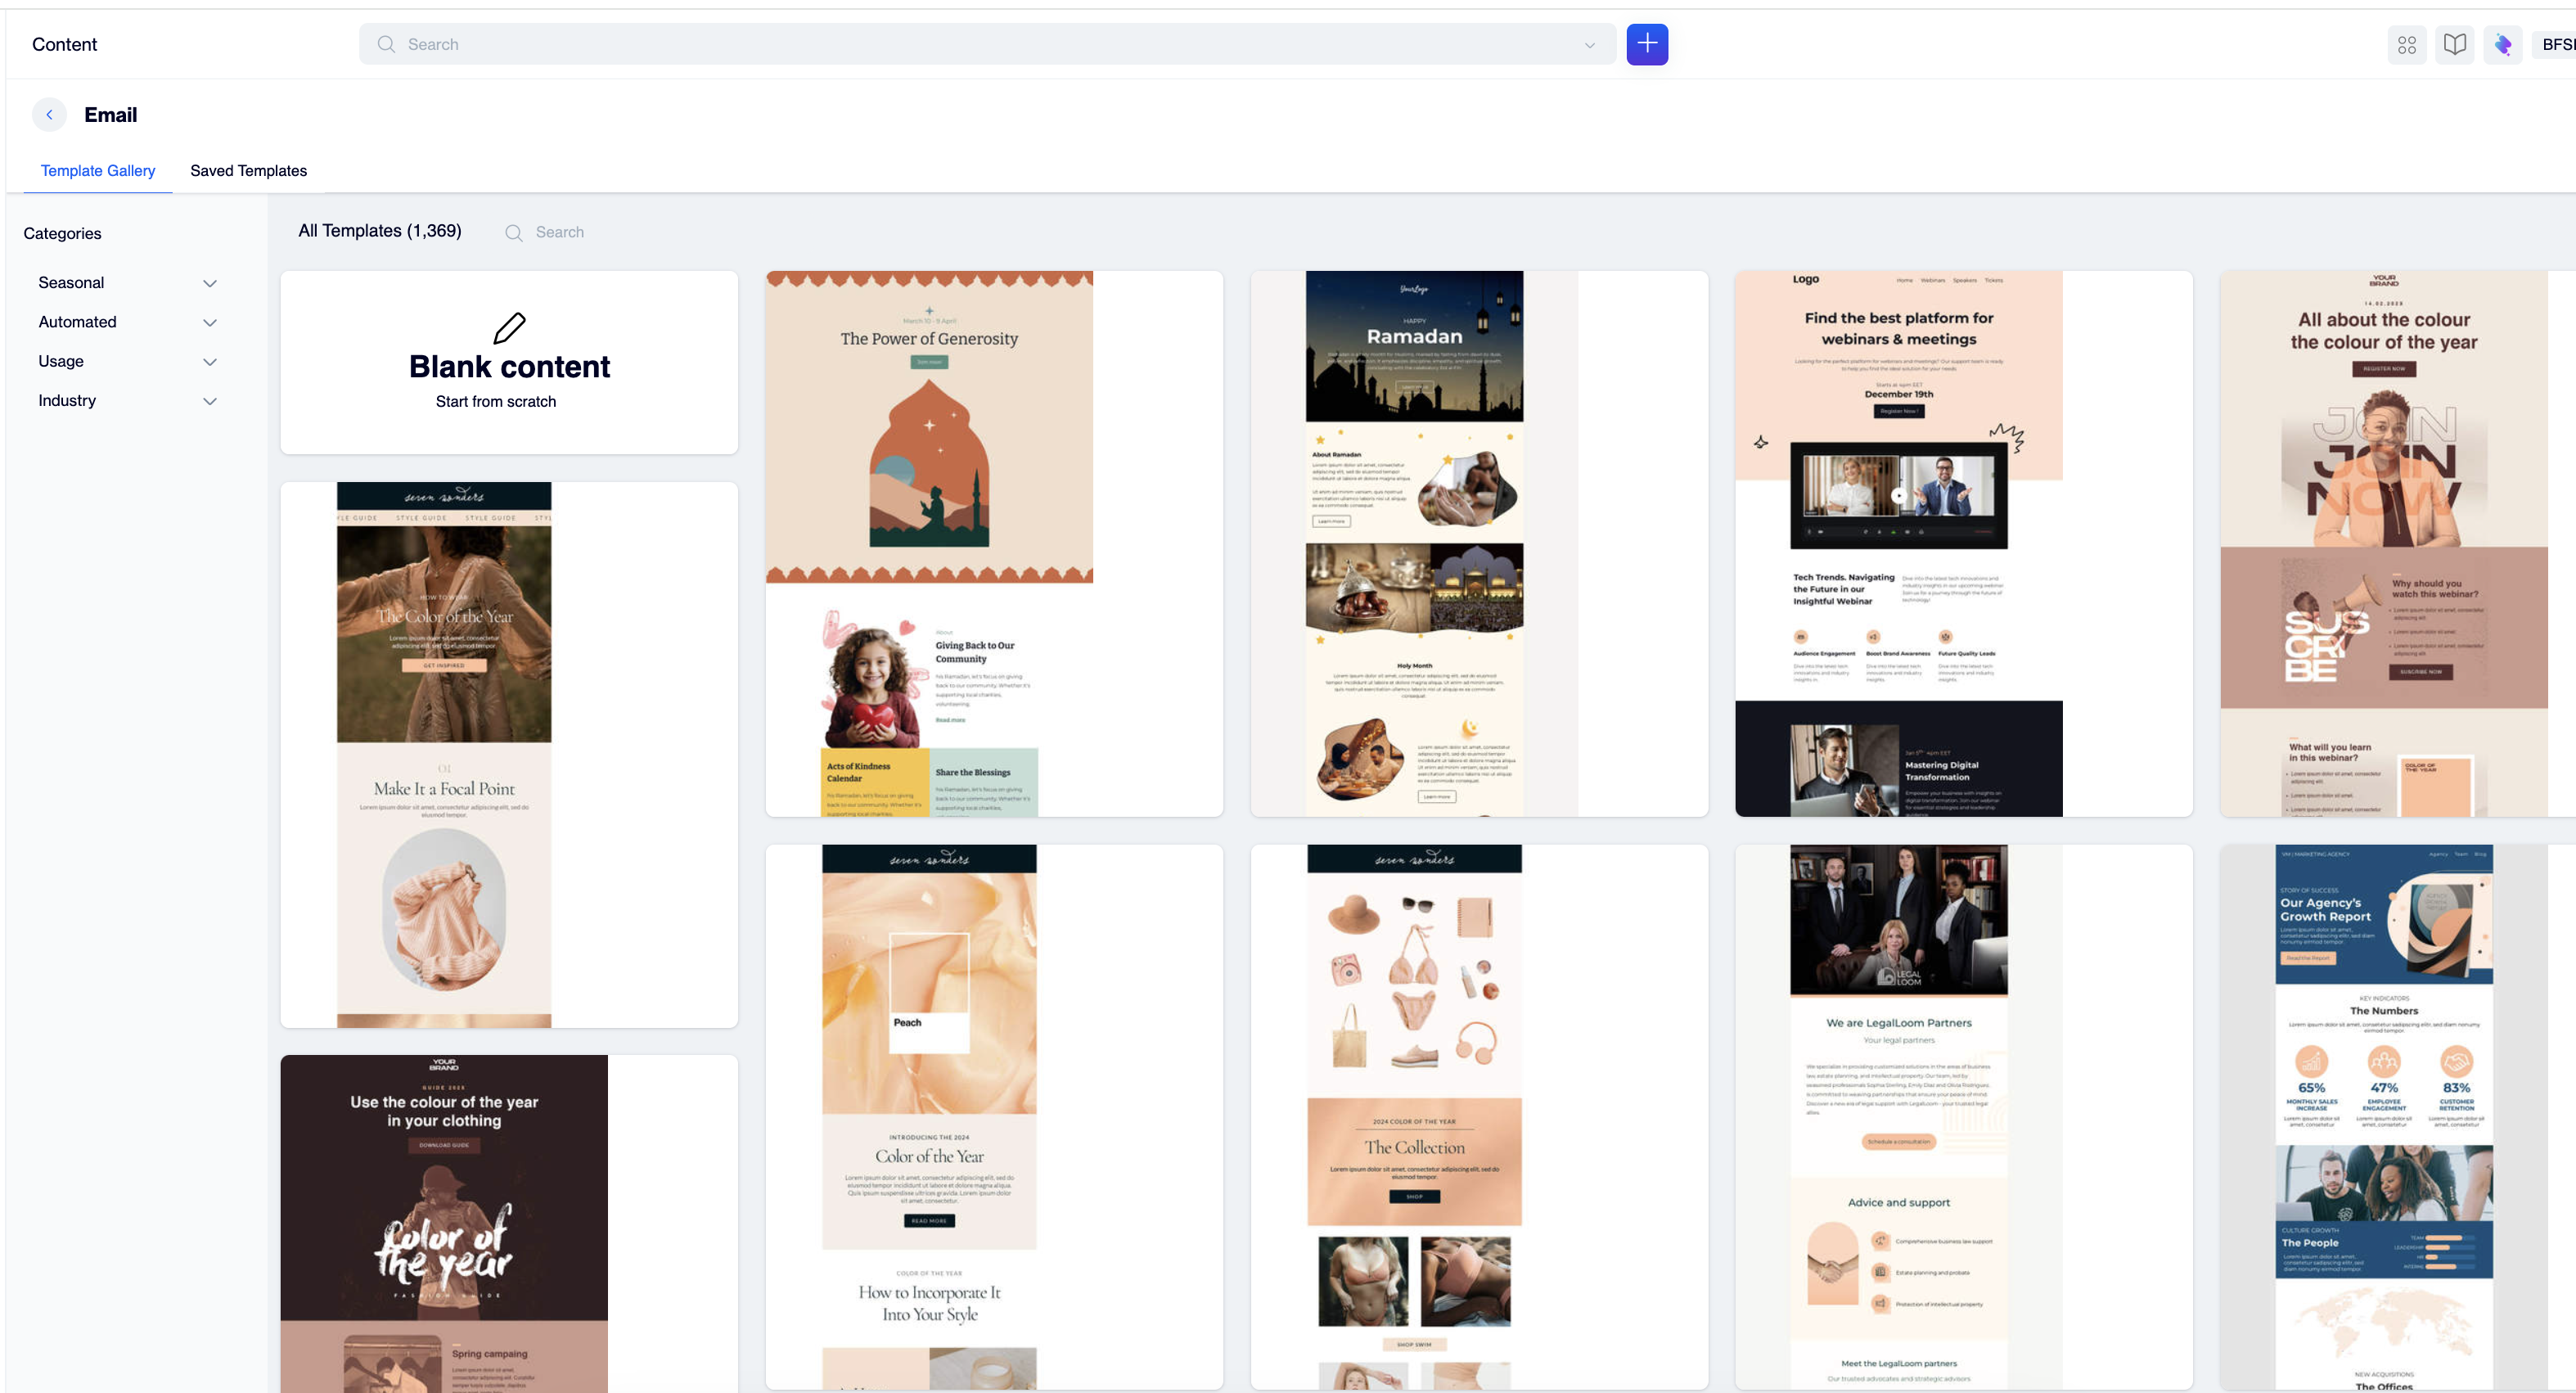
Template Gallery
Every template is fully customizable, so you can quickly adapt it to your brand identity and campaign goals.
Saved Templates
The Saved Templates section stores templates you created earlier. It is divided into All Saved Templates and Created by Me, and includes a search box so you can quickly locate a specific template. Use it to access, reuse, or modify your own custom designs for future campaigns.
Blank Content
Select Blank Content to design a new template from scratch. When you are done, you can save it as a custom template and reuse it later from Saved Templates.
Get to Know the Editor
Once you select a starting point and click Next, the Email Builder opens. The interface provides two viewing modes, Desktop and Mobile, so you can check how your email will appear on different devices at any time.
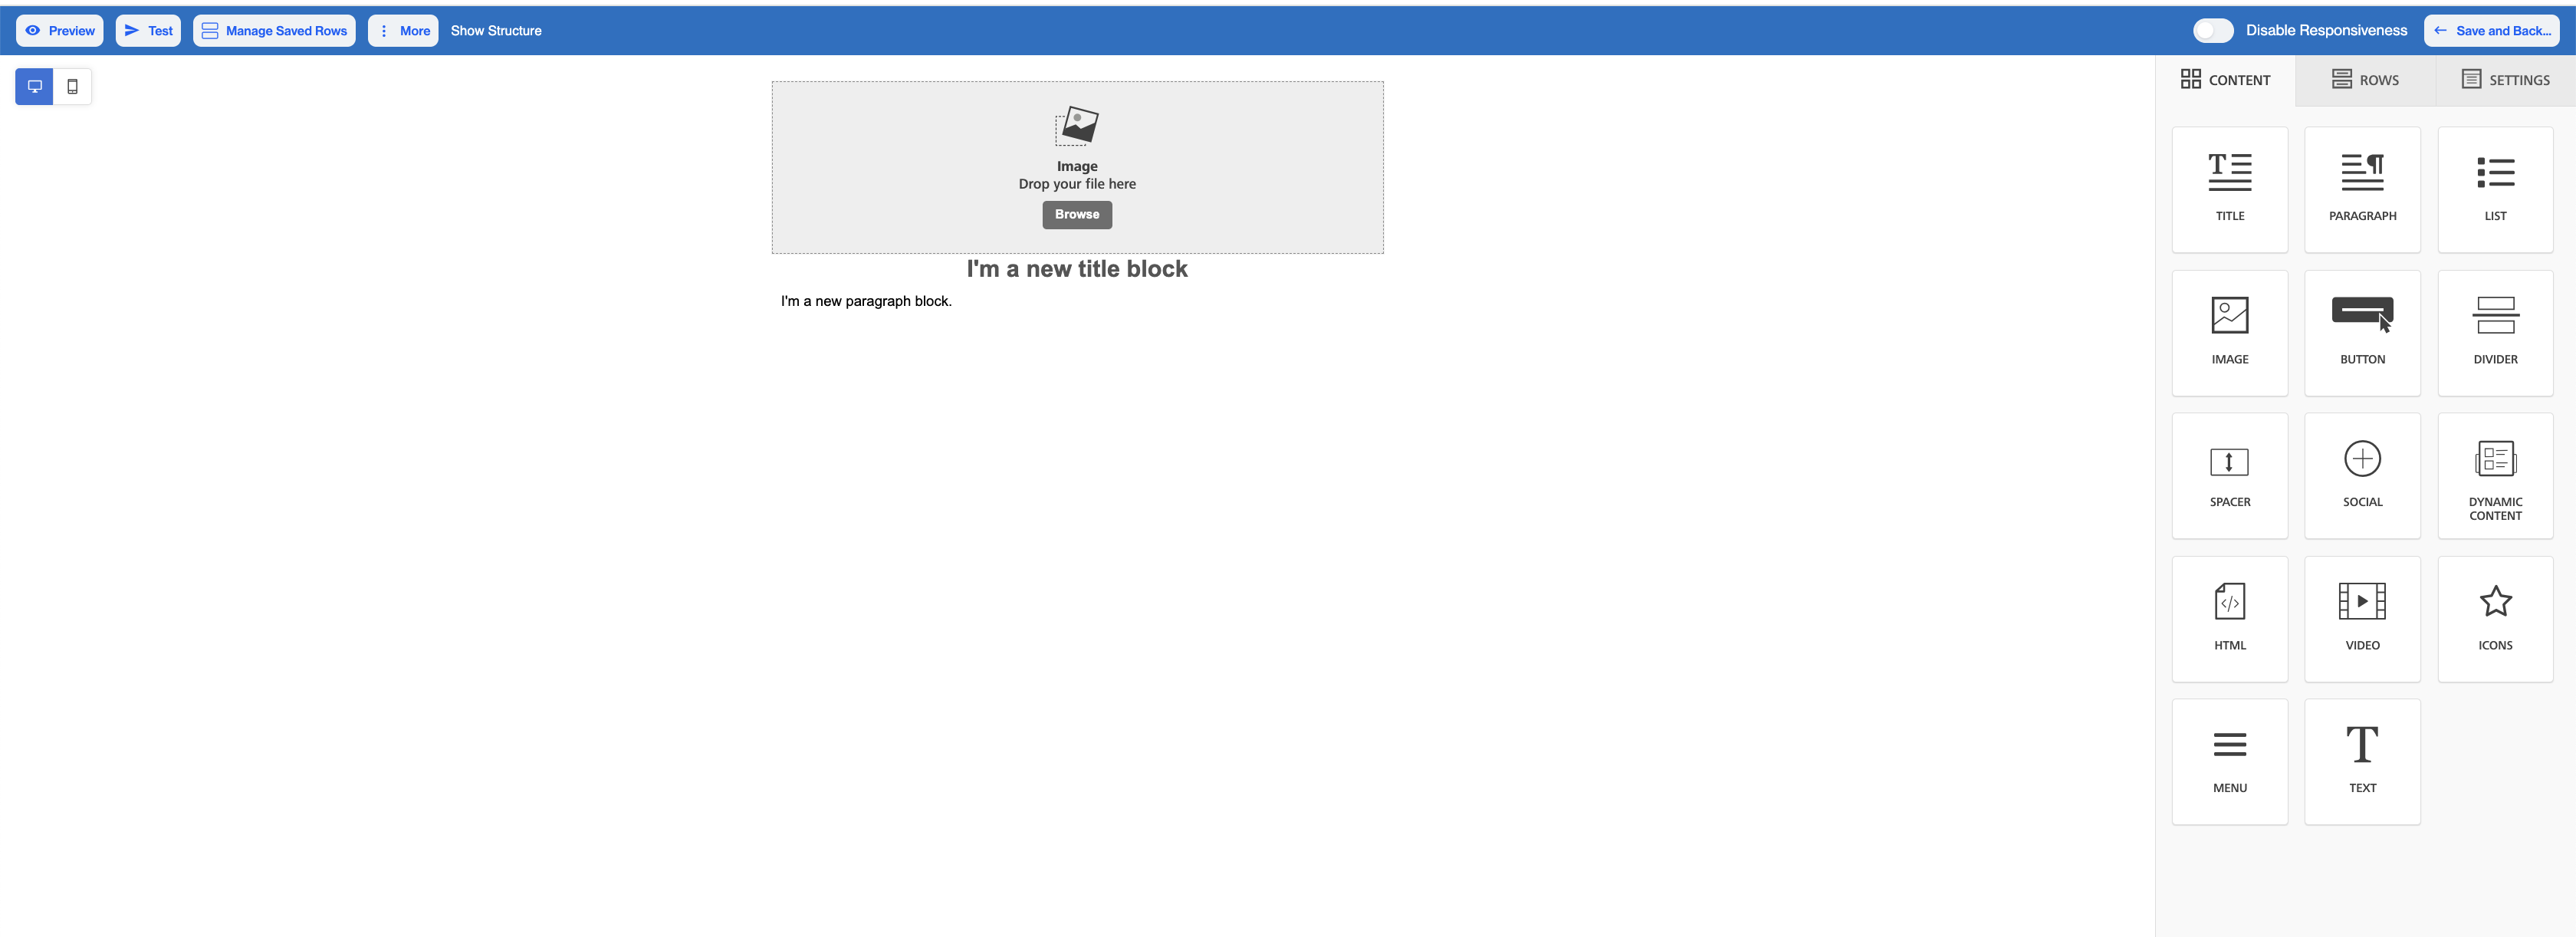
Email Builder
The screen is divided into two main areas:
- On the left, the design canvas, marked "Drop Content Blocks Here", is where you drag and drop elements to build the structure and content of your email.
- On the right, a panel with three tabs:
- Content: The building blocks of your email, such as paragraphs, images and buttons.
- Rows: Layout structures, such as one column, two column, or multi column rows.
- Settings: Options that affect the appearance of the entire email, such as background color and default font.
You can switch freely between these tabs while designing.
Design with Content Blocks
Drag any block from the Content tab onto the canvas, then click it to configure its options.
| Block | What it does |
|---|---|
| Title | Adds headings or titles, with text formatting options. |
| Paragraph | Adds blocks of text, such as descriptions or messages, with styling options. |
| Text | Adds customizable text with options for font size, text color, line height and more. |
| List | Creates bullet lists within your email content. |
| Image | Adds an image. Drag a file into the block or click Browse to upload from the file manager. |
| Button | Adds a call to action button with configurable click behavior. See the detailed options below. |
| Divider | Adds a visual line that separates sections of content. |
| Spacer | Adds vertical space between content blocks for better layout and readability. |
| Social | Adds social media icons linked to your profiles. |
| Dynamic Content | Adds elements that change based on user data or preferences. |
| HTML | Adds custom HTML code for advanced formatting or features not available through standard blocks. |
| Video | Embeds a YouTube or Vimeo video by specifying its URL and a title. |
| Icon | Adds icons with customizable size and color. |
| Menu | Adds a menu with configurable items, link types and target settings. |
| Carousel | Showcases multiple images in a rotating format. Upload images by dragging them in or browsing your device. |
Button Options in Detail
The Button block configuration has three main sections:
-
Action: Defines what happens when the button is clicked. Choose one of the link types:
- Open Web Page: Directs users to the URL you enter.
- Send Email: Opens the user's default email application with a pre-filled address.
- Make Call: Starts a phone call when clicked, ideal for mobile users.
- Send SMS: Lets users send a text message from their device.
In the URL field you can also select Special Links, such as Unsubscribe (a pre-defined opt out link) or Brand Unsubscribe (opt out for brand specific preferences). The Link File option lets you attach a file from the file manager; you can upload your own file or search free photos.
-
Button Options: Customization features such as font size, background color, alignment and content padding.
-
Block Options: Padding adjustments, visibility settings to hide the button on mobile or desktop, and options to hide it in HTML or AMP formats.
Dynamic Content and Personalization
Important Note on Dynamic ContentWhile adding Dynamic Content using the Insert button or the Add Customization button in Advanced Personalization, these features may not function properly if an ad blocker is enabled in your browser. To ensure all personalization and customization options work as expected, please disable ad blockers while using the Email Builder.
Structure Your Email with Rows
The Rows tab provides extensive customization options for layout and design:
- Backgrounds: Adjust the row background color and the content area background color, with additional fine tuning settings.
- Borders: Set content area borders and rounded corners for a polished look.
- Layout: Control vertical alignment, enable stacking on mobile, and manage visibility on different devices.
- Dynamic Content: Set conditions to display the row dynamically based on filters.
- Columns Structure: Customize column background color, padding and other column specific settings to organize your content.
Adjust Email Settings
The Settings tab controls the overall look and feel of the email:
- Content Area Width: Optimize the layout width for different devices and screen sizes.
- Content Area Alignment: Set how the content area is aligned.
- Background Color: Choose the email background color to match your branding.
- Content Area Background Color: Set a separate background for the content area to create contrast and focus.
- Background Image: Upload or select a background image to add depth to the design.
- Default Font: Keep typography consistent across the email.
- Link Color: Make links stand out and easy to identify.
Editor Toolbar
At the top of the editor you will find options that support your workflow:
- Preview: View a real time preview of the email, in both desktop and mobile modes.
- Test: Send a test email to evaluate content, formatting and overall presentation before the final send.
- Manage Saved Rows: Access and manage previously saved row templates.
- More: Additional functionality:
- Export Template: Save the current email as a template file for future use or sharing.
- Upload Template: Import an existing email template to edit or customize.
- Disable Responsiveness: View the email without responsive adjustments. Responsiveness automatically adapts the design to desktops, tablets and mobile devices; disabling it allows a static layout review.
Autosave and Draft Recovery
The Email Builder automatically saves your work while you design. If you close your browser, log out, or accidentally leave the page, your unsaved progress is retained and restored when you return, so accidental closures and session timeouts do not cost you your work.
Recover an Unsaved Draft
Each time you create a new email with the Email Builder, the system checks for unsaved work:
- If there is no unsaved draft, an information banner confirms it: "There is no previously processed template saved in the system. After assigning a name to the content, you may proceed with your actions using this template." Continue creating your email as usual.
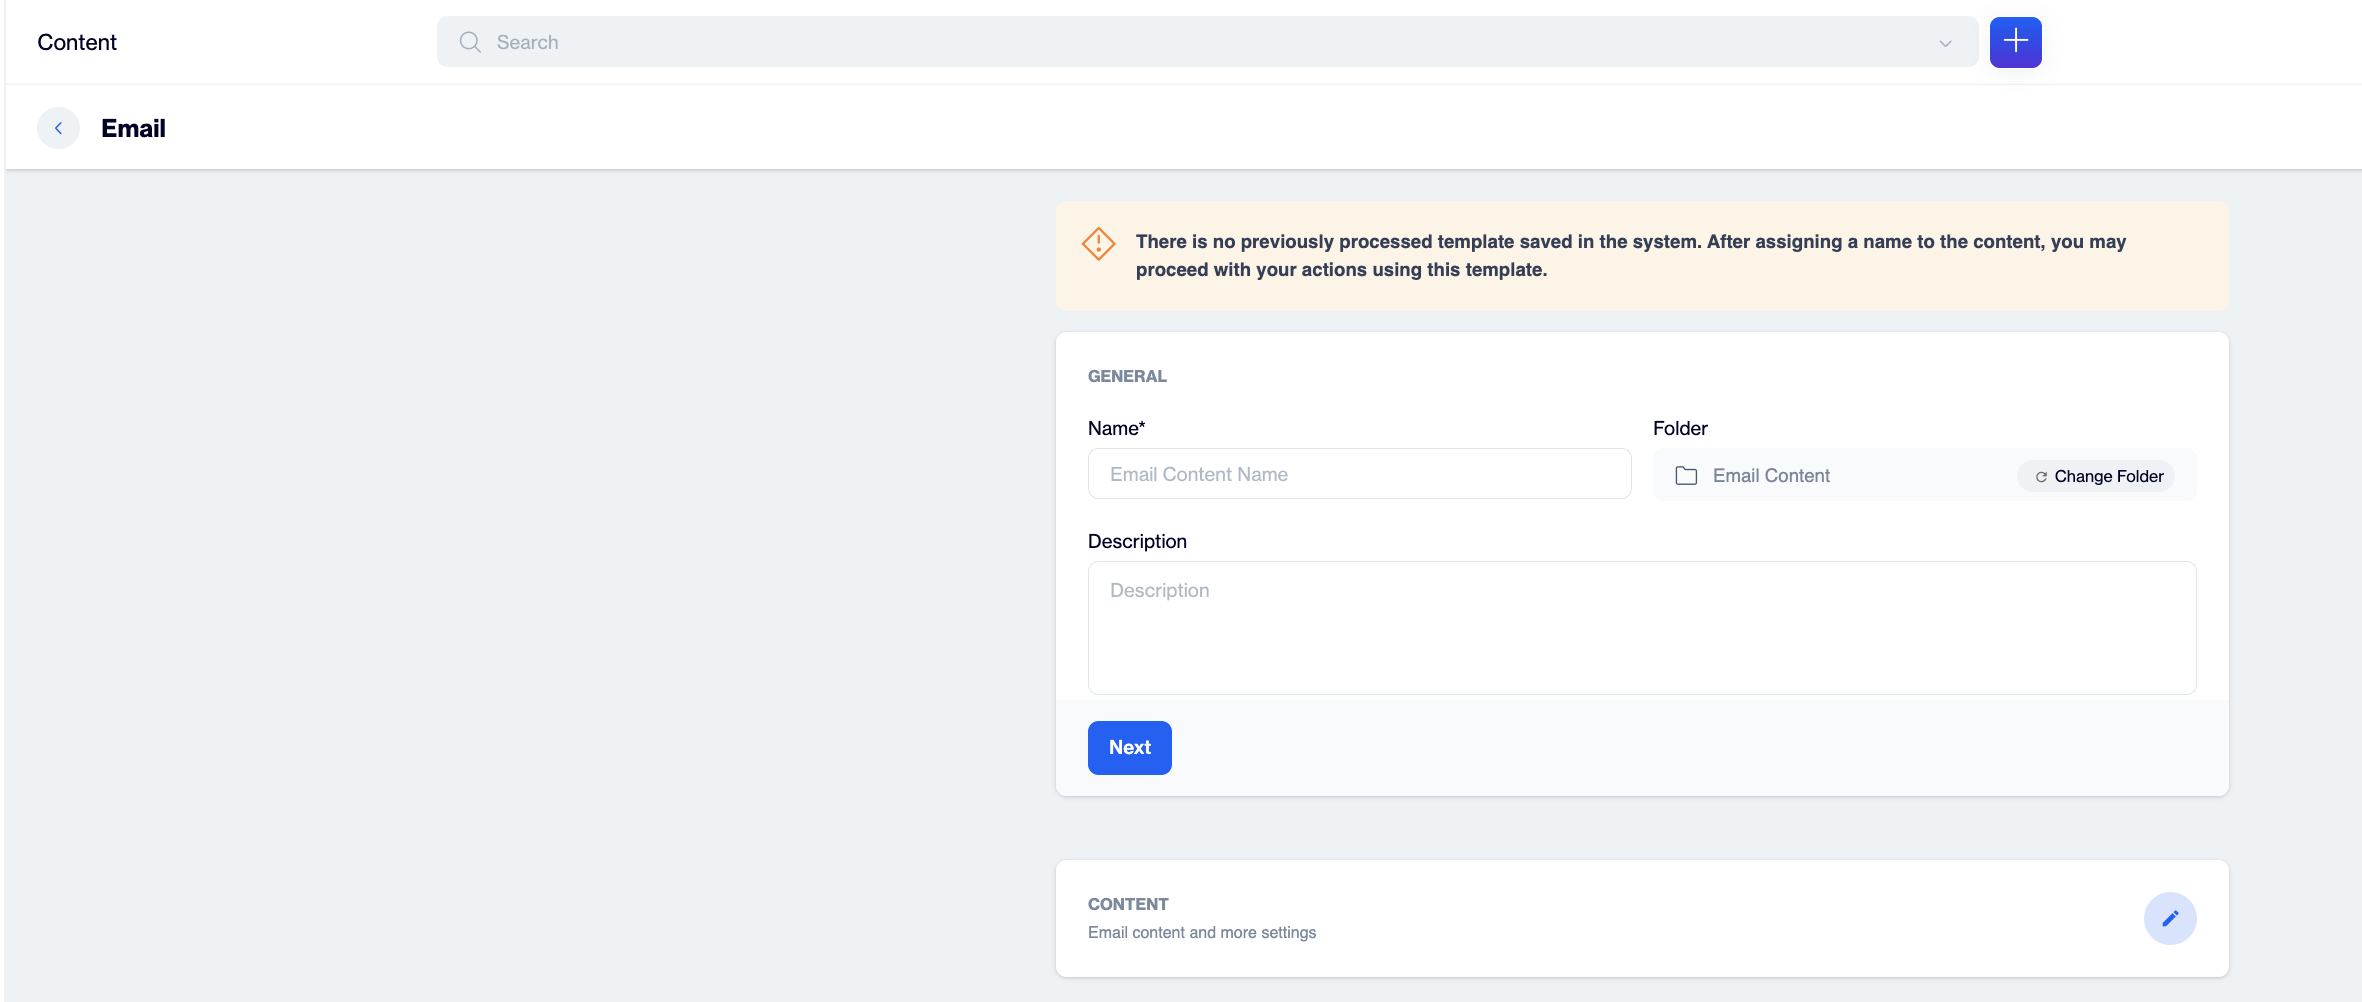
Information banner shown when no unsaved draft exists
- If an unsaved draft exists, the Unsaved Template Available prompt appears: "You have unsaved draft template. Would you like to continue editing?"
- Yes: Resume editing from the last saved state.
- No: Discard the draft and start a new email.
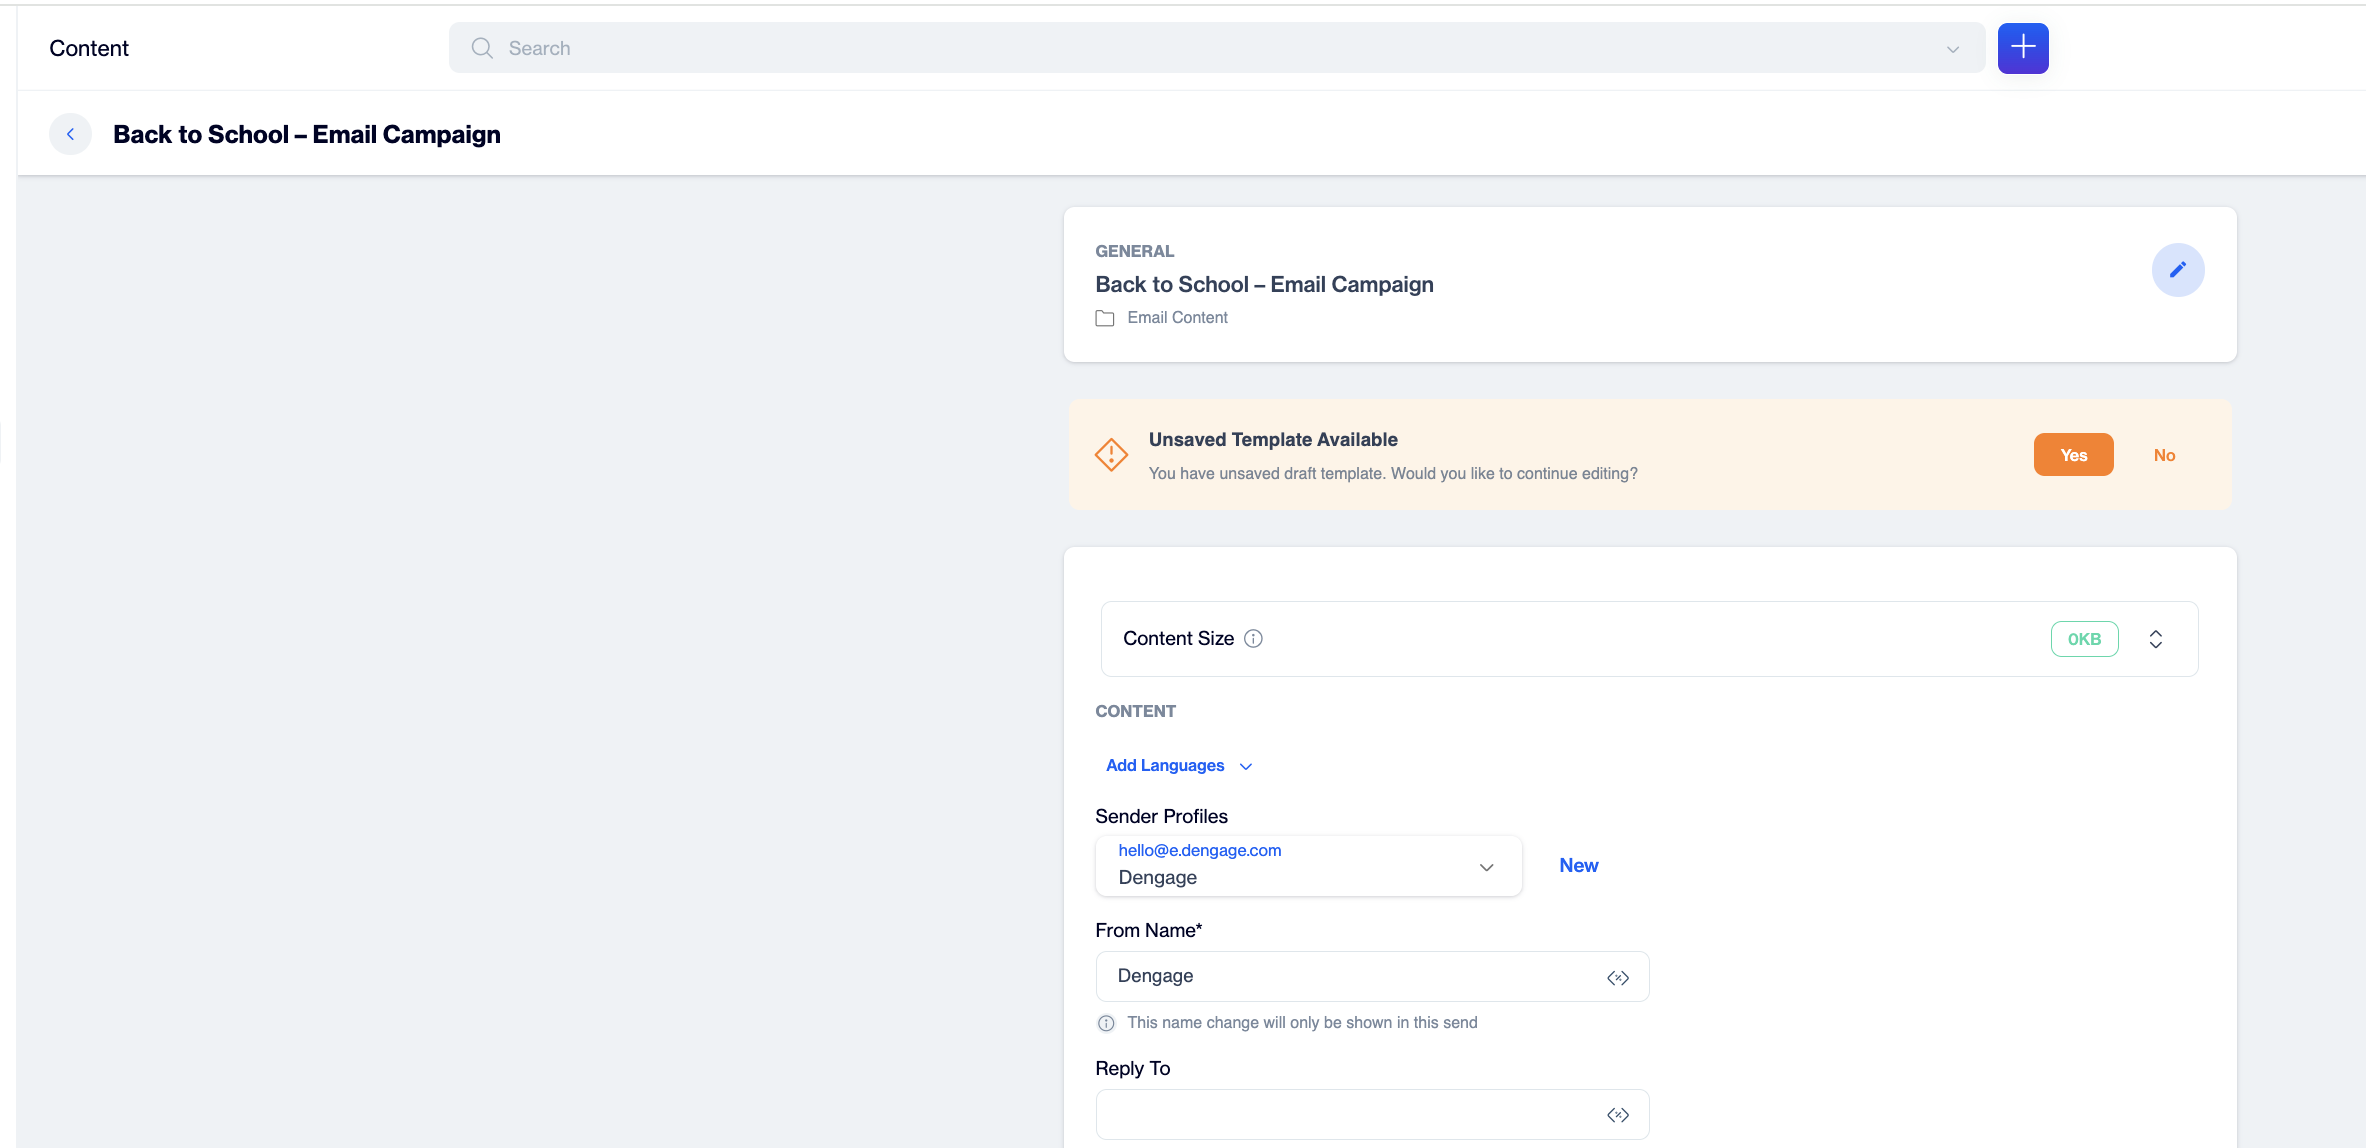
Unsaved Template Available prompt with the Yes and No buttons
Automatic Save When Returning to the Content Page
If you click Back to Content in the upper right corner of the Email Builder, your progress is saved automatically before you are redirected to the content page. You do not need to take any extra action.
Restore Your Work After Logging Out
If you log out and log in again, the system keeps your last unsaved email content. The next time you attempt to create new content, it asks whether you want to continue from your previous session. Confirm to continue working with your most recent changes preserved.
Preview, Test and Publish
- Use Preview to check your design in both desktop and mobile views.
- Use Test or Preview & Test to send a test email and review it in a real inbox.
- When you finish designing, click Back to Content in the upper right corner of the builder. Your progress is saved automatically.
- On the content page, complete the sending details, such as Sender Profile, From Name and Reply To. Use Add Languages to manage additional language versions.
- Click Save Draft to finish later, or Publish when your email is ready to use.
Tips for Better Emails
- Check the Mobile view before publishing; most recipients read email on their phones.
- Send a Test email to yourself or your team to verify links, images and personalization.
- Save rows you use often with Manage Saved Rows to keep designs consistent and speed up production.
- Use Export Template to back up a design or share it across accounts, and Upload Template to bring it back in.
- Build your brand template once with Blank Content, save it, and reuse it from Saved Templates for every campaign.
Frequently Asked Questions
What happens to my work if my browser closes unexpectedly?
Nothing is lost. The Email Builder retains an unsaved draft of your last work. The next time you create a new email, choose Yes on the Unsaved Template Available prompt to resume where you left off.
How do I reuse a design?
Save it as a template and select it later from Saved Templates, save individual rows with Manage Saved Rows, or use Export Template and Upload Template to move designs between environments.
Why are the Insert or Add Customization buttons not working?
An ad blocker in your browser can interfere with Dynamic Content and Advanced Personalization. Disable ad blockers while using the Email Builder.
Where do I change the background or the default font of the whole email?
Open the Settings tab on the right side of the editor.
Updated about 2 months ago