
SMS/MMS
Marketing SMS and MMS content in Dengage is the message text (and, for MMS, one media file) that you reuse in campaigns and flows. You create the content once under Content > Marketing > SMS/MMS, get it approved, then send it from a one-time campaign, a recurring campaign or a flow node.
This guide covers the whole task in order: what to set up first, how the list works, how to create and edit content, how to test it, how to personalize it, and how to send it. SMS and MMS share the same screen and the same steps; the MMS differences are marked where they occur.
This page covers marketing messages. Messages triggered by an event for one contact at a time (order confirmations, one-time passwords, delivery updates) are transactional content and live under Content > Transactional. See the Transactional SMS guide for those.
Prerequisites
| Requirement | Why it matters |
|---|---|
| An SMS provider integration | Messages are sent through the provider connected to your account. Each sender name in the content editor belongs to a provider, shown as "Sender - provider". |
| At least one sender name | The sender name is the header your customers see at the top of the message. If the Sender Name list is empty, no sender is set up for your account. |
| Content and publish permissions for your role | Creating and editing content needs the content permission. Publishing needs the publish permission. Without it, your content waits for approval. See Roles and Permissions. |
| MMS only: an MMS-capable provider | The MMS option stays greyed out until MMS is enabled for your account. Not every SMS provider supports MMS. |
| Optional: a predefined test audience | A saved test list lets you send test messages without typing numbers each time. |
Limits at a glance
| Item | Limit |
|---|---|
| Message length per language | 400 characters |
| Characters outside the ANSI set | Each counts as 2 (for example Turkish letters such as ş and ğ, and emojis) |
| Concatenated SMS | Enabled by default. A message longer than one SMS part is split and delivered as one message on the phone. The counter shows the number of parts. |
| MMS media file | JPEG, PNG or GIF, maximum 400 KB, 2:1 aspect ratio recommended |
Open the SMS/MMS list
- In the left menu, click Content.
- Under Marketing, click SMS/MMS. The list opens at the All view.
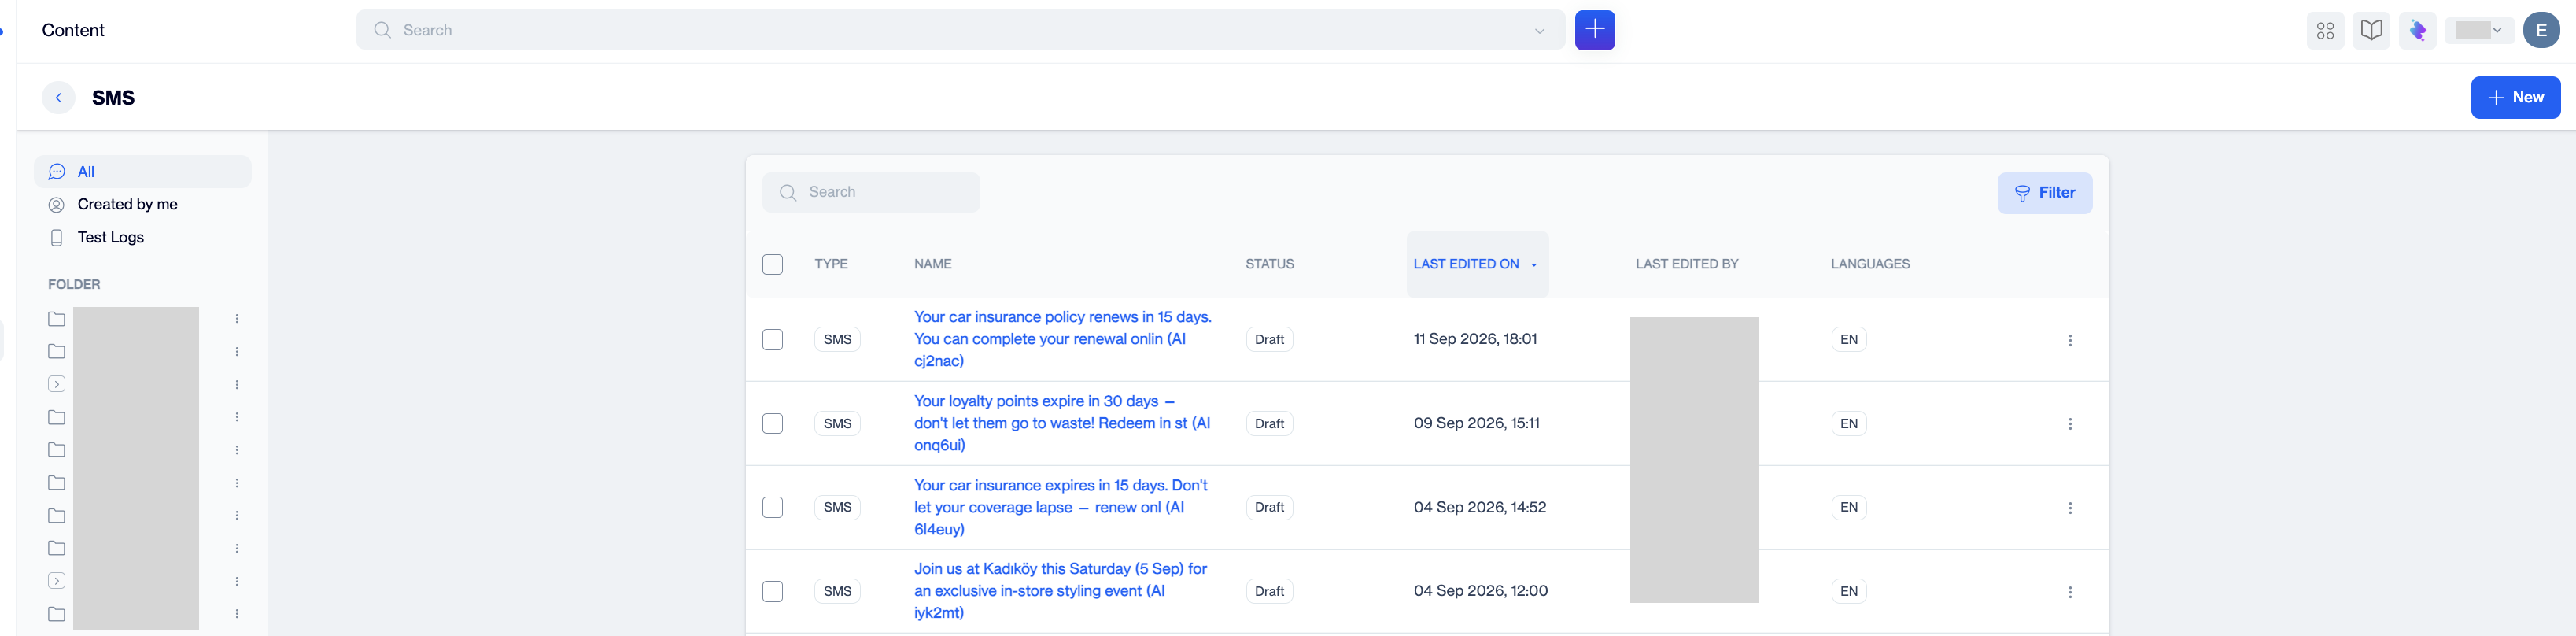
The SMS/MMS list. Use the left panel to switch views and folders, and the table to open or manage content.
Views, folders, search and filter
- All shows every SMS and MMS content. Created by me shows only yours. Test Logs shows every test message sent from this screen (see Preview and test).
- Folders keep content organised. Click New Folder to add one. Use the three-dot menu next to a folder to manage it. New content goes to the default SMS Content folder unless you change the folder.
- Search by name in the box above the table.
- Filter by Languages, Date Range (by update date or by create date) and Message Type (All, SMS, MMS). Click Apply, or Clear Filter to reset.
- Sort by clicking the Name or Last Edited On column header. Click again to reverse.
Statuses
| Status | Meaning | Usable in a campaign? |
|---|---|---|
| Draft | Saved but not published. | No |
| Waiting | Sent for approval by a user without publish permission. A user with publish permission must approve it. | No |
| Approved | Published and ready to use. | Yes |
Row actions
Click the three-dot menu at the end of a row:
- Create Campaign: opens the campaign wizard with this content selected. See Send it.
- Edit: opens the content. See Edit content.
- Duplicate: creates a copy of the content.
- Move: moves the content to another folder.
- Copy Public ID: copies the content's public ID, the identifier used to refer to this content from other parts of the platform.
- Delete: removes the content after you confirm.
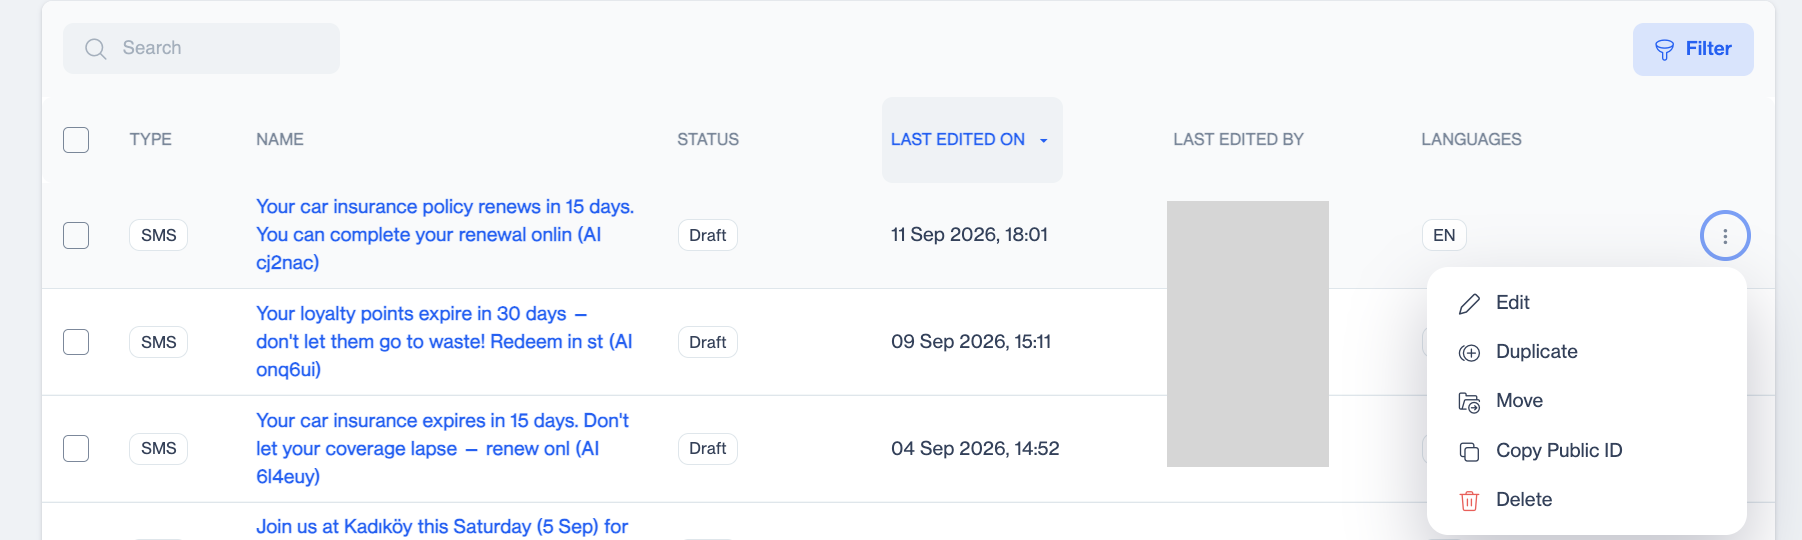
Row actions for a single content.
Create content
Creating takes two cards: General (name, description, folder) and Content (type, languages, sender, message, link settings). You can save a draft at any point.
Step 1: Fill in General
- Click New in the top right of the list.
- In Name, type a name your team can find later. Customers do not see it.
- (Optional) In Description, note the purpose, campaign or owner.
- In Folder, keep the default or click Change Folder.
- Click Next. The Content card opens. Click the pencil icon on the General card at any time to change these values.
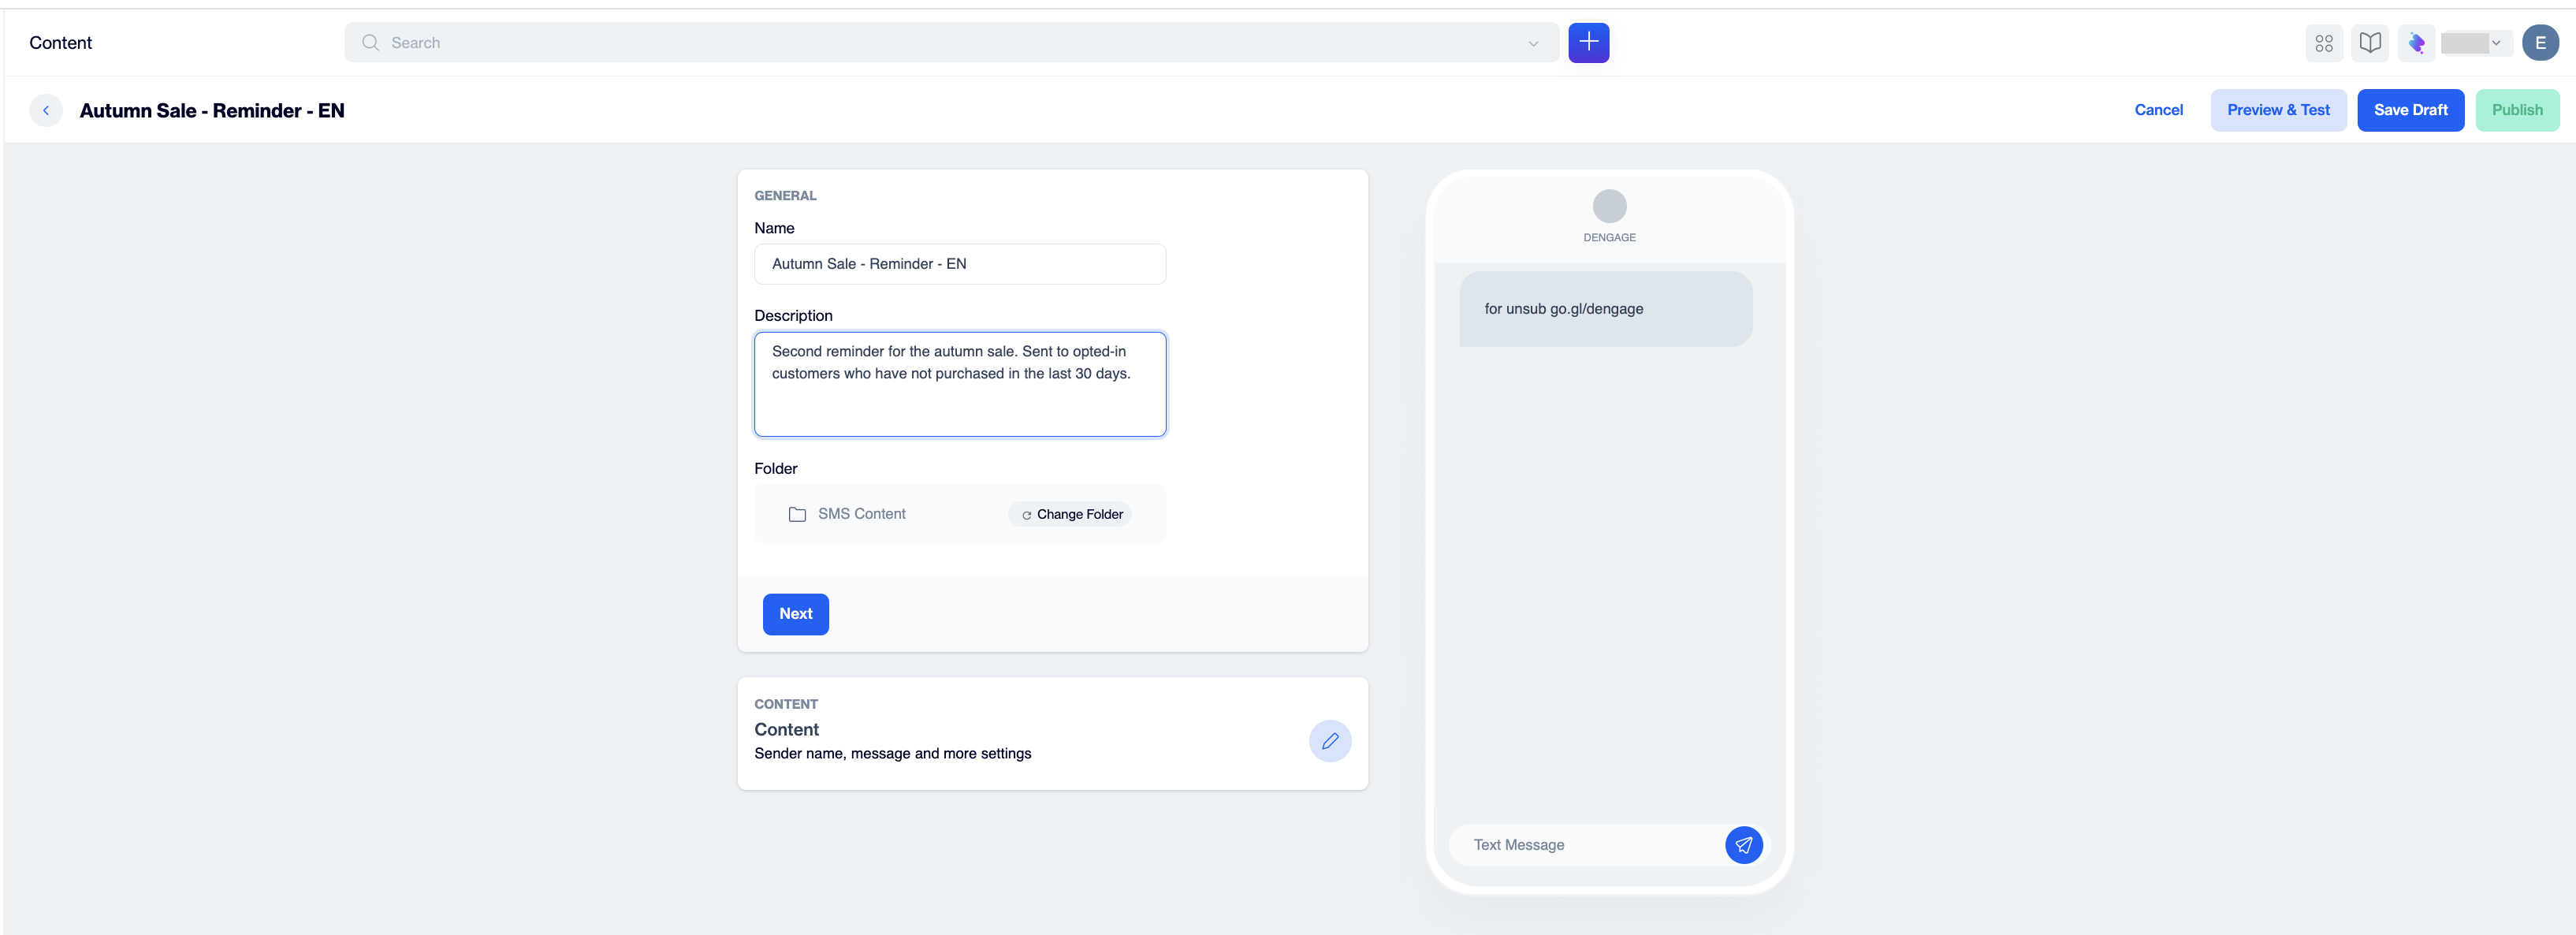
Name the content and choose its folder.
Step 2: Choose the message type
Under Message Type, select SMS (text only) or MMS (text plus one media file). MMS is greyed out when MMS is not enabled for your account.
If you chose MMS: a Multimedia field appears above the message. Choose URL and paste the file link in Source URL, or choose Upload, click Select and pick a JPEG, PNG or GIF up to 400 KB. A 2:1 aspect ratio is recommended. Select the sender name again after switching to MMS; the field resets.
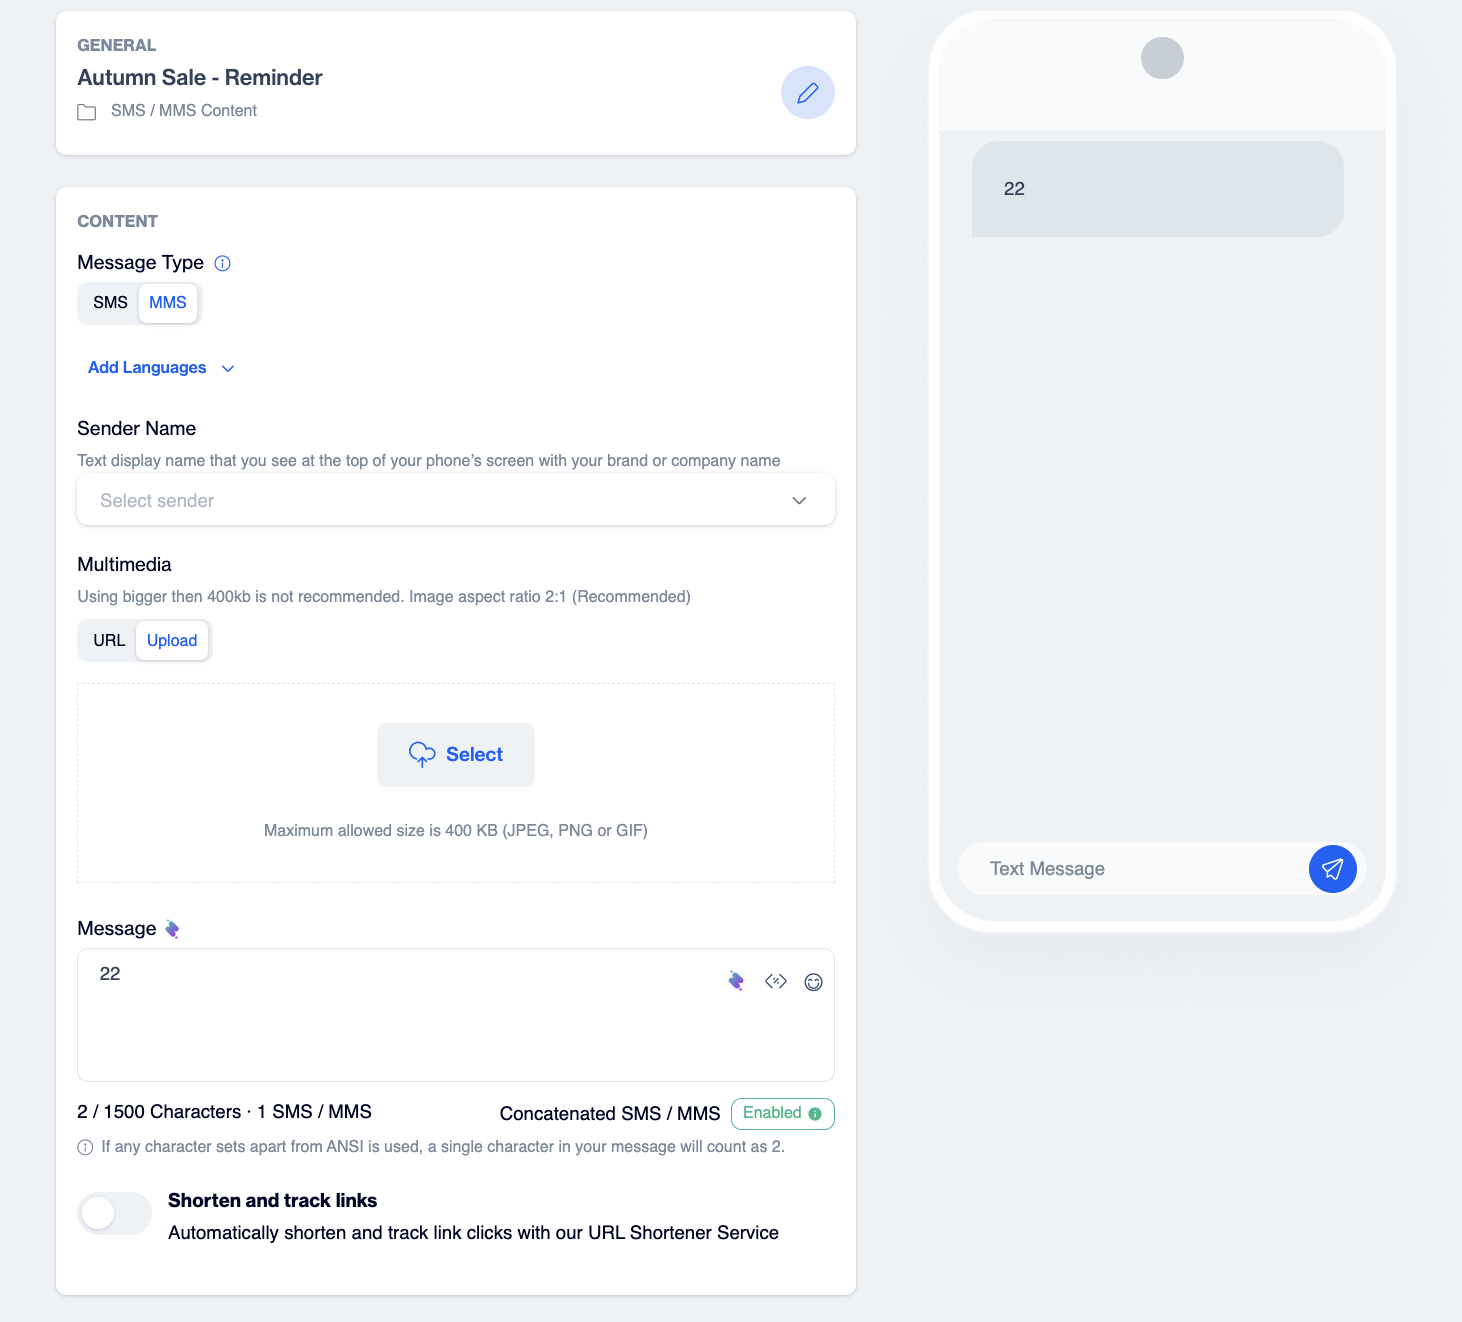
Step 2 for MMS. Add the media by URL or upload.
Step 3: Add languages (optional)
A content can hold one message per language.
- Click Add Languages.
- Choose Copy from Content to start from another SMS content, or Create Blank Content to start empty.
- In Select Language, tick the languages you need and click Apply. English is selected by default.
- Fill in the sender and message for each language.
Step 4: Select the sender name
In Sender Name, pick the header your customers see at the top of the message. Options are listed as "Sender - provider" because each sender name belongs to a provider integration.
Step 5: Write the message
- Type in the Message box. The phone preview on the right updates as you type.
- Watch the counter below the box, for example 53 / 400 Characters · 1 SMS. The number after the dot is how many SMS parts the message uses. See Limits at a glance for how characters are counted.
Three icons sit in the top right of the message box:
- Zeki AI assistant (sparkle icon): opens the AI panel with Improve Writing, Make Shorter, Make Longer, a brand persona selector and Enter New Prompt.
- Add Customization (code icon): inserts a personalization tag. See Personalize the message.
- Emoji: inserts an emoji. Each emoji counts as two characters.
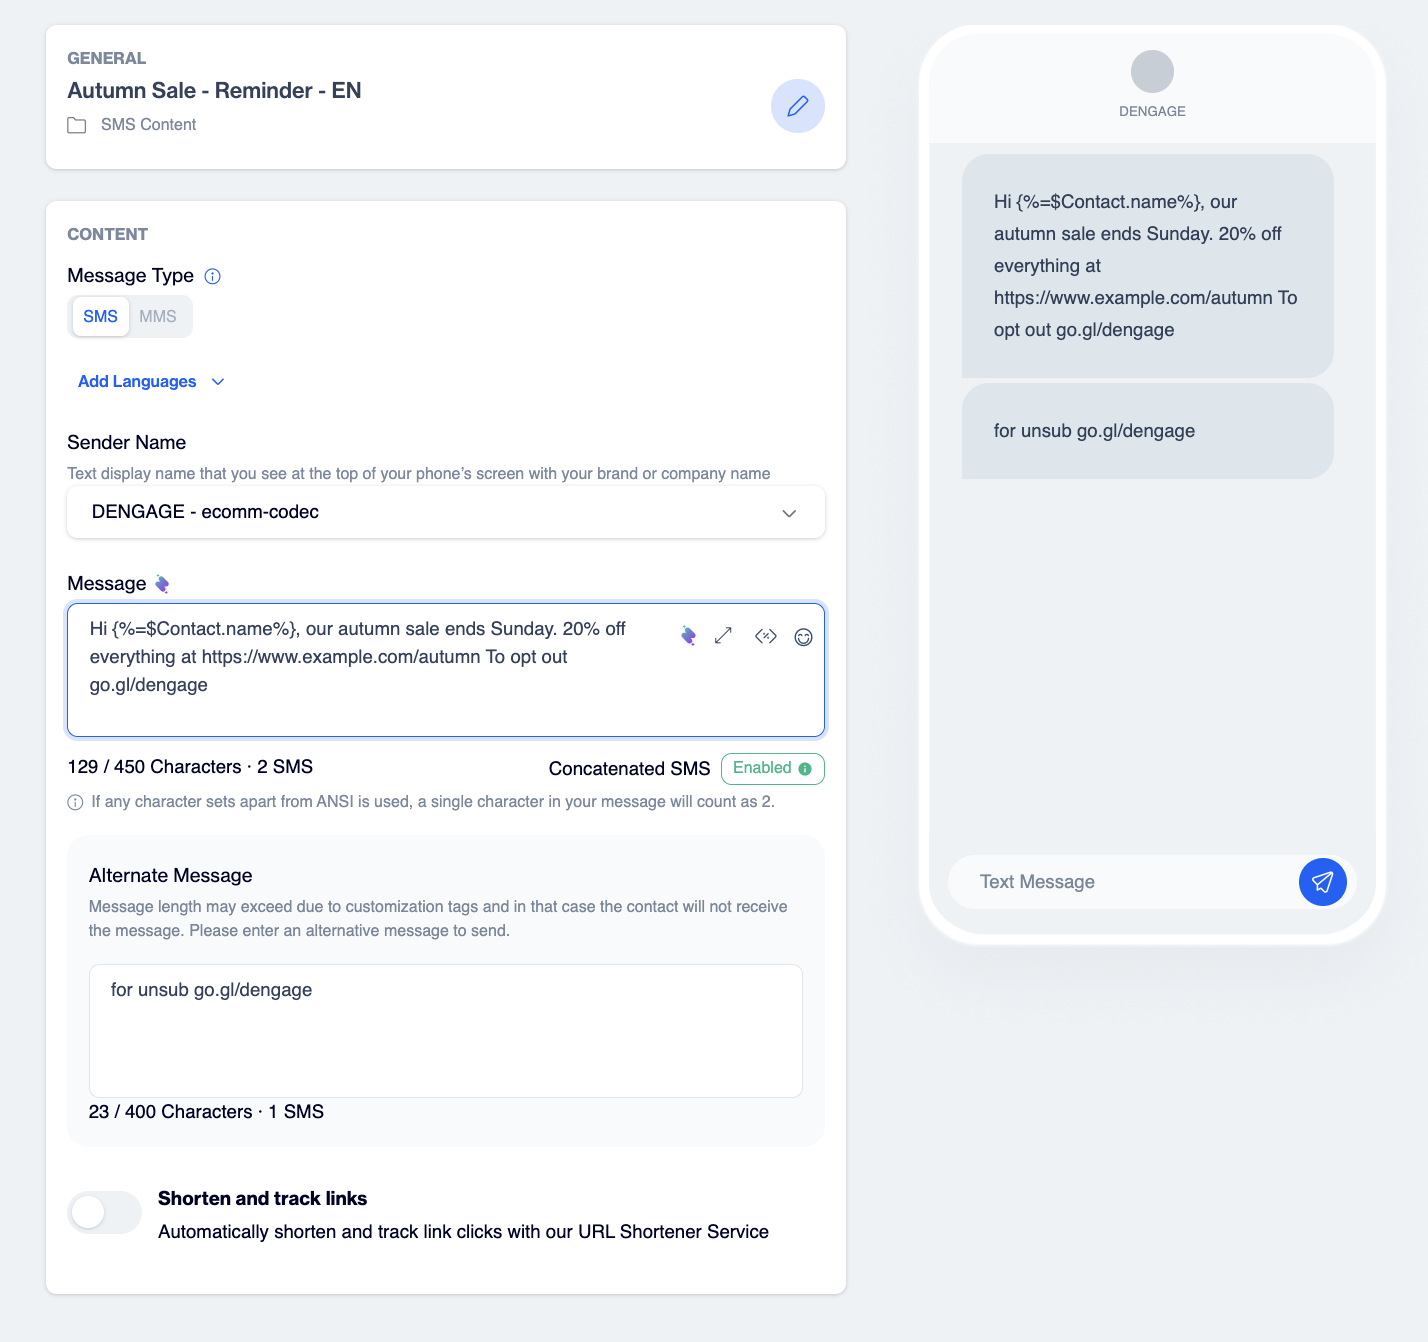
The message box, counter and link toggle.
Step 6: Shorten and track links (optional)
Turn on Shorten and track links to replace every URL in the message with a short link from the Dengage URL Shortener Service. The preview shows the short form. Short links save characters and let you track clicks.
Step 7: Save or publish
- Save Draft keeps the content as Draft.
- Publish makes it usable. With publish permission the status becomes Approved; without it, the status becomes Waiting until a user with publish permission approves it.
- Cancel leaves without saving.
Worked example
| Field | Example |
|---|---|
| Name | Autumn Sale - Reminder - EN |
| Folder | Promotions |
| Message Type | SMS |
| Languages | English (default), Turkish |
| Sender Name | BRAND - providername |
| Message (EN) | Hi {{contact.name}}, our autumn sale ends Sunday. 20% off everything: https://www.example.com/autumn Reply STOP to opt out. |
| Shorten and track links | On |
Edit content
What you can change depends on the status and on your publish permission.
- Draft opens directly in edit mode. Change any field except the message type, then Save Draft or Publish.
- Approved opens read-only on the Current Content tab. Click the Edit Content tab and choose Copy Current Content (start from the live text) or Create From Scratch. Users with publish permission can publish the edited version directly; other users send it for approval.
The header of an open content also offers More (Copy Public ID, Duplicate Template, Delete), Create Campaign and Preview & Test. The pencil icon next to the name changes the name, description or folder.
Preview and test
- Open the content and click Preview & Test.
- The Test SMS Template dialog shows the message for a sample contact, with personalization filled in, plus the Length, the No Of SMS (parts) and the sender name. Click Show Another to preview with a different contact.
- Click Send Test SMS. Under Select Test Audience choose Predefined Audience (a saved test list) or Type-in Gsm (type numbers), then click Send.
To confirm a test went out, click Test Logs in the left panel of the list. Pick a date range and, optionally, a GSM number, then click Search. Each row shows the Log ID, Content, Message, GSM List, Predefined List, Send Date and Sender.
Personalize the message
- Place the cursor where the value should appear.
- Click the Add Customization (code) icon.
- Pick a tab, search for the column and click it. The tag is inserted.
Tabs in the Customization Selector: Contact Columns, Device Columns, Dynamic Contents (Plain Text), Columns From Segment, Columns From Remote Segment, Columns From Table and System.
For conditions, default values and formatting, use the Advanced Personalization syntax described in the developer guide. Use Preview & Test to check the real length after personalization.
Writing tips
SMS has no formatting, so clarity comes from the words. Write in plain language and short sentences. Avoid whole words in capital letters. Put the most important information first. Use emojis sparingly, and remember each one counts as two characters. Include a clear opt-out instruction where regulation requires it.
Send it
Approved marketing content can be sent in two ways:
- Create Campaign from the row menu or the content header: the campaign wizard opens with this content selected. Choose one-time or recurring, set the audience, exclusions, control group, permissions, contact extension and duplicate handling, review the content, then set the schedule, hourly capping, conversion and visit tracking, drop conditions, and Google Analytics UTM parameters. See the SMS campaign guide for each setting.
- Flow node: in a flow, add the SMS / MMS send node and pick the content. MMS content sits under its own tab in the node.
Marketing content is not used by the Transactional API. For event-triggered messages, create the content under Content > Transactional.
Results appear under SMS/MMS Analytics.
Updated 11 days ago