
In-App
In-App messages let you reach users while they are inside your mobile app, with pop-ups, banners, full-screen messages, surveys, stories, and interactive content that promote offers, collect feedback, and drive conversions. You design the content once here, in Content > Marketing > In-App, and then use it in your campaigns.
How In-App works
- Create your content on this screen, using the no-code Visual Editor or the code-based HTML Editor.
- Test and publish it so it is ready for use.
- Add it to a campaign: a Targeting campaign or a Flow (as an In-App action node). This is what actually shows the message to your users.
Content is not displayed until you use it in a campaignThis screen only creates and stores your In-App content. Creating or publishing content here does not display anything in your app by itself. The message reaches users once you use the content in a Targeting campaign or a Flow. Displaying In-App messages also requires the SDK to be integrated in your mobile app (see the In-App section of the Developer Guide).
Step 1: Create new In-App content
- Go to Content > Marketing > In-App.
- Click the New button in the top-right corner.
- In the Select a Type, choose your editor: Visual Editor or HTML Editor.
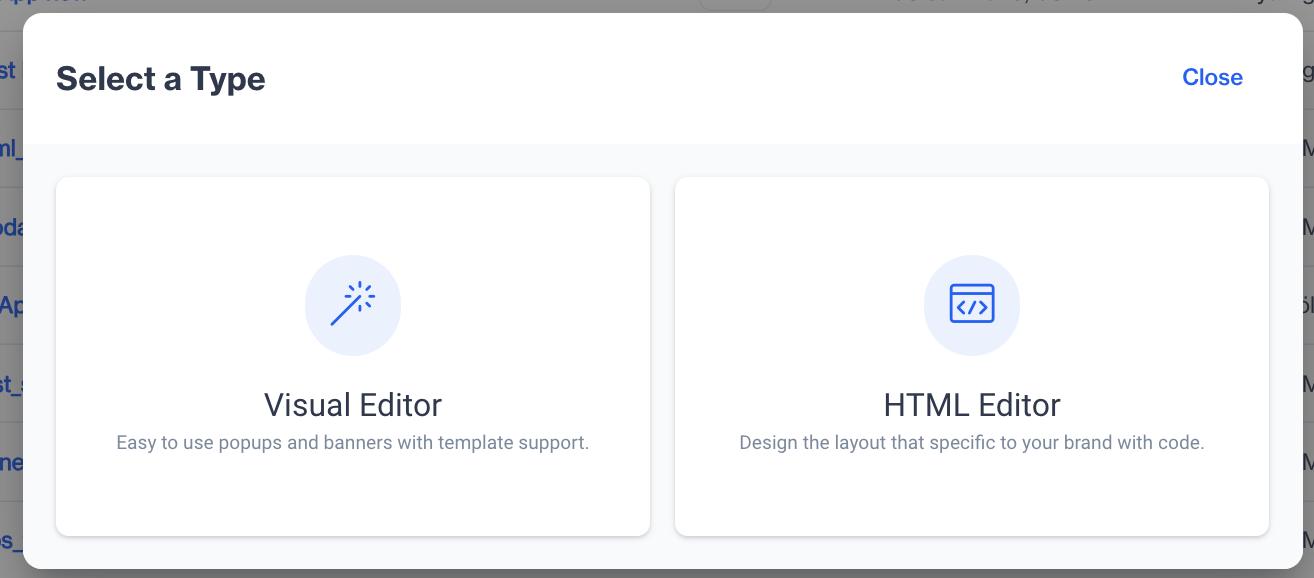
Visual Editor and HTML Editor
Which editor should I choose?
| Visual Editor | HTML Editor | |
|---|---|---|
| Best for | Building messages quickly from ready-made templates, without code | Designing the layout from scratch, with full control over every element |
| What you get | A template gallery covering pop-ups, banners, full-screen messages, surveys, gamification, recommendations, and stories | A code editor where you build the message in custom HTML and tailor it exactly to your brand |
| Skills needed | None | HTML/CSS |
Detailed walkthroughs are in the Visual Editor and HTML Editor subsections.
Step 2: Design your message
If you chose the Visual Editor
You start by picking a template. The gallery is organized into five groups:
| Template group | Templates | Use it to |
|---|---|---|
| Blank Layout | Banner (image), Modal (image + text), Image Modal (image only), Full Screen (image + text), Full Image (image only) | Show announcements and promotions in the format you need |
| Feedback | Survey, NPS (Net Promoter Score) | Get feedback with a single question, or measure visitor satisfaction and loyalty |
| Gamification | Countdown to Win, Scratch to Win, Spin to Win | Boost engagement with urgency and instant-reward mechanics |
| Recommendation | Recommendation Widget | Show product recommendations; the widget is reusable across campaigns |
| Inline Personalization | Inline Content, Story | Personalize in-app areas to your visitors' preferences, or craft an App Story experience |
After you pick a template, you customize it directly in the Visual Editor; every displayed option can be edited. See the Visual Editor subsection for a full walkthrough of each template.
If you chose the HTML Editor
- Fill in the General section: give the content a Name, keep or change the Folder it is saved in, and add an optional Description. Click Next.
- Build your message in the Content section. You work in two tabs: HTML Editor (your code) and Preview (what users will see). You can switch between vertical and horizontal views and expand the editor to full screen.
- Under Select Layout, choose how the message appears in the app:
- Pop-up: a modal over the app content. You can set the pop-up width and let users dismiss it by touching outside it.
- Banner: a bar over the app content. You can set its layout position.
- Full Screen: covers the whole screen.
To edit the content later, click Edit Content and choose Copy from Content (start from the existing content) or Create Blank Content (start clean); the button then changes to Draft Content. See the HTML Editor subsection for details.
Working with draftsYour edits are saved as a draft alongside the live content, so you can keep working safely. Save the draft again for later, Test it to check exactly what will be published, and Publish when it is ready for use in your In-App campaigns. Y
Step 3: Add languages (optional)
To create the same message in more languages, click Add Language and choose:
- Copy from Content: start from the existing content and translate it, or
- Create Blank Content: start the language version from scratch.
A pop-up then prompts you to select and apply the language. Each item's languages are shown in the listing, and you can filter the listing by language.
Step 4: Test your message
Always send a test before publishing:
- Open the content and click the Test button. A pop-up appears with Send Test "In App" and Show Another.
- Click Send Test "In App" and choose who receives the test: a Predefined Audience selected from the dropdown, or a specific contact via Type-in Contact Key.
- Choose where the message appears: Home Screen (selected by default) or Another Screen from the available list.
- Click Send Test "In App". The test message is sent to the selected recipients.
Step 5: Publish
Publishing makes your content ready to be used in campaigns. The listing shows each item's status:
- Draft: still being worked on, not available to campaigns yet.
- Waiting Approval / Waiting Publish / Rejected: shown when an approval flow is enabled for your account. The content is waiting for a reviewer, approved and waiting to go live, or sent back for changes.
- Published: live version of the content, ready to use in campaigns.
Step 6: Use your content in a campaign
Once published, your content is ready wherever In-App campaigns are set up:
- Create Campaign: the quickest route. Click the three-dot menu next to the content in the listing and select Create Campaign. A wizard opens to complete the campaign setup with this content.
- Flows: add an In-App action node to a Flow and select your content, to show the message as part of an automated journey (see In-App Delivery Settings).
- Targeting campaigns: use the content in a Targeting campaign to show it to a chosen audience.
Managing your In-App content
The In-App listing shows all your content with its Name, Status, Last Edited On, Last Edited By, and Languages. Click any item to view and update its details.
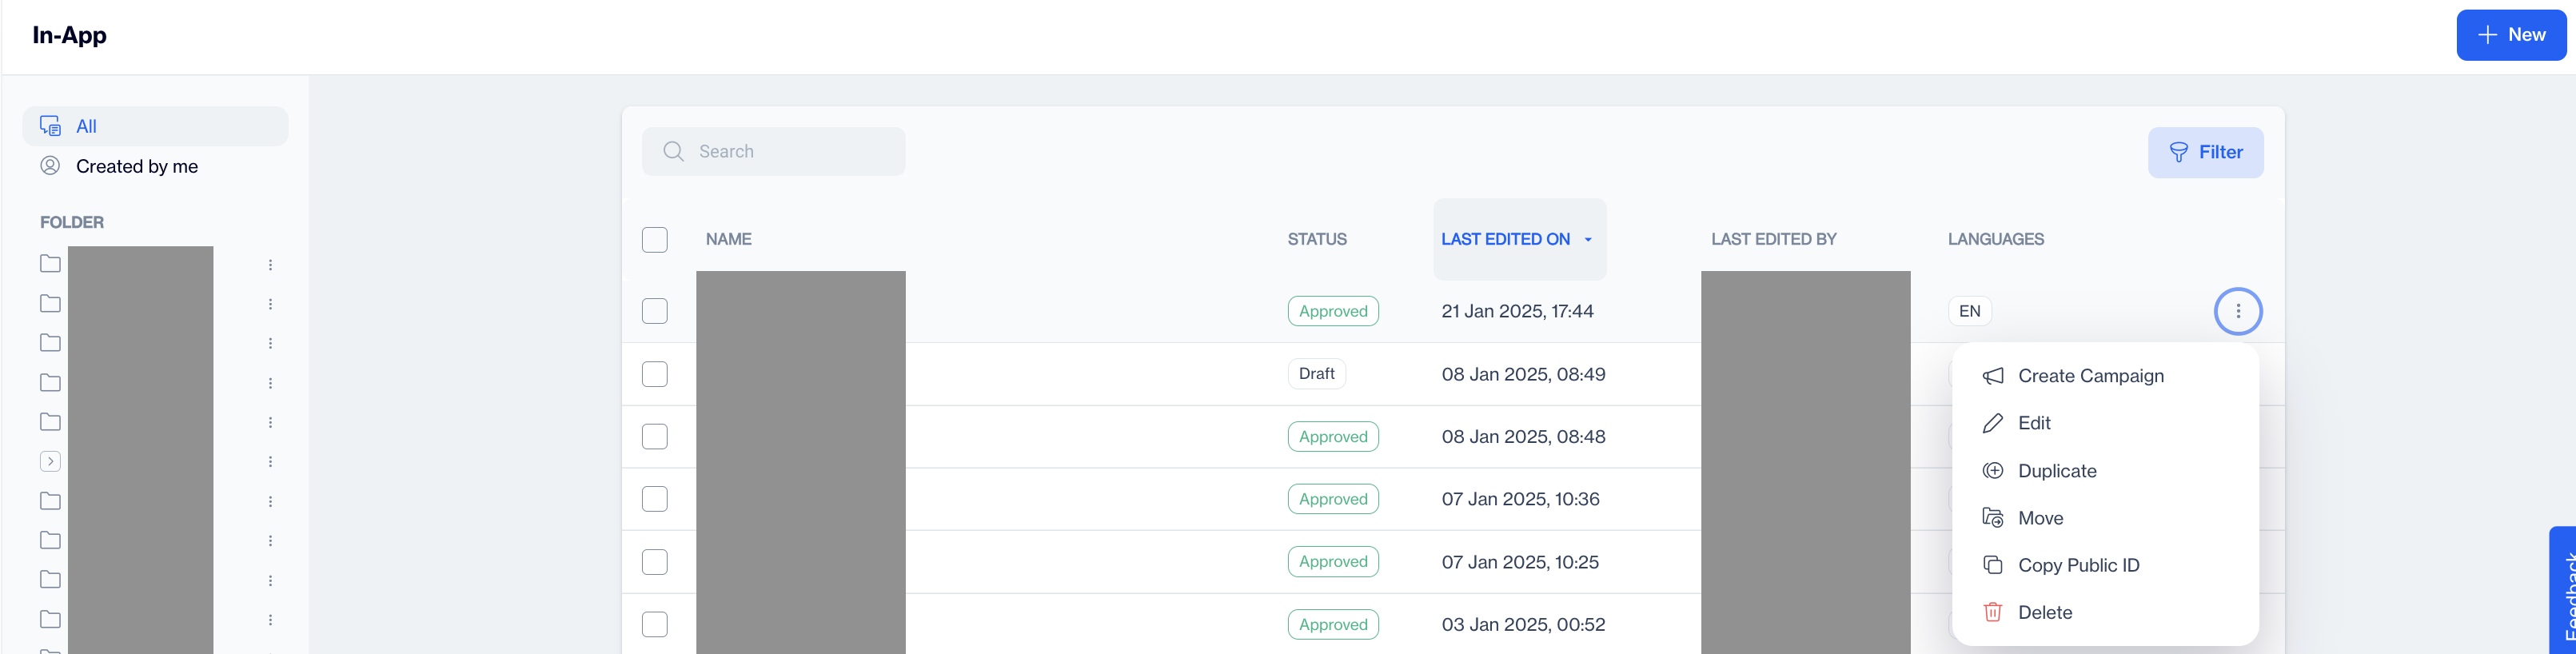
- Folders: Keep content organized by sorting it into folders. You can create new folders, rename them, move items between them, copy folder public IDs, and delete folders you no longer need. The Created by me view shows only the content you created.
- Search: Find any In-App content directly from the listing.
- Filters: Filter by language and by date ranges based on creation date and updated date. Clear Filters removes all applied filters; Cancel closes the pop-up.
- Sorting: Sort by Name (alphabetical or reverse) or Last Edited On (ascending or descending by date).
Item actions
The three-dot menu next to each item offers:
| Action | What it does |
|---|---|
| Create Campaign | Starts the campaign wizard with this content (see Step 6). |
| Edit | Opens the item in editable mode, in the Visual Editor or HTML Editor depending on how it was created. You can also rename the item, view its details via the info icon, and duplicate or delete the template from the more-options menu. |
| Duplicate | Duplicates the item directly from the listing. |
| Move | Moves the item to another folder. You can also create a new folder as you move. |
| Copy Public ID | Copies the item's Public ID, e.g. for API/SDK references. |
| Delete | Deletes the item after a confirmation pop-up. |
FAQ
I published my content. Why don't users see it in the app?
Publishing only makes the content available. To display it, add it to an active Targeting campaign or a Flow with an In-App action node (Step 6), and make sure the SDK is integrated in your app.
How do I show the same message in several languages?
Use Add Language on the content (Step 3). Each language version is managed on the same content item.
Updated 2 months ago