
AI Text Creation
AI Text Creation allows you to create marketing content faster and more efficiently by using generative AI. While content is created separately within each channel’s own editor, the same AI capabilities can be used across Email, SMS/MMS, Push, WhatsApp, In-App, and Onsite channels.
To do this correctly, the AI first needs to understand who your brand is, how it looks, and how it speaks. That is why AI Text Creation is built on two key foundations:
- Brand Kit (visual identity)
- AI Brand Persona (tone and communication style)
Once these are defined, the AI can produce content that feels consistent, professional, and aligned with your brand, just like content created manually by your team.
Before You Start: Required Setup
To use AI Text Creation effectively, you must complete the following steps:
- Create a Brand Kit
- Create an AI Brand Persona
These steps are required because the AI cannot generate meaningful or accurate content without understanding your brand’s identity and communication style.
1. Brand Kit
What is a Brand Kit and Why Is It Needed?
A Brand Kit defines the visual identity of your brand. It tells the AI how your brand should look, not just in AI-generated content, but also in manual content creation.
Without a Brand Kit, AI-generated visuals and layouts may look generic or inconsistent. By creating a Brand Kit, you ensure that every piece of content follows the same visual rules, such as colors, fonts, and logo usage.
How to Access Brand Kit
Go to: Settings > Campaign Configurations > Brand Kit
This page displays all Brand Kits created in your account. For each Brand Kit, you can see key details such as:
- Brand Name
- Website
- Last Update
- Created By

Brand Kit
At the end of each row, the three-dot menu allows you to manage the Brand Kit. From this menu, you can:
- Edit the Brand Kit
- Duplicate it to create a new version or variation
- Delete it if it is no longer needed
To create a new Brand Kit, click Create New at the top of the page.
Brand Kit Setup: Step by Step
Each section of the Brand Kit helps the AI understand a different part of your brand identity.
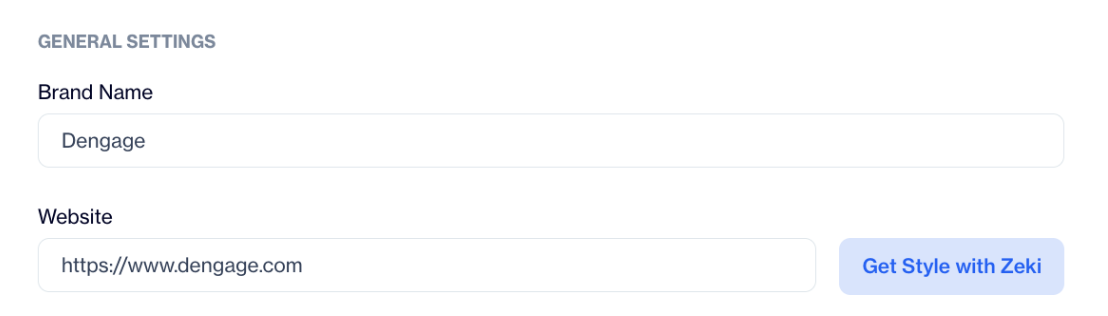
General Settings
- Brand Name
- Website
General Settings
You can also click Get style with Zeki next to the Website field. This allows Zeki AI to automatically analyze your website and fill your Brand Kit with suggested styles, such as colors, fonts, and visual elements.
This information gives the AI a general context about your brand and helps maintain consistency when generating content references or templates.
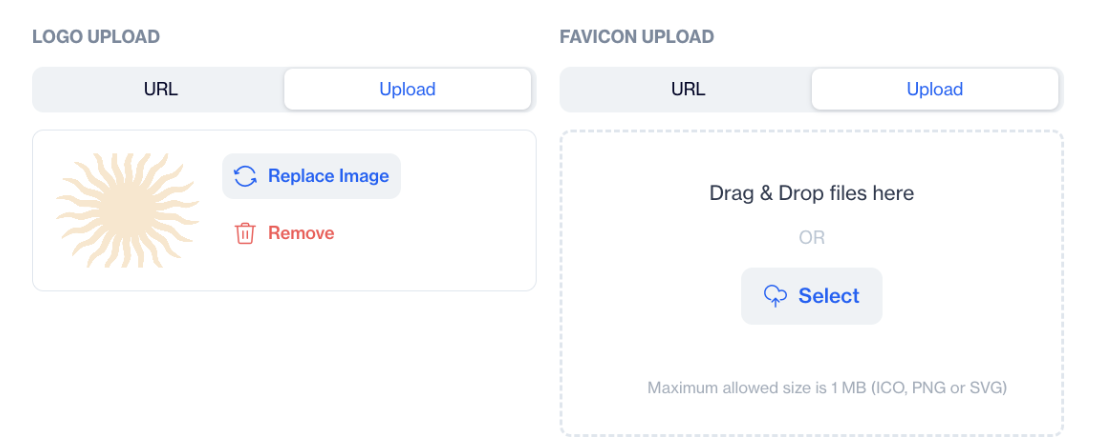
Logo Upload
Uploading your logo ensures that AI-generated visuals and templates always include the correct branding.
Logo Upload
You can upload your logo using:
- A URL, or
- File upload (Drag & Drop or Select)
Supported formats: JPEG, PNG, SVG
Maximum file size: 5 MB
Providing a logo prevents incorrect or missing brand visuals in generated content.
Favicon Upload
The favicon is used in layouts where a small brand icon is needed, such as browser-based or compact visual elements.
You can upload it using:
- A URL, or
- File upload
Supported formats: ICO, PNG, SVG
Maximum file size: 1 MB
Colors
- Primary Colors
- Secondary Colors
Defining your brand colors allows the AI to use the correct color palette when generating templates and layouts. This ensures that all visuals match your brand’s identity and remain recognizable to your audience.
Font Families
Font families define how your text should appear across campaigns.
By setting fonts in the Brand Kit, you ensure that AI-generated content uses the same typography as your existing brand materials, maintaining a consistent look.
Buttons
Button settings control how call-to-action elements appear across your content. You can define separate styles for Primary and Secondary buttons.
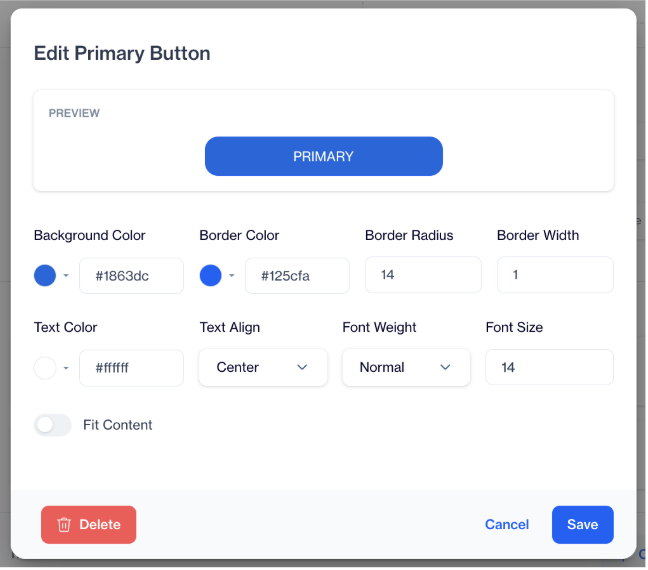
Buttons
For each button type, you can customize various button properties such as color, size, and other visual attributes to match your brand’s style.
A live preview is available, allowing you to see how the button will look before saving.
Header
The header defines the top section of your content layouts.
When you click Create, the Create Header Template Editor opens. Here, you can design a header that reflects your brand and will be reused in AI-generated templates.
This ensures consistent structure and branding across campaigns.
Footer
The footer defines the bottom section of your content layouts.
Click Create to open the Create Footer Template Editor. This is typically used for:
- Legal text
- Contact information
- Brand references
Using a predefined footer helps maintain consistency and reduces repetitive manual work.
Set as Default
At the bottom of the Brand Kit screen, you can select Set as Default.
The default Brand Kit is automatically used by AI when generating content, unless another Brand Kit is selected. This is especially useful if you mainly work with a single brand.
To save the Brand Kit, click the Save button at the bottom of the page.
2. AI Brand Persona
An AI Brand Persona defines how your brand communicates. It controls the tone, voice, and style used by AI when generating content across all channels.
While the Brand Kit defines how your brand looks, the AI Brand Persona defines how your brand sounds. This helps ensure that all AI-generated messages feel consistent, intentional, and aligned with your brand’s personality.
You can create multiple AI Brand Personas within the same account. This is useful when your brand communicates with different audiences or uses different communication styles for different purposes. For example, a company may want a professional and informative tone for B2B communications, while using a more friendly and engaging tone for consumer-focused campaigns. By creating multiple personas, you can tailor AI-generated content to specific audiences while maintaining consistency within each communication style.
How to Access AI Brand Persona
Go to: Settings > Campaign Configurations > Brand AI Persona
This page displays all AI Brand Personas created in your account. For each Persona, you can see:
- Persona name
- Linked Brand Kit
- Last update date
- Created by

AI Brand Persona
At the end of each row, the three-dot menu (vertical) allows you to:
- Edit the Persona
- Duplicate it
- Set it as default
- Delete it
To create a new AI Brand Persona, click New, then complete the sections below.
AI Brand Persona Setup: Step by Step
Each section of the AI Brand Persona helps the AI understand how your brand should communicate, sound, and connect with your audience. By defining these settings, you guide the AI to generate messages that reflect your brand’s tone, voice, and communication goals across all channels.
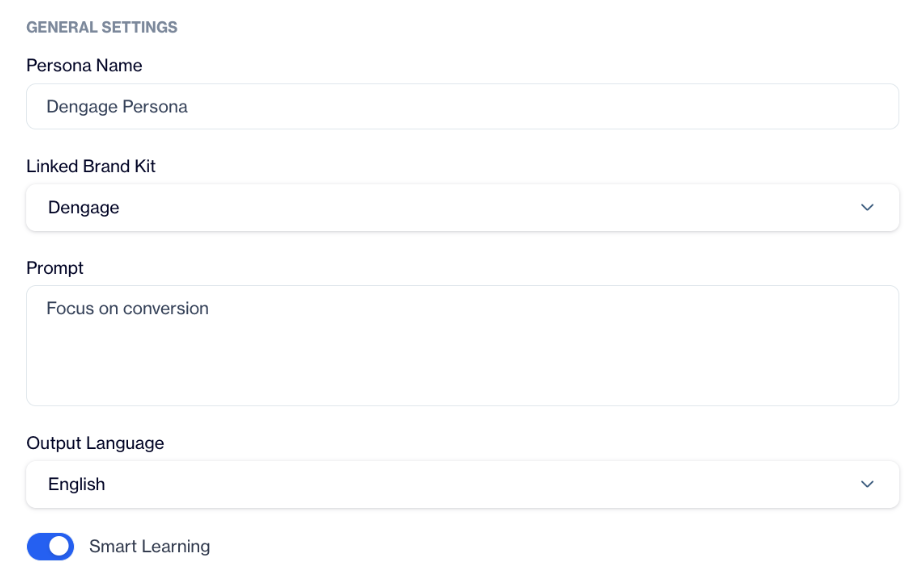
General Settings
General Settings define the basic identity and behavior of your AI Brand Persona.
General Settings
Persona Name
Enter a descriptive name for the Persona.
This helps you easily identify the communication style, especially if you manage multiple Personas.
Linked Brand Kit (Optional)
Select a Brand Kit to associate with this Persona.
Linking a Brand Kit ensures that the Persona’s tone and voice are always used together with the correct visual identity. If not linked, the Persona can still be used independently.
Prompt (Optional)
Use this free-text field to describe your brand’s communication style, personality, or tone preferences in natural language. This description becomes the base instruction for AI when generating content.
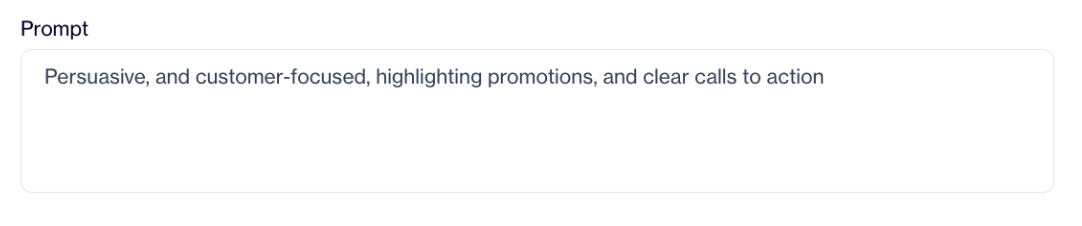
Prompt
You can explain how your brand should sound, what kind of personality it should reflect, or how it should communicate with users.
Output Language
Select the language in which AI-generated content will be created. The AI will generate all messages in the selected language by default.
Smart Learning
Use this toggle to allow the AI to learn your brand’s writing tone, phrasing, and structure from past campaigns.
When enabled, the AI analyzes your existing content and improves its outputs over time to better match how your brand communicates.
Advanced Settings
Advanced Settings allow you to further refine how AI generates content.
Include Keywords
Add keywords that you want the AI to prioritize and include in generated content. This is useful when certain terms, product names, or messages must appear consistently.
Exclude Keywords
Add keywords that you want the AI to avoid. This helps prevent the use of unwanted phrases or terms that do not align with your brand guidelines.
Target Audience
Select a target audience from the dropdown list to tailor messaging style and language.
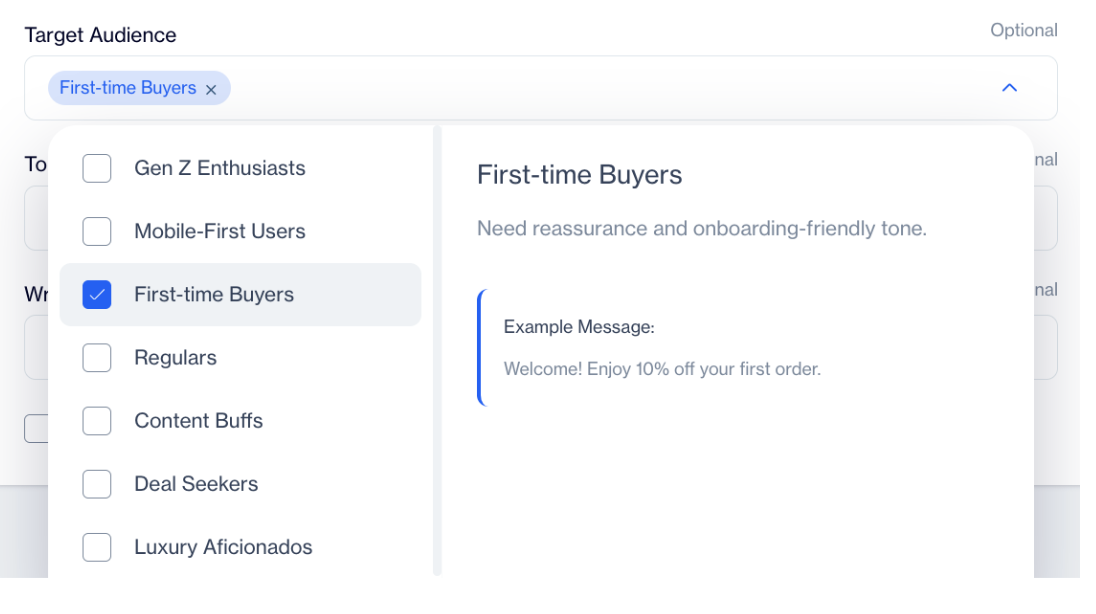
Target Audience
By selecting a target audience, you guide the AI on how to shape the language, level of detail, tone, and messaging approach. This ensures that generated content feels relevant and appropriate for different user groups, such as new users, loyal customers, mobile-first audiences, or premium segments.
Tone (Voice & Emotion)
The Tone setting defines the emotional style and voice the AI should use when generating content. Selecting a tone helps ensure that messages feel appropriate for your brand’s intent, whether you want to inform, motivate, reassure, or excite your audience.
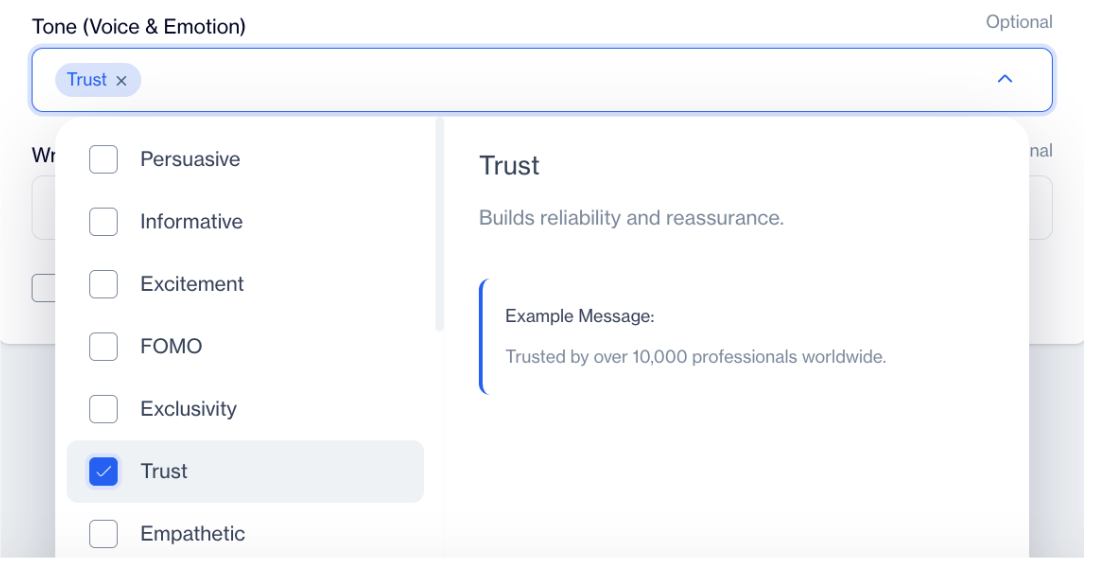
Tone
Writing Style
The Writing Style setting defines how AI-generated content is structured and presented. It influences the overall flow, wording, and level of expressiveness in messages.
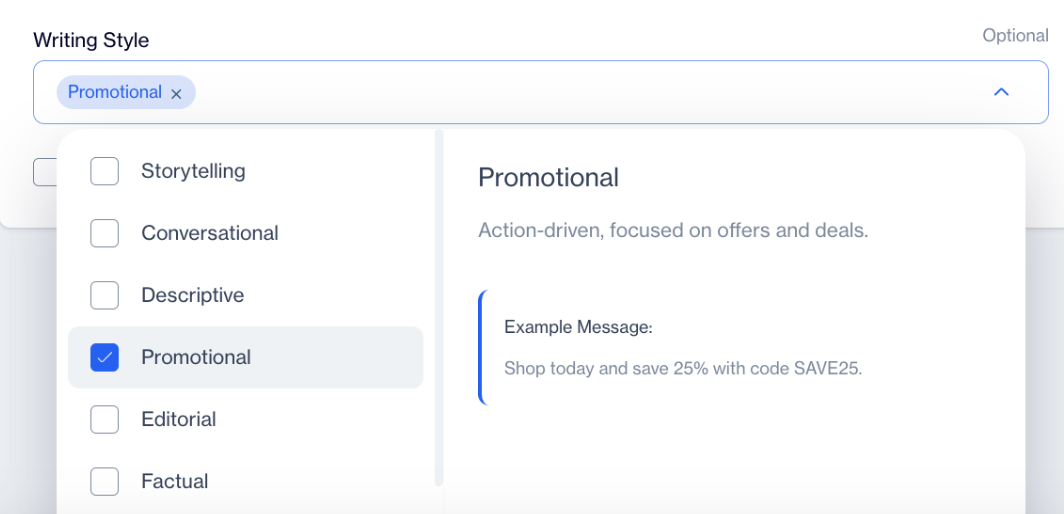
Writing Style
By selecting a writing style, you guide the AI on whether content should feel more narrative-driven, conversational, concise, informational, or action-oriented. This helps ensure that the format and delivery of messages align with your campaign goals and brand communication approach.
Set as Default
At the bottom of the screen, you can select Set as Default.
The default AI Brand Persona is automatically used whenever AI-generated content is created, unless another Persona is manually selected.
AI Text Creation
AI Text Creation helps you create, refine, and enhance content across channels by using generative AI. Instead of starting from scratch, AI assists at the field level such as subject, message and pre-headers making content creation faster while keeping full control in your hands.
Using AI Text Creation in Text Fields
AI Text Creation can be used in text fields to help you generate and refine content more quickly. Instead of writing everything manually, you can use AI to create a first draft or use it to enhance text you have already created.
All AI-generated content follows the rules defined in your Brand Kit and AI Brand Persona, ensuring that visuals, tone, and messaging stay consistent across all channels.
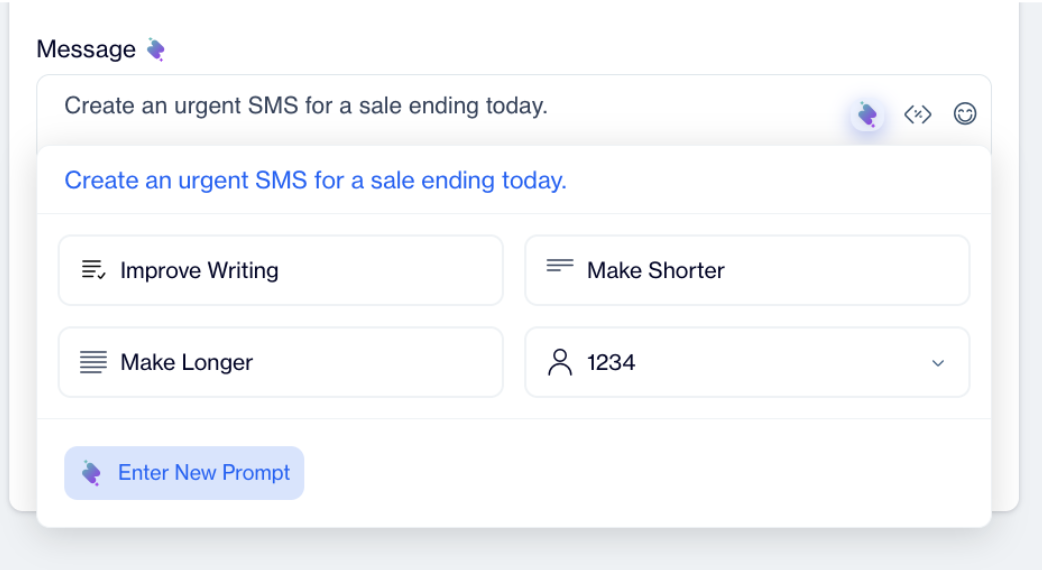
To get started, click the AI Assistant icon next to the text field. This opens the AI panel, where you can guide how the content should be generated.
Generating a New Content with a Prompt
In the AI panel, first enter a prompt. The prompt describes what you want the AI to create, such as the purpose of the message, key points to highlight, or the overall intent. This helps the AI understand your goal before generating content.
Generating a New Content with a Prompt
Next, choose an AI Brand Persona from the dropdown menu. The selected Persona defines the tone and communication style of the generated content. At the end of the Persona dropdown, there is an option to create a New Persona, allowing you to define a new tone.
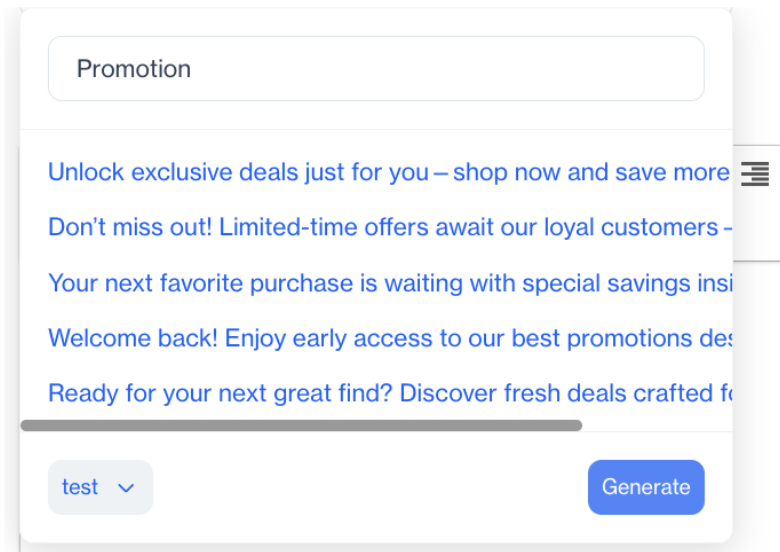
Text Generation
Once content is generated, you can continue refining it using the available AI actions. These actions allow you to adjust the text without starting over. You can:
- Improve the overall writing quality
- Make the text shorter or longer
- Test the same content with a different Persona to compare tones
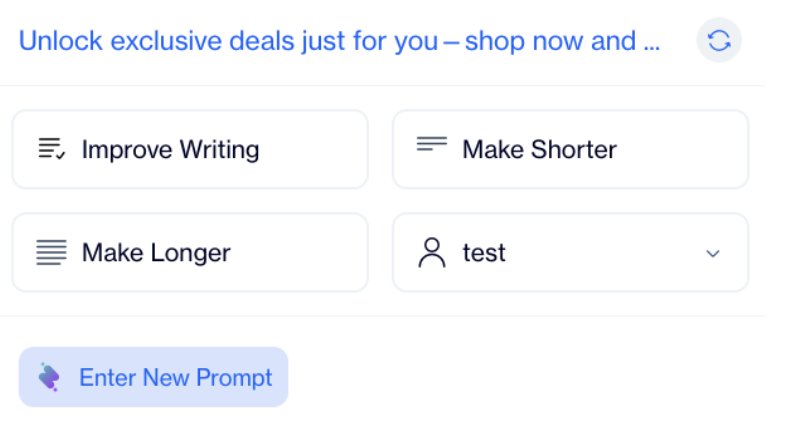
AI Actions
If you want to change your instructions, you can select Enter New Prompt to regenerate the content with updated guidance.
Improving Existing Text
If you already have text in the field, you can use AI actions to refine it without generating new content. These actions work on any existing text, whether it was written by you or generated by AI.
You can:
- Improve overall writing quality
- Make the text shorter or longer
- Try the same content with a different Persona to compare tones
There is no requirement to generate content first; AI can be used purely as an editing and optimization tool.
This step-by-step flow allows you to experiment with different messages, tones, and prompts while keeping full control over the final content.
Example Scenarios: Using Brand Kit and AI Brand Persona
Scenario 1: Launching a Campaign Across Multiple Channels
Before launching a campaign on Email, Push, and Onsite, first create a Brand Kit to define brand visuals and an AI Brand Persona to define communication style.
When AI generates content for each channel:
- Visual elements follow the Brand Kit automatically
- Message tone and wording follow the selected AI Brand Persona
Even though content is created for different channels, all messages remain consistent and clearly aligned with the same brand.
Scenario 2: Adjusting Communication for Different Audiences
To communicate differently with new users and returning customers, use:
- One Brand Kit to keep visuals consistent
- Create multiple AI Brand Personas to support different communication tones and styles
Select a more informative Persona for onboarding messages and a casual Persona for loyalty campaigns. This allows targeted communication without recreating brand assets.
Updated about 2 months ago