
Engagement Split
The Engagement Split node routes contacts down two paths based on how they engaged with a message you sent earlier in the same flow. Use it to follow up differently with contacts who opened or clicked and contacts who did not.
For example, you send a welcome email, wait one day, and then use the Engagement Split node to send a push notification only to contacts who did not open the email.
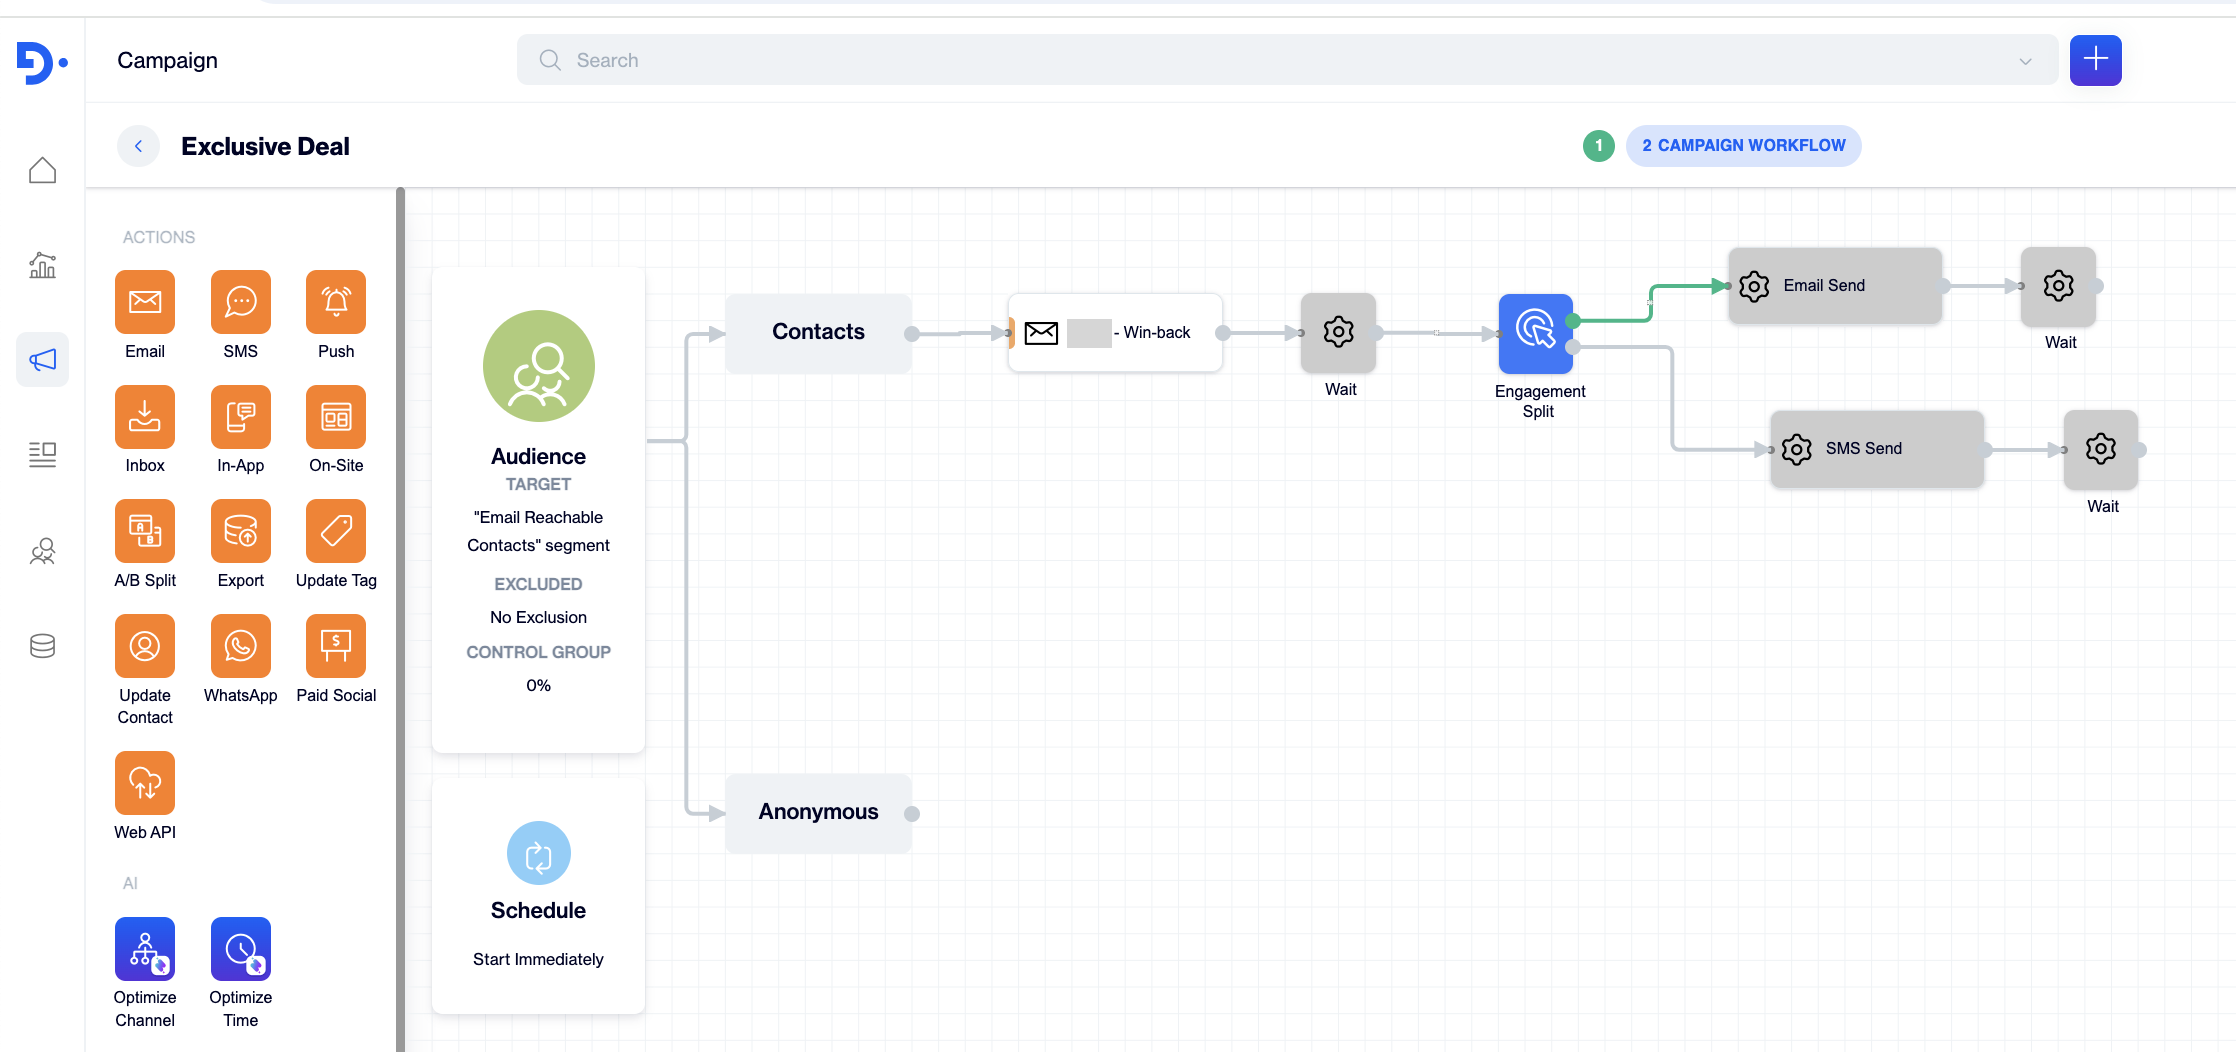
A typical flow: Email Send, Wait, then Engagement Split with a follow-up action on each output.
Before you start
Check these points before you add the node. The app blocks the settings modal until they are met.
- Your flow contains at least one Send node before the Engagement Split node. Supported Send nodes are Email, SMS, Push, In-App, On-Site and A/B Split.
- Every Send node that you want to filter on has content selected. Open the Send node, pick a content on the Content step and click Save.
- The Engagement Split node sits after the Send node in the flow. The Send node does not need to be the direct predecessor. You can place a Wait node or other nodes between them.
- Do not connect a Join node directly to the Engagement Split node. The app rejects this connection.
WhatsApp and Inbox Send nodes do not produce engagement events that this node can use. The app shows a warning when you try to connect them to an Engagement Split node.
Supported channels and events
The events you can filter on depend on the channel of the Send node you select in the filter.
| Send node | Available events | Notes |
|---|---|---|
| Delivery, Open, Click | When you select Click, an extra Email Link Name field appears. Leave it empty to match any link, or select one or more link names to match only those links. | |
| SMS | Delivery, Click | Click applies to tracked links in the SMS body. |
| Push | Delivery, Open | Push does not offer a Click event. |
| In-App | Click, Display, Dismiss | Display means the message was shown to the user. Dismiss means the user closed it without clicking. |
| On-Site | Click, Display, Dismiss | Same event meanings as In-App. |
| A/B Split | Depends on the channel selected inside the A/B Split node: Email gives Delivery, Open and Click; Push and On-Site give Delivery and Open. | Configure the A/B Split node first. The app shows "Please configure A/B split node" if you skip this. |
| WhatsApp, Inbox | Not supported | You cannot use these Send nodes with the Engagement Split node. |
Step 1: Add the node to the flow
- Open your campaign and go to the Campaign Workflow step.
- Configure the Audience node. The node palette on the left stays disabled until you select an audience.
- Add a Send node (for example Email) from the Actions section and select its content. The app adds a Wait node after each Send node automatically.
- Drag the Engagement Split node from the Decisions section onto the canvas.
- Connect the output of the Wait node (or of the Send node) to the input on the left side of the Engagement Split node.
Keep the Wait node between the Send node and the Engagement Split node and set a waiting period that gives contacts time to open or click. If the split runs immediately after the send, most contacts land on the "did not engage" path.
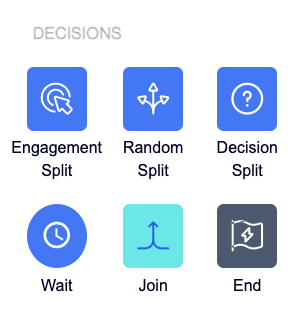
Find the Engagement Split node under Decisions in the node palette.
Step 2: Open the node settings
Click the Engagement Split node on the canvas. The Engagement Split modal opens with two sections: Inclusion Filters and Exclusion Filters.
A gray node with a gear icon is not configured yet. After you save valid filters, the node turns blue and shows the icon of the selected event.
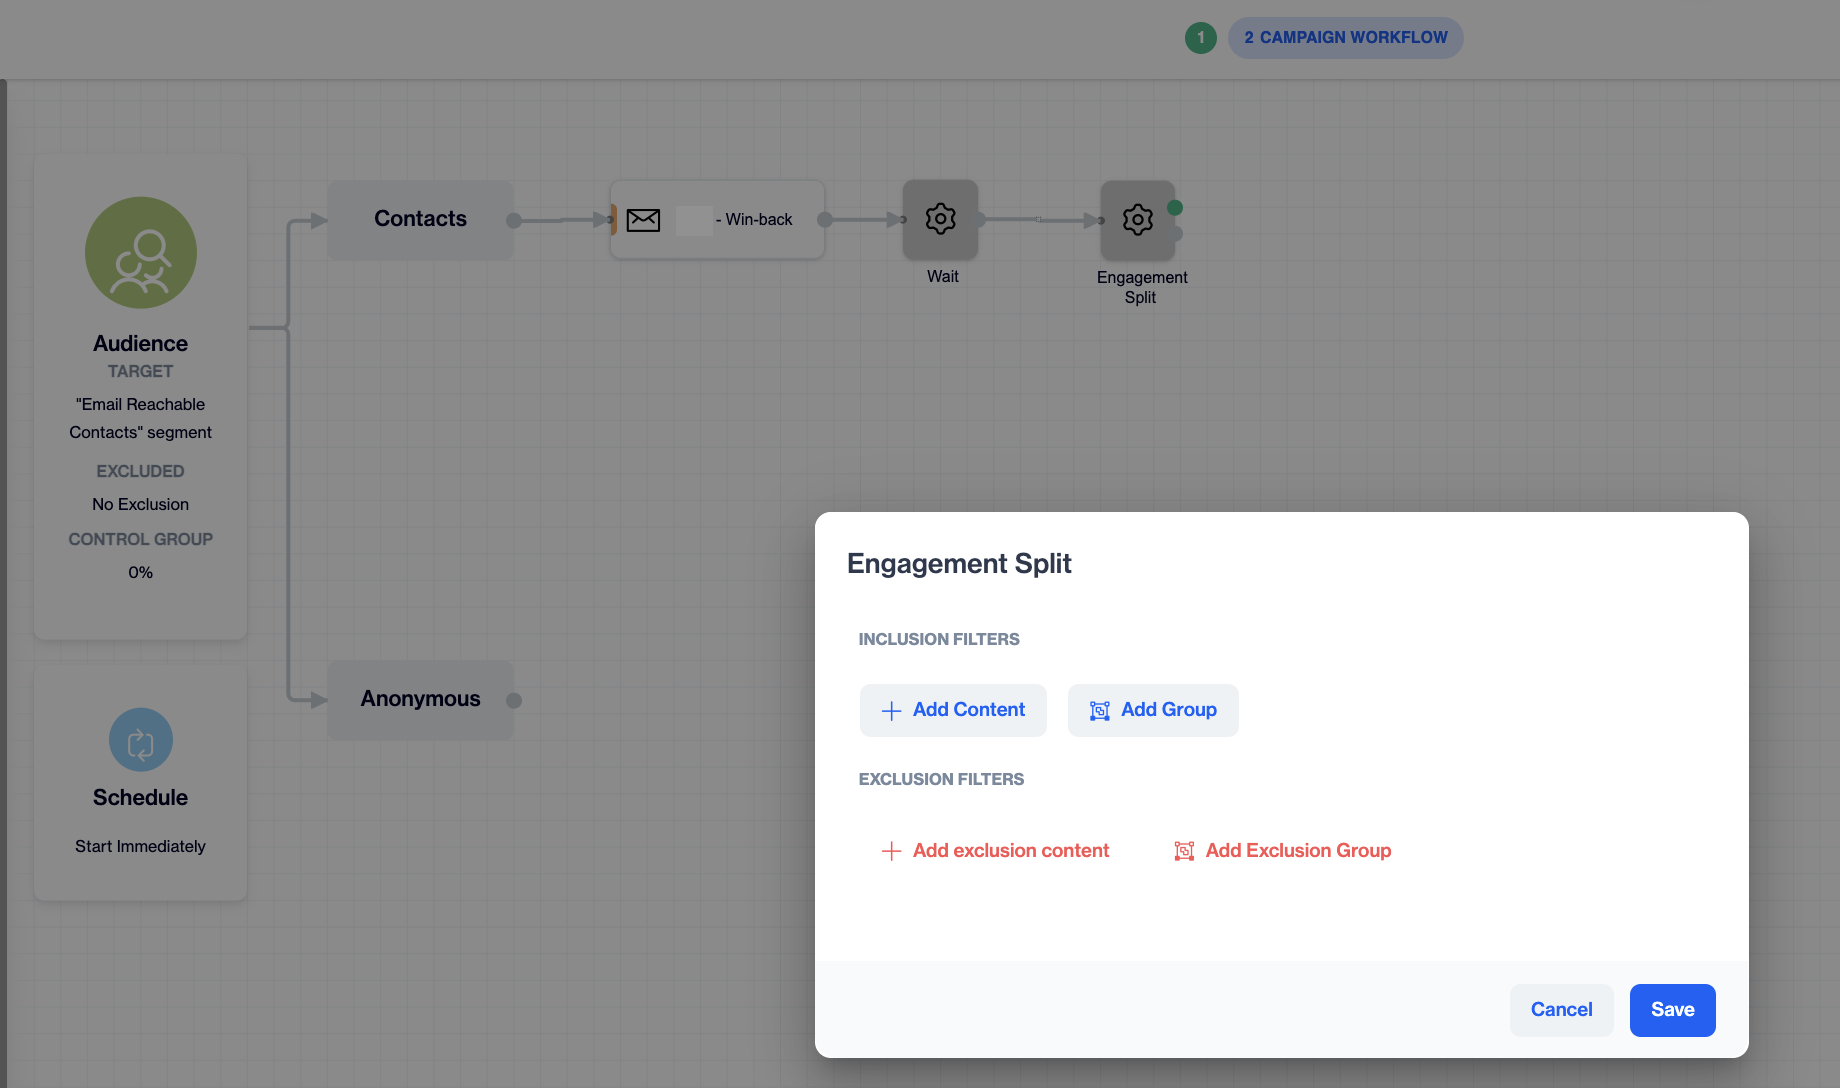
The Engagement Split modal before any filter is added.
Step 3: Add an inclusion filter
Inclusion filters define which contacts go down the green (matched) output. At least one inclusion filter is required.
- Under Inclusion Filters, click Add Content.
- Select the Send node content you want to filter on. The list shows every Send node that comes before this node in the flow and has content selected.
- In the Event dropdown, select the engagement event, for example Open. The default value is Click. See the table above for the events each channel supports.
- For email Click only: in Select link names, pick one or more link names from the email content. Leave the field empty to match a click on any link. The list shows "No Data" when the selected content has no named links.
- Click OK to keep the filter, or Discard to cancel it. The saved filter appears as a row that reads "content name > event".
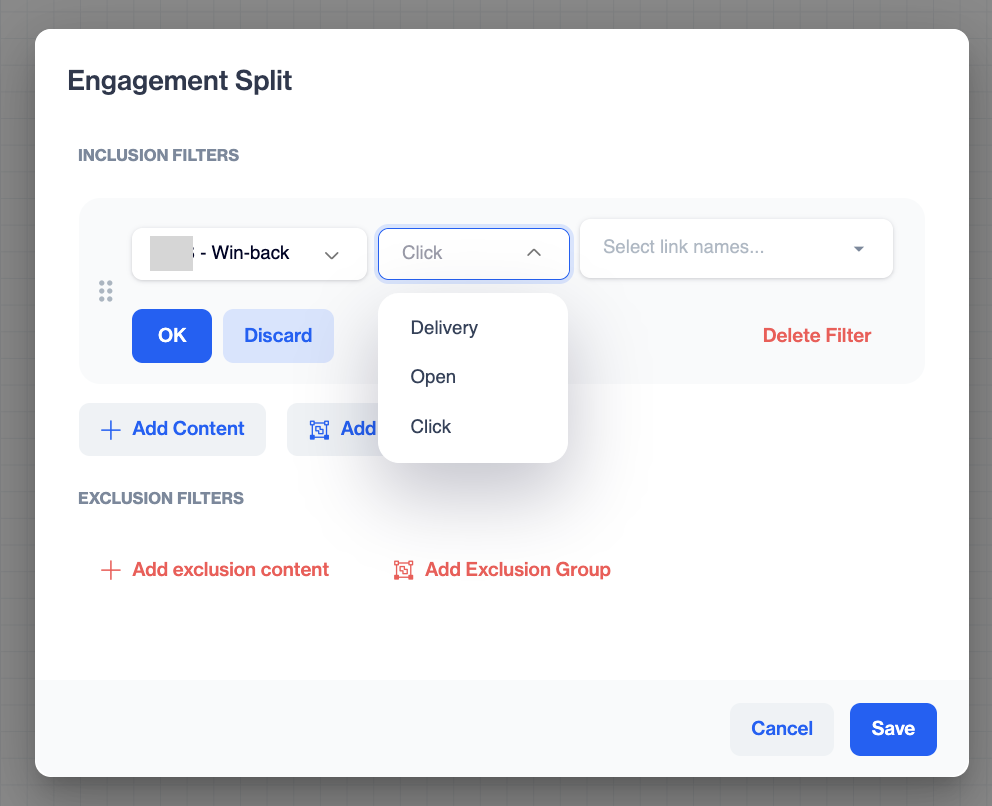
Available events for an email content.
Add more filters and groups
You can combine several filters to describe more specific behavior.
- Click Add Content again to add another filter to the same section.
- Click Add Group to create a nested group. Each group has its own operator badge. Click the badge to switch between AND and OR. With AND, a contact must match every filter in the group. With OR, matching any filter is enough.
- Drag a filter by its handle (the six-dot icon on the left) to reorder it or move it into another group.
- Open a filter row and click Delete Filter to remove it. Use the trash icon on a group to remove the whole group.
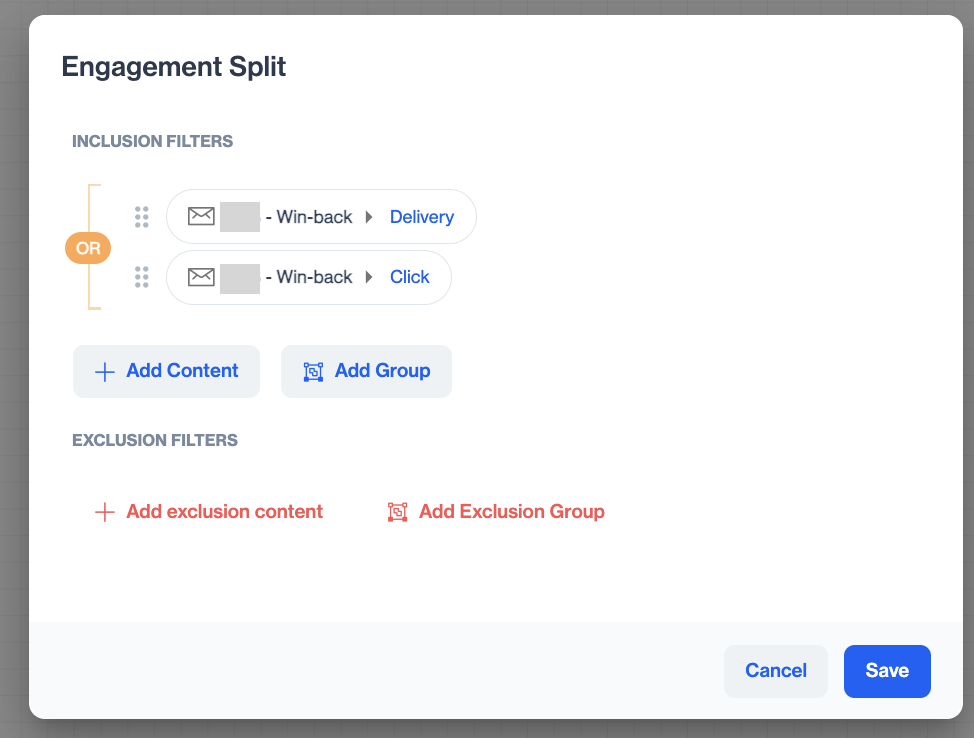
A nested group with the OR operator. Click the badge to toggle between AND and OR.
Step 4: Add exclusion filters (optional)
Exclusion filters remove contacts from the green output even if they match an inclusion filter. Use them to express "did X but not Y".
- Under Exclusion Filters, click Add exclusion content.
- Select the content, the event and, for email clicks, the link names in the same way as an inclusion filter.
- Click OK.
- Use Add Exclusion Group to nest exclusion filters with AND or OR logic.
Step 5: Save and connect the outputs
- Click Save. The modal closes and the node turns blue.
- Connect the two outputs on the right side of the node:
- The green output (top) carries contacts who match the inclusion filters and none of the exclusion filters.
- The gray output (bottom) carries every other contact that reached the node.
- Add the follow-up action for each path, for example a reminder push on the gray path.
Contacts who did not receive the message at all, for example because the Send node skipped them, also travel down the gray output.
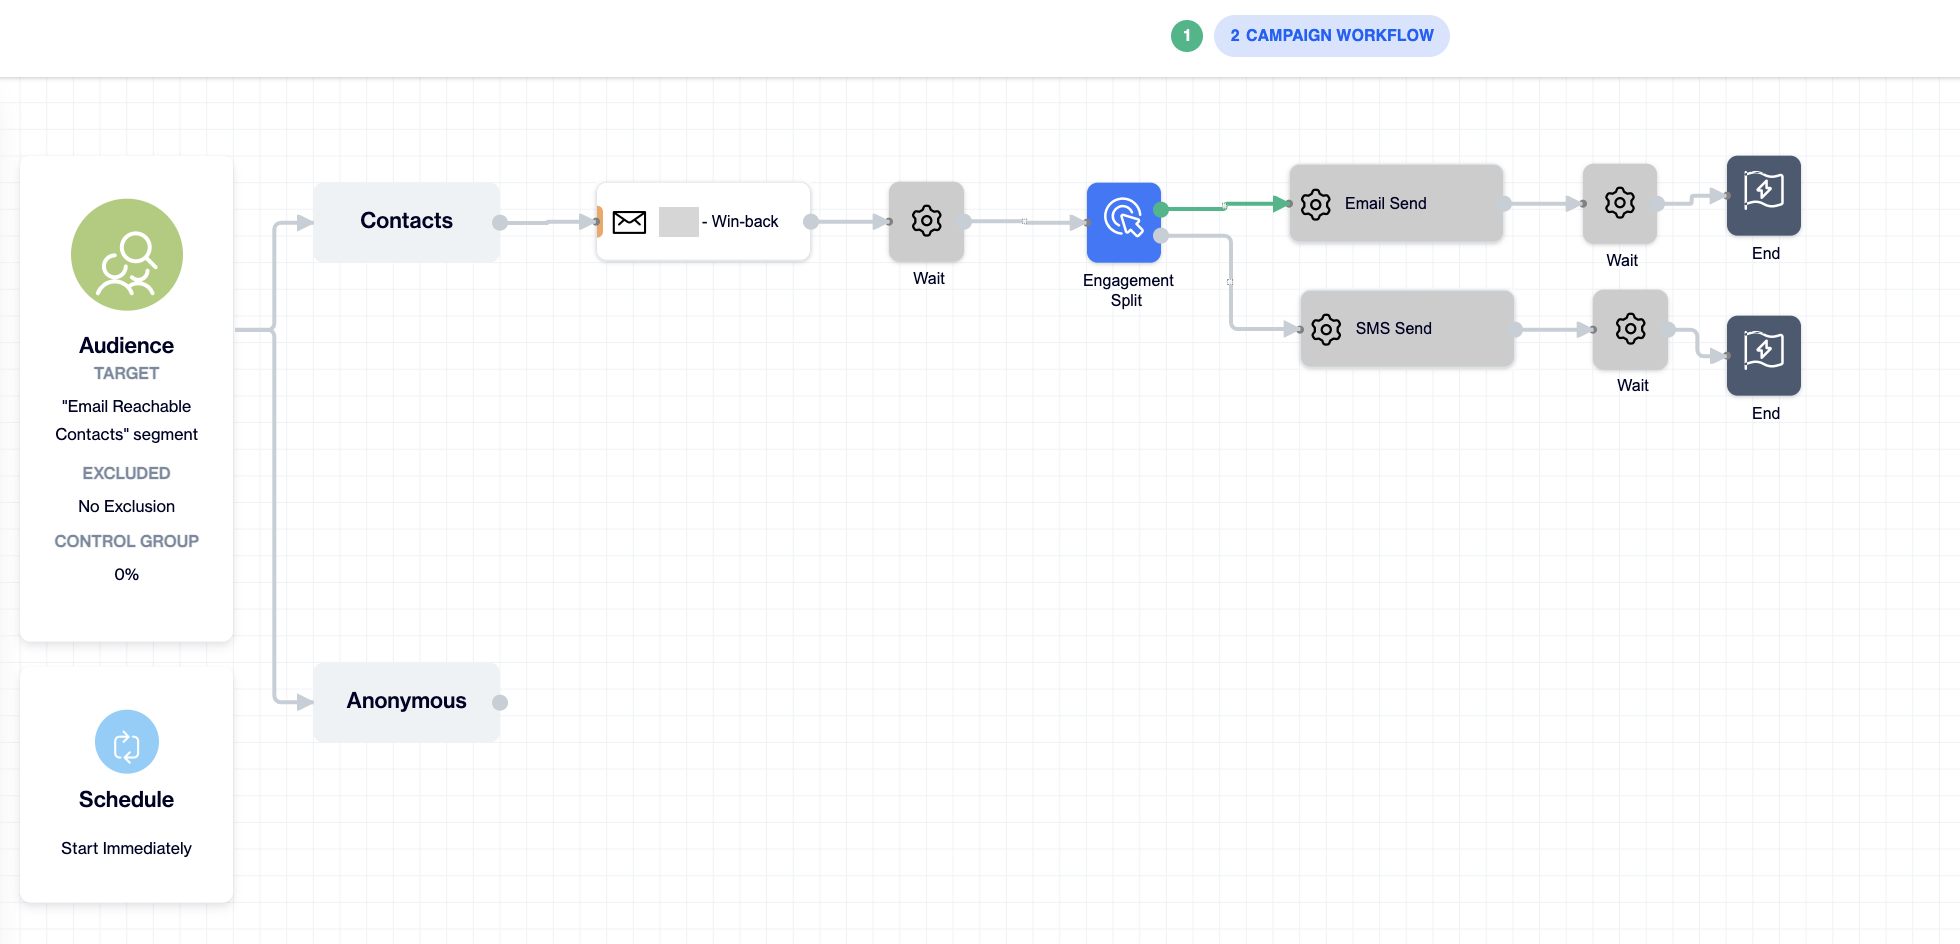
Green output: matched contacts. Gray output: everyone else.
How the split is evaluated
- The node checks engagement data recorded for the referenced Send node up to the moment the contact reaches the Engagement Split node.
- Filters in the top level of a section are combined with the operator shown on the section badge. Nested groups apply their own operator.
- A contact goes to the green output when the inclusion result is true and the exclusion result is false.
- Each filter references a specific Send node. If you send the same content from two Send nodes, add a filter for each node.
Manage the node on the canvas
- Hover over the node to show the Duplicate and Delete icons above it.
- When you delete a Send node that an Engagement Split node references, the app removes the related filters automatically and shows the message "Filter for a disconnected node has been automatically removed and saved." Open the node afterwards and check that at least one inclusion filter remains.
- The Node Counter at the bottom right shows how many nodes the flow uses out of the limit of 100.
Warnings and how to fix them
| Message | Cause and fix |
|---|---|
| Please connect this node after a send node. | No supported Send node comes before the Engagement Split node. Connect a Send node (or a Wait node that follows one) to the input of this node. |
| Previous node is not defined or content is not added. | A Send node before this node has no content. The app highlights the node in red. Open it, select a content and save. |
| Multiple previous nodes do not have content. Please add content to continue. | Several Send nodes before this node have no content. Add content to each highlighted node. |
| At least one inclusion filter is required. | You clicked Save with an empty Inclusion Filters section. Add at least one inclusion filter. |
| Groups cannot be empty. Please add filters or remove the group. | A group has no filters. Add a filter to the group or delete the group. |
| Please configure A/B split node | The referenced A/B Split node has no channel or content yet. Configure it first. |
| You cannot connect Join actions to engagement split. | A Join node is connected to the input of this node. Place the Engagement Split node before the Join, or after a Send node that follows the Join. |
| You cannot connect Whatsapp send actions to engagement split. / You cannot connect Inbox send actions to engagement split. | These channels do not provide usable engagement events. Use a different Send node. |
| Engagement Split references a disconnected node. Please remove the filter or reconnect the node. | Shown at publish time when a filter points to a Send node that is no longer upstream. Open the node and remove the filter, or reconnect the Send node. |
| Engagement Split references a node which has no content. Please add content to this node. | Shown at publish time. Add content to the referenced Send node. |
Best practices
- Give contacts time to engage. Set the Wait node to several hours or days before the split.
- Name your Send nodes clearly. The content name appears in the filter list, so a clear name helps you pick the right node when a flow has several sends.
- Pick events the channel supports. SMS has no Open event and Push has no Click event, so use Delivery or the events listed in the table above.
- Use link names when a single email has several calls to action and you want to react to one specific link.
- Connect both outputs. Contacts on an unconnected output leave the flow.
FAQ
Can the Engagement Split node reference a Send node that is not directly before it?
Yes. The node lists every supported Send node that comes earlier on its path, even with Wait or other nodes in between.
What happens to contacts who never received the message?
They do not match any engagement event, so they go down the gray output.
Does the node wait for engagement?
No. It evaluates the data available at the moment the contact arrives. Add a Wait node before it to allow time for engagement.
Updated 28 days ago