
On-site
An on-site campaign shows targeted content to visitors while they browse your website — at the moment, and on the page, you choose. Use it for promotions, announcements, lead collection, personalized page sections, and product suggestions — anything that should reach visitors on your site rather than in a channel like email or push.
There are three on-site campaign types. Each has its own page describing what is specific to it; this page covers the steps that are common to all types.
| Type | What it shows | Typical use |
|---|---|---|
| Targeting | Overlay messages on top of the page — pop-ups, banners, subscription forms. | Promotions, announcements, lead collection, abandonment offers. |
| Inline Personalization | Personalized content rendered inside a section of the page itself. | Personalized banners and blocks that feel native to the page. |
| Recommendation | Product or content suggestions displayed on your site. | "Similar products", best-sellers, personalized picks. |
Every on-site campaign is created in the same four-step setup — 1 Content → 2 Targeting → 3 Audience & Delivery → 4 Summary — and displays an on-site content you have prepared before. While you configure, a live preview on the right shows the selected content for desktop and mobile.
How On-Site Campaigns Work
Here is what happens after you save a campaign:
- The campaign starts at its start time. If you chose Now, it is active as soon as you save it. If you chose Schedule, it activates at the date and time you set, and stops at the end date if you set one.
- A visitor opens your website. On every page view, the platform checks the campaign's rules: the website, the device type (web or mobile web), and the page targeting.
- The trigger fires. The campaign waits for the activity you chose — page load (immediately, after a delay, or after scrolling), a custom event, or exit intent — before the content appears.
- The audience is evaluated. If you used an advanced filter, the visitor must match your conditions (browser, traffic source) at that moment.
- Delivery rules decide whether it displays. Frequency settings (once per visitor, or delivery limits), the stop-after-engagement rule, and the campaign priority — when several campaigns qualify for the same page view — make the final call.
- Results are tracked. The campaign list shows Visitor, Display, Click, Unique Click, and CTR per campaign; A/B variants are reported separately.
1. Create the campaign
Go to Campaign › Targeting › On-Site and click + New in the top-right corner, then choose the campaign type — Targeting, Inline Personalization, or Recommendation (see each type's page for what is specific to it). The New On-Site Campaign builder opens; the indicator at the top shows the four setup steps, and you move between them with Next and Back.
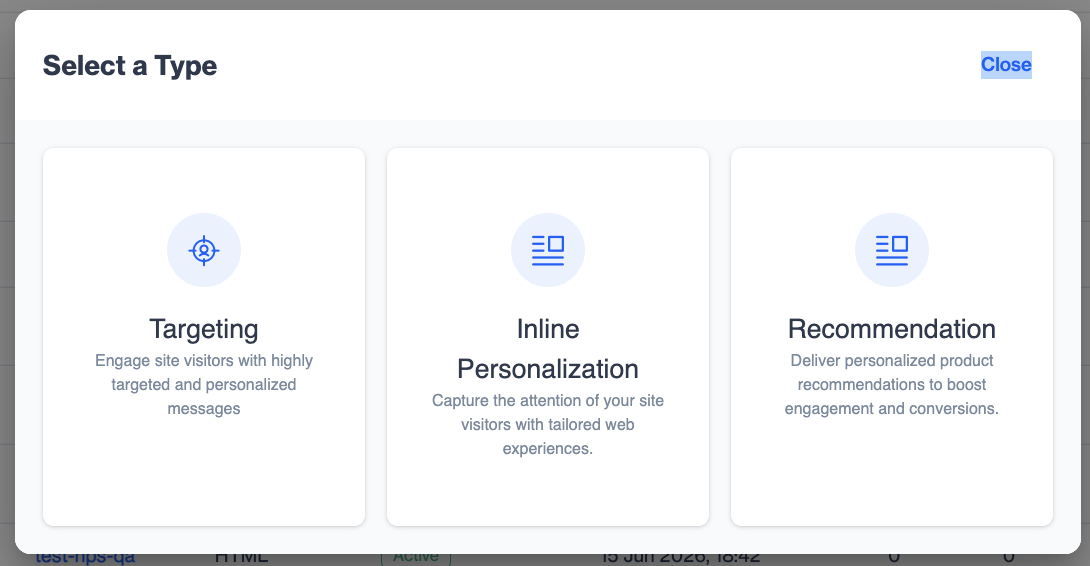
Campaign Types
2. Enter campaign info
On the Content step, fill in the Campaign Info section:
- Name — a descriptive internal name. Required.
- Start Date — Now starts the campaign when it is saved; Schedule starts it at a future date and time.
- End Date — No End Date runs it until you stop it; Set End Date stops it automatically.
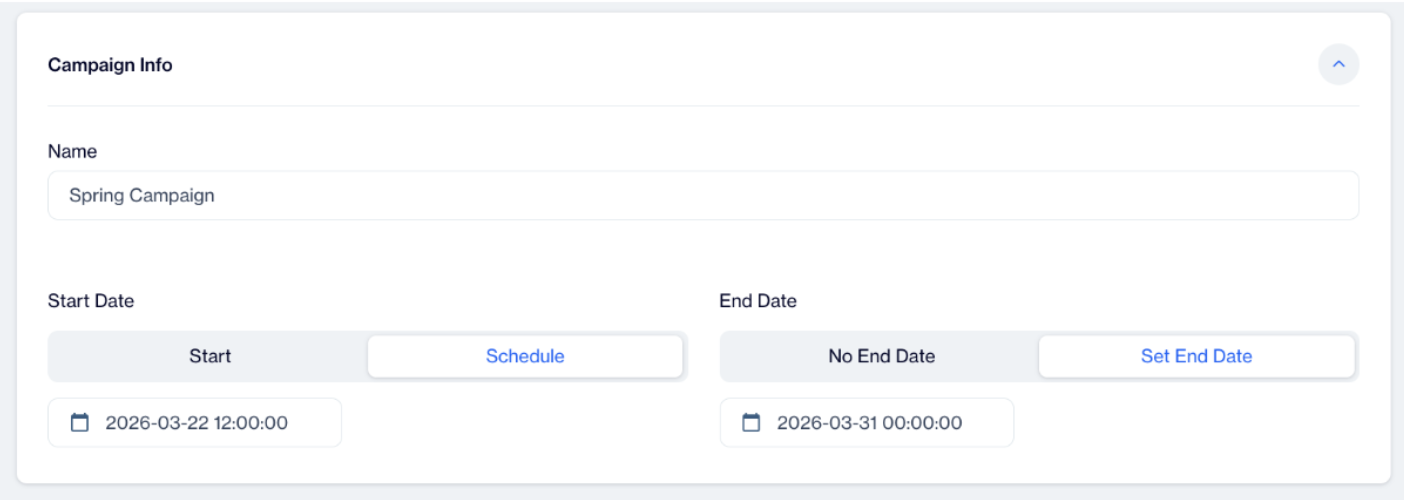
Campaign Info
3. Turn on A/B testing (optional)
In the Testing section, switch on A/B Testing to compare more than one content. You will then select a content per variant and split the audience between variants (equally or with custom percentages), with an optional control group that sees nothing. A variant is declared the winner automatically when it outperforms the others with at least 95% statistical confidence; tests run for up to 30 days, and you can also pick a winner manually with Mark as Winner. See On-site A/B Testing for details.
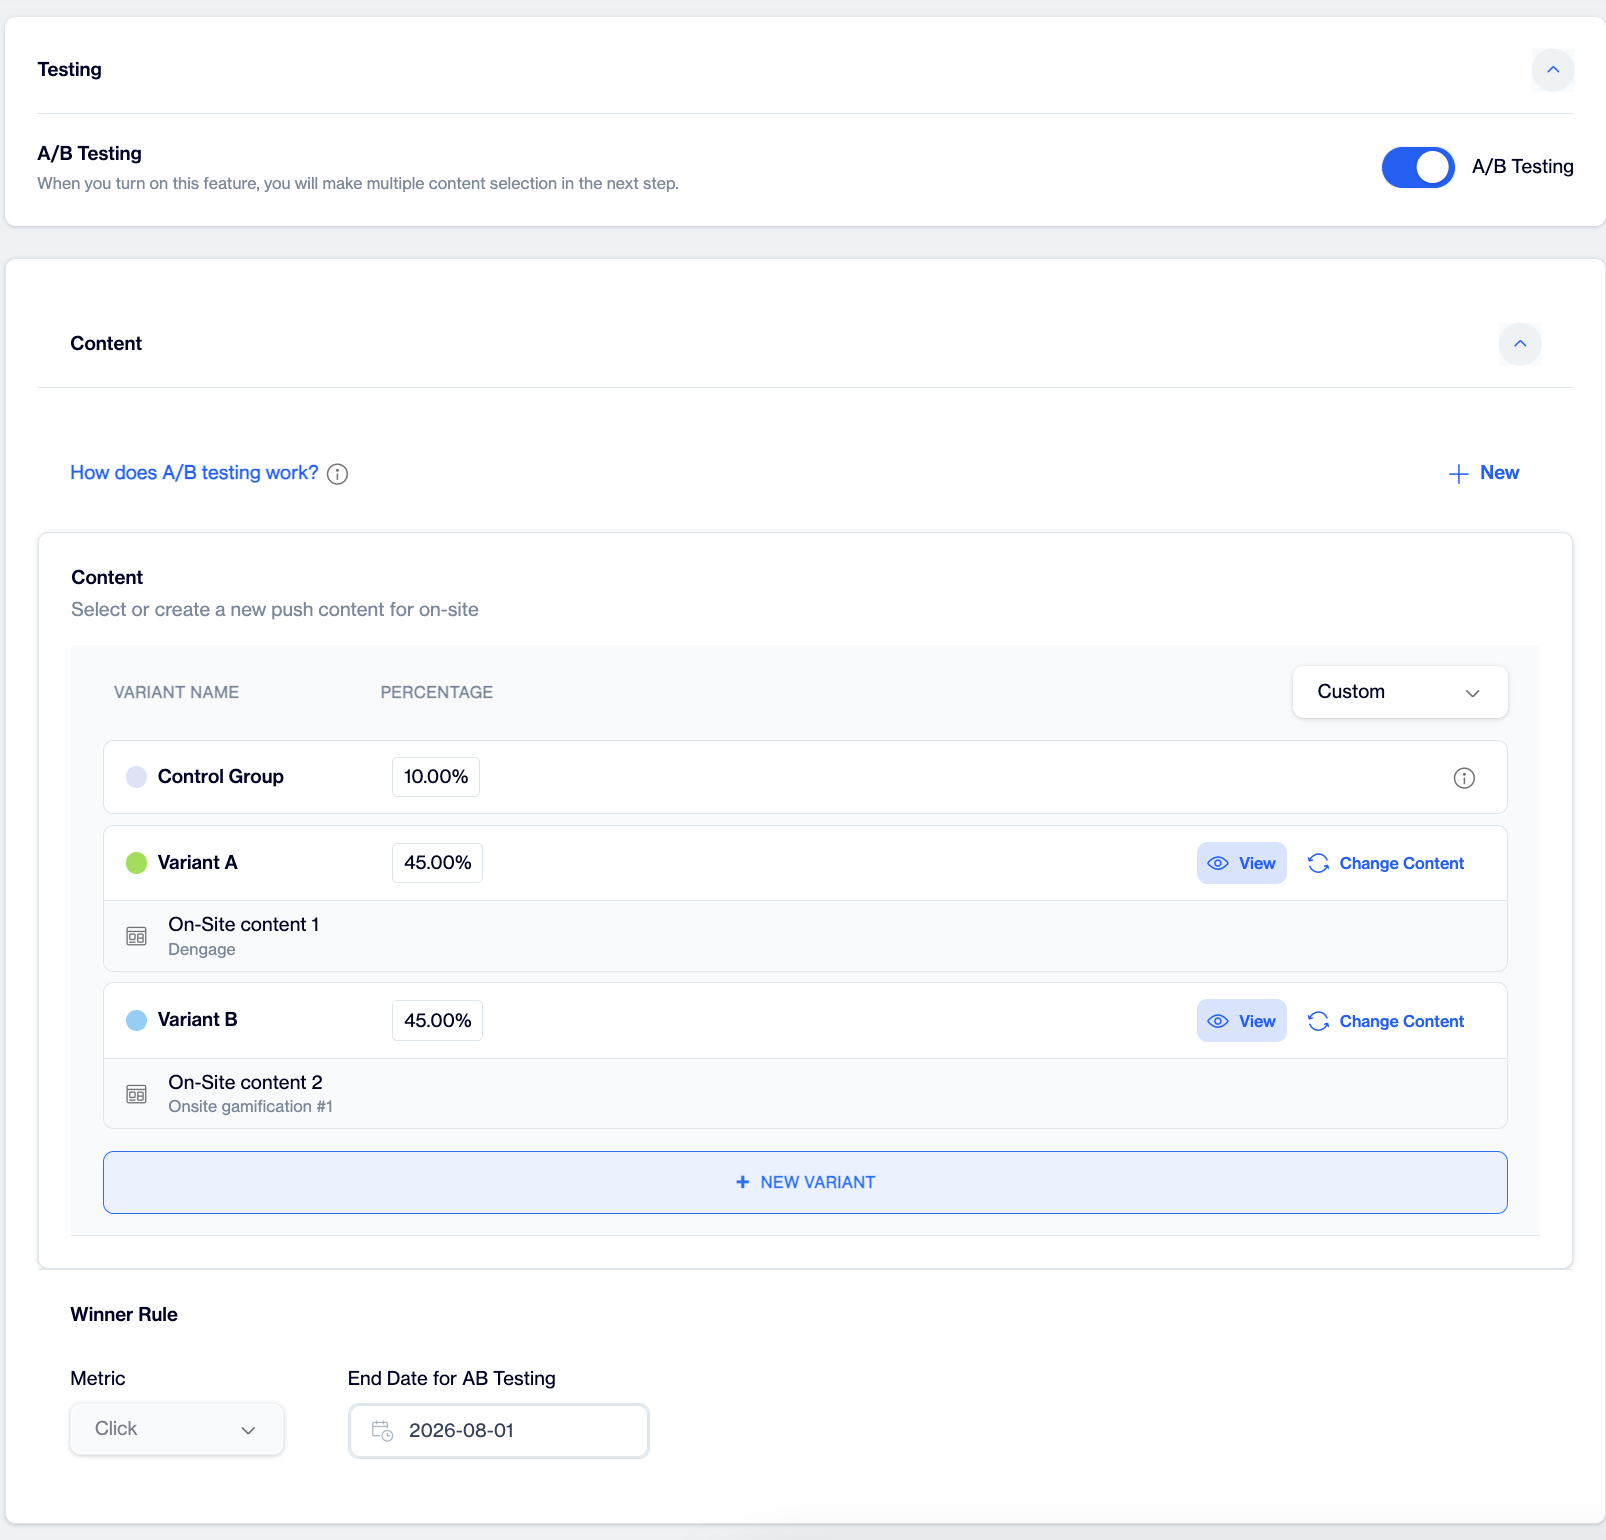
A/B Testing
4. Select the content
- In the Select Content list, find the on-site content the campaign should display — search by name or use Filter to narrow by language.
- Click a row to select it, or click + New to create a content without leaving the setup.
- Click Next. The button becomes active once a name is entered and a content is selected.
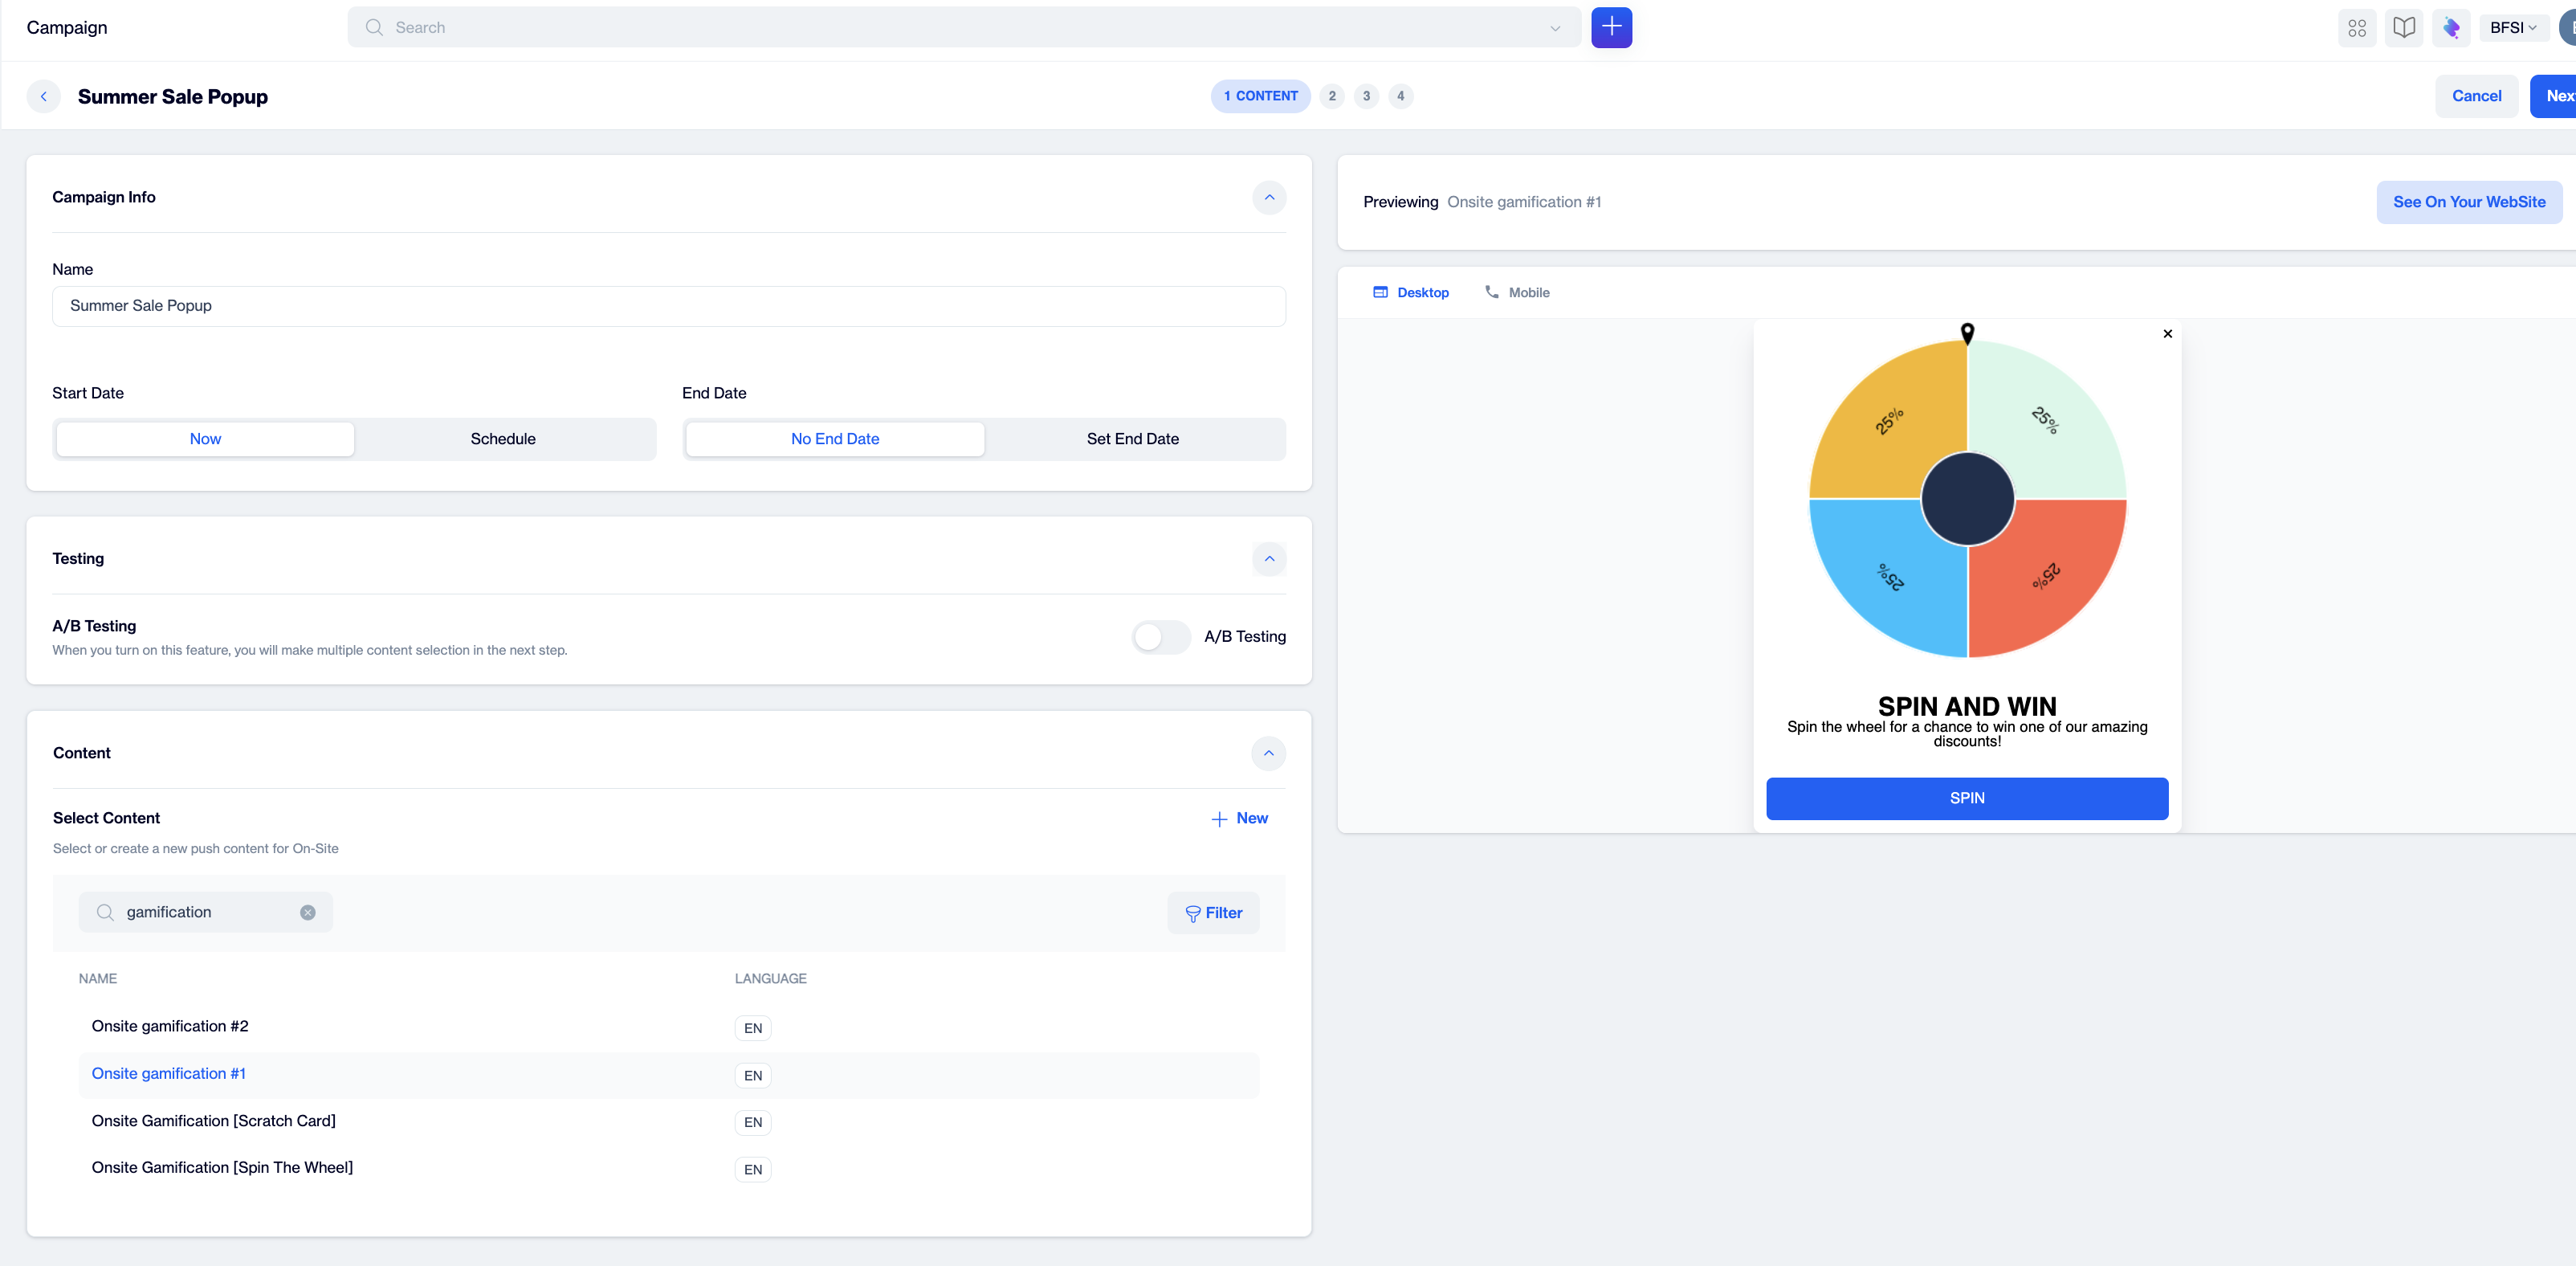
Select the Content
5. Choose the website and devices
On the Targeting step, under Targeting Device:
- Select the website the campaign runs on from the Select Website list. A website must be selected before you can continue.
- Use the Web and Mobile Web checkboxes to control the platforms. Both are selected by default; untick one to target only desktop or only mobile web visitors.
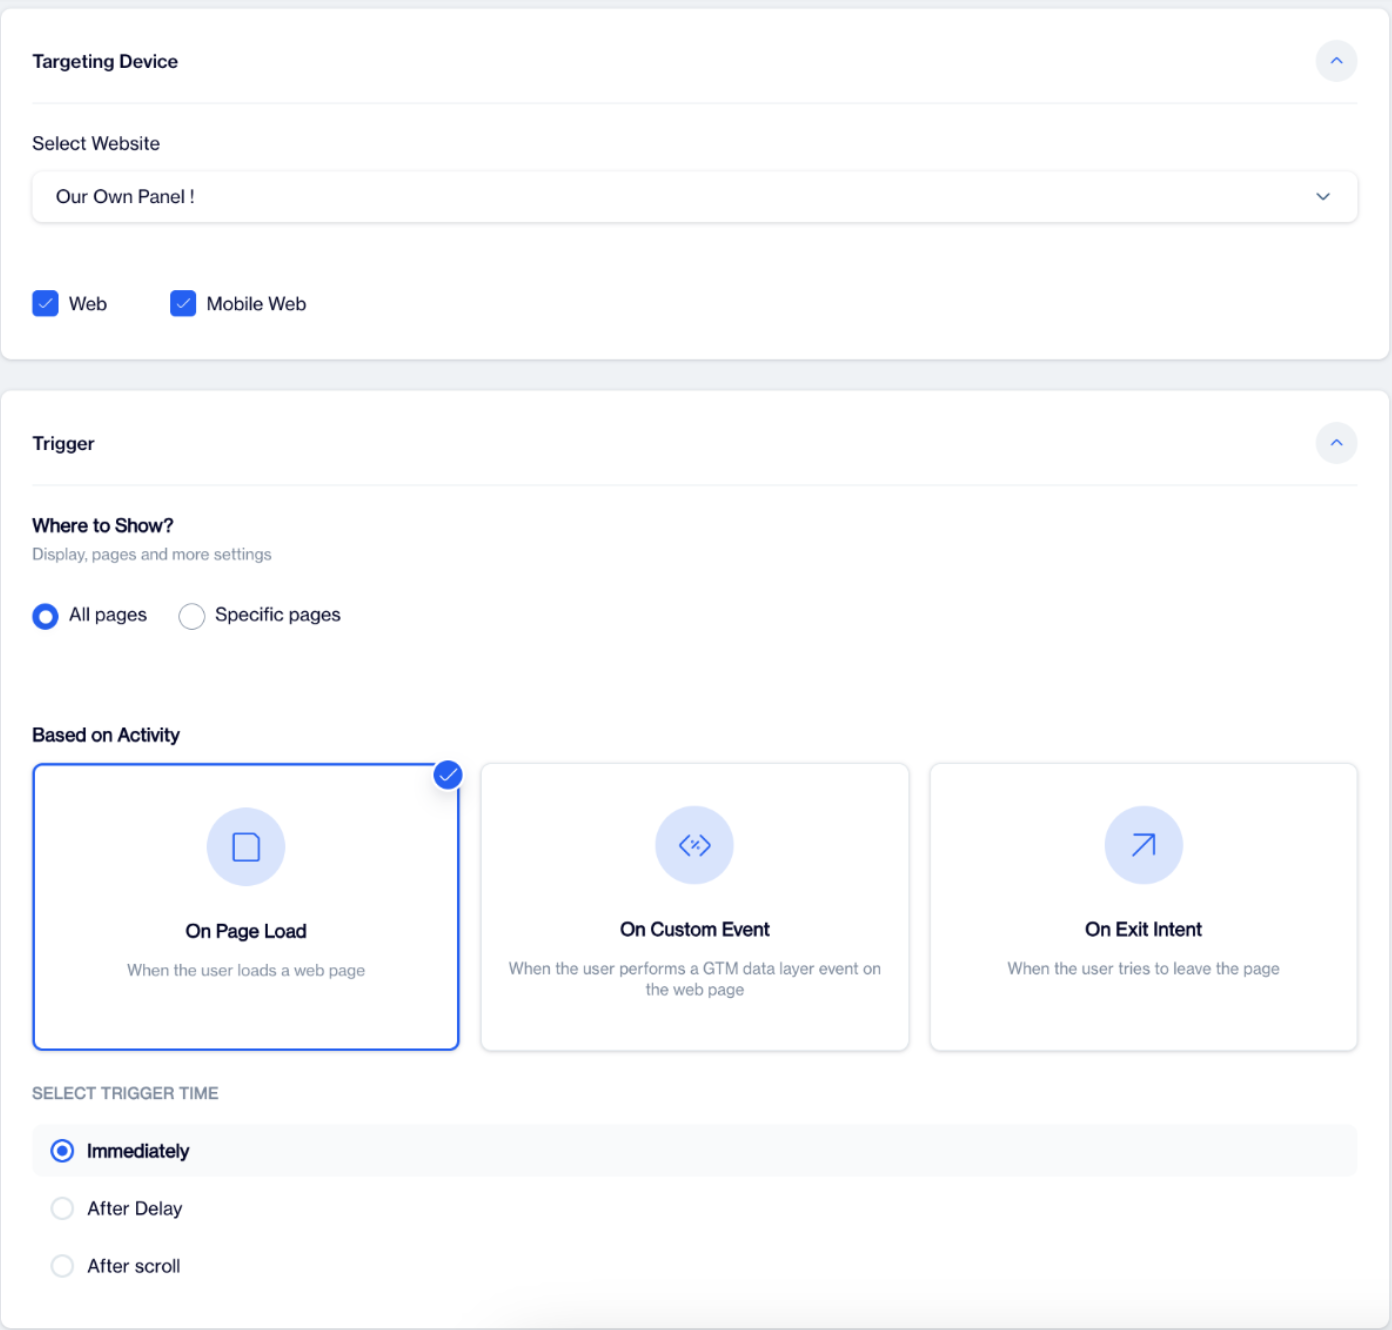
Targeting
6. Set where it appears
Under Trigger › Where to Show?, keep All pages (default) to show the campaign anywhere on the site, or choose Specific pages to target or exclude URL paths. Each rule compares the URL Path with an operator — is, is not, contains, does not contains, starts with, and similar — against a value you type (for example, contains "/products/"). Click + to add more rules.
7. Set when it appears
Under Based on Activity, pick one of the three trigger cards:
- On Page Load — when the visitor loads a page. Then choose the trigger time: Immediately, After Delay (wait N seconds after page load), or After scroll (show when the page is scrolled by N percent).
- On Custom Event — when the visitor performs a GTM data layer event on the page. Enter the Event Name to listen for.
- On Exit Intent — when the visitor is about to leave the page. No additional settings.
8. Select the audience
On the Audience & Delivery step, All User (default) shows the campaign to every visitor who matches the targeting rules. Choose Advanced Filter to narrow the audience:
- Click + Add Filter inside the group, pick a filter from the categorized menu, set its operator and value, and click Add.
- Add more filters to combine conditions — they are joined with AND by default and can be switched to OR — and use Add Group for separate rule groups.
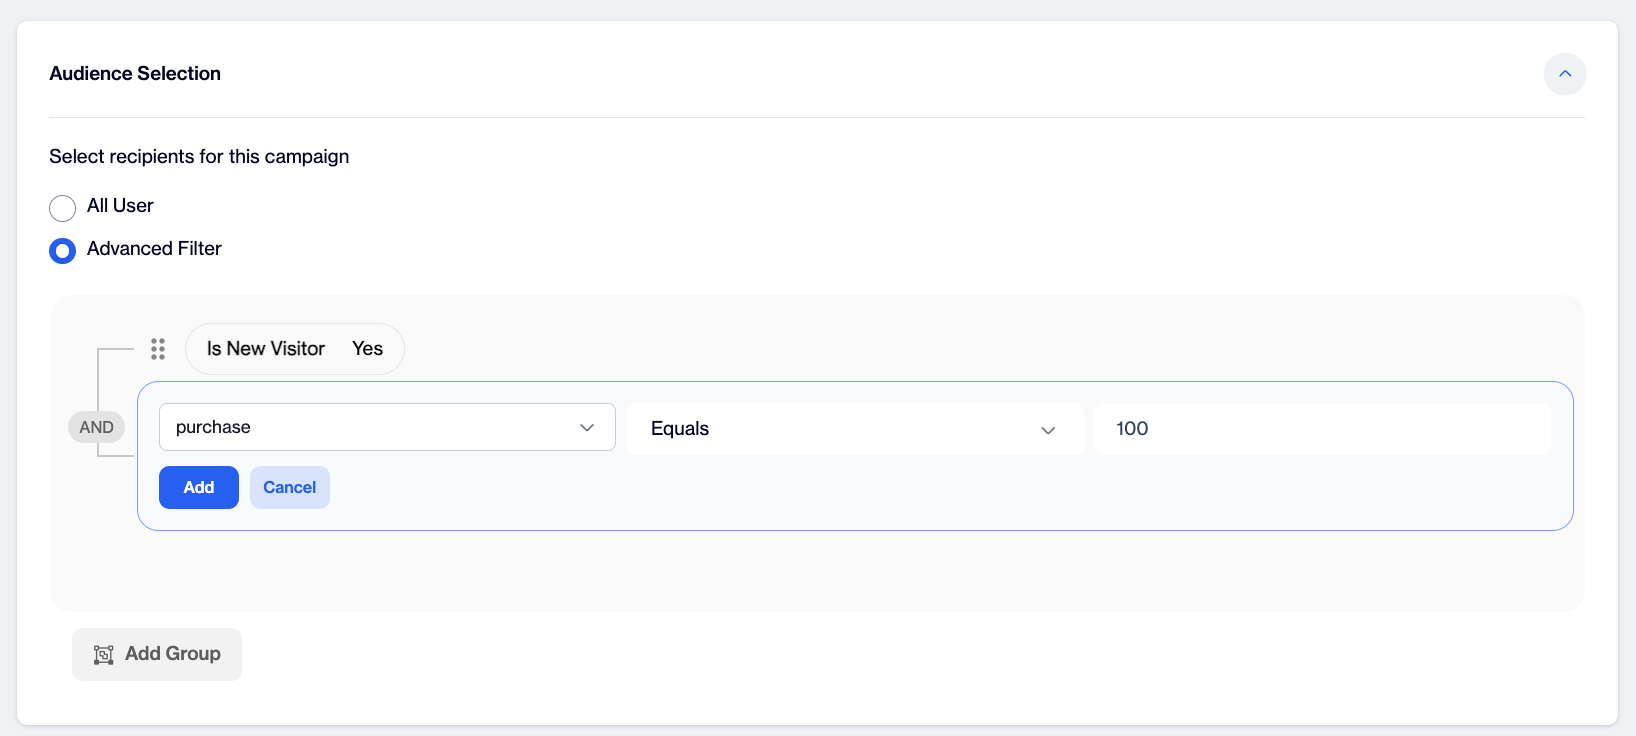
Audience Selection
Filter categories include Technology (browser, operating system, web push support and permission, screen size, language, time zone), Visit, Traffic Source, Query String, Local Storage, Cookie, Data Layer, and Data Space — enough to target segments like visitors from a specific campaign source or visitors with a given data-layer value. See Filters for On-site Targeting Campaigns for the full list.
9. Set delivery limits and priority
In Delivery Settings, control how often the campaign is shown:
- Campaign Priority — High, Medium (default) or Low. When several campaigns qualify for the same page view, the higher-priority one is shown. The exact ranking among active campaigns can be changed later from the Priority page.
- Show Once Per Visitor — each visitor sees the campaign only once.
- Delivery Limits (default) — "Show to each visitor up to N times" and "Show to each visitor once in every N minutes" (both default to 5).
- Stop after engagement — on by default; hides the campaign for a visitor once they interact with it.
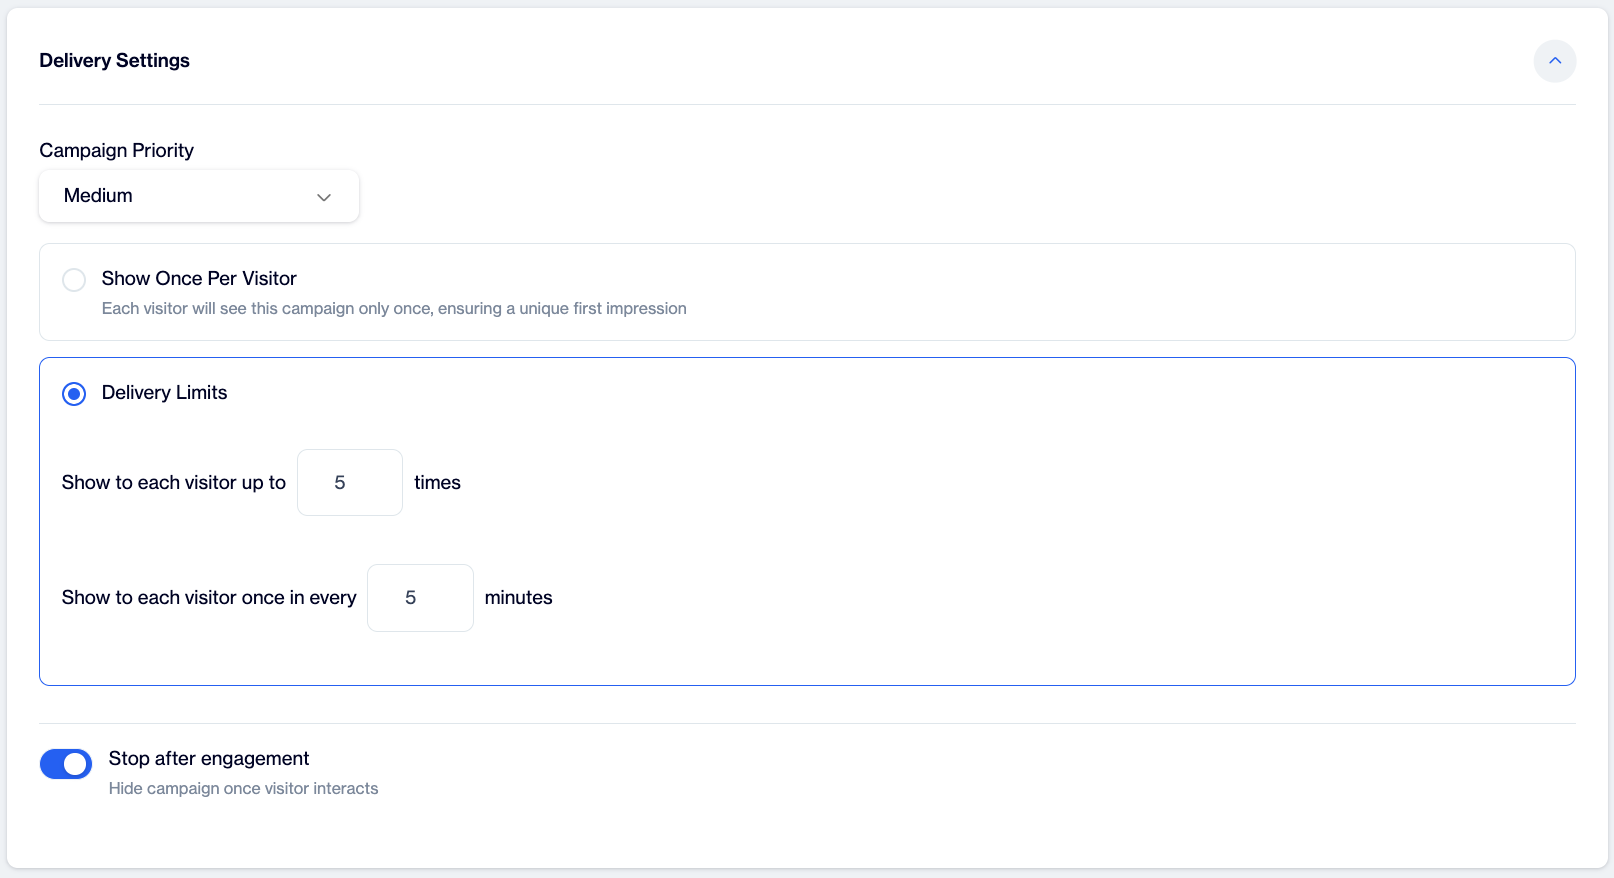
Delivery Settings
10. Review and save
The Summary step shows the whole configuration on one screen — campaign info, website and platform, audience, selected content, triggers, delivery limits, duration, and the campaign's current priority ranking. Use Edit on a card to jump back to the related step. When everything is correct, click Save. The campaign is created and starts according to its start date — immediately if you chose Now.
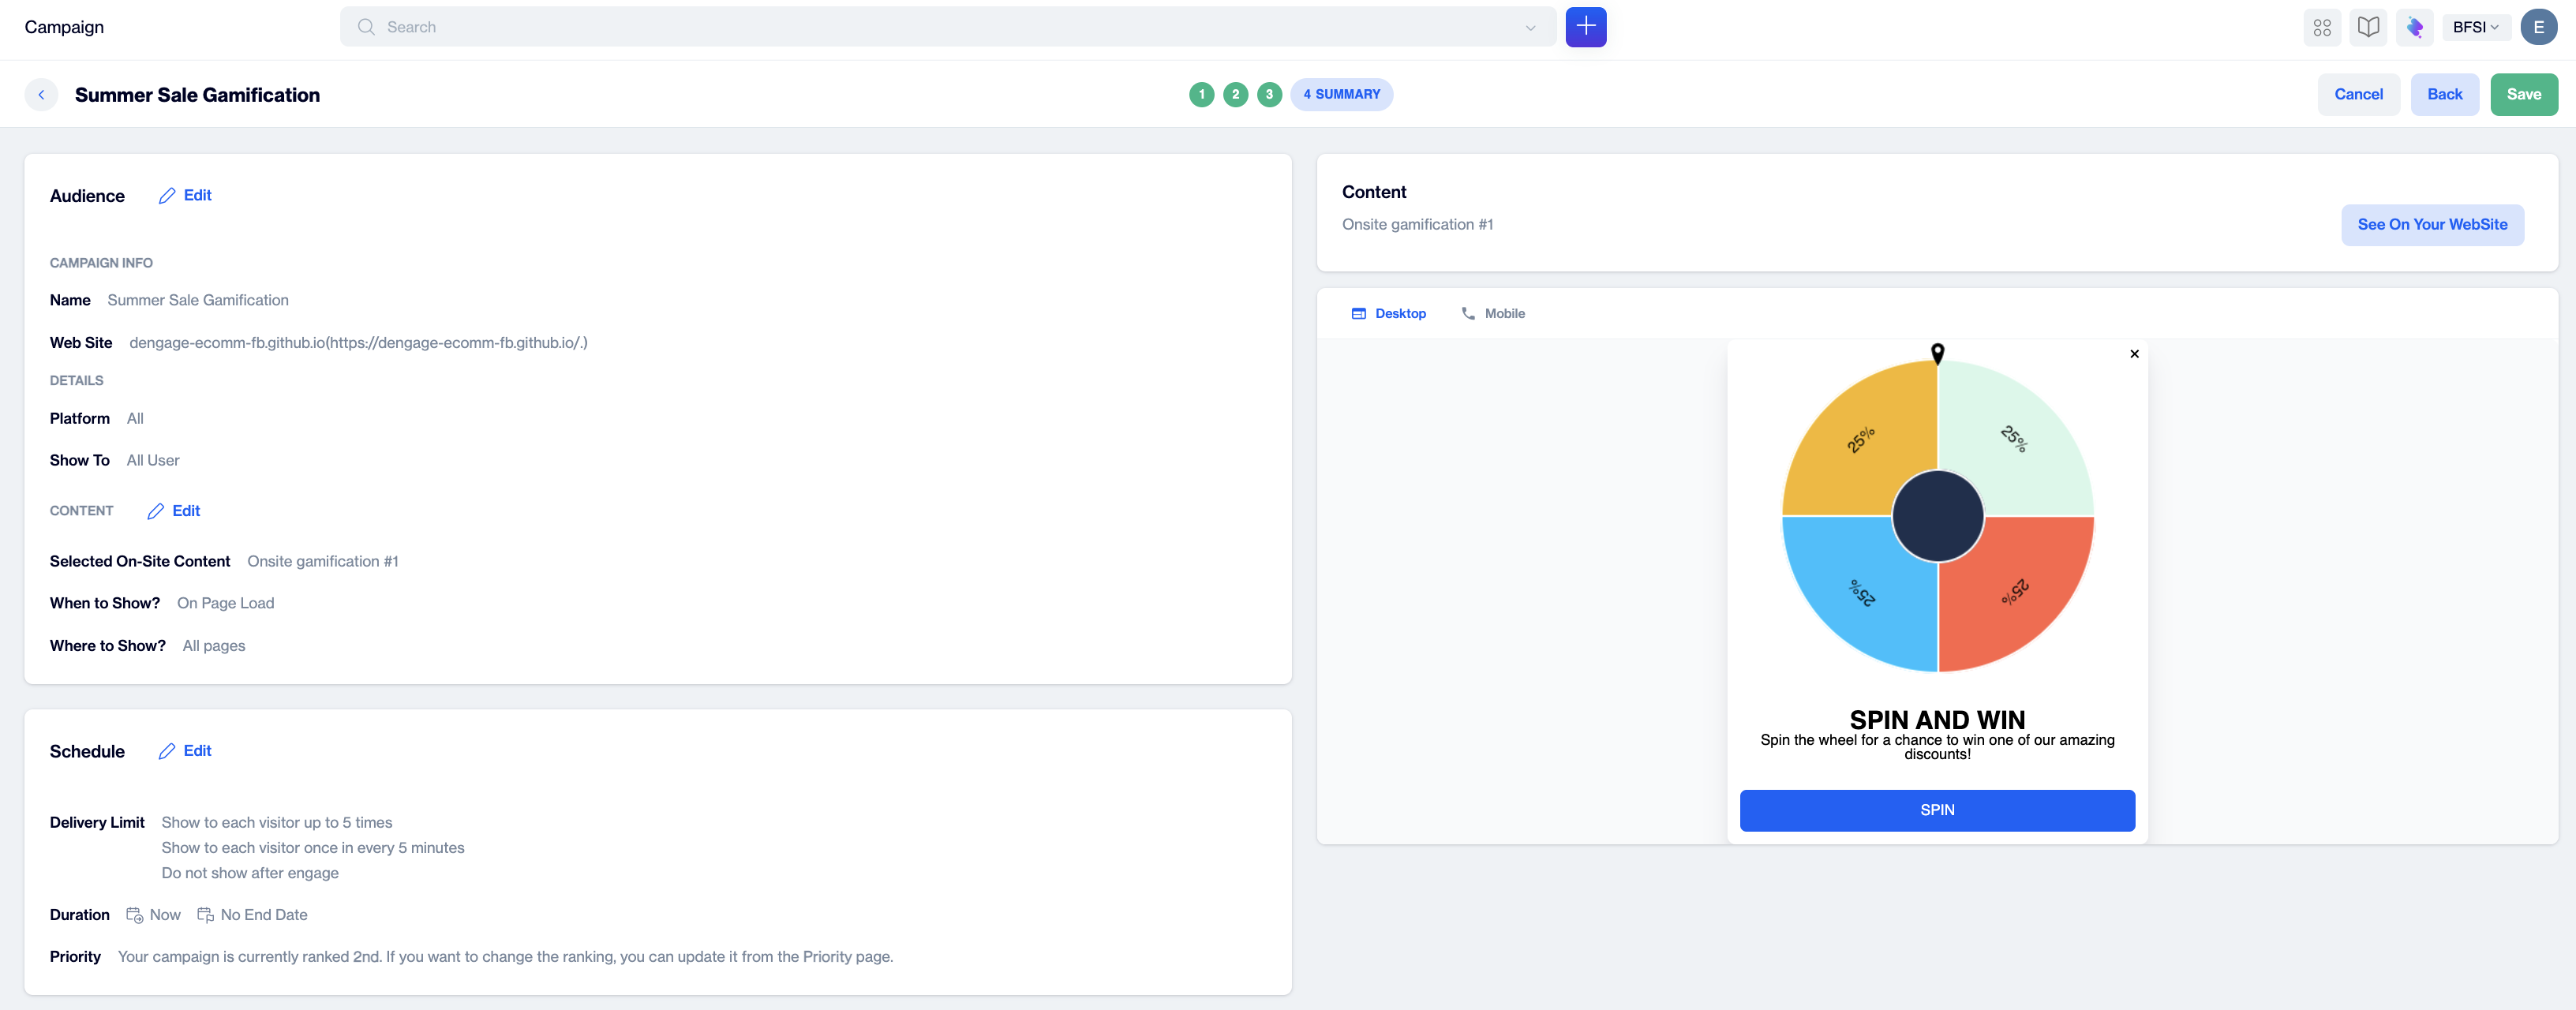
Summary
11. Test before you go live
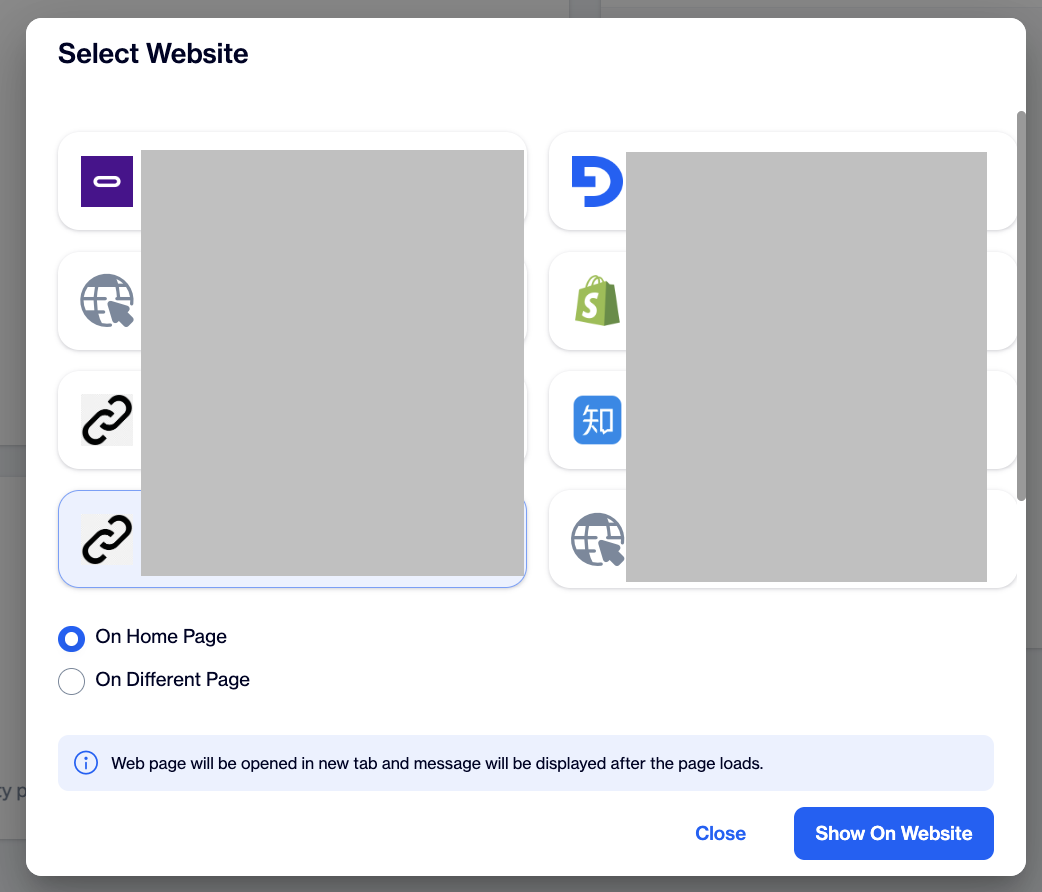
On setup steps 2–4, use the preview panel on the right: the Desktop / Mobile toggle shows how the content responds to each device type, and See On Your WebSite opens your live site with the content rendered on top so you can check placement in context.
Testing
The content editor additionally offers a Test button (see the content on your website, send a test on-site message, switch variations) — testing at both stages is the recommended flow before going live.
Updated 2 months ago