
Brand Kit
A Brand Kit stores the visual identity of your brand in Dengage: your logo, favicon, colors, fonts, button styles, and reusable header and footer blocks. Zeki AI reads the Brand Kit every time it generates content, so the emails, push notifications, in-app messages and on-site designs it produces look like your brand. You can also reuse the same assets when you build content manually.
The Brand Kit controls how your brand looks. The AI Brand Persona controls how your brand sounds. Set up both to get consistent AI-generated content.
Why create a Brand Kit
Without a Brand Kit, Zeki AI has no reference for your brand style, so generated layouts look generic and can differ from one campaign to the next. A Brand Kit fixes this in three ways:
- Consistency. Every generated template uses the same colors, fonts, logo and button styles.
- Speed. You define the header, footer and buttons once and reuse them in every campaign instead of rebuilding them.
- Flexibility. You can keep several Brand Kits in one account, for example one per brand or market, and mark one as the default.
Before you start
Prepare the following items so you can complete the Brand Kit in one sitting:
| Item | Requirement | Example |
|---|---|---|
| Brand name | The name shown in the Brand Kit list and used by Zeki AI as brand context. | Demo Airlines |
| Website URL | Public address of your brand site. Zeki AI analyzes it when you click Get Style with Zeki. | https://www.demoairlines.com |
| Logo file or URL | JPEG or PNG, up to 5 MB. | demo-airlines-logo.png |
| Favicon file or URL | ICO or PNG, up to 1 MB. A favicon is the small square icon that browsers show next to a site name. | demo-airlines-favicon.ico |
| Brand colors | Hex codes for a primary and a secondary color. A hex code is a six-character color value that starts with #. | #125CFA and #1C2C46 |
| Fonts | Choose from the eight web-safe font families in the app. | Roboto, sans-serif |
| Header and footer text | Short text you want at the top and bottom of every template, such as a tagline, legal text or contact details. | See the examples in the Header and Footer sections. |
Open the Brand Kit page
Go to Settings > Campaign Configurations > Brand Kit.
The page lists every Brand Kit in your account. A Default badge marks the Brand Kit that Zeki AI uses automatically.
| Column | What it shows |
|---|---|
| Brand Name | The name you entered in General Settings. Click it to open the Brand Kit for editing. |
| Website | The website URL you entered. |
| Update Date | Date and time of the last save. |
| Created By | The user who created the Brand Kit. |
Click the three-dot menu at the end of a row to Edit, Duplicate, Set as Default or Delete a Brand Kit. See Manage existing Brand Kits for details.
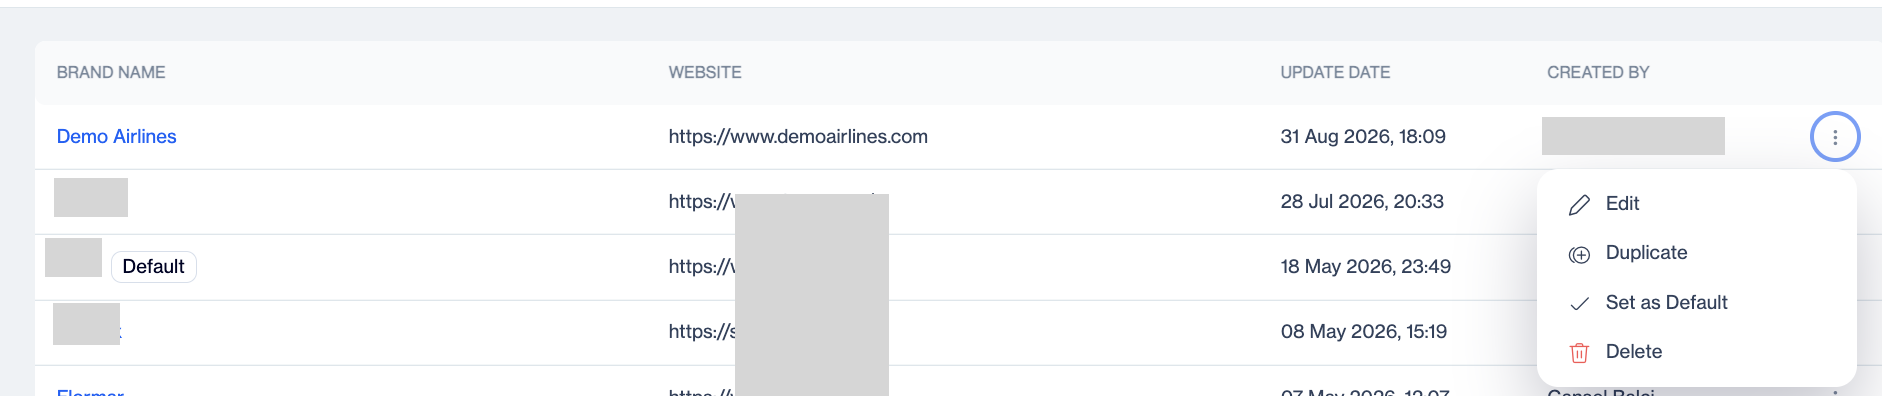
The Brand Kit list. The Default badge marks the Brand Kit that Zeki AI uses automatically.
Create a Brand Kit
Click Create New at the top right of the Brand Kit page. The Create Brand Kit screen opens with seven sections: General Settings, Logo Upload, Favicon Upload, Colors, Fonts, Buttons, Header and Footer. Fill in the sections in order, then save at the end.
Step 1: Enter general settings
- In Brand Name, type the name of your brand. This name appears in the Brand Kit list.
- In Website, type the full URL of your brand website, for example
https://www.demoairlines.com. - Optional: click Get Style with Zeki. Zeki AI visits your website, detects its colors, fonts and visual elements, and fills the matching fields in the Brand Kit for you. Review each suggested value and change anything that does not match your brand guidelines.
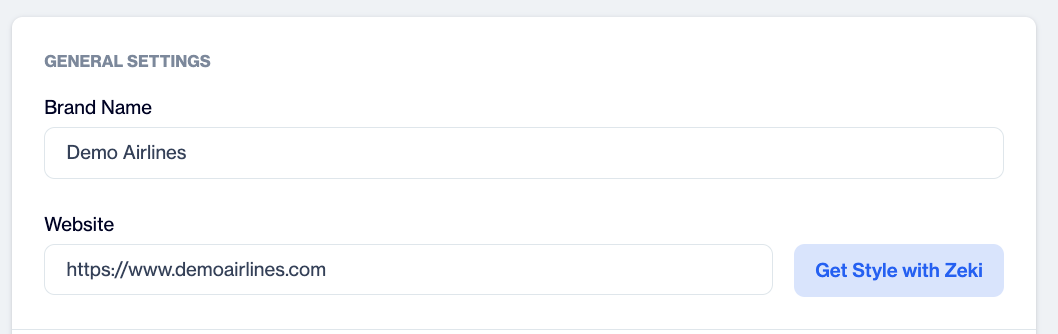
Enter the brand name and website, then click Get Style with Zeki to let Zeki AI suggest colors and fonts from your site.
Step 2: Upload your logo
The logo appears in AI-generated templates and visuals, so every piece of content carries the correct branding.
- In Logo Upload, select the URL tab and paste a direct link to the image file, or select the Upload tab and drag and drop the file into the box or click Select to pick it from your computer.
- Check the preview. To change the file later, click Replace Image; to delete it, click Remove.
Supported formats: JPEG, PNG. Maximum size: 5 MB.
Step 3: Upload your favicon
Zeki AI uses the favicon in layouts that need a small brand icon, for example compact browser-based elements.
- In Favicon Upload, choose URL or Upload, as for the logo.
- Add the file and check the preview. Use Replace Image or Remove to change it later.
Supported formats: ICO, PNG. Maximum size: 1 MB.
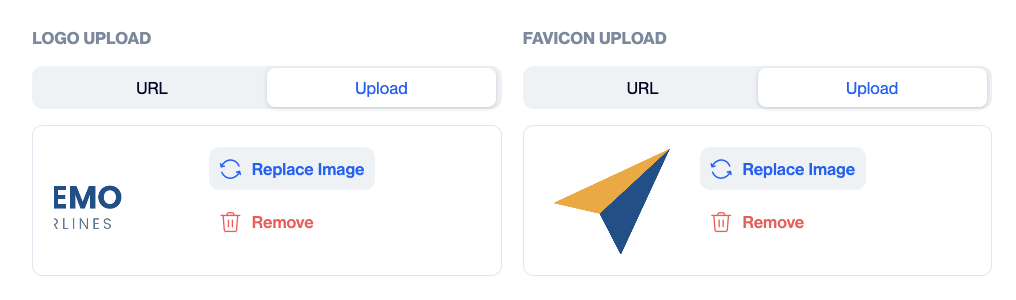
Upload a logo (JPEG or PNG, up to 5 MB) and a favicon (ICO or PNG, up to 1 MB) by URL or from your computer.
Step 4: Set your brand colors
Colors tell Zeki AI which palette to use in generated templates, so every visual stays recognizable.
- In Colors, click the color circle next to Primary Color to open the color picker, or type a hex code directly in the field, for example
#125CFA. - Repeat for Secondary Color, for example
#1C2C46.
Step 5: Choose your fonts
Fonts define how text looks in every template. The Brand Kit offers web-safe font families, which display correctly in all email clients and browsers.
- In Fonts, open the Primary Font Family list and select a font. Use the primary font for headings and body text.
- Open the Secondary Font Family list and select a font for supporting text such as captions or footers.
Available font families: Courier New, Georgia, Helvetica/Arial, Roboto, Tahoma, Times New Roman, Trebuchet MS and Verdana. The default for both fields is Roboto, sans-serif.
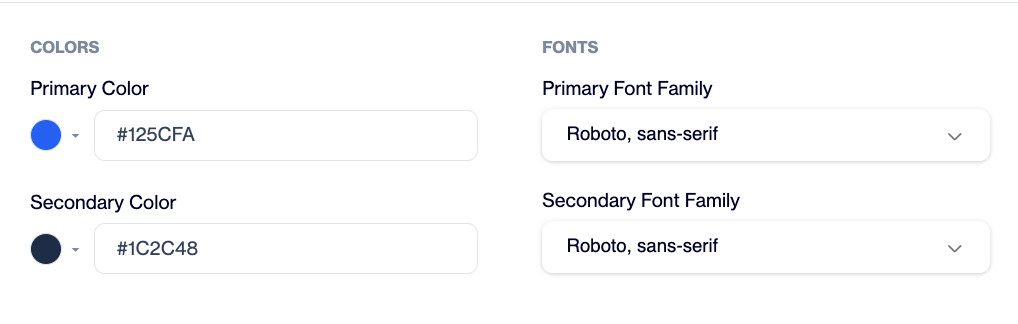
Set a primary and a secondary color, then choose a primary and a secondary font family.
Step 6: Define your buttons
Button styles control how call-to-action buttons look. A call to action is the button that asks the reader to act, for example "Shop now" or "Book a flight". You can define a Primary button for the main action and a Secondary button for less important actions.
- In Buttons, click Create. The Create Primary Button window opens.
- Set the properties in the table below. The Preview at the top of the window updates as you type.
- Click Save. The button appears in the Buttons section as Primary Button.
- Click Create again to define the Secondary Button in the same way.
| Property | What it does |
|---|---|
| Background Color | Fill color of the button. |
| Border Color | Color of the button outline. |
| Border Radius | How rounded the corners are, in pixels. 0 gives square corners. |
| Border Width | Thickness of the outline, in pixels. |
| Text Color | Color of the button label. |
| Text Align | Position of the label inside the button. |
| Font Weight | Thickness of the label text, such as Normal or Bold. |
| Font Size | Size of the label text, in pixels. |
| Fit Content | When on, the button shrinks to the width of its label. When off, the button uses the full available width. |
To change a saved button, click the pencil icon next to it. To remove it, click the trash icon.
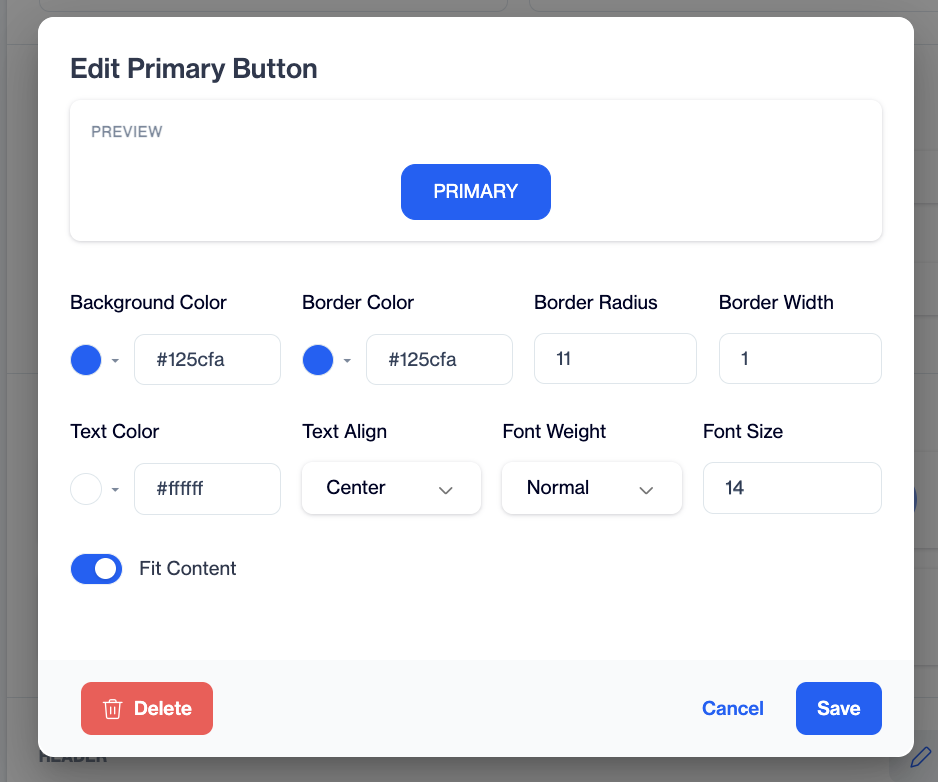
Style the primary button and check the live preview before you save.
Step 7: Create a header
The header is a reusable block at the top of your content layouts, for example a tagline or a short welcome line. Zeki AI places it at the top of generated templates.
- In Header, click Create. The Create Header Template editor opens.
- Type your header text. Use the toolbar to format it: paragraph style, bold, italic, text color, background color, alignment, bulleted and numbered lists, indentation, and a source code view for HTML.
- Click Save. A preview of the header appears in the Header section.
Step 8: Create a footer
The footer is a reusable block at the bottom of your content layouts. Teams usually put legal text, contact details and brand references here.
- In Footer, click Create. The Create Footer Template editor opens with the same toolbar as the header editor.
- Type your footer text and format it.
- Click Save. A preview of the footer appears in the Footer section.
To change a saved header or footer, click Edit. To remove it, click the trash icon next to the preview.
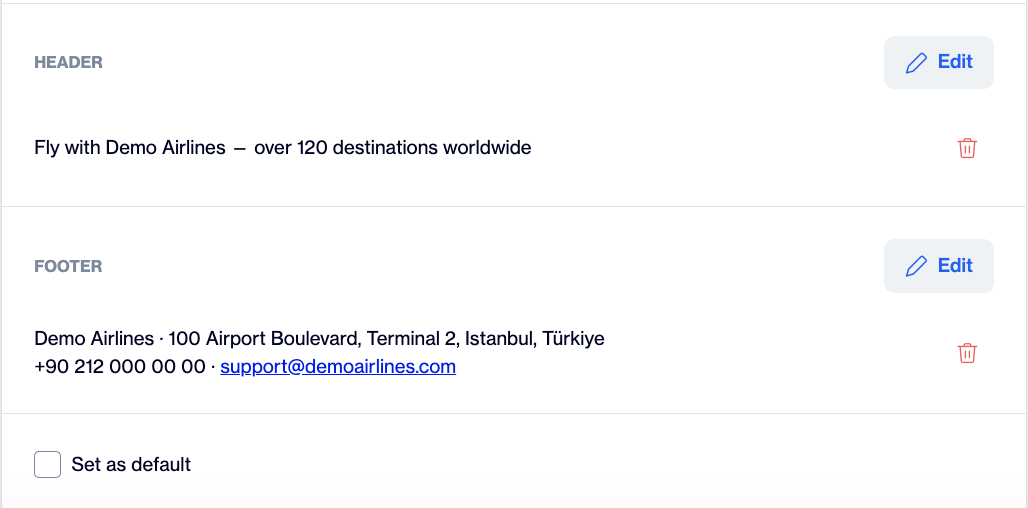
Write and format the header in the template editor. The footer editor works the same way.
Step 9: Set as default and save
- At the bottom of the screen, select Set as default if you want Zeki AI to apply this Brand Kit automatically whenever you do not select another Brand Kit. Only one Brand Kit holds the default role at a time.
- Click Save at the top right. The new Brand Kit appears in the list.
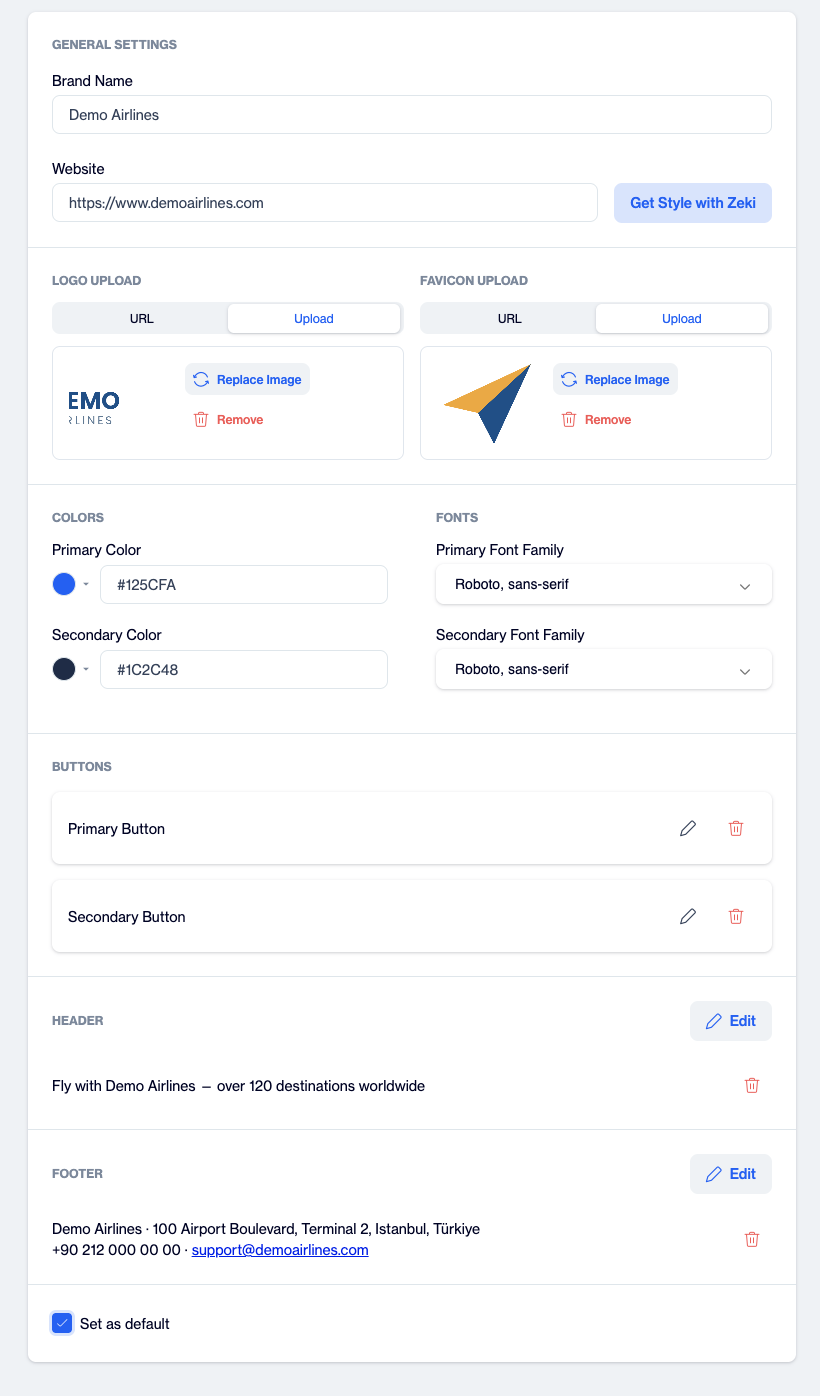
A completed Brand Kit with primary and secondary buttons, a header, a footer and the Set as default option.
Manage existing Brand Kits
Open the three-dot menu at the end of a row in the Brand Kit list to manage a Brand Kit.
| Action | What happens |
|---|---|
| Edit | Opens the Brand Kit. Change any field and click Update at the top right to save. You can also open a Brand Kit by clicking its name. |
| Duplicate | Creates a copy with the same settings. Use it to create a variation, for example a seasonal version or a second market, without starting from scratch. |
| Set as Default | Marks this Brand Kit as the one Zeki AI uses automatically. The Default badge moves to this row. This option does not appear for the Brand Kit that is already the default. |
| Delete | Removes the Brand Kit. |
How Zeki AI uses your Brand Kit
When you generate content with Zeki AI, Zeki applies the default Brand Kit unless you select another one. It uses the logo, favicon, colors, fonts, buttons, header and footer to build layouts that match your brand. Pair the Brand Kit with an AI Brand Persona so the wording matches your brand as well. See AI Text Creation for the full generation flow.
Good practices
- Use a PNG logo with a transparent background so it works on light and dark layouts.
- Keep colors, fonts and button styles identical to your published brand guidelines so AI output and manually built content match.
- Create one Brand Kit per brand or market and give each a clear name, such as "Demo Airlines TR" and "Demo Airlines UK".
- Review the header and footer whenever legal or contact details change, because every new template reuses them.
- Write header and footer text in plain language and keep it short. Screen readers read this text on every message.
Troubleshooting
| Problem | What to check |
|---|---|
| The logo or favicon does not upload. | Check the format and size: logo JPEG or PNG up to 5 MB, favicon ICO or PNG up to 1 MB. If you use a URL, make sure it points directly to the image file and is publicly accessible. |
| Get Style with Zeki is inactive. | Enter a website URL first. |
| Get Style with Zeki returns colors that do not match my brand. | Zeki AI reads the colors that appear most on your site. Correct the values manually before you save. |
| Generated content uses another brand's style. | Check which Brand Kit has the Default badge and set the right one as default, or select the correct Brand Kit during generation. |
Updated about 1 month ago