
A/B Split
The A/B Split node tests two versions of your content inside a single one-time campaign. It sends each variant to a small part of your audience, waits for a test period, and then sends the winning variant to everyone else.
You can use the A/B Split node with the Email, Push, On-Site, and In-App channels.
How A/B Split works
- You add the A/B Split node to your campaign flow and choose a channel.
- You assign a content to Variant A and to Variant B, and set the percentage of the audience that receives each one.
- Dengage sends both variants at the same time.
- Dengage waits for the test duration you set, in minutes.
- When the test ends, Dengage compares the click performance of the two variants and sends the winning variant to the rest of the audience.
Audience sizeUse the A/B Split node with a large audience. Each variant reaches only a small share of the audience, so a small audience produces test groups that are too small to compare with confidence. As a guideline, an audience of at least 100,000 recipients gives reliable results.
Add the node to your flow
- Open a one-time campaign and go to the Campaign Workflow step.
- Configure the Audience node first. The action nodes stay inactive until you select an audience.
- Drag the A/B Split node from the Actions list onto the canvas and connect it to the flow.
- Double-click the A/B Split node. The A/B Test window opens on the Channel step.
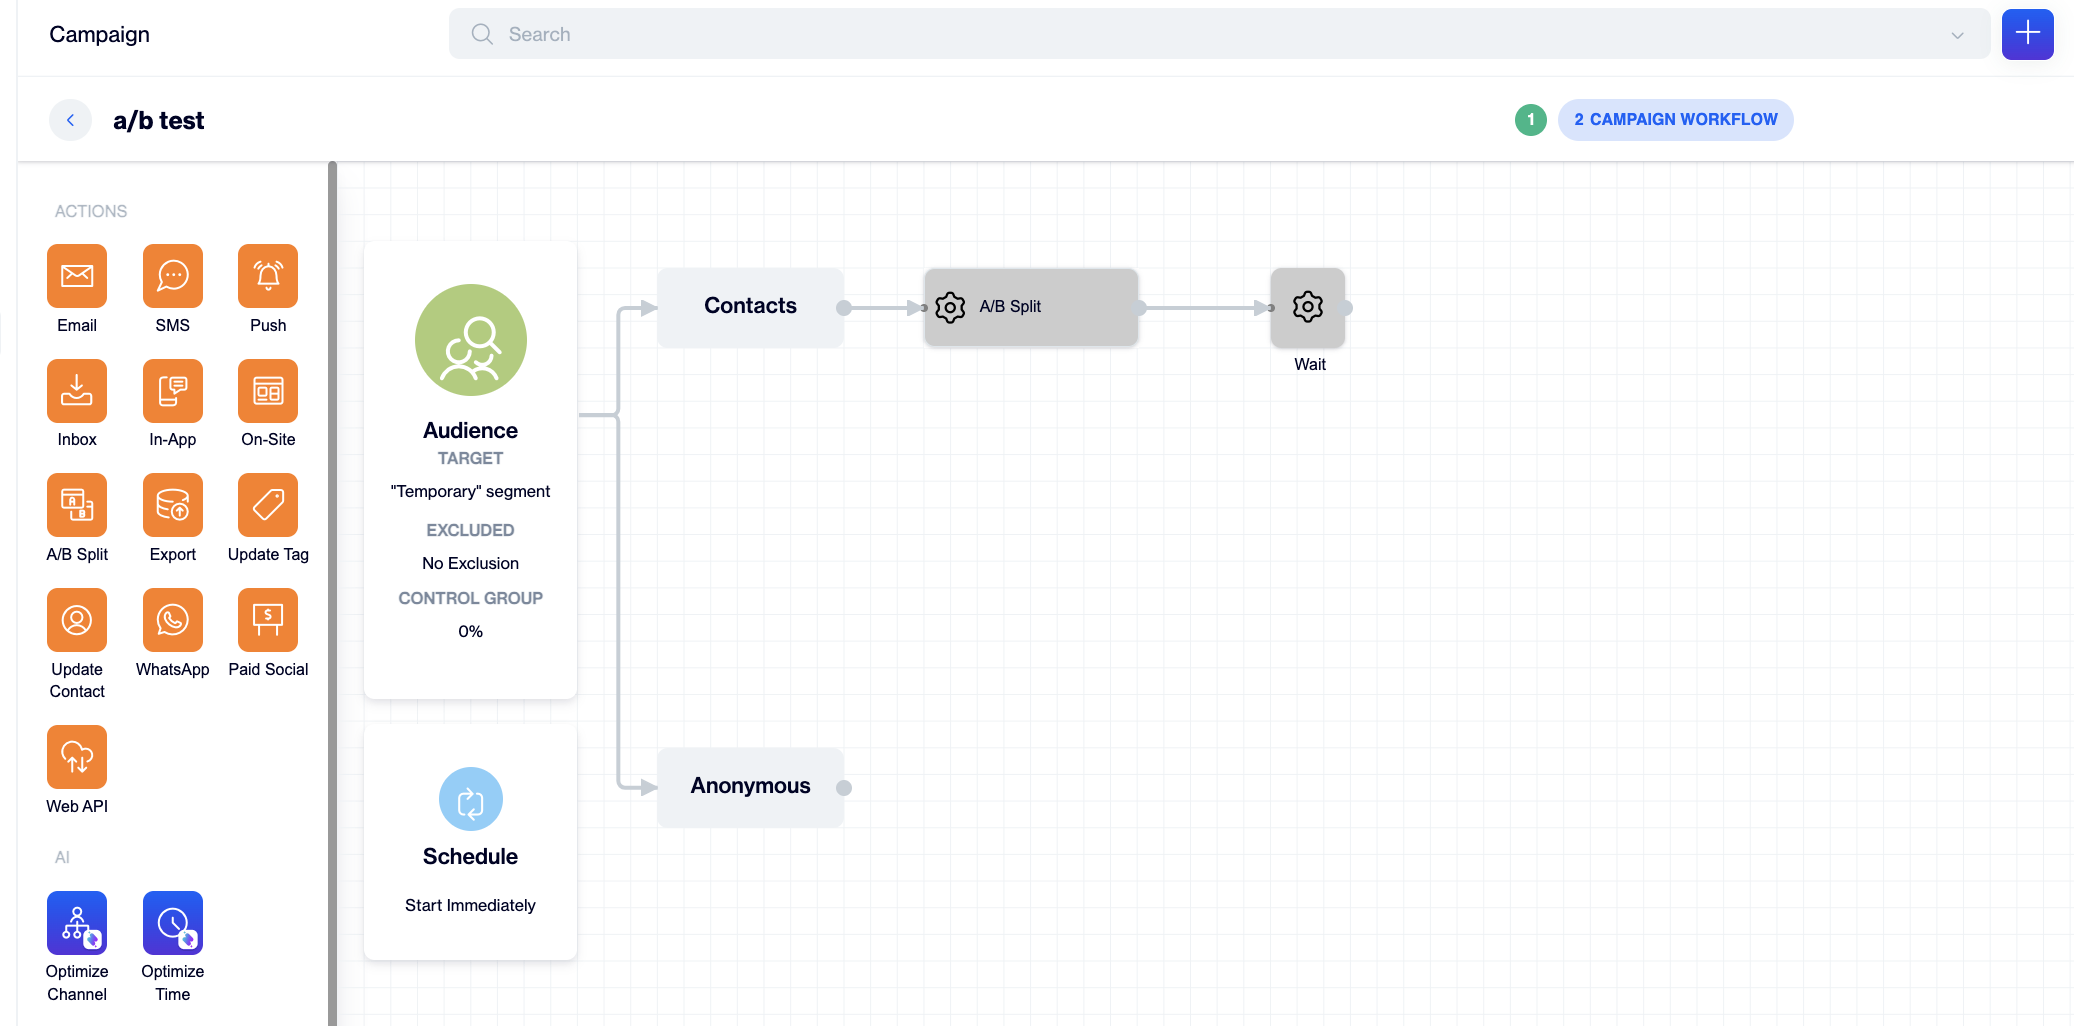
A/B Split Node
Step 1: Choose a channel
The Channel step lists the channels you can test: Email, Push, On-Site, and In-App.
Select a channel and click Next. The channel you pick decides which delivery settings appear on the next step.
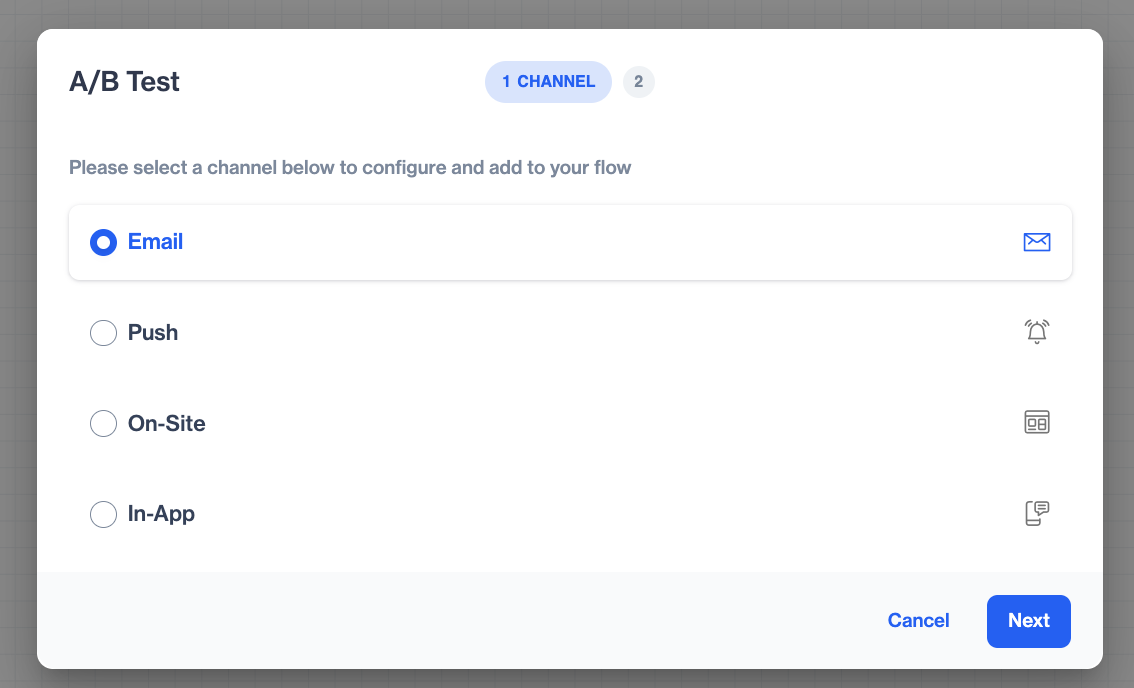
A/B Test - Channel Selection
Step 2: Configure the test
The Configure step has three parts: the distribution bar, the variant rows, and the A/B Optimization section. The delivery settings of the selected channel follow below them.
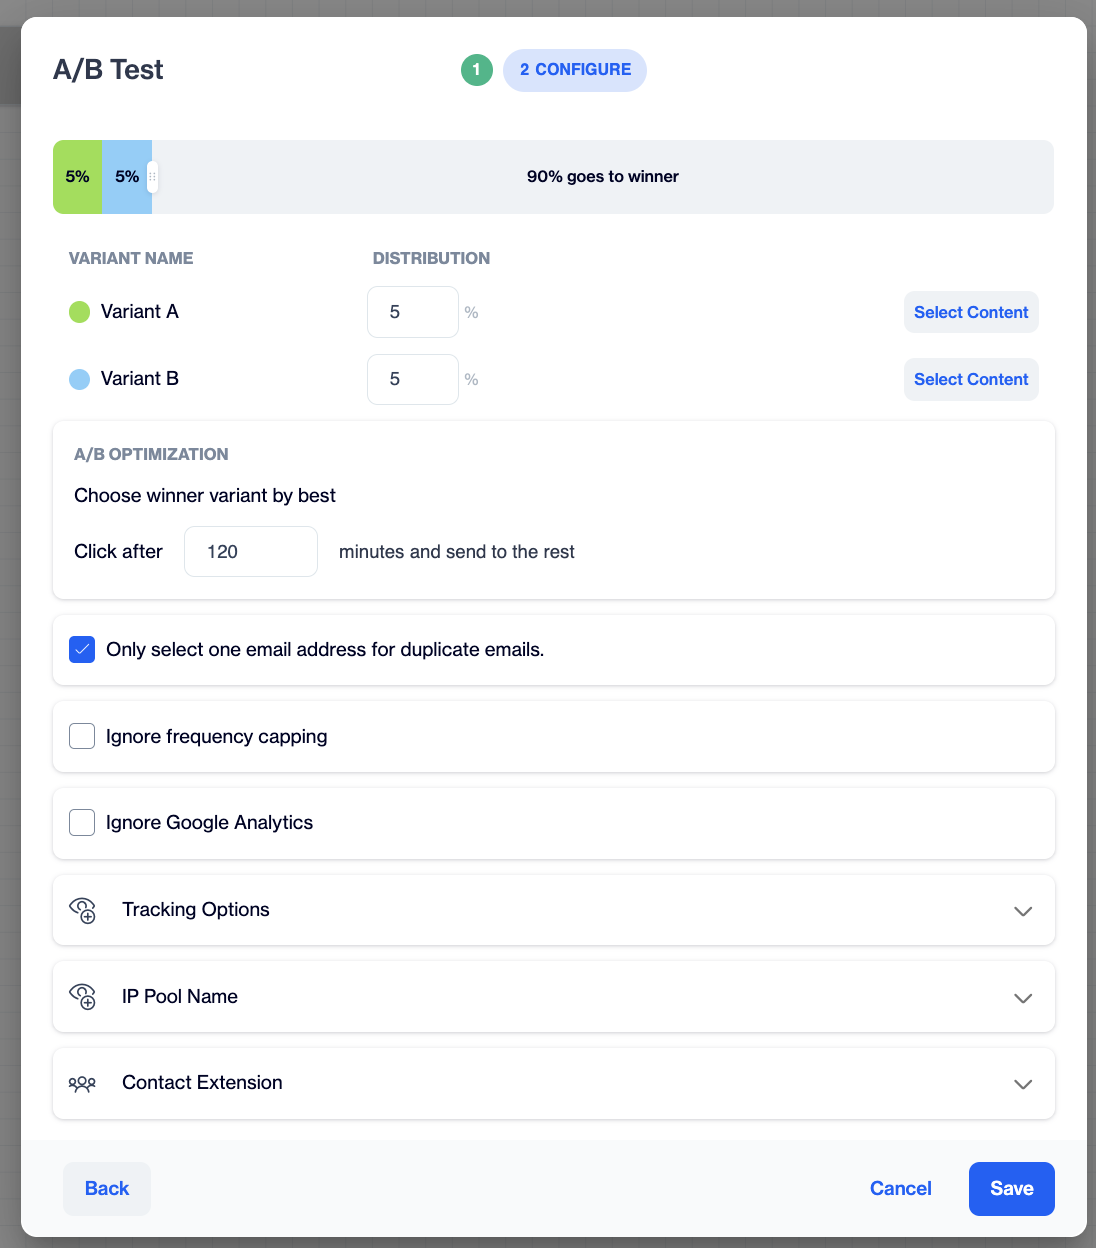
A/B Split Configuration
Distribution bar
The bar at the top shows how Dengage splits the audience. The green section is the share that receives Variant A. The blue section is the share that receives Variant B. The grey section is the share that waits for the winning variant, and its label shows the percentage, for example 90% goes to winner.
The bar updates as you change the percentages in the variant rows. You can also drag the handle between the sections to adjust the split.
Variant rows
Each variant has its own row with a Distribution field and a Select Content button.
- In the Variant A row, enter the percentage of the audience that receives this variant. The default is 5%.
- Click Select Content. The Select Content window lists the contents of the selected channel in folders. Use the search box or the Filter button to find a content, select it, and click Select.
- Repeat the same steps in the Variant B row.
After you select a content, its name appears under the variant row with a preview icon, and the button changes to Change Content. Click Change Content to pick a different content for that variant.
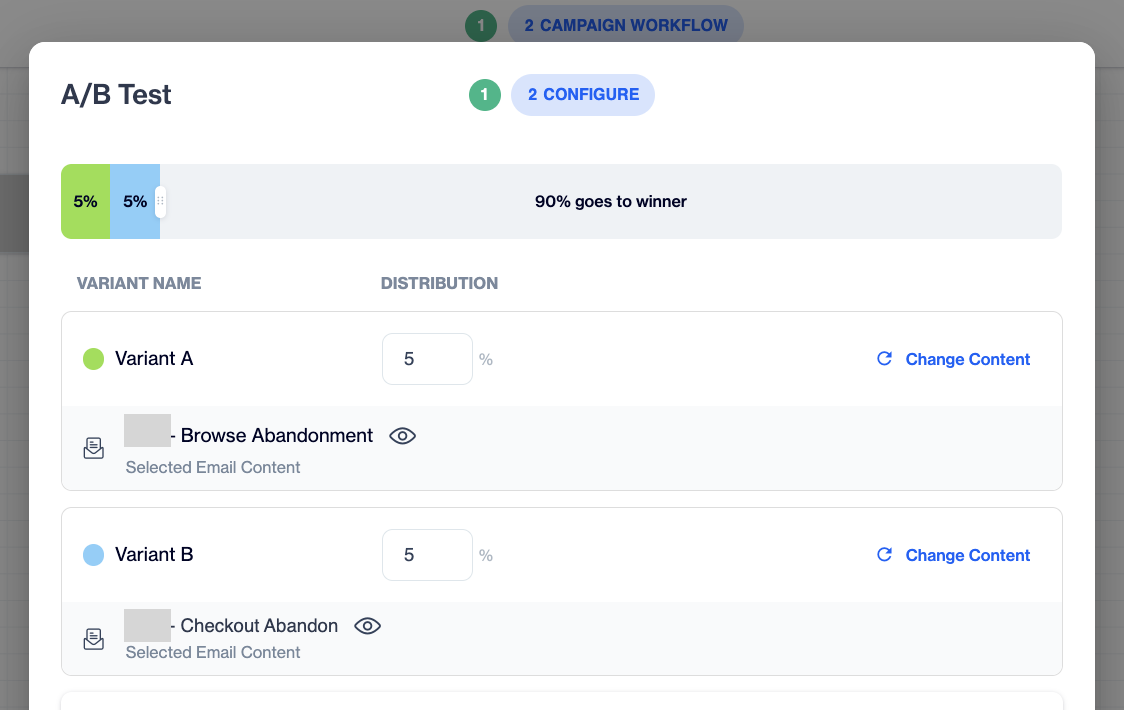
A/B Test - Content
Dengage sends the remaining share of the audience to the winning variant. For example, with 5% for Variant A and 5% for Variant B, the remaining 90% receives the winner.
A/B Optimization
This section sets how Dengage picks the winner. It reads Choose winner variant by best Click after [N] minutes and send to the rest.
Enter the test duration in minutes in the Click after field. The default is 120 minutes. When the test duration ends, Dengage compares the click performance of Variant A and Variant B. It then sends the variant with the better result to the rest of the audience. After the campaign runs, the read only summary of the node shows the same settings under Advanced Settings as A/B Optimization: Audience Threshold (the total share of the audience that receives the two test variants) and Wait Time (the test duration in minutes).

A/B Optimization
Channel settings
Below the A/B Optimization section, the window shows the delivery settings of the selected channel. These settings work the same way as they do in the standard channel nodes.
| Channel | Settings on the Configure step |
|---|---|
| Only select one email address for duplicate emails, Ignore frequency capping, Ignore Google Analytics, Tracking Options, IP Pool Name, Contact Extension | |
| Push | Select one or more application for sending, Only select recently used token for contacts, Ignore frequency capping, Ignore Google Analytics, Save to inbox with Expire message, Messages expire in |
| On-Site | Select one or more application for sending, Ignore Google Analytics, Messages expire in, Priority, When to display (Show on any page, Show on home page, Show on specific pages), Dismiss behavior (Show once, Show every), Delay |
| In-App | Select one or more application for sending, Ignore Google Analytics, Messages expire in, Priority, When to display (Show on any page, Show on specific pages), Dismiss behavior (Show once, Show every), Delay |
For Push, On-Site, and In-App, the application list fills in after you select the contents. The list shows only the applications that the selected contents can use.
Report the A/B test results
After the campaign runs, Dengage reports the test result for each variant in three places: the node summary on the campaign flow, the View Details window, and the send's detailed report. The variant based result is available for the Email, Push, On-Site, and In-App channels.
Node summary
Open the campaign and click the A/B Split node on the Flow tab. The A/B Send summary opens and shows:
- Template A and Template B: the content name of each variant, a WINNER or LOSER badge, the share of the audience the variant received, and its result count: Clicks for Email, Opens for Push, On-Site, and In-App.
- Started and Ended: the date and time the test started and the date and time Dengage picked the winner.
- A rate chart for the whole send. It shows the Open Rate for Email and Push and the Click Rate for On-Site and In-App.
- The counters of the whole send: Sent, Delivered, Opens, and CTR for Email; Sent, Delivered, and Opens for Push; Sent, Displayed, Click, and Dismissed for On-Site and In-App.
Click View Details to open the configuration, or View report to open the detailed report in a new tab.
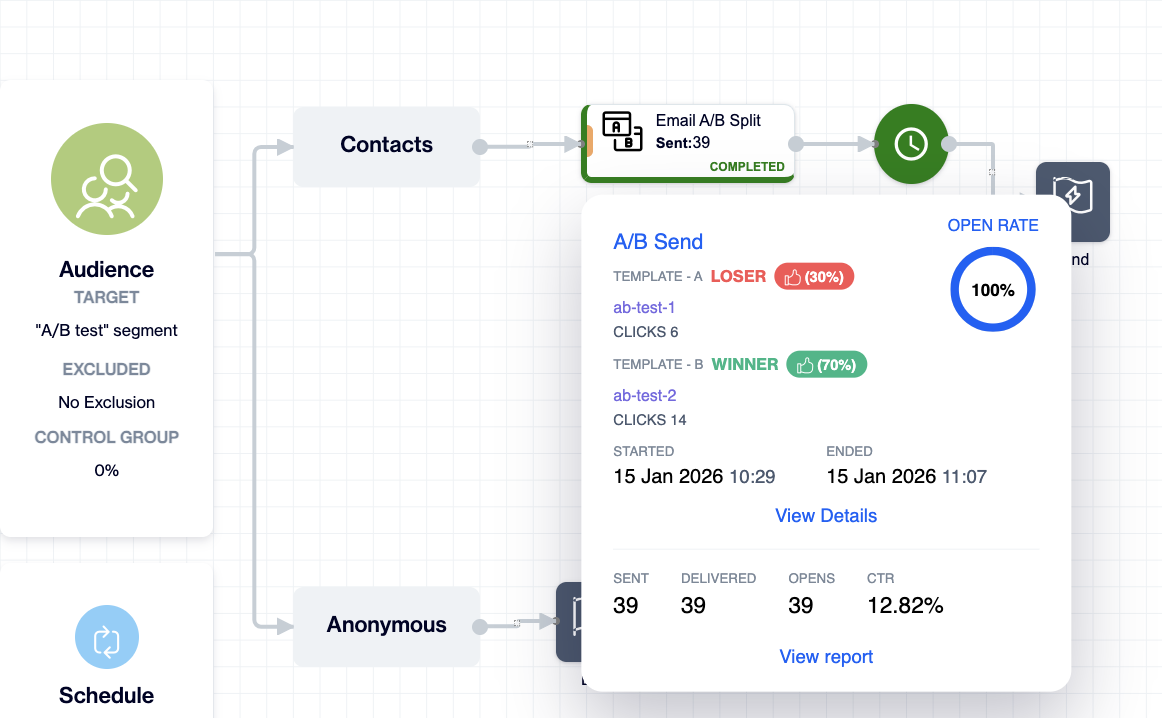
A/B Split node summary
View Details
Click View Details in the node summary. The read only A/B Test window shows the configuration of the completed test:
- The distribution bar with the share of each variant and the share that went to the winner, for example 10%, 10%, and 80% goes to winner.
- The Variant A and Variant B rows with their distribution and selected content. The winning variant carries a Winner tag.
- Selected Applications: the applications the send used. This part appears for the Push, On-Site, and In-App channels.
- Advanced Settings: the A/B Optimization values (Audience Threshold and Wait Time) and the delivery settings of the channel.
Click OK to close the window.
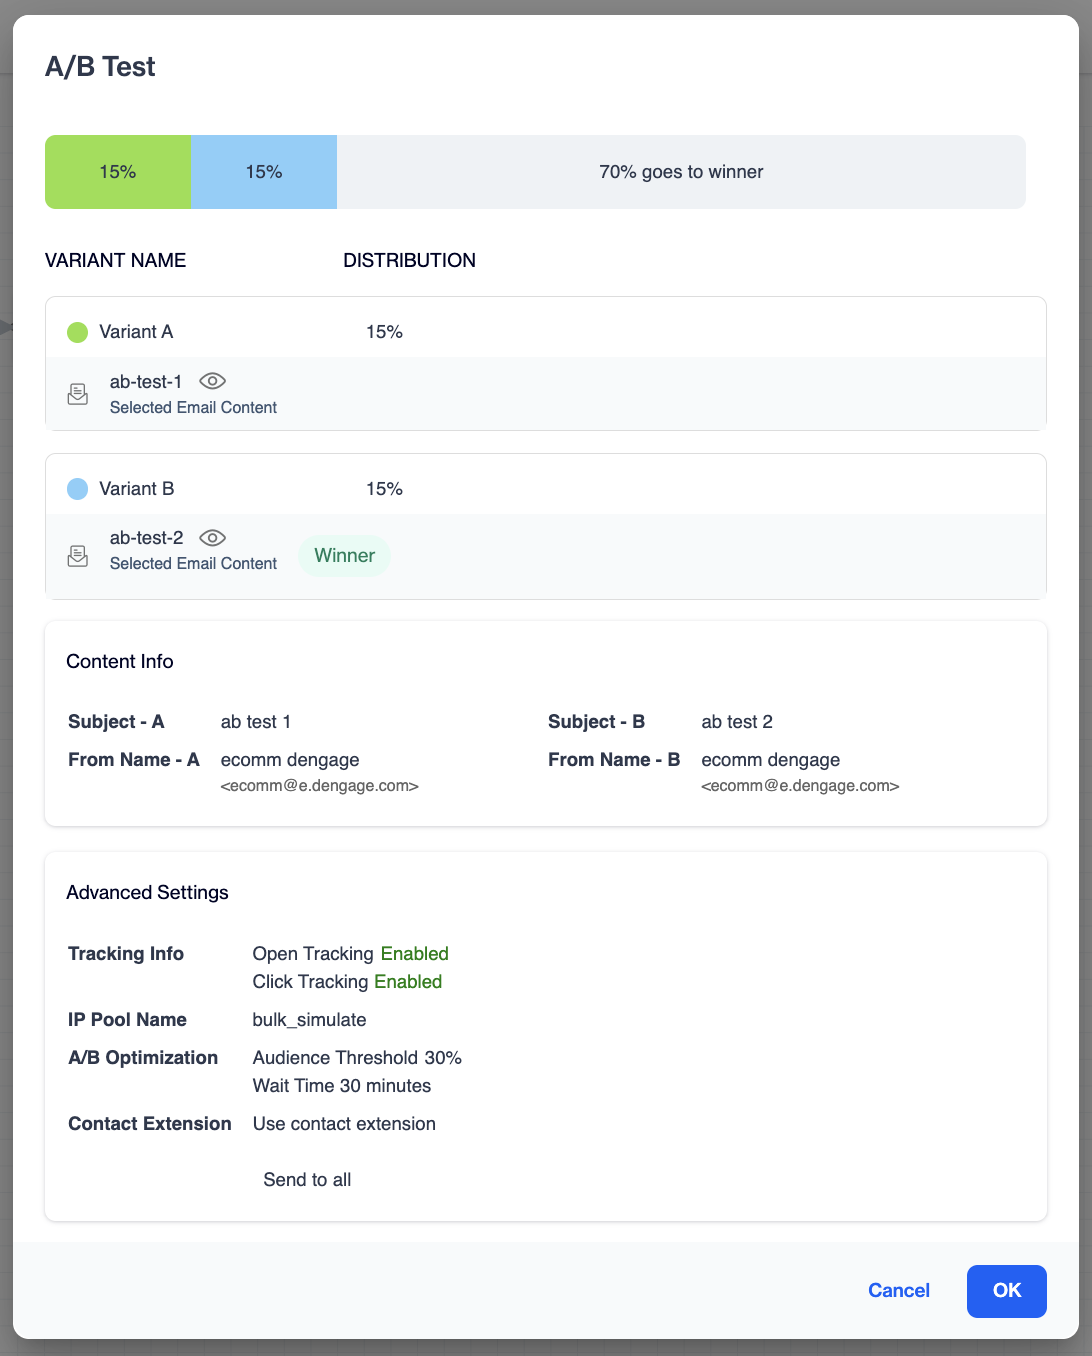
A/B Test details
Detailed report
Click View report in the node summary. The detailed report of the send opens in a new tab. On the Summary tab, the Content Statistic panel next to the Content block shows a thumbnail of each variant with a WINNER or LOSER badge and the share of the audience the variant received. Under each thumbnail, Email shows the variant's Clicks and Open counts; Push, On-Site, and In-App show the Open count. The winning thumbnail carries the Winner Content label.
The rest of the detailed report covers the whole send, including the messages that went to the winner, and does not split the metrics by variant. For the metrics of each channel's detailed report, see the Flow Analytics pages.
Save the node
Click Save to add the configured A/B Split node to your flow. Click Back to return to the Channel step, or Cancel to close the window without saving.
Example: testing two email subject lines
You prepare an email campaign for a new product launch. You want to know which subject line drives more engagement.
- You add the A/B Split node to your flow and choose the Email channel.
- You assign an email with the subject line "Introducing Our New Collection" to Variant A.
- You assign an email with the subject line "You Asked, We Delivered" to Variant B.
- You keep the distribution at 5% for Variant A and 5% for Variant B. The remaining 90% waits for the winner.
- You keep 120 minutes in the Click after field.
Dengage sends both emails to their test groups at the same time. After two hours, it compares the click performance of the two emails. It then sends the better performing email to the remaining 90% of your audience.
Your campaign optimizes itself, and most of your contacts receive the version that performs better.
Updated about 8 hours ago