
Event Based RFM Report
The Event-Based RFM Report feature enhances the existing RFM Analysis system by allowing users to define and calculate custom RFM segments based on selected events, attributes, and metrics. This flexibility improves segmentation accuracy and marketing effectiveness by reducing dependence on predefined RFM models.
How to Access
- Navigate to Analytics > RFM Analytics.
- Choose an existing RFM segment from the dropdown menu and click the Edit button next to it.
- To create a new RFM segment, click the New button.

RFM Segment
Defining a Custom RFM Segment
Creating a New RFM Segment
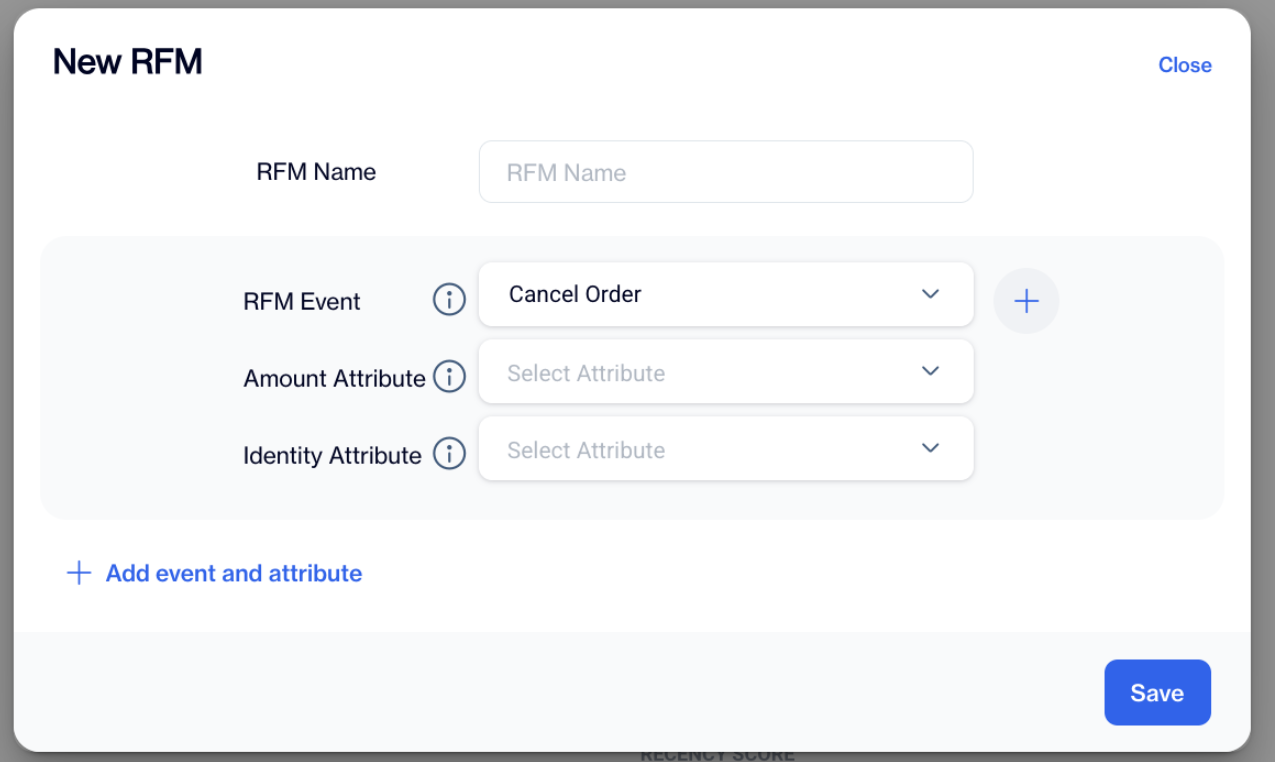
- Click the New button in the upper right corner.
- In the opening popup, provide the necessary details:
- RFM Name: Enter a unique name for the RFM segment.
- RFM Event: Choose one or more events from the dropdown. The selected event should serve as the basis for your RFM analysis, representing user actions relevant to business goals (e.g., purchases, sign-ups, page views, add to cart).
- Amount Attribute: Select an attribute that corresponds to the monetary value associated with the chosen RFM events. This typically represents transaction amounts, purchase values, or revenue generated from a single event.
- Identity Attribute: Select an attribute that uniquely identifies events in the dataset. This is typically an event ID or another distinguishable field.
- Click Add Event and Attribute if you want to add more than one.
- Click Save. You can use the trash can icon while hovering over an RFM event to remove it if needed.
Creating a New RFM Segment
Editing an Existing RFM Segment
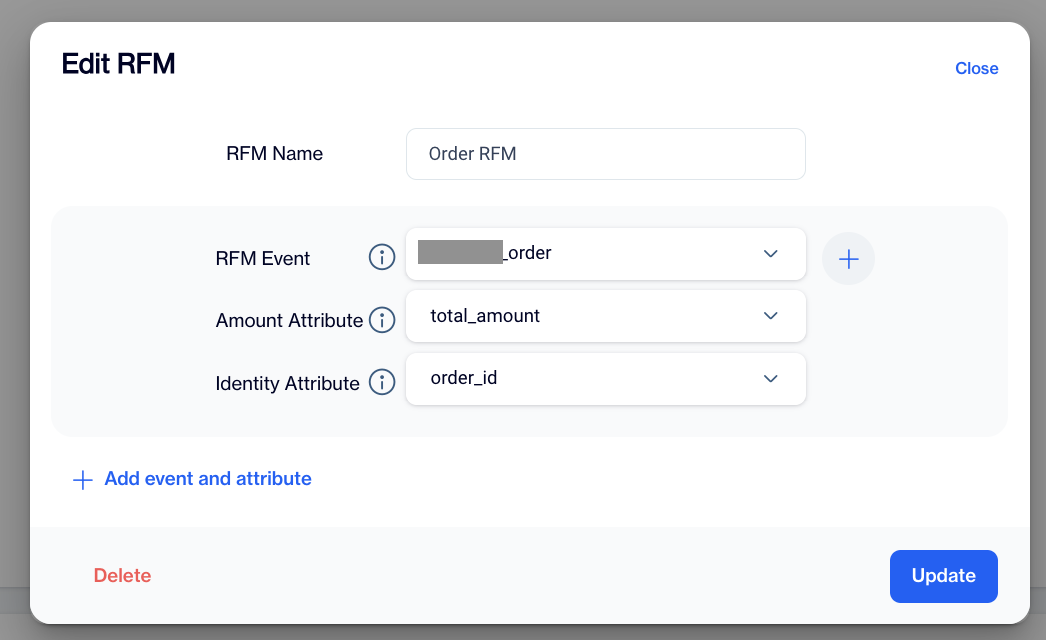
- Choose an existing RFM segment from the dropdown menu.
- Click the Edit button next to it.
- Modify the necessary fields:
- Update the RFM Name, Amount Attribute, or Identity Attribute.
- Click Save to apply the changes.
Editing an Existing RFM Segment
Calculating and Displaying RFM Data
- CLV Calculation: The system calculates Customer Lifetime Value (CLV) for each defined RFM type.
- RFM List & Statuses: All RFM types appear in a list with statuses:
- Active – Currently applied and in use.
- Passive – Defined but not in use.
- Draft – Not finalized yet.
- Tabs for Calculated RFM Types:
- Custom RFM segments appear in the main RFM screen tabs, alongside existing tabs like General and Mobile App.
- Profile RFM Widget Update:
- The CLV and RFM widgets under the Profile section update dynamically, displaying the defined RFM types in a slider format.
The Event-Based RFM Report provides a powerful way to create personalized RFM analyses tailored to specific business needs. By enabling event-based segmentation, this feature enhances marketing precision and improves user engagement strategies.
Updated 10 months ago
Did this page help you?