
Recommendation Rules
Recommendation Rules determine which products are recommended to users and how those products are selected.
A recommendation rule acts as the decision-making logic behind a recommendation widget. Whenever a recommendation widget is displayed in an email, in-app, or onsite campaign, the widget uses a recommendation rule to decide which products should be shown to each user.
For example, a recommendation rule can:
- Show the best-selling products in a category.
- Show products similar to the one a visitor is viewing.
- Show products that are frequently purchased together.
The recommendation rule defines this behavior.
Prerequisites
Before creating recommendation rules, ensure that:
- The SDK is integrated.
- Analytics Event Definition is enabled.
- Product Integration is completed.
How to Access
Go to Content > Assets > Recommendation Engine.
From this screen, you can create, edit, and manage recommendation rules.
The screen is a simple two-part wizard:
- General — the rule's name and description.
- Content — three collapsible panels: Recommendation Logic, Output Settings (including Advanced Filters), and Fallback Behavior.
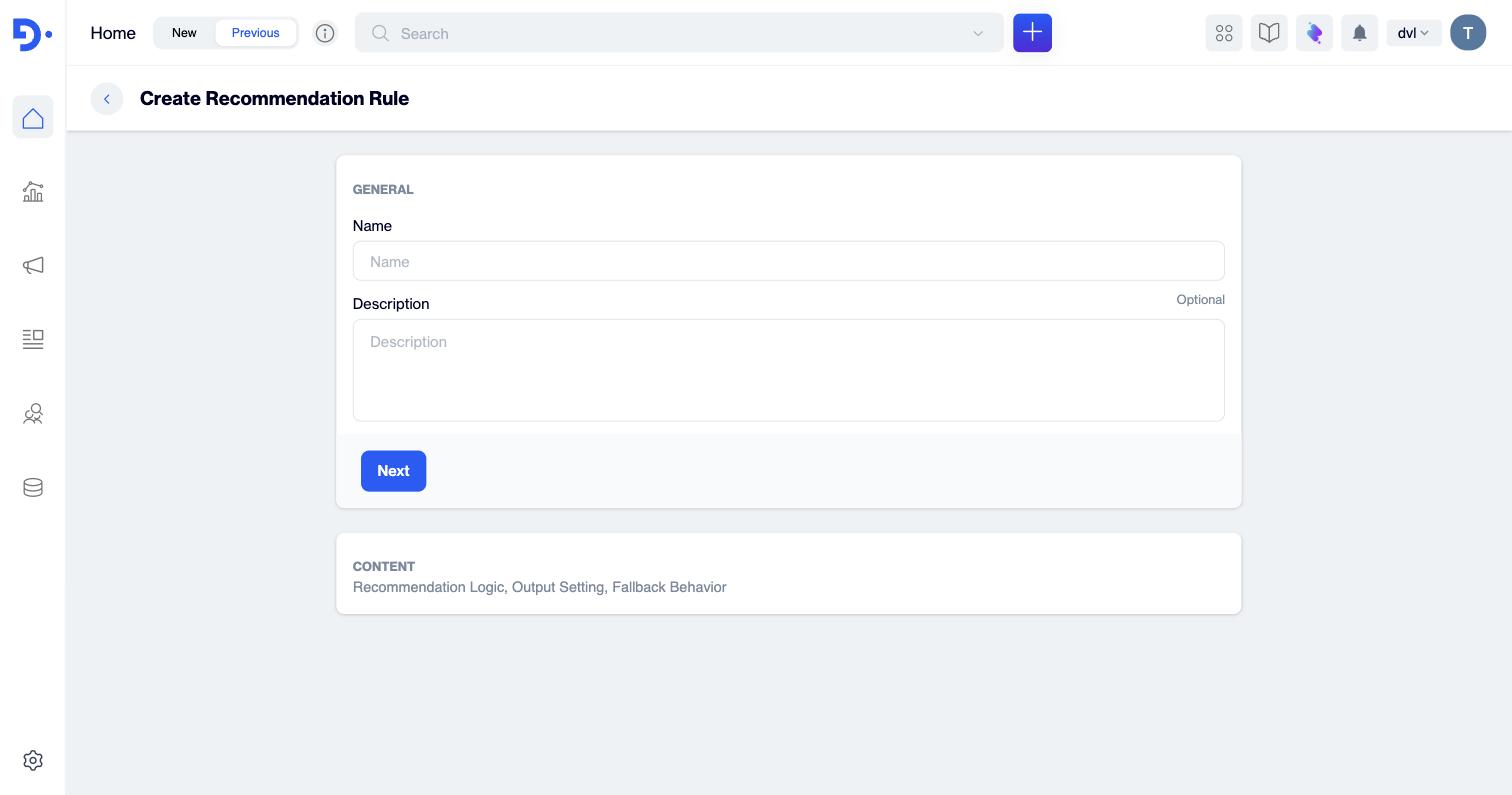
The Create Recommendation Rule screen when it first opens: fill in General, then press Next to unlock the Content section.
Step 1 — General
Give the rule a name your whole team will recognise.
- Name (required) — how the rule appears in lists and pickers elsewhere in D·engage. Use a convention that encodes the model and placement, e.g. "Best Sellers – Homepage" or "Similar Items – PDP".
- Description (optional) — a short note about what the rule does and where it's used.
- Press Next. The General block collapses into a summary card and the Content section opens below. You can re-open and edit the name/description at any time with the pencil (✎) icon on the summary card.
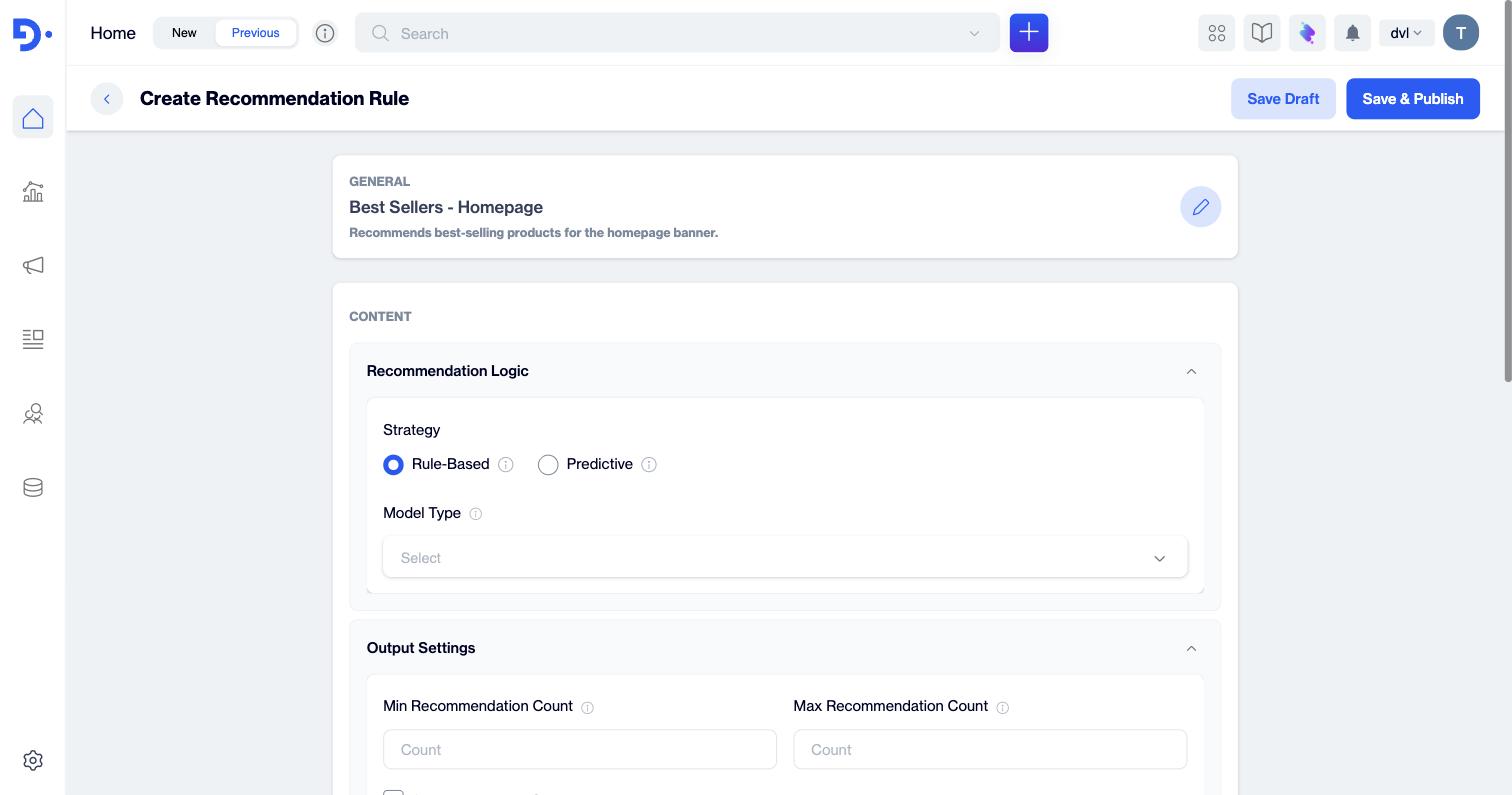
After pressing Next: General is shown as a summary card (editable via the pencil icon), the Content section opens, and Save Draft / Save & Publish buttons appear in the header.
Step 2 — Recommendation Logic
Choose how products are selected: a deterministic rule or an AI model.
2.1 Strategy
| Strategy | What it means (on-screen tooltip) | Best for |
|---|---|---|
| Rule-Based | "Deterministic rules based on catalog and simple behavioral data." Transparent, predictable lists such as best sellers or new arrivals. | Homepage banners, category pages, campaigns where you want full control and explainability. |
| Predictive | "AI-powered models provided by Zeki AI. These models require context input." Personalised, ML-driven picks per visitor or product. | Product detail pages, cart cross-sell, 1-to-1 personalisation. |
2.2 Model Type
Tooltip: "Defines how products are selected for this recommendation. Some models work globally, while others require an input such as a product, category, or user data."
Rule-Based models
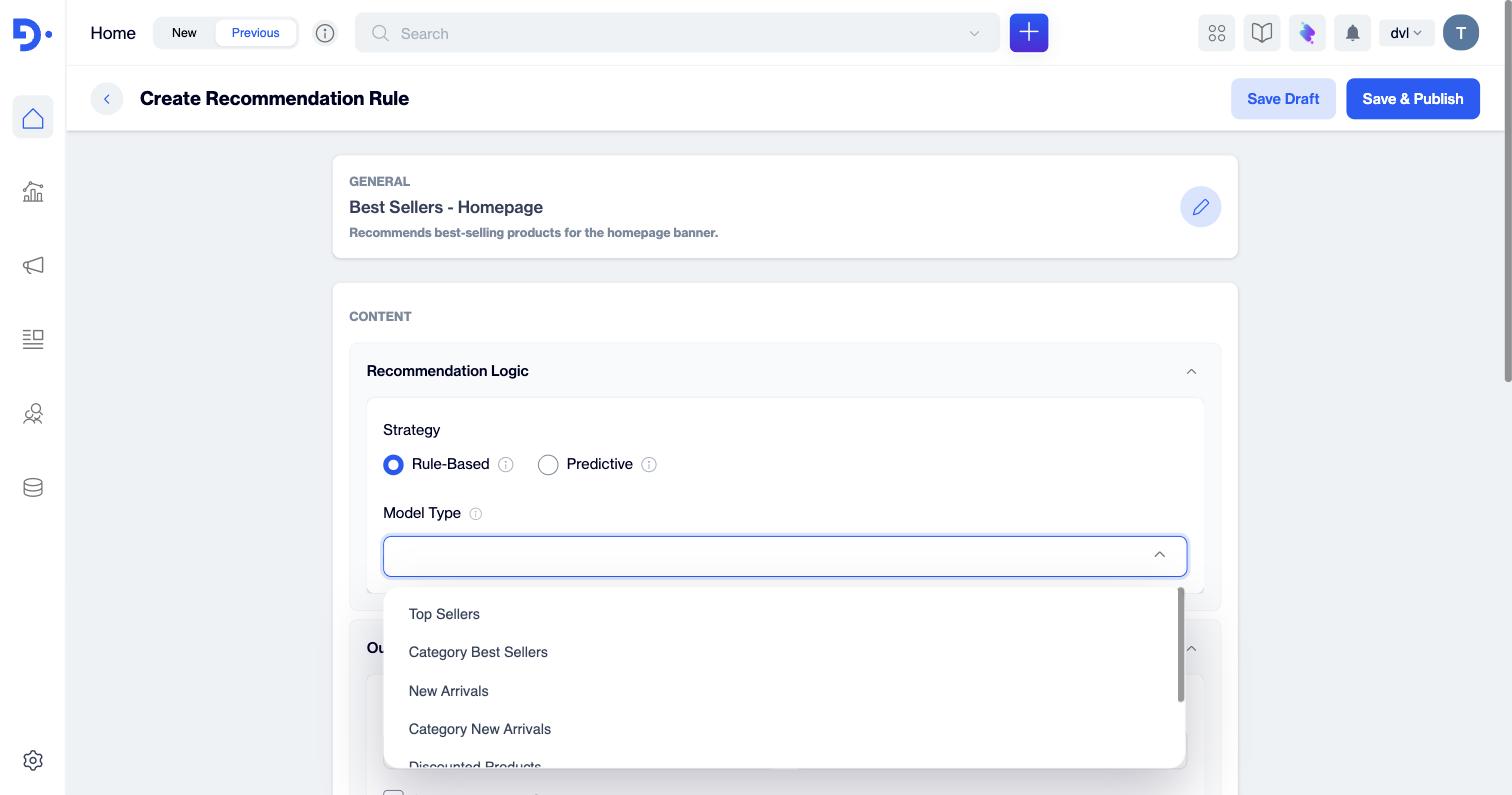
| Model | What it recommends | Extra inputs shown |
|---|---|---|
| Top Sellers | Overall best-selling products across the whole catalog. | Sales Period |
| Category Best Sellers | Best sellers within a specific category. | Sales Period + Context Source (category) |
| New Arrivals | The newest products added to the catalog. | — |
| Category New Arrivals | Newest products within a specific category. | Context Source (category) |
| Discounted Products | Products currently on discount. | — |
| Category Discounted Products | Discounted products within a specific category. | Context Source (category) |
| Trending Products | Products gaining momentum right now. | Sales Period |
Predictive models (Zeki AI)
| Model | What it recommends | Typical context input |
|---|---|---|
| Similar Items | Products similar to a reference product. | A product — e.g. the product currently being viewed. |
| Frequently Bought Together | Products often purchased in the same basket as the reference product. | A product (great for cart & post-purchase). |
| Frequently Viewed Together | Products browsed in the same sessions as the reference product. | A product. |
| Recommended Items (User-Based) | Personal recommendations based on each user's own behaviour. | User data — works per visitor. |
2.3 Sales Period (sales-driven models)
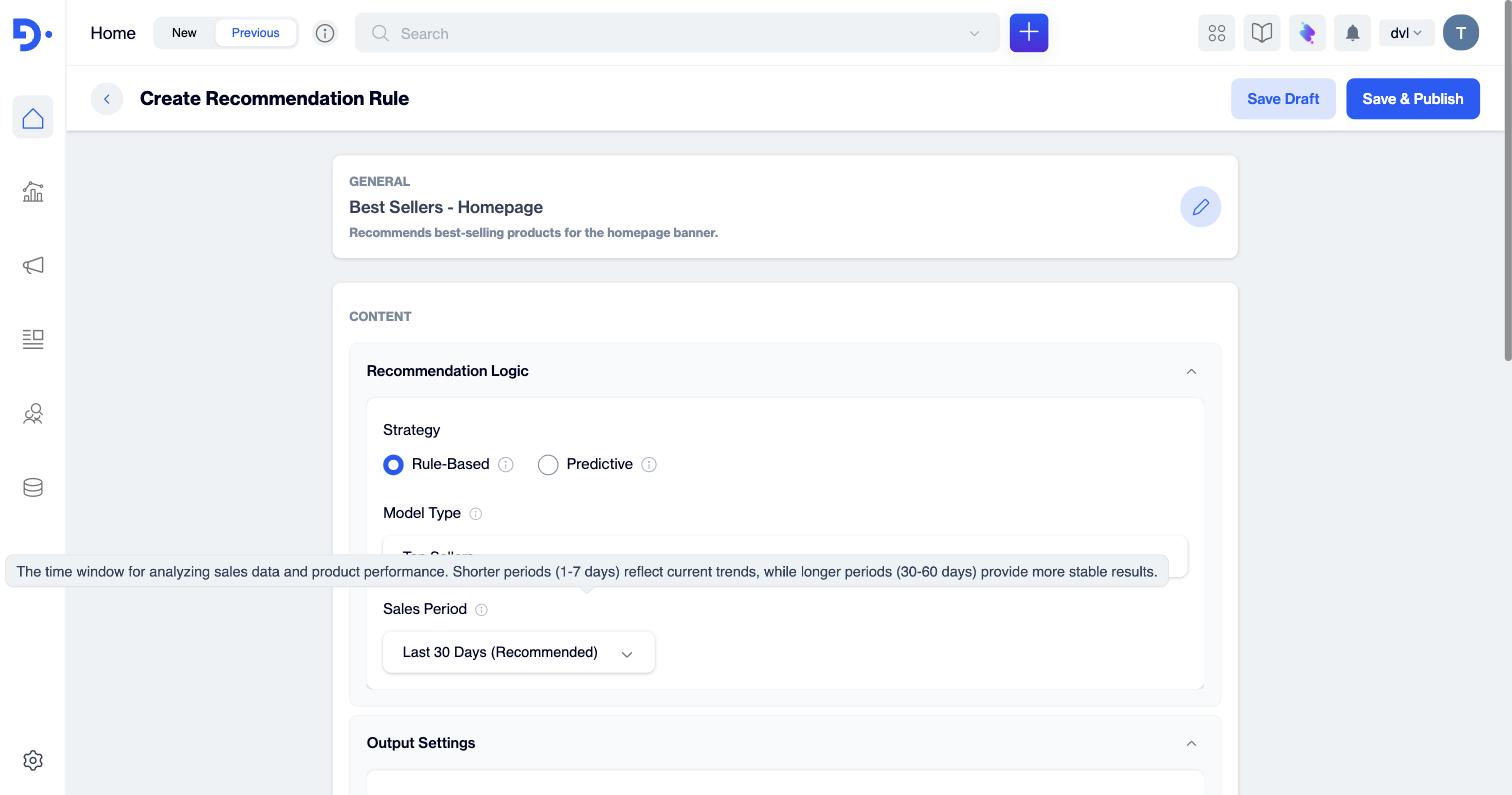
Tooltip: "The time window for analyzing sales data and product performance. Shorter periods (1-7 days) reflect current trends, while longer periods (30-60 days) provide more stable results."
Available options: Last 1 Day · Last 3 Days · Last 7 Days · Last 14 Days · Last 30 Days (Recommended) · Last 60 Days
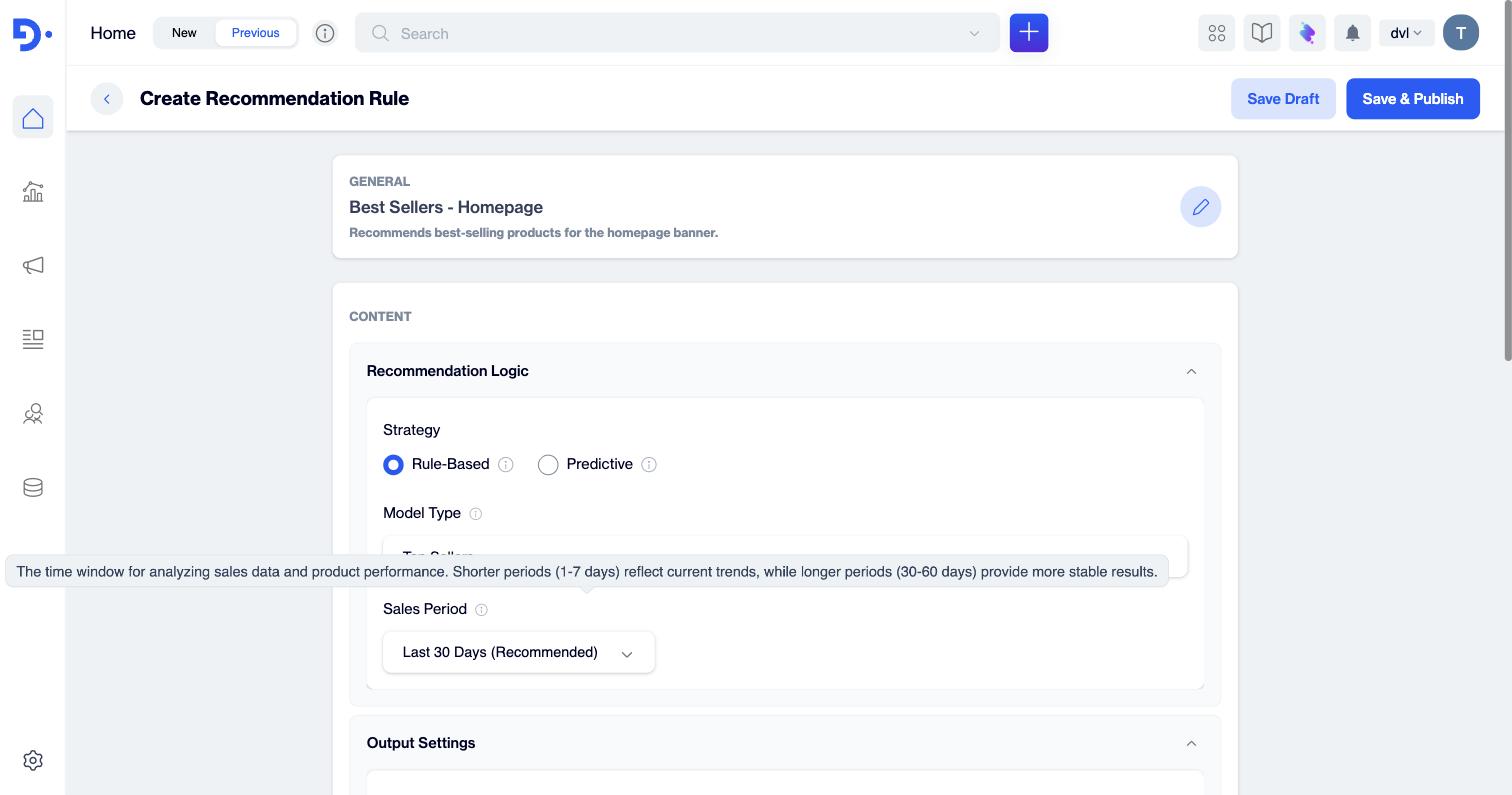
Sales Period appears for models such as Top Sellers, Category Best Sellers and Trending Products.
2.4 Context Source (context-driven models)
Tooltip: "Context defines the input that drives the recommendation (product, category, or user-level data). The source must match the selected model type. For example, Similar Items requires a product input, while Category Best Sellers requires a category input."
When a model needs a context, a Context Source row appears with two dropdowns — first where the context comes from, then the exact value:
| Source | How it works | Example |
|---|---|---|
| Static | You fix the value while building the rule. The second dropdown lets you search and pick from your catalog (e.g. a category path). | Category Best Sellers pinned to "Accessories" for a homepage strip. |
| User Attribute | The value is read from an attribute of the viewer's profile at run time. | Best sellers from each user's favourite category. |
| Event Attribute | The value comes from the event/page where the widget is shown — e.g. Current Product. | Similar Items driven by the product the visitor is looking at. |
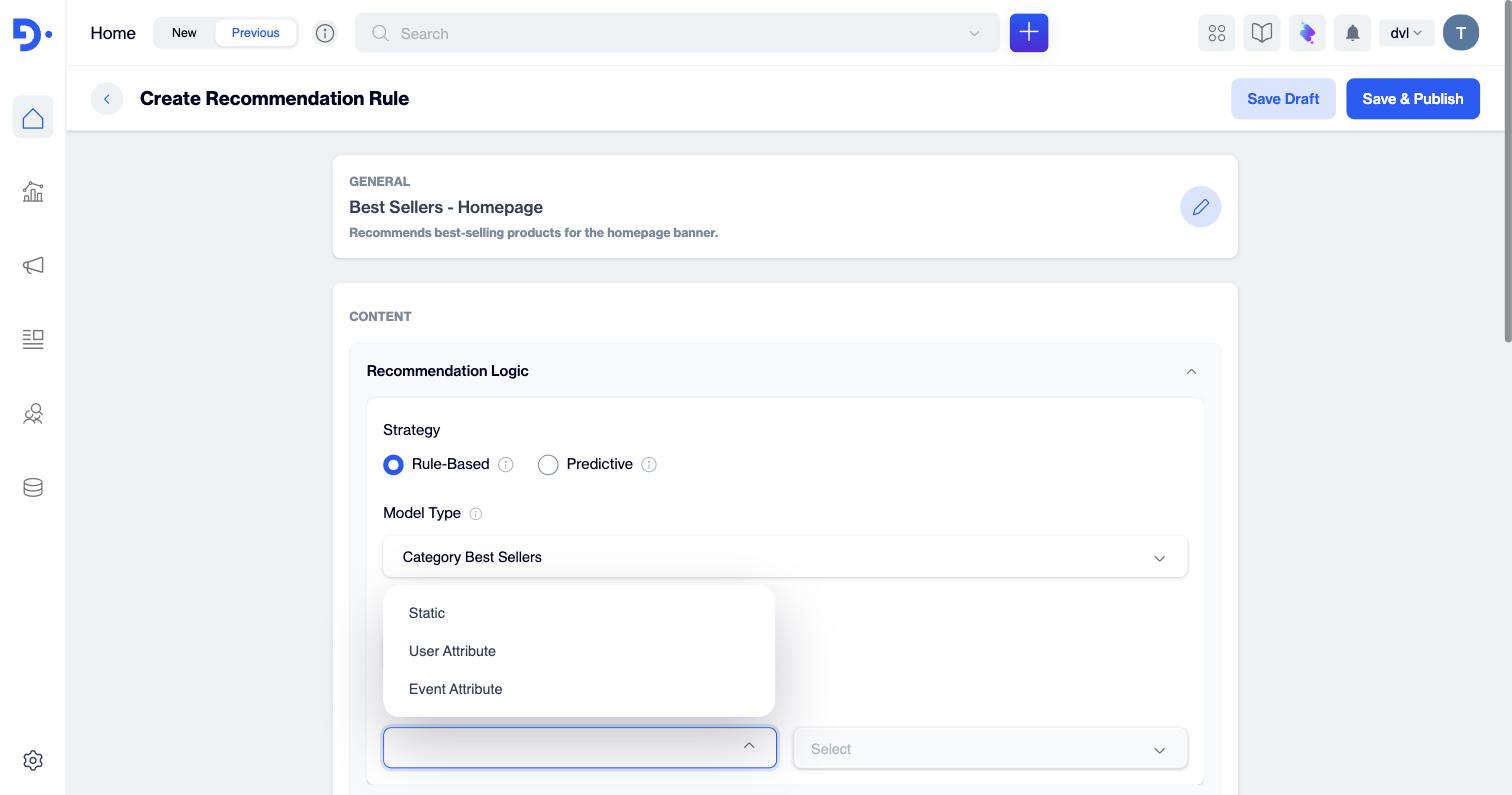
Category Best Sellers selected: the Context Source dropdown offers Static, User Attribute, Event Attribute.
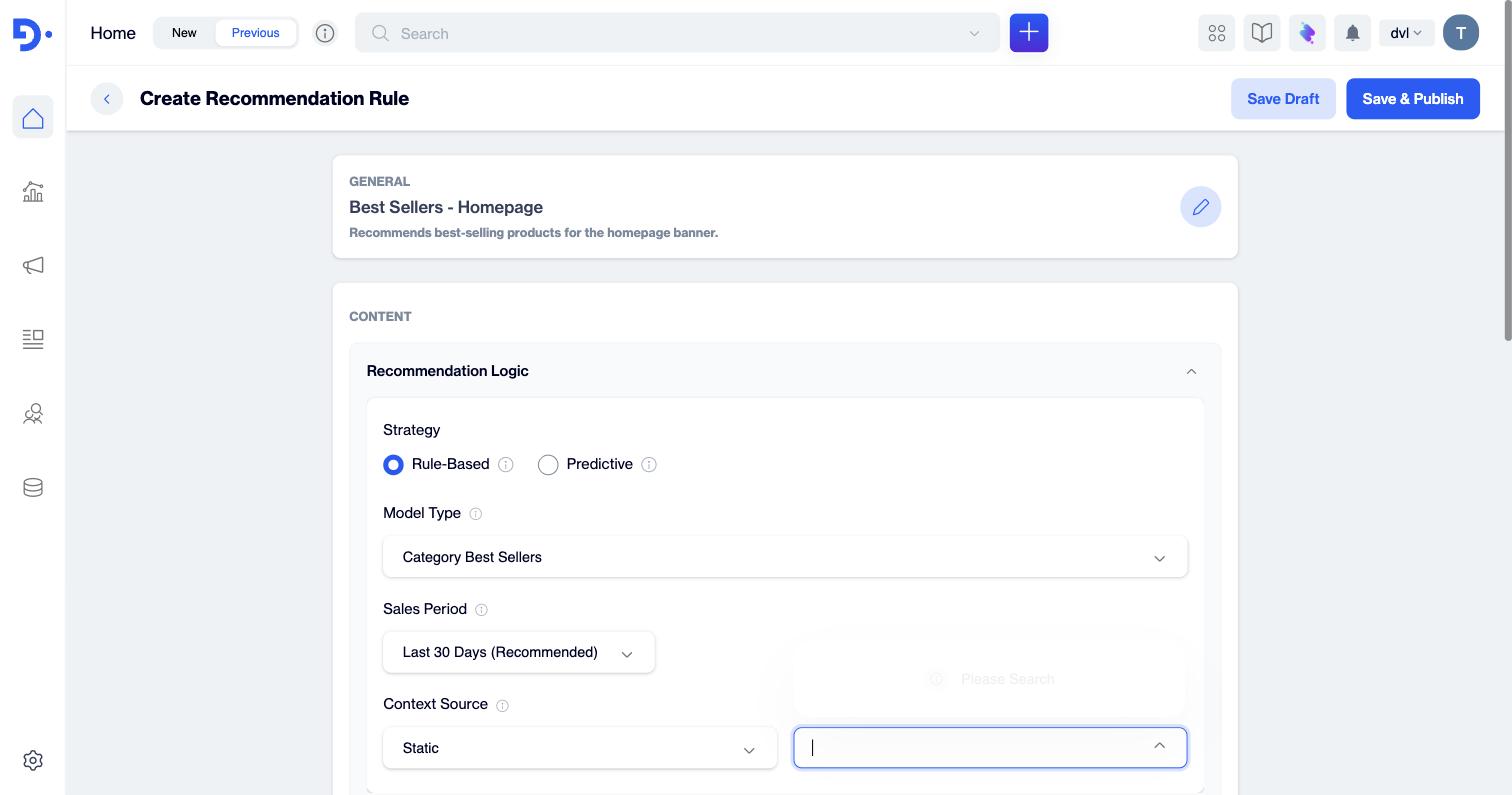
With Static selected, the second field becomes a searchable category picker ("Enter Category Path").
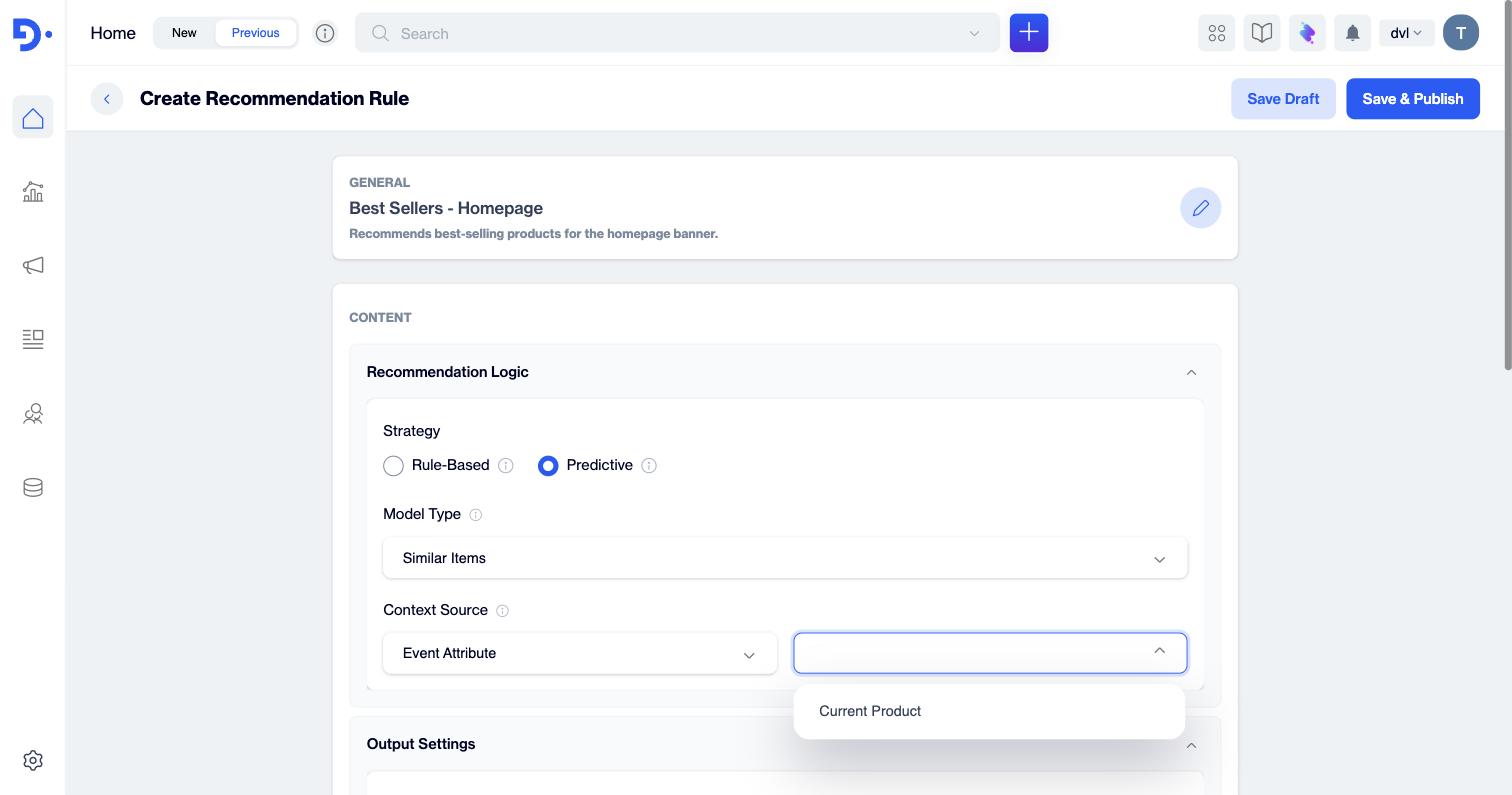
Predictive example — Similar Items with Context Source = Event Attribute: the value dropdown offers Current Product.
Tip: Match the source to the placement: Static for fixed merchandising strips, Event Attribute → Current Product for product-detail and cart pages, User Attribute for personalised category content on home or in email.
Step 3 — Output Settings
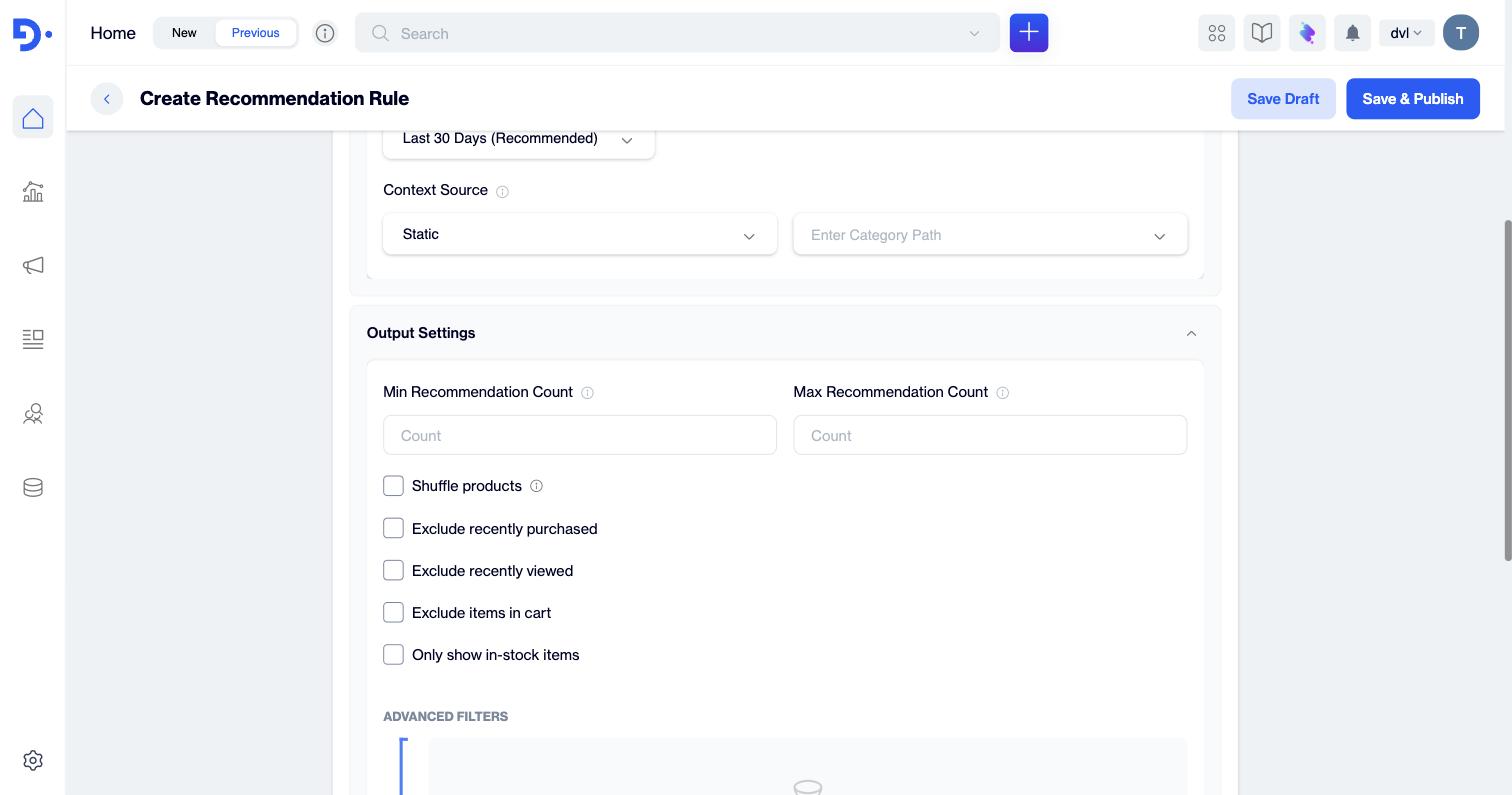
Control how many products come back — and keep the list clean.
| Setting | What it does |
|---|---|
| Min Recommendation Count | Tooltip: "Minimum number of product recommendations required to show the widget. If fewer products are available, fallback behavior will be applied." Protects you from half-empty widgets. |
| Max Recommendation Count | Tooltip: "Maximum number of product recommendations to show to the user." Match this to your widget design (e.g. 4 tiles, 10-item carousel). |
| Shuffle products | Tooltip: "Randomizes product order to reduce pattern repetition." Keeps frequently-visited placements feeling fresh. |
| Exclude recently purchased | Hides products the visitor has recently bought — avoids "you already own this" moments. |
| Exclude recently viewed | Hides products the visitor has just browsed, so the widget adds discovery instead of repeating history. |
| Exclude items in cart | Hides products already sitting in the visitor's basket. |
| Only show in-stock items | Limits results to products currently in stock — strongly recommended for all commerce placements. |
How Min count and Fallback work together: If, after all filters and exclusions, fewer than Min products remain, the rule doesn't render a thin widget — it triggers the Fallback Behavior you define in Step 5.
Step 4 — Advanced Filters
Narrow the product pool with catalog conditions — combinable with AND/OR and nested groups.
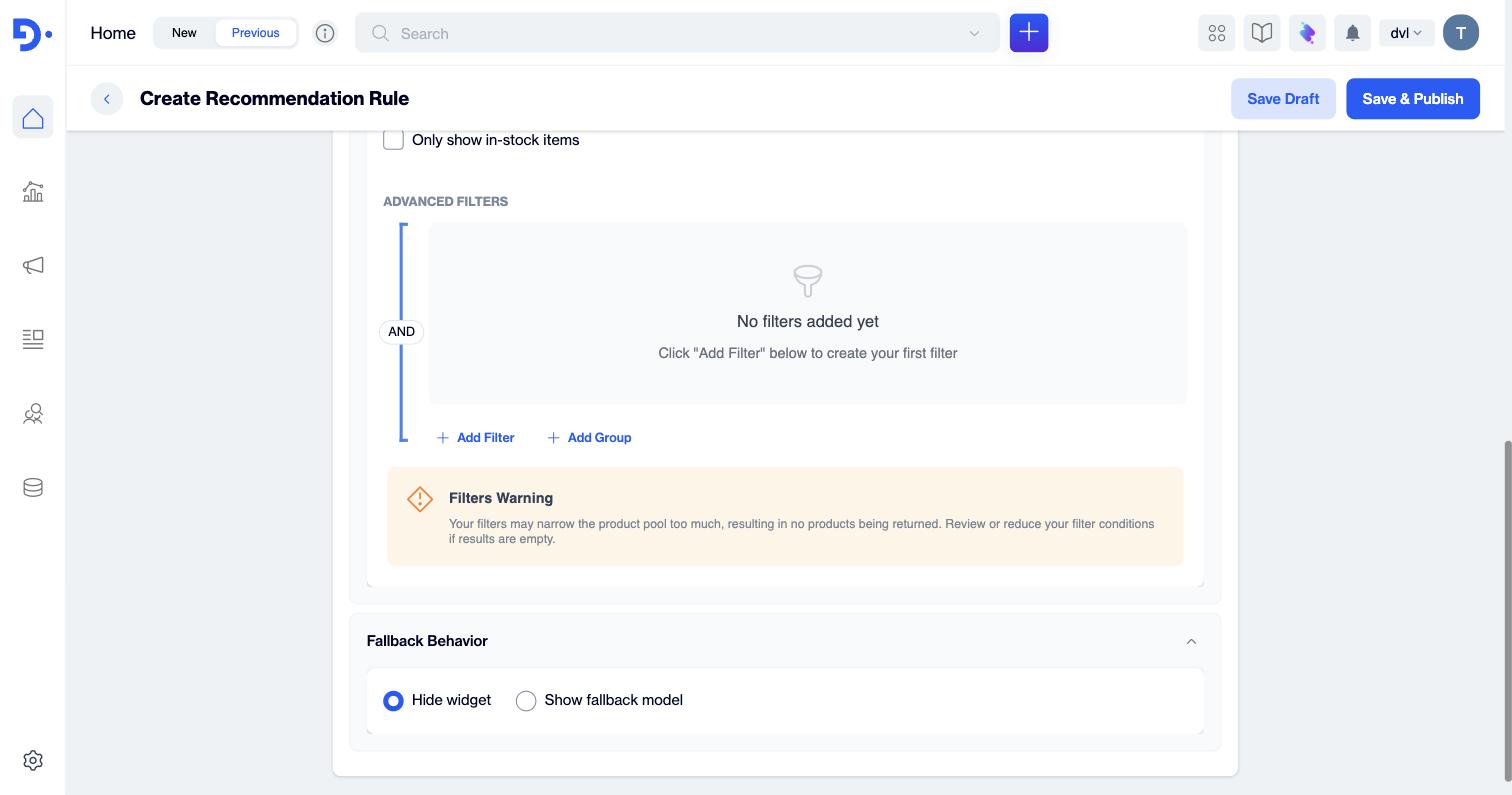
The empty state: an AND group with Add Filter and Add Group actions, plus a standing warning about over-filtering.
4.1 Adding a filter
-
Click Add Filter. A row appears with Select attribute and Select operator dropdowns.
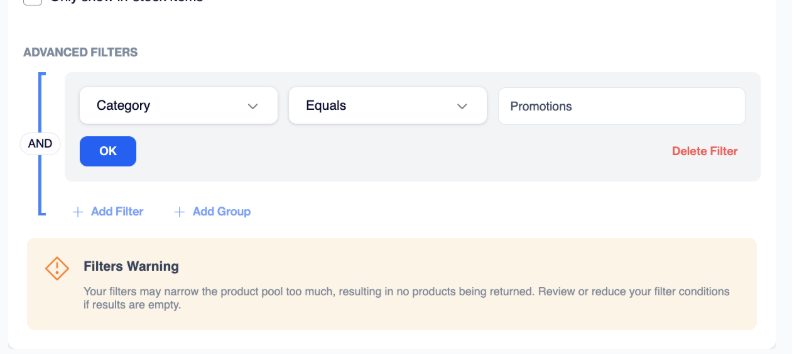
Attribute list: standard catalog fields — Category, Brand, Price, Original Price, Discount, Stock Level, In Stock Status — followed by your account's custom catalog attributes (here: city, performer, productType, region, venue, eventStartDate).
-
Pick an operator. For numeric attributes such as Price: Equals · Not Equals · Greater Than · Greater Or Equal · Less Than · Less Or Equal · Between. (Text attributes get matching text operators.)
-
Enter the value and press OK. The condition collapses into a chip; use the pencil to edit or the bin to delete it. Delete Filter discards a row you haven't confirmed yet.
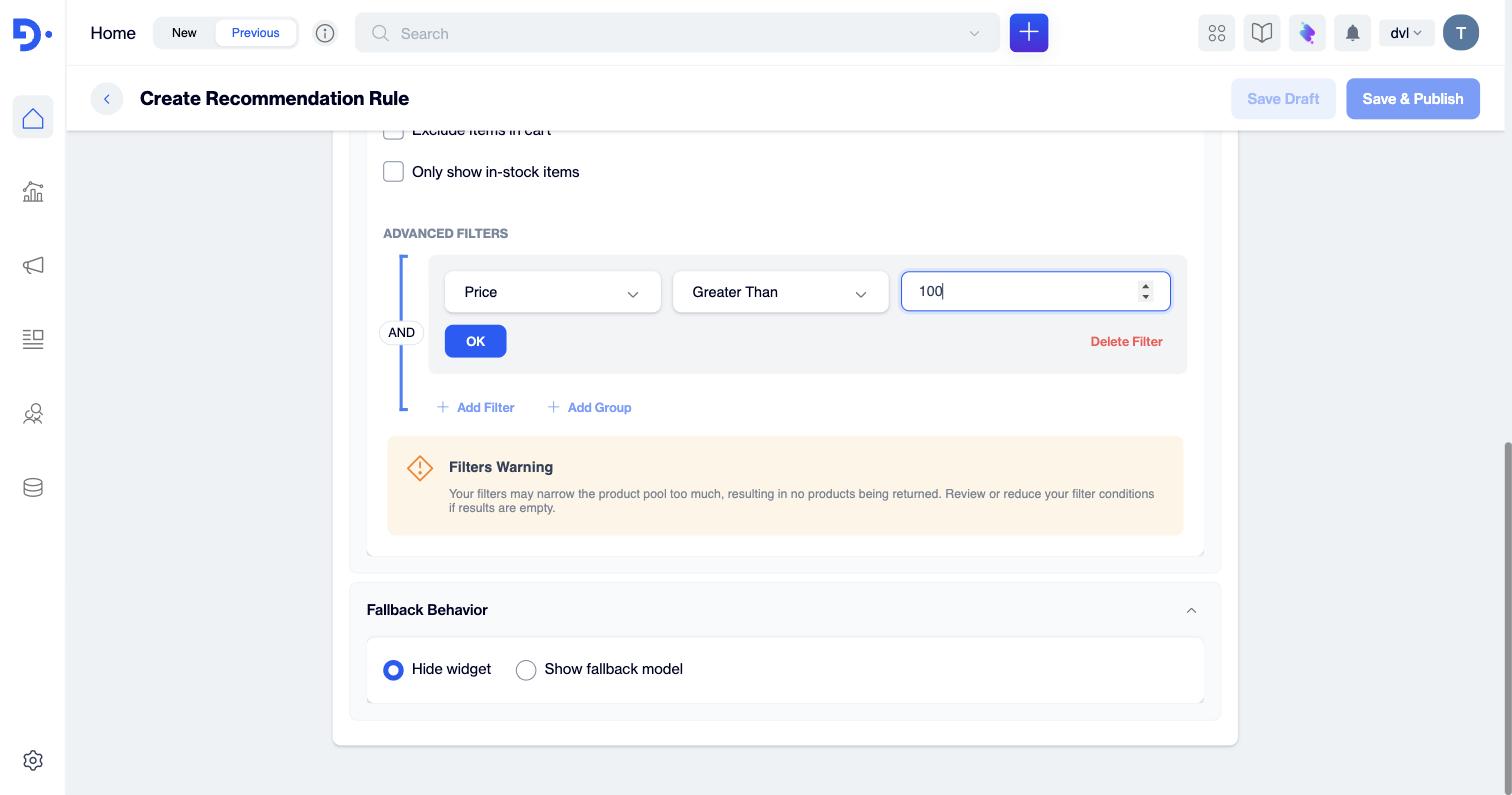
A filter being built: Price · Greater Than · 100.
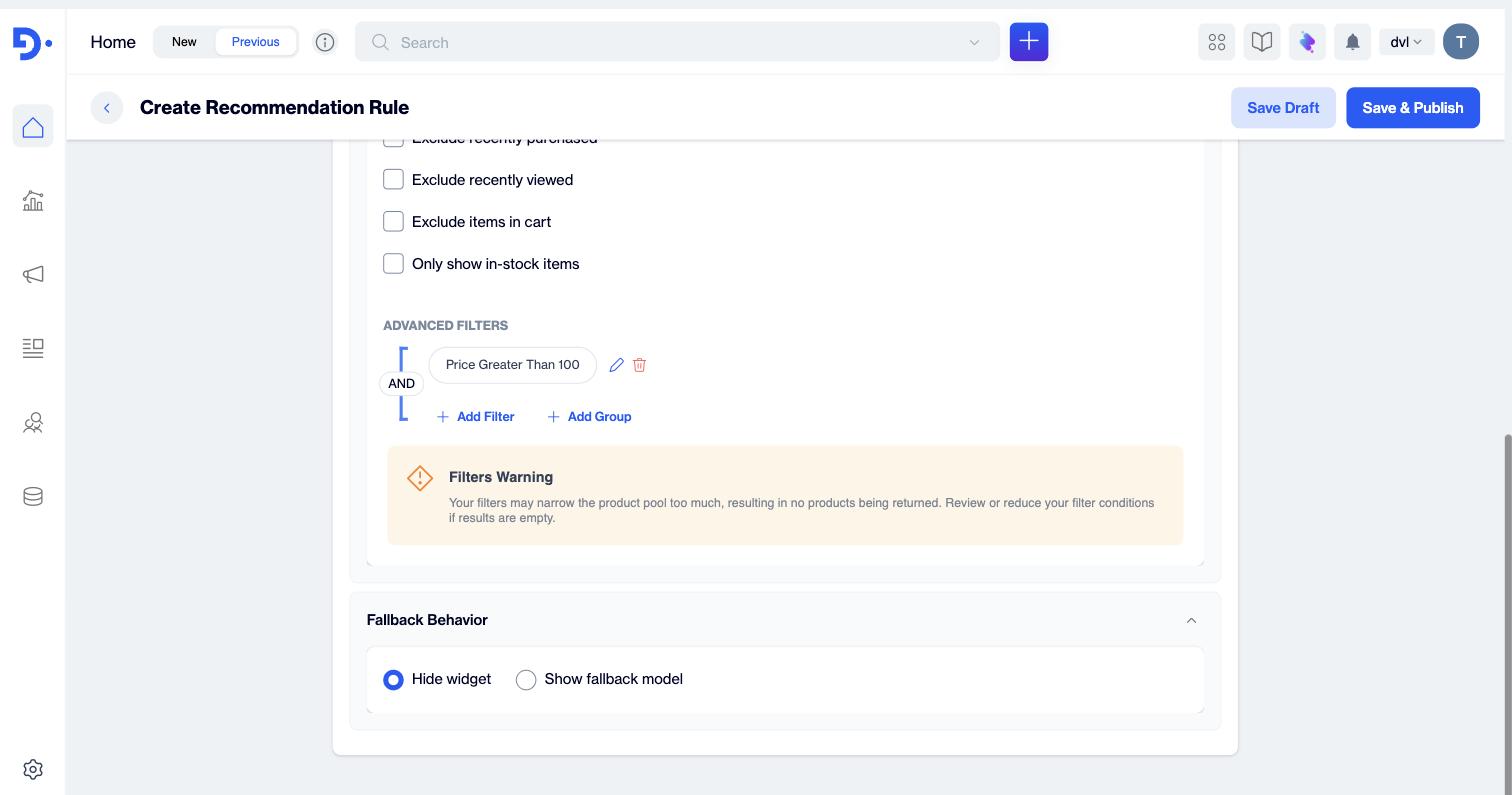
After OK, the filter becomes a chip ("Price Greater Than 100") with edit ✎ and delete 🗑 actions.
4.2 AND / OR and nested groups
The badge on the left edge of a group shows how its conditions combine. Click the badge to toggle between AND and OR. Add Group creates a nested block with its own AND/OR logic — letting you express things like "(Brand = X AND Price > 100) OR (Discount > 30%)". Each group has its own Add Filter and a red Delete Group action.
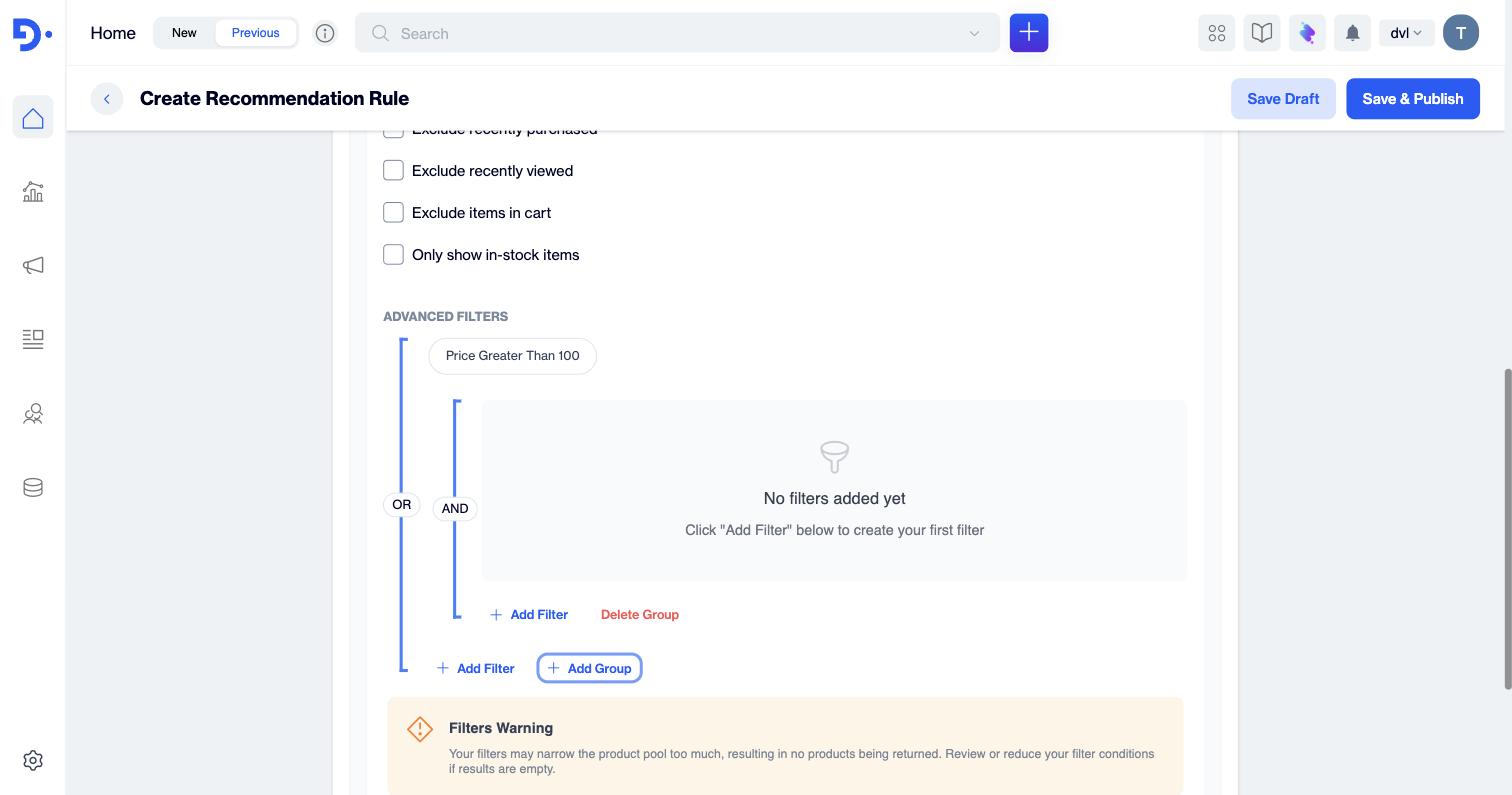
A nested group inside the main group: the outer logic is OR, the inner group has its own AND toggle.
Filters Warning (always shown on screen): "Your filters may narrow the product pool too much, resulting in no products being returned. Review or reduce your filter conditions if results are empty." — if a placement suddenly goes blank, over-filtering is the first thing to check.
Step 5 — Fallback Behavior
Decide what happens when the rule can't return enough products.
- Hide widget (default) — the placement simply doesn't render. The page looks normal, with no empty box.
- Show fallback model — a second model steps in so the placement never goes empty. Selecting this reveals a Fallback Model Selection dropdown.
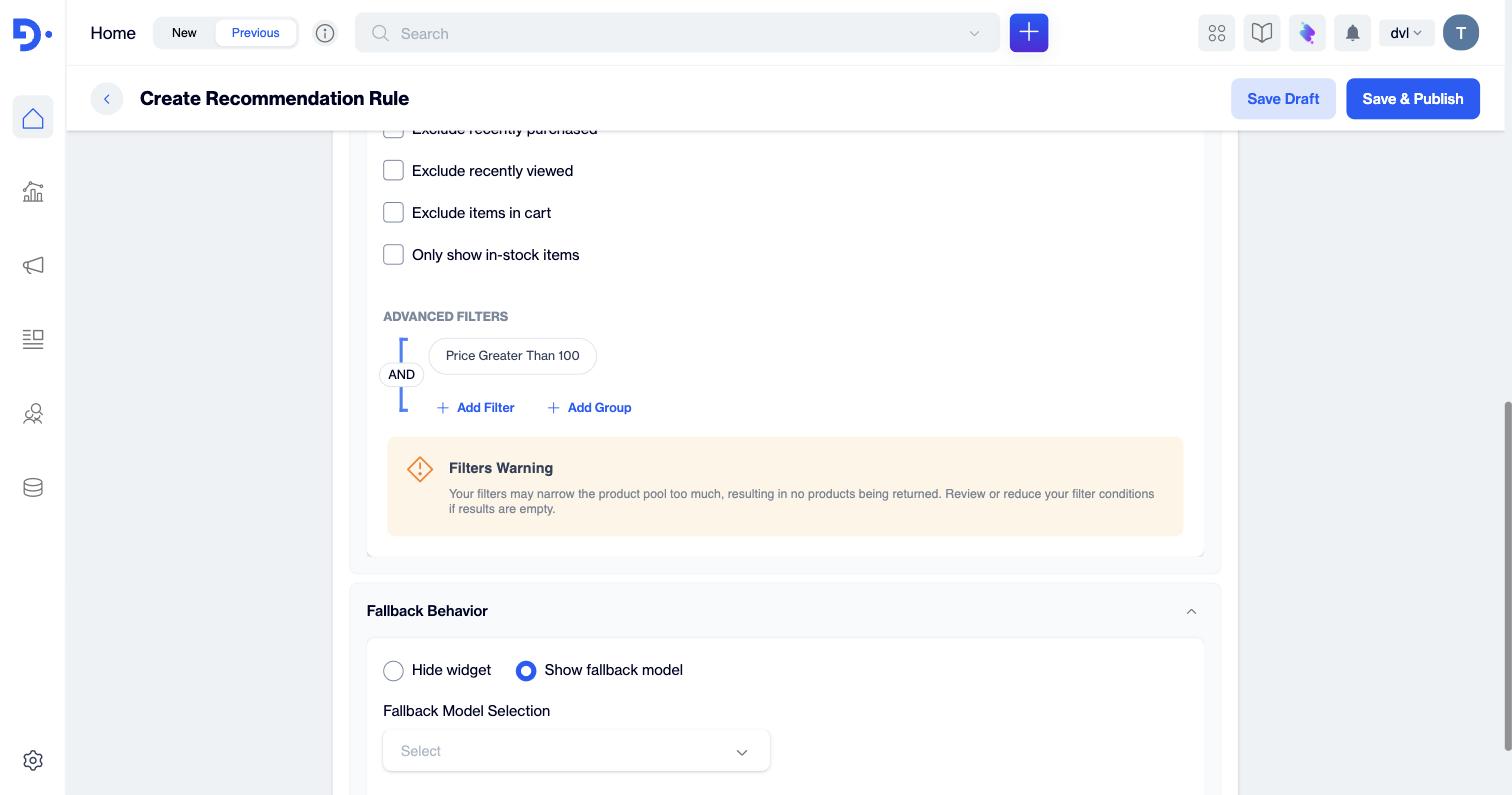
Choosing Show fallback model reveals the Fallback Model Selection dropdown.
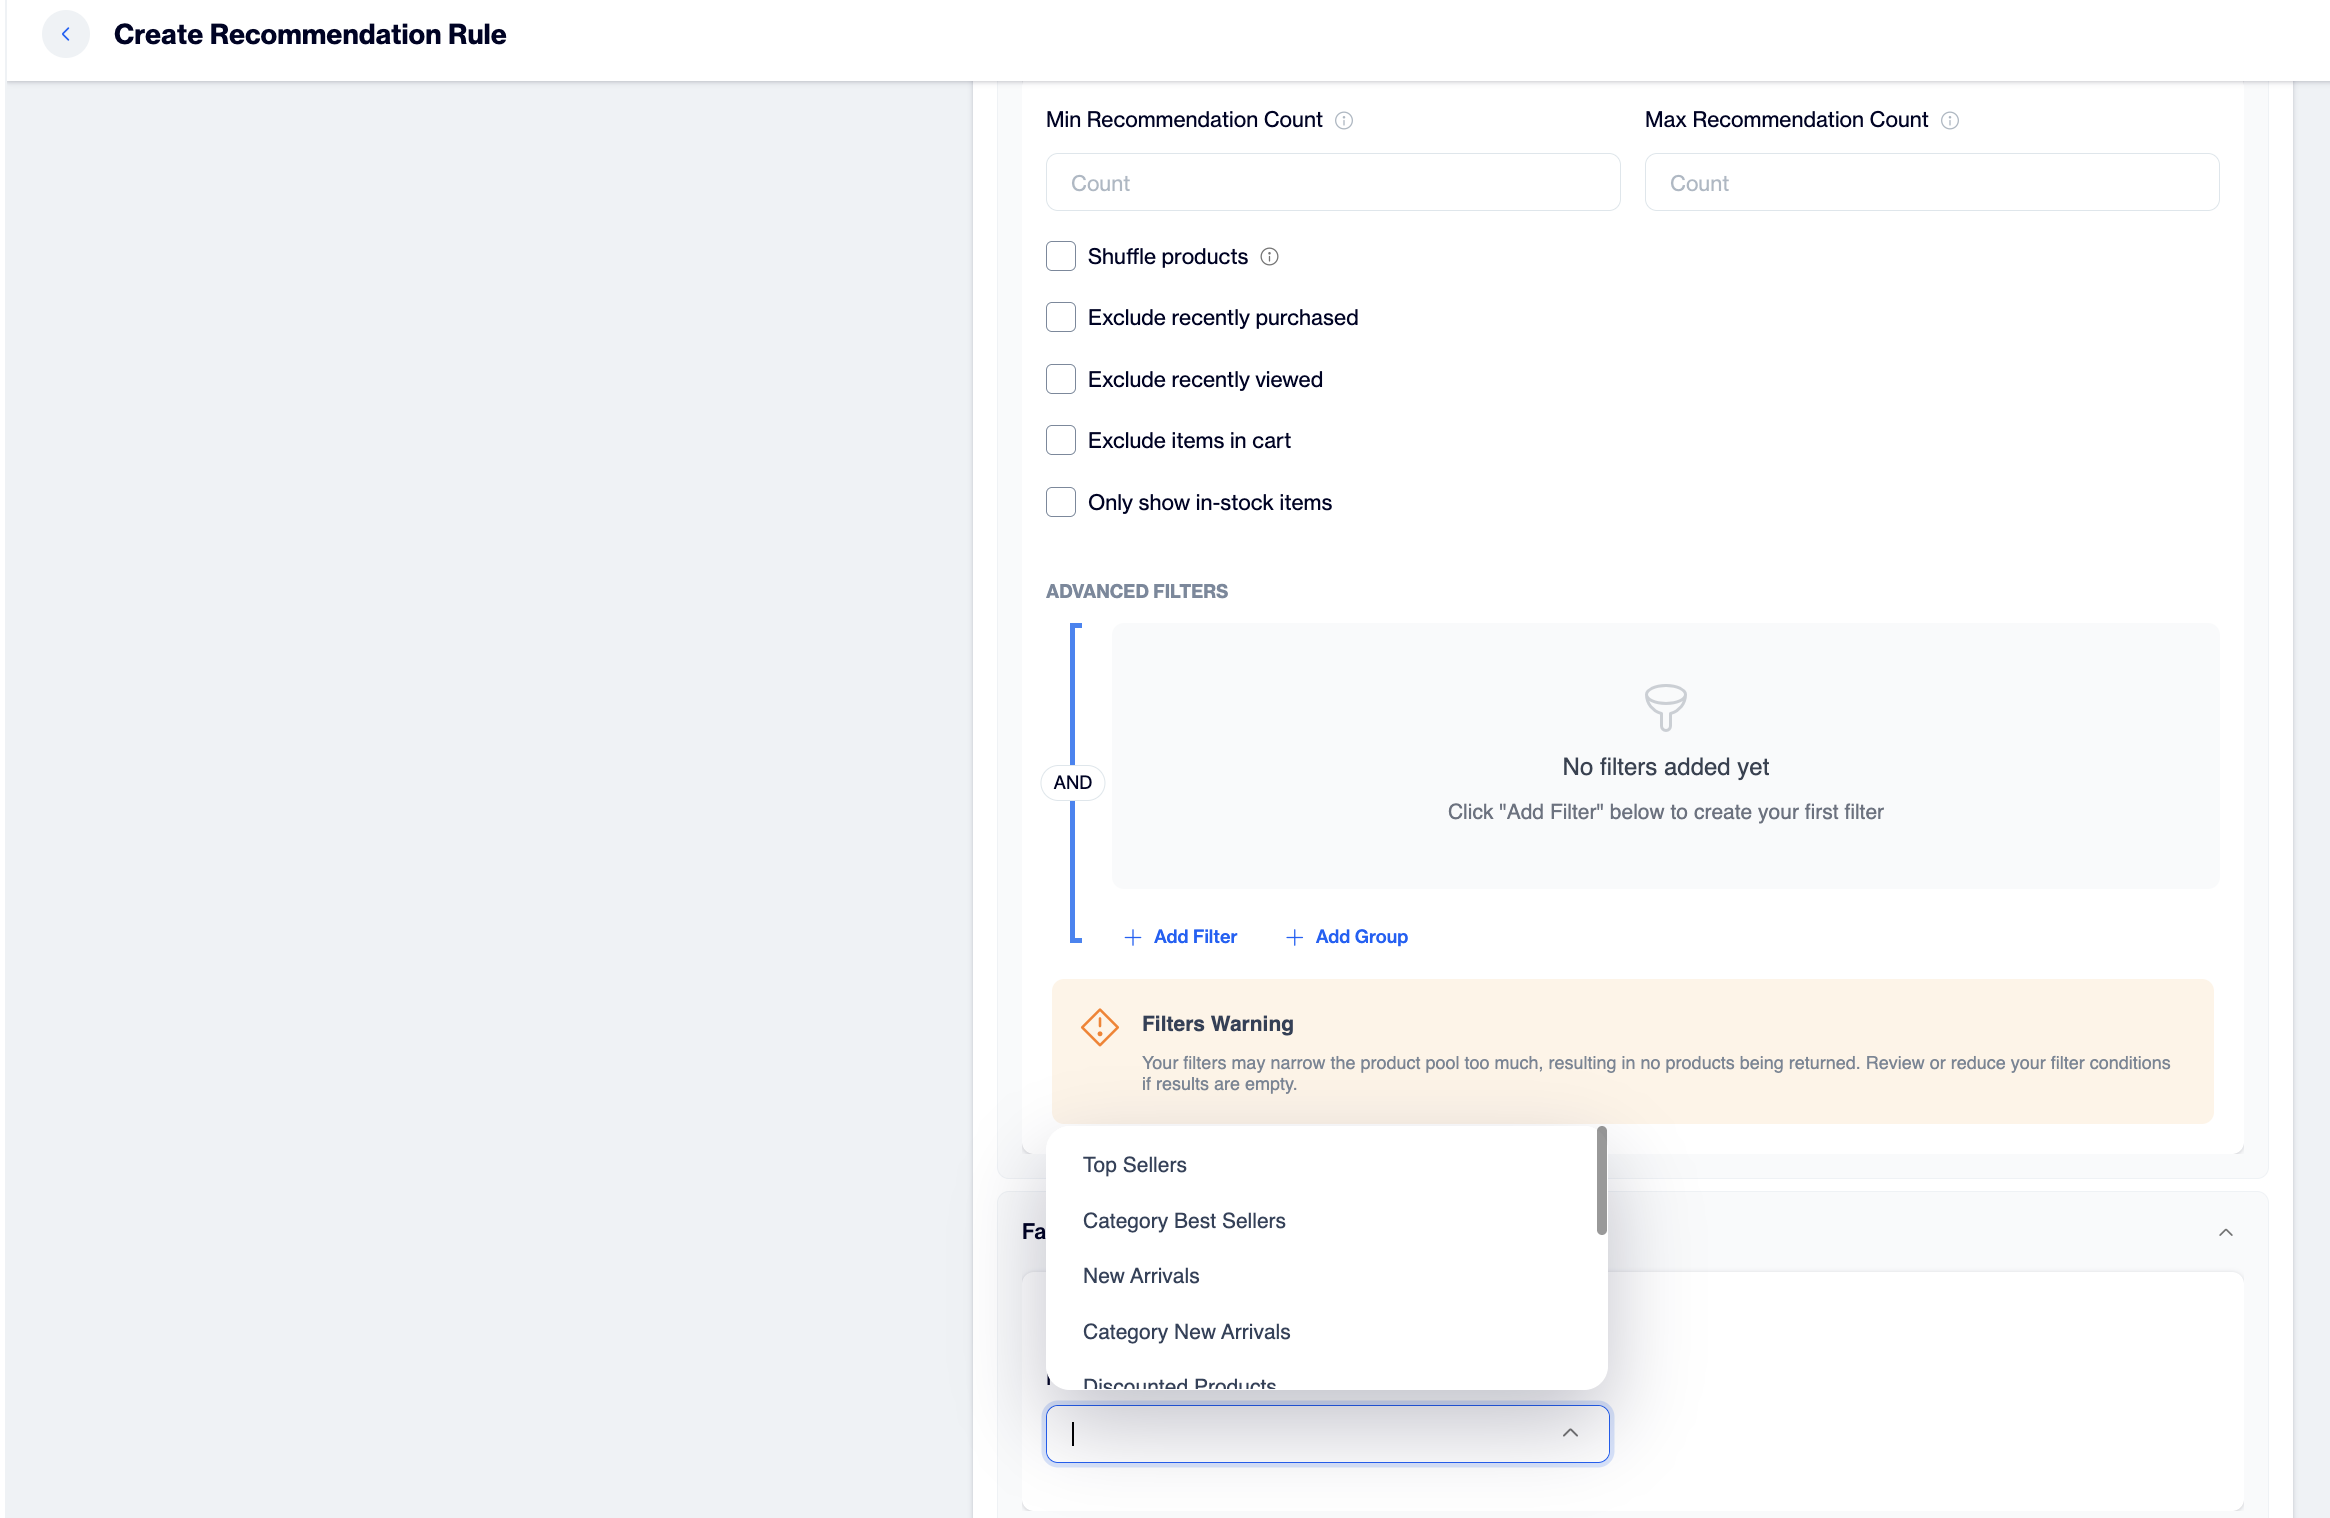
Any model can serve as the fallback — all eleven (7 rule-based + 4 predictive) are available.
Best practice: Fall back to a global, context-free model such as Top Sellers or New Arrivals. It always has products to show — even for brand-new visitors or missing context.
Step 6 — Saving & publishing
Two buttons in the top-right corner once the Content section is open:
| Button | What it does |
|---|---|
| Save Draft | Stores the rule without making it live — ideal while you're still aligning with the team or waiting for a campaign date. |
| Save & Publish | Saves and activates the rule so it can be used by live widgets and campaigns. |
The back arrow (‹) next to the page title returns you to the Recommendation Rules list.
Step 7 — Test Recommendation
After saving the recommendation configuration, the Test Recommendation button becomes available. Click Test Recommendation to verify that the recommendation setup is working as expected and to preview the products returned by the selected recommendation rule or model.
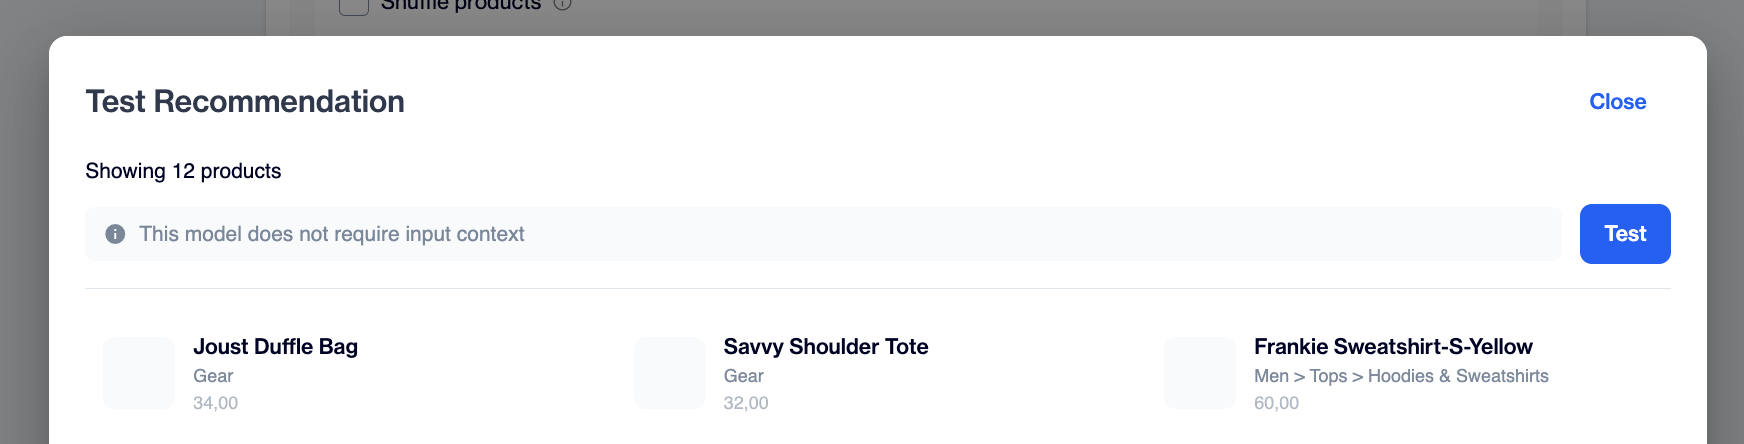
Test Recommendation
Quick recipes for common campaigns
| Placement | Recipe |
|---|---|
| 🏠 Homepage — Best Sellers strip | Rule-Based → Top Sellers · Sales Period: Last 30 Days · Max 10 · Only in-stock ✓ · Exclude recently purchased ✓ · Fallback: New Arrivals |
| 🛍️ Product page — "You may also like" | Predictive → Similar Items · Context: Event Attribute → Current Product · Max 8 · Exclude items in cart ✓ · Fallback: Category Best Sellers |
| 🛒 Cart — Cross-sell | Predictive → Frequently Bought Together · Context: Event Attribute → Current Product · Max 4 · Exclude items in cart ✓ · Only in-stock ✓ · Fallback: Top Sellers |
| 💌 Email — Personalised picks | Predictive → Recommended Items (User-Based) · Max 6 · Exclude recently purchased ✓ · Fallback: Top Sellers |
| 🆕 Category page — New in category | Rule-Based → Category New Arrivals · Context: Static → pick the category (or Event Attribute on dynamic pages) · Max 8 · Only in-stock ✓ |
| 🔥 Sale campaign — Deep discounts | Rule-Based → Discounted Products · Advanced Filter: Discount Greater Than 30 · Shuffle ✓ · Fallback: Trending Products |
Updated 2 months ago