
Geofence
A geofence is a virtual boundary that you draw around a real world location, such as a store, a mall, or an airport. Geofencing enables location triggered push notifications: a push notification is sent when a user's device enters, exits, or dwells in a geographic area you draw on a map.
Geofences and campaign content are stored on the device in advance, allowing notifications to be shown immediately when a user enters or exits a geofence. This ensures timely delivery without requiring a network request at the moment the boundary is crossed. Triggering is delegated to the operating system (iOS CoreLocation, Android GeofencingClient): the fence list and the campaign content are synchronized to the device ahead of time, and when the OS detects a transition, the notification is shown immediately from the cache. This is why a geofence campaign can fire even in airplane mode.
- You draw geofences and group them into reusable clusters. This is done under Data Space > Geofence.
- A geofence campaign then connects a push content, a trigger type, and one or more clusters, and defines who is eligible to receive it. Campaigns are created under Targeting Campaigns > Geofencing, see the Geofencing Campaigns guide.
- Every transition is reported back to Dengage, where it feeds campaign reports and can be used to build segments.
Prerequisites
Before you start using geofencing, make sure the following are in place:
- The geofence feature must be enabled for your account. Geofence is switched on per account. On a disabled account, the SDK ignores geofence completely. If you do not see Geofencing in your panel, contact your account manager.
- Your app must include the Dengage geofence SDK module in addition to the core SDK. For implementation instructions, refer to the iOS and Android Geofence Developer Guides
- The user must grant background location permission: "Allow all the time" on Android, "Always" on iOS. "While using the app" is not enough, because fences must be monitored while the app is closed.
How the Geofence Channel Behaves
- OS level triggering. The operating system wakes the app when a boundary is crossed, and the cached notification is shown at once. No network round trip is involved in the trigger path.
- Synced, not polled. Devices refresh their fence list through an automatic silent push every 6 hours, when the device moves far enough (about 1 km at walking speed, about 5 km at highway speed), and immediately when you press Sync Now in the panel. Only fences that belong to active campaigns are distributed to devices.
- Only the nearest fences are monitored. Both platforms limit how many regions an app may monitor (iOS allows 20 per app). The SDK registers the fences nearest to the device and swaps them as the user moves, so a distant fence starts being watched as the user approaches it.
- Missed transitions are recovered. Operating systems sometimes drop geofence events under battery optimization. The SDK cross checks the device location against its own state and repairs missed transitions. A recovered transition fixes future behavior but does not send a late notification.
- Offline still works. With the campaign's Offline Message setting enabled, cached content is shown as a local notification even with no connectivity, and the event is queued and sent to Dengage when the device comes back online.
Trigger Types
You choose the trigger type while building a geofence campaign, but it is useful to understand the trigger types before drawing your geofences, because the right radius depends on the trigger you plan to use.
| Trigger | Behavior |
|---|---|
| Enter | Fires the moment the user enters the area. If the user is already inside when the fence is registered on the device, the enter event fires immediately. |
| Exit | Fires when the user leaves the area. Exit is deliberately conservative: the device must move clearly beyond the boundary before the event fires. This prevents repeated notifications for users hovering at the boundary, at the cost of a slightly later exit. |
| Dwell | Fires when the user stays inside the area for the Dwell Duration you set (in minutes, default 3). Prefer a radius of 300 m or more so users do not cross and leave before the timer elapses. |
The Dwell trigger may not work reliably on iOS when the app is in the background or has been killed. On Android, longer dwell durations may increase battery consumption. The campaign form shows this warning when Dwell is selected.
Choosing the Right Radius
Most "the geofence did not fire" cases are caused by a radius smaller than the device can resolve. A location fix is a circle of uncertainty, not a point, and background geofencing rarely runs with a fresh GPS fix. Choose the radius accordingly.
| Radius | Expected behavior | Use for |
|---|---|---|
| Below 100 m | Frequently missed, may never fire | Avoid |
| 100 to 150 m | Fires only with a strong open sky GPS fix | Critical cases only |
| 150 to 300 m | Reliable, recommended range | Store, branch, building |
| 300 to 1000 m | Very reliable | Mall, campus, district |
| Over 1000 m | Very reliable, but the user may be far from the actual place | Region, area |
Keep these rules in mind when placing your geofence points:
- Add the expected accuracy to the size of the place. A 40 m wide store in a dense city center needs roughly 40 + 100 = 140 m, so round up to 150 m.
- Keep fences at least twice the radius apart. Overlapping or adjacent fences produce ambiguous transitions and duplicate looking notifications.
- Indoor geofences do not work. Indoors there is no satellite signal and accuracy falls to hundreds of meters. Cover the building, not a room inside it.
- The radius is used exactly as configured. The SDK does not enlarge or clamp it.
One Time Setup
Geofence needs a one time setup on two sides: the panel and the mobile app. Once both are in place, you can run every campaign from the panel.
Panel Prerequisites
- Geofence feature flag must be enabled. Geofence is switched on per account.
- Prepare transactional push content. Geofence campaigns send push content. Create it as transactional push content with the title, message, image, deep link, and languages you need, or create it inline while building the campaign; the campaign builder itself only selects content. Do not create the content in the marketing push section.
App Prerequisites
Your mobile team integrates the geofence module once, alongside the core Dengage SDK:
| Android | iOS | |
|---|---|---|
| Module | sdk-geofence, same version as the core SDK (6.0.97 or later) | DengageGeofence via CocoaPods or Swift Package Manager |
| Minimum OS | API 19+, API 29+ for background location | iOS 12+ |
| Permission | "Allow all the time" location | "Always" location, plus the location background mode |
| Testing | Physical device recommended | Physical device required |
- The app starts the engine with a single call (DengageGeofence.startGeofence()) right after SDK initialization, and requests location permissions with the SDK helper. The OS requires a two step flow: first "while in use", then "always".
- Geofence silent pushes are handled automatically once standard push setup is in place. Nothing needs to be sent manually.
- Ask users for the location permission in context, after explaining the benefit. A cold prompt on first launch is usually denied, and a denial is expensive to reverse.
Geofence Clusters
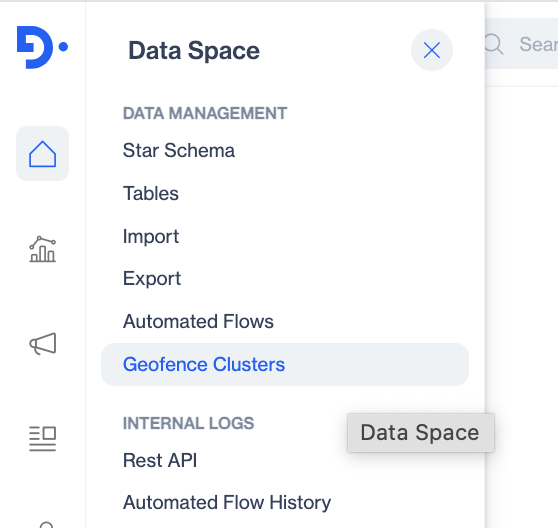
Clusters live under Data Space > Data Management > Geofence. This screen is your first step for using geofencing.
Geofence Clusters
A cluster groups one or more geofence points under a single name, so you can select them all at once when setting up a campaign and reuse them across campaigns. Changes made to a cluster are periodically synced and are also reflected in any active campaigns that use that cluster.
The Cluster List
When you open Data Space > Geofence , you see all the geofence clusters defined in your account. The page header also shows how many of your clusters are currently active. You can search clusters by name and use Filter to narrow the list.
The listing page has two views, List and Card, which you can switch between at the top of the list:
- List view shows each cluster in a table with the following columns: Name, Status (Active or Paused), Geofence (how many geofence points the cluster contains), Enter and Exit (the accumulated event counts for the cluster), Campaign (how many campaigns use the cluster), Created On, and Created By.

List
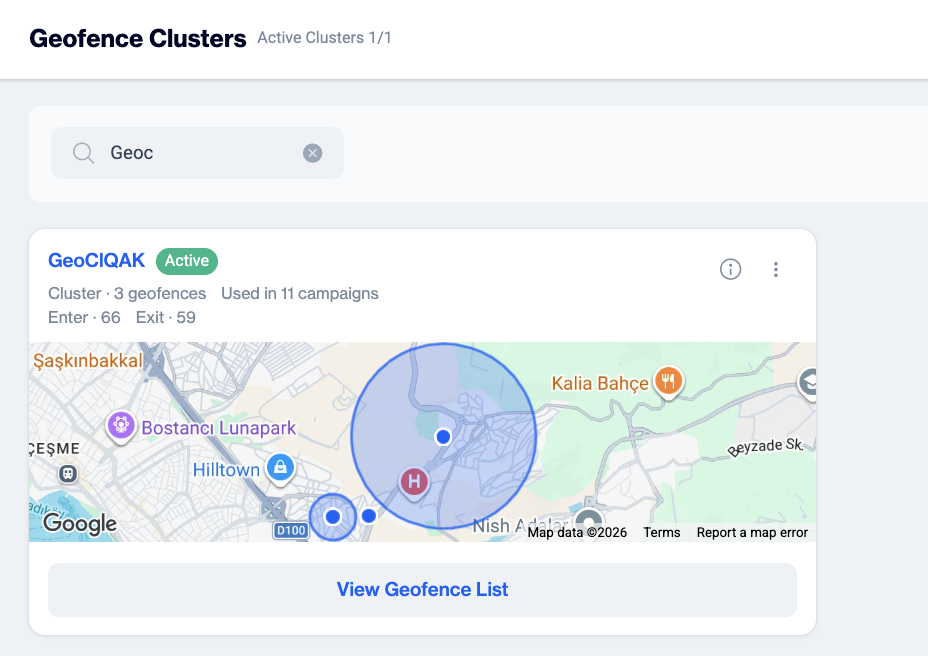
- Card view additionally shows the clusters on a map. Each card summarizes the same information. From the card you can Edit, Pause, or Delete the cluster, and View Geofence List opens the list of geofence points inside the cluster.
Card
Creating a Cluster
To create a new cluster, click + New on the Geofence Clusters page. (You can also create a cluster without leaving the campaign builder, using the + Add Geofence button there.) There are two steps:
-
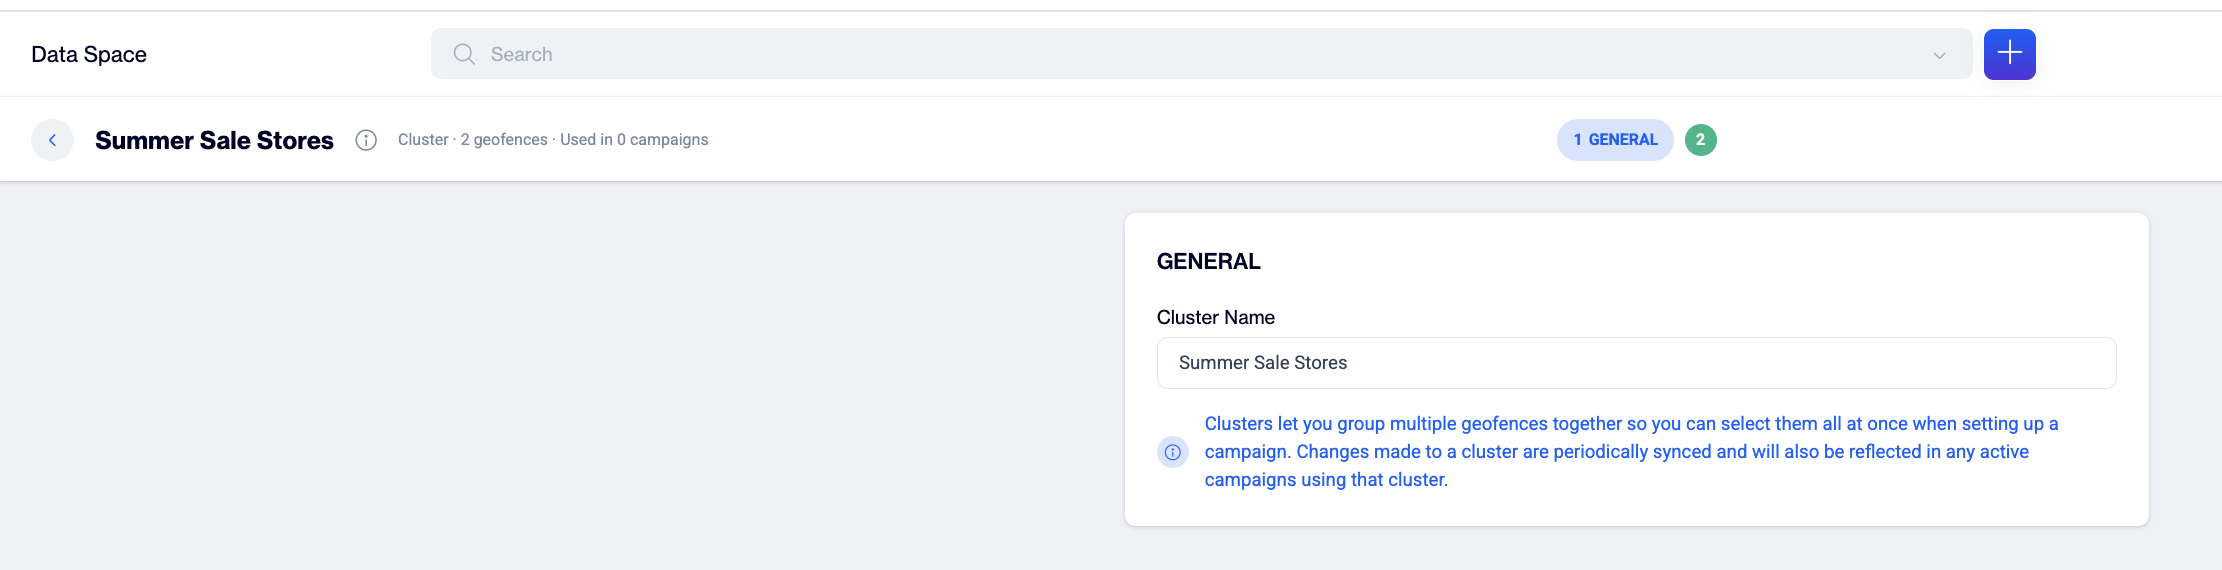
General. Give the cluster a name and click Next.
Cluster Name
-
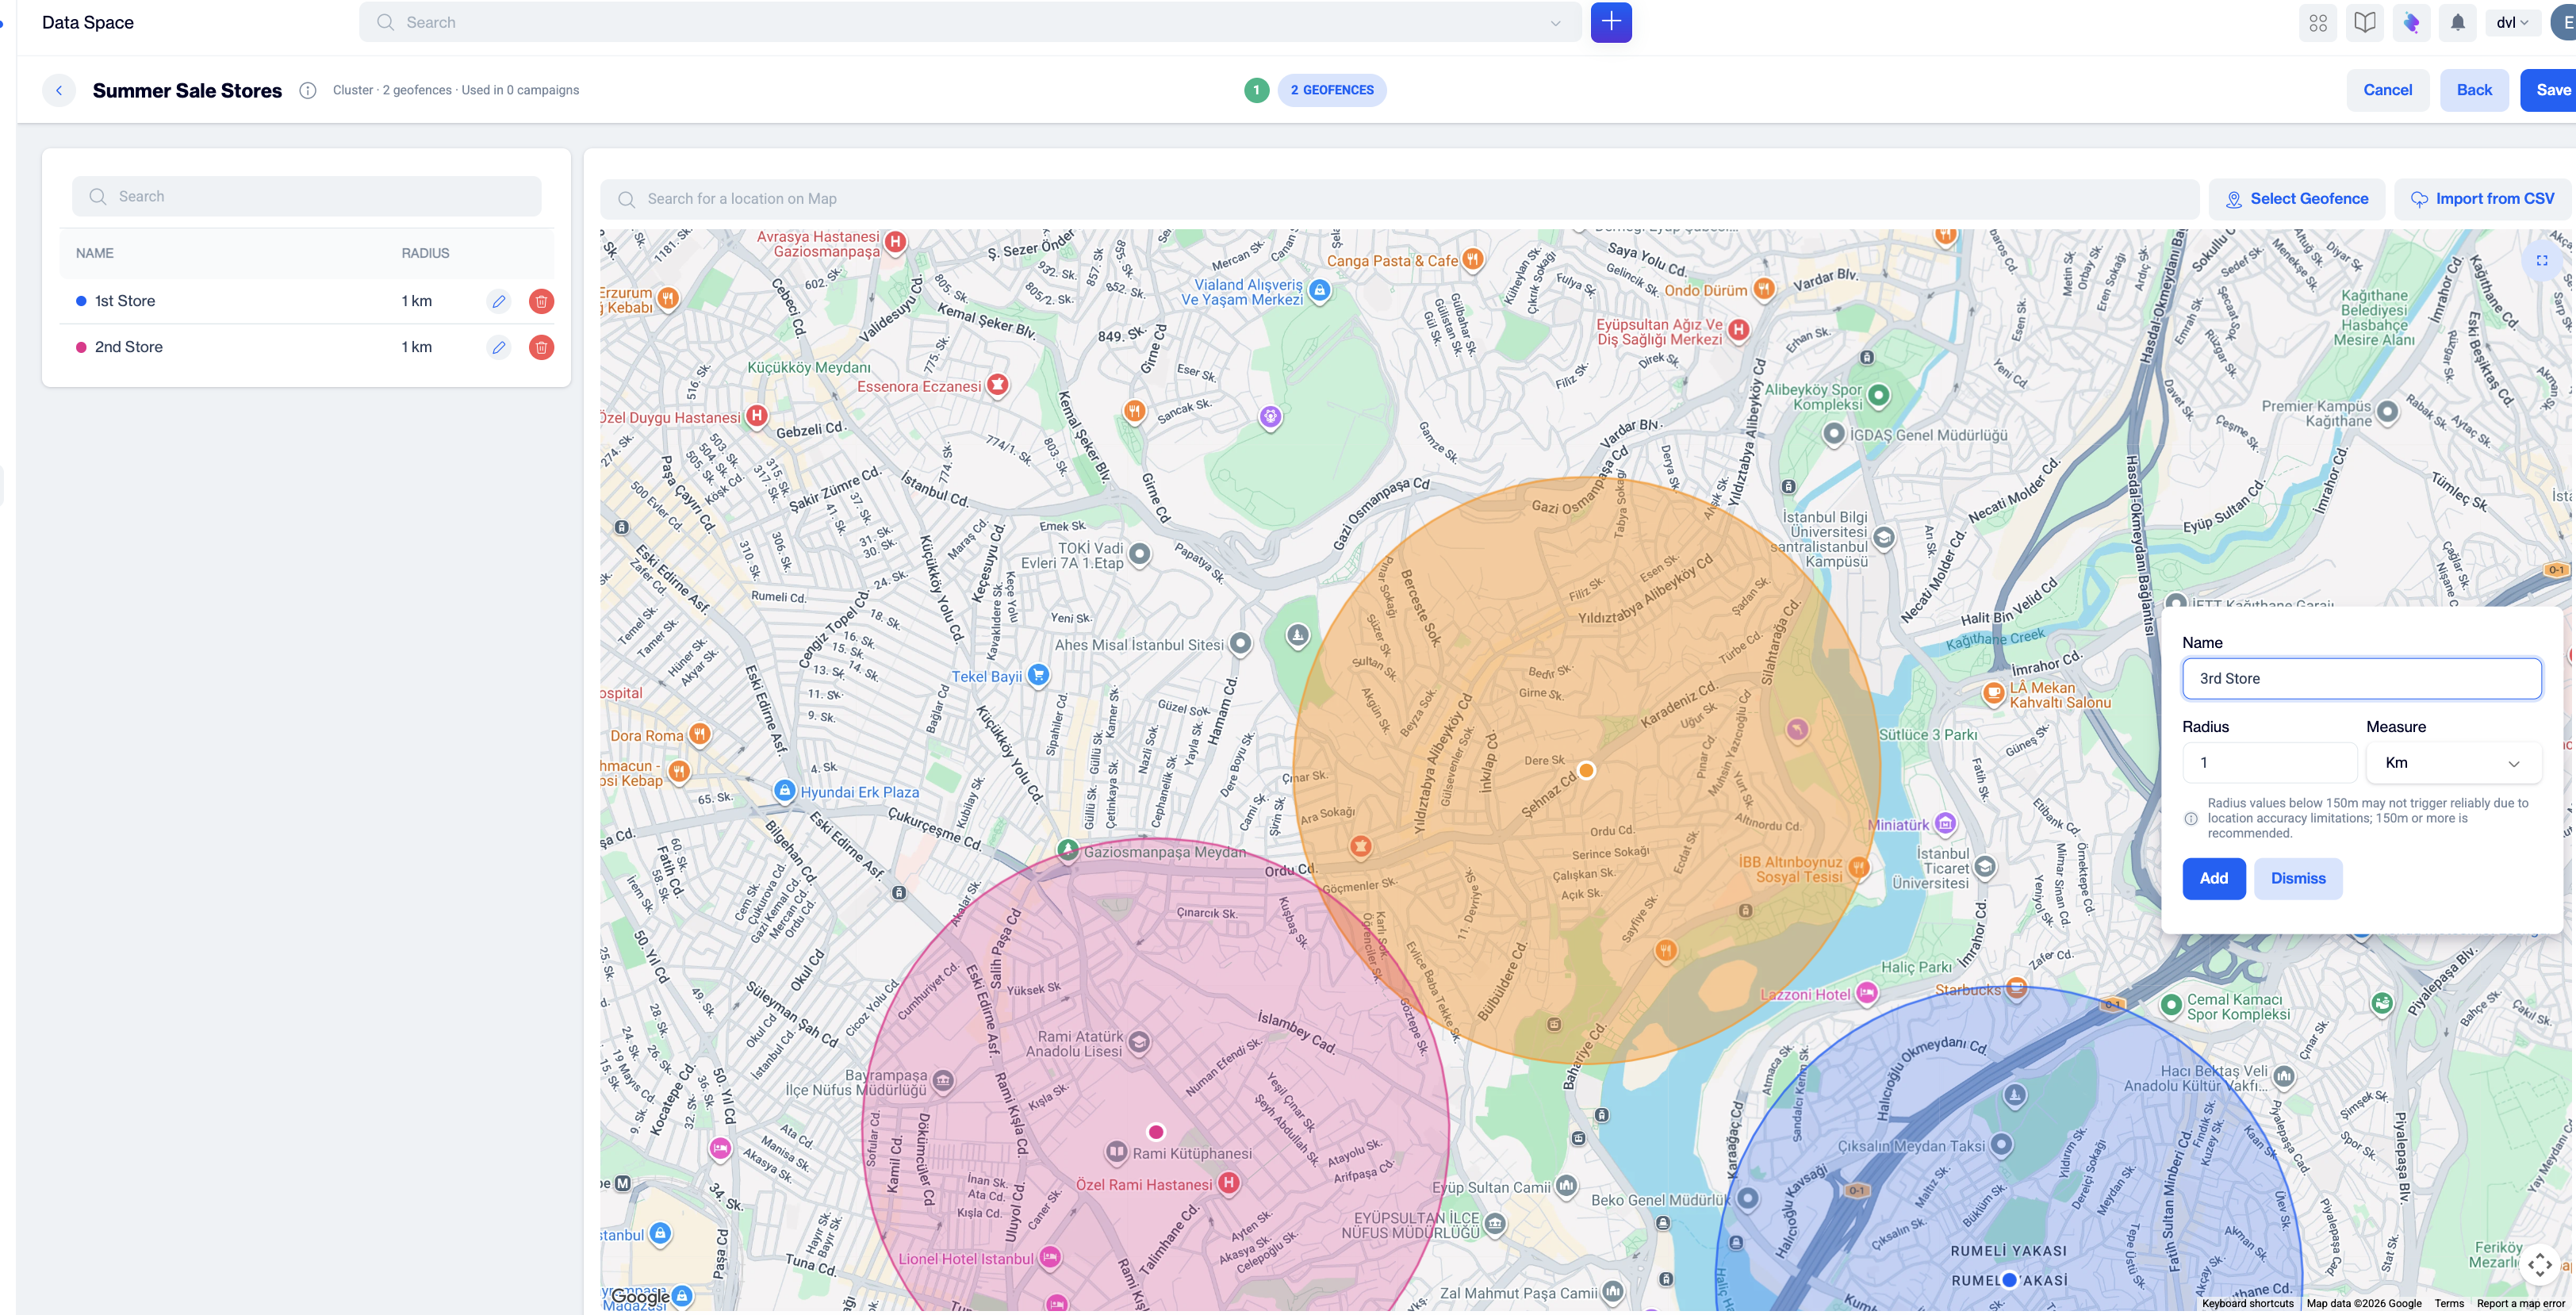
Geofences. Add the geofence points that belong to this cluster. You can add points in three ways, and combine them freely:
- Draw on the map. Find each location on the map, drop a point, and set its radius, then save the point. Follow the radius guidance below when sizing your fences.
The minimum distance for a cluster is 0.05 km or miles, depending on the selected unit.
The maximum distance for a cluster is 25 km or miles, depending on the selected unit.
- Select Geofence. Click this button to choose from geofences that already exist, instead of drawing them again.
- Import from CSV. Upload many geofences at once from a file.
- Draw on the map. Find each location on the map, drop a point, and set its radius, then save the point. Follow the radius guidance below when sizing your fences.
Geofences
When you are done, save the cluster. It is stored in Data Space and becomes selectable in every geofence campaign under Targeting Campaigns > Geofencing.
Importing Geofences from a CSV File
Geofence uploads are supported only with CSV files that use a fixed column structure. Your file must include the following columns: GeofenceName, Longitude, Latitude, Radius, and MeasureType (the measurement unit used for the radius). To ensure a correct upload, use the Sample File provided on the import screen.
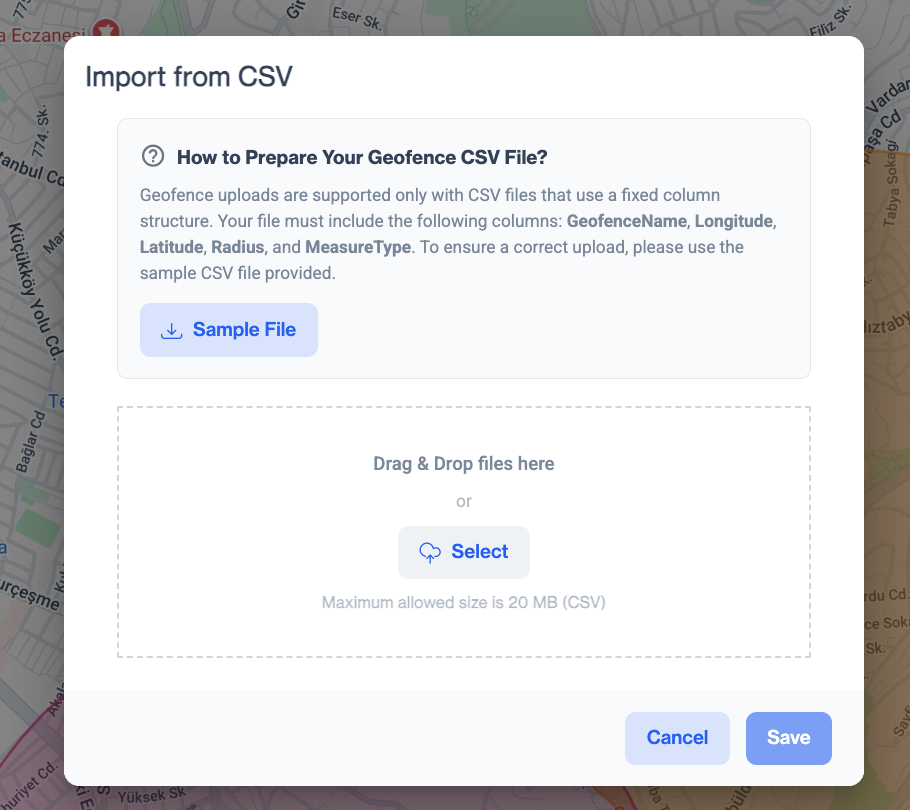
Import from CSV
Drag and drop your file onto the upload area, or click Select to browse for it. The maximum allowed file size is 20 MB (CSV).
Overlapping Geofences
If a geofence you are adding overlaps with an existing one, for example when one geofence is large enough to contain another, the panel shows this warning:
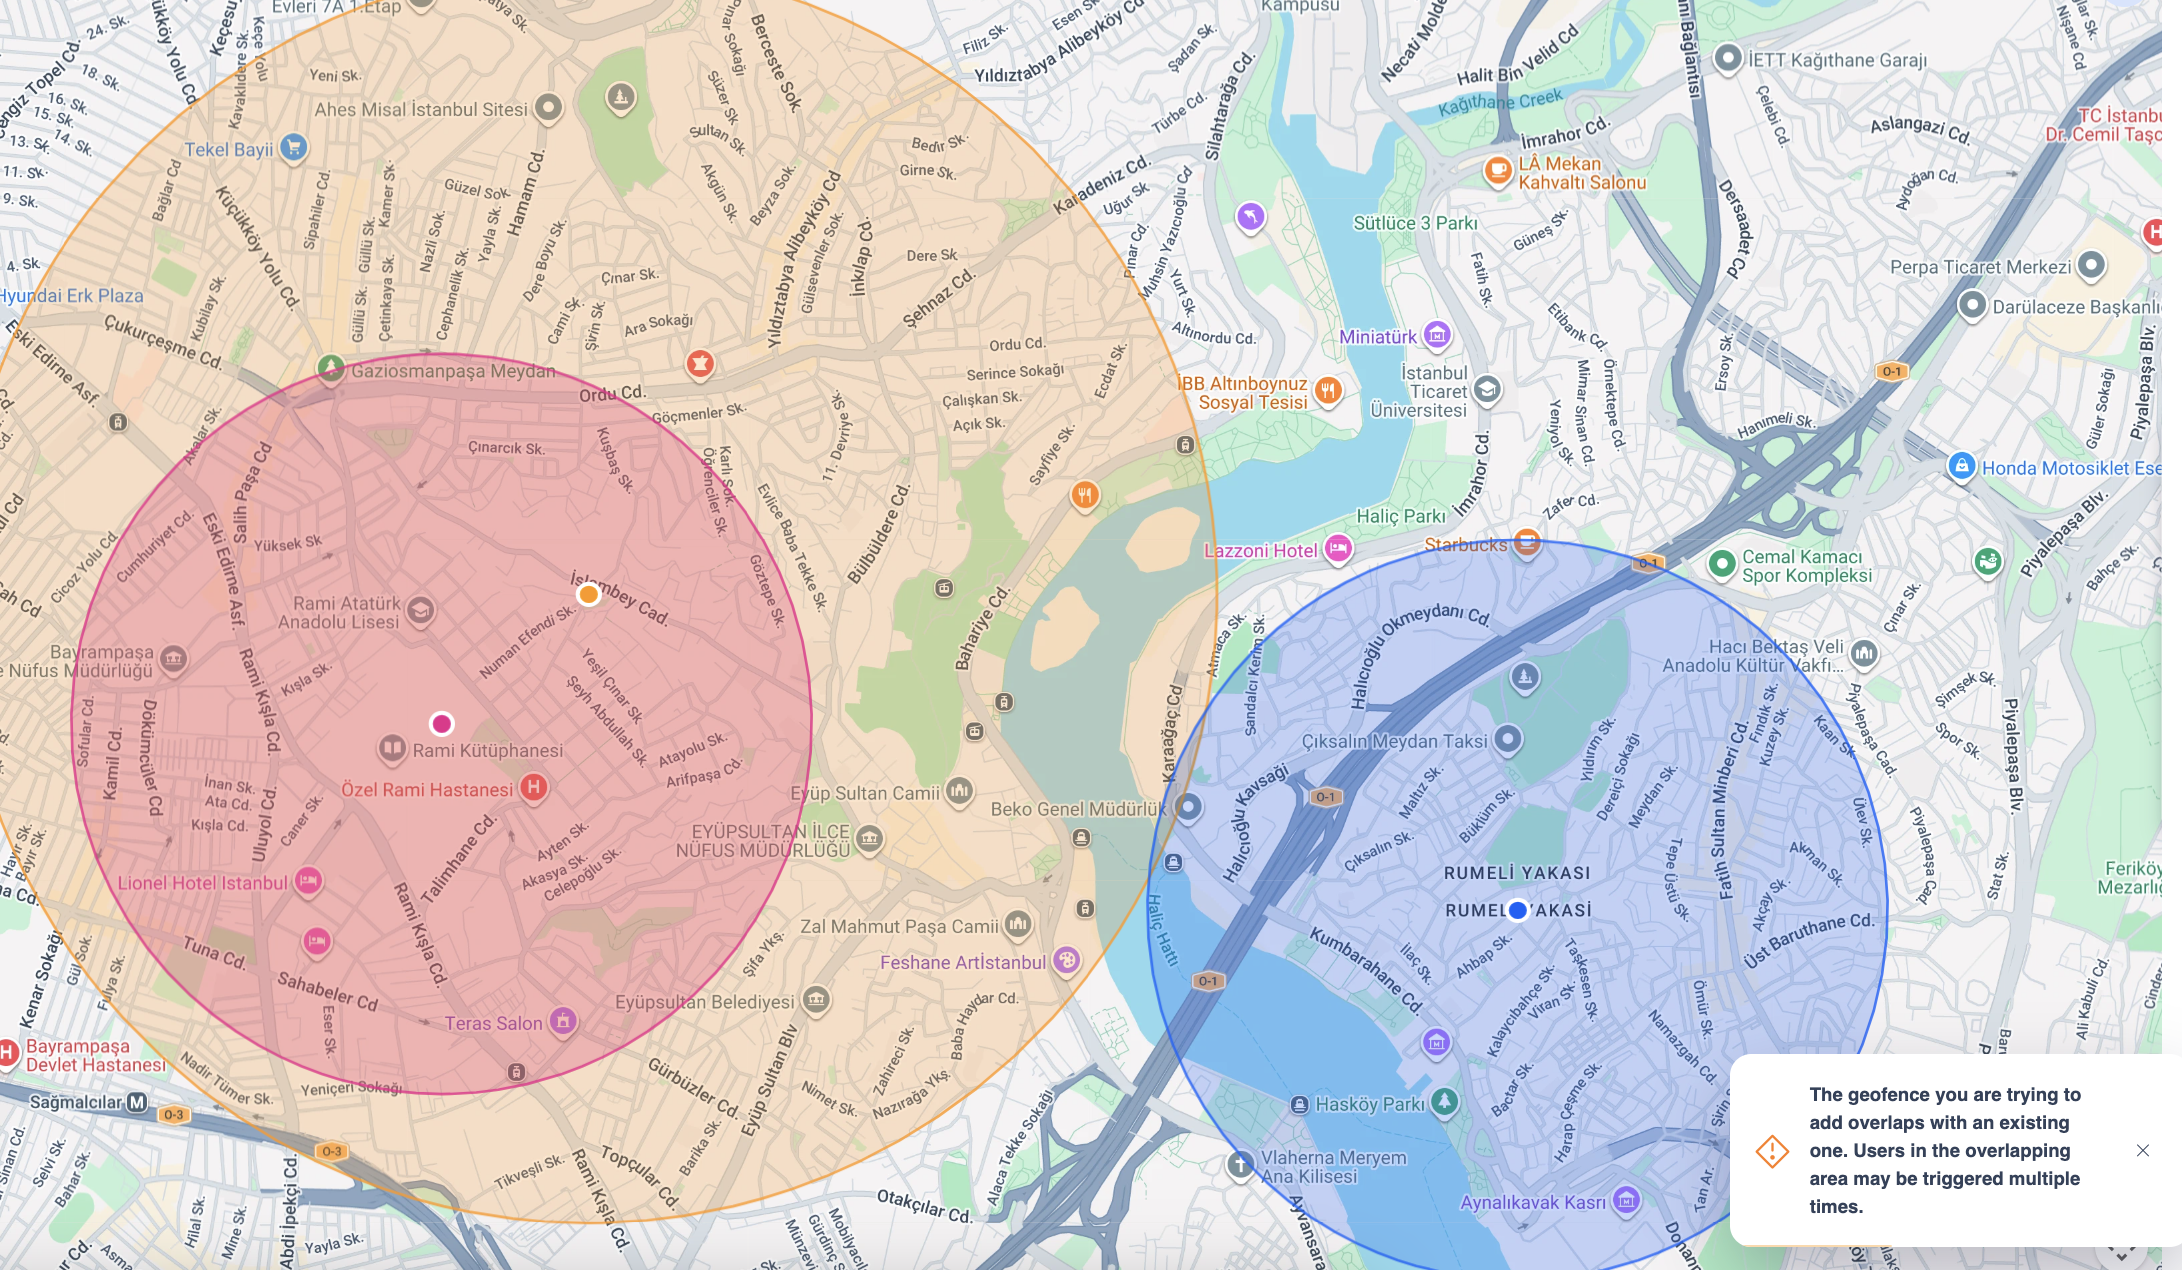
The geofence you are trying to add overlaps with an existing one. Users in the overlapping area may be triggered multiple times
You can still save the geofence, but keep in mind that users located in the overlapping area may receive more than one notification. Where possible, keep fences at least twice the radius apart.
Managing Clusters
The cluster list shows each cluster's status, how many geofences it contains, its accumulated Enter and Exit event counts, how many campaigns use it, and who created it. Use the row menu to Edit, Pause, or Delete a cluster.
Changes made to a cluster are periodically synced and are reflected in any active campaign that uses that cluster. To push a change to devices immediately, use the Sync Now button. Follow the radius guidance in this document whenever you add or move geofence points.
Once your clusters are ready, continue with the Geofencing Campaigns guide to connect them to a push content, choose a trigger, and go live.
Use Cases
- Store and branch networks. Create one cluster per city or region, for example "Istanbul Stores" and "Ankara Stores", with a 150 to 300 m radius around each store. Campaigns can then target a whole region with one selection, and the per cluster Enter and Exit counts let you compare footfall between regions.
- Bulk onboarding of many locations. If you have dozens or hundreds of branches, prepare their coordinates once and upload them in a single CSV import instead of drawing each fence by hand.
- Malls, campuses, and large venues. Cover large places with a 300 to 1000 m radius. A reusable "Malls" cluster can serve every mall campaign you run, and dwell based campaigns work best with these larger fences.
- Events and seasonal locations. Create a temporary cluster for a fair, stadium, or pop up store. When the event is over, pause the cluster so it stops feeding campaigns, and reuse it next season.
- Airports and transport hubs. Group airports and stations into a travel cluster with a large radius. These fences are very reliable and pair well with offline delivery, since travelers often have no connectivity.
- Districts and regions. For city level promotions, use fences over 1000 m to cover a district. Keep in mind that users may be far from any specific venue inside such a large area.
FAQ
Nothing fires while the app is in the background or closed.
Verify the location permission is "Allow all the time" (Android) or "Always" (iOS); "while using the app" is the most common cause. On Android, aggressive vendor battery managers (Xiaomi, Huawei, Oppo, Samsung) restrict background work well beyond stock Android; guide users to exempt the app from battery optimization. If geofence works on one device but not another, this is the usual reason.
Events arrive, but very late.
Usually Doze on Android or process suspension on iOS; both platforms defer background work when the device is idle. Test with the device moving and the screen occasionally on before reporting an issue.
Why does the exit notification come later than the actual exit?
By design. The device must move clearly beyond the boundary before exit is inferred, which prevents users standing at the boundary from generating repeated enter and exit notifications.
The SDK recovered a missed transition. Why was no notification shown?
Recovery restores correct future behavior, but the missed push stays missed on purpose: the transition happened at an unknown point in the past, and delivering a notification about it hours later would be misleading.
Does geofence survive the user force stopping the app?
No. If the user force stops the app from system settings, nothing is delivered until the app is launched again. Swiping the app away from the recents list is survivable; force stop is not.
What are the minimum versions?
Android: core SDK and sdk-geofence 6.0.97 or later (same version for both), Google Play services location, API 29+ for background location. iOS: iOS 12+ with the DengageGeofence module. Test on a physical device, outdoors and moving; simulators do not reproduce real geofencing behavior.
Updated 2 months ago