
Inapp Campaign Redesign
The In-App Campaign Redesign updates the platform experience for creating and managing campaigns that appear inside your app. The redesigned workflow organizes the campaign setup into clear, logical steps, making it easier to select content, define targeting, choose audience, and review settings.
This redesign improves usability by:
- Separating the process into Content, Targeting, Audience & Delivery, and Summary steps
- Making campaign details, content selection, and delivery rules more visible and easier to manage
- Offering smarter controls for in-app delivery, and audience targeting
With the In-App Campaign Redesign, campaigns can now be created faster and more accurately, helping you deliver relevant content to app users with confidence.
Step 1: Content
The Content step is where you define the basic details of your In-App campaign and select the content that will be shown to your app users. This step ensures that all essential campaign information is set up before moving on to targeting and audience selection.
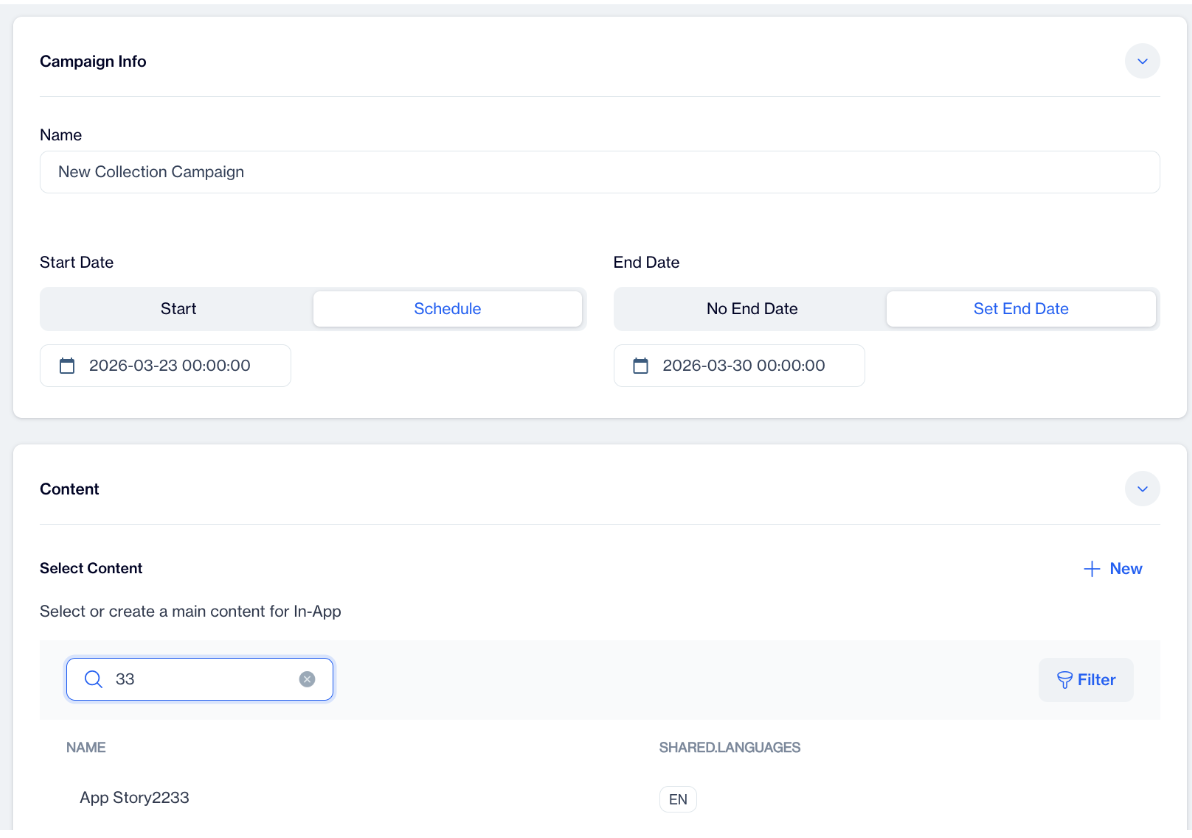
In-App Content
Campaign Info
In the Campaign Info section, you give your campaign a name and set the dates for when it will run. You can select a start date and either leave the campaign without an end date or set a specific end date. This makes it easy to control the timing of your campaign.
Content
The Content section is where you select the main content for your campaign. You can choose existing content or create new content directly from this step. Use the search and filter options to quickly find the content you need.
Step 2: Targeting
The Targeting step lets you control where and when your In-App campaign will appear. This ensures your campaign is delivered to the right users in the right part of the app at the right time.
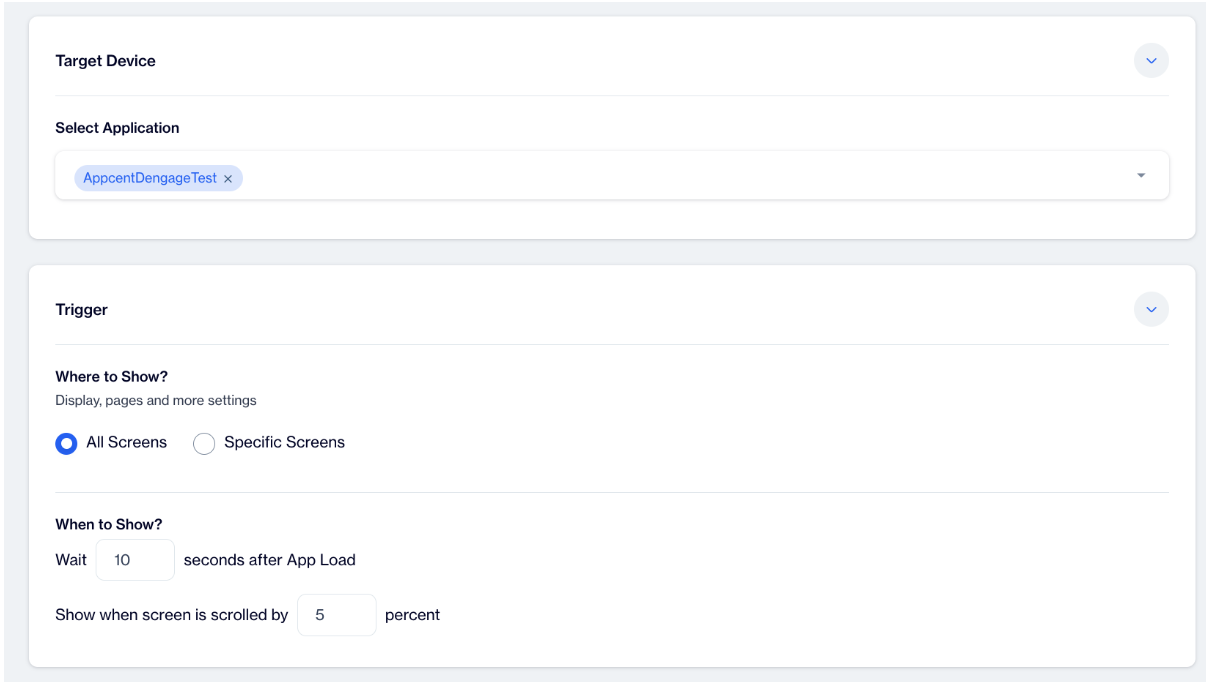
Targeting
Target Device
In the Target Device section, you select the application where the campaign will run. This ensures that your campaign is delivered to the correct app environment.
Trigger
Where to Show
The Where to Show section lets you choose which screens in your app will display the campaign. You can select All Screens to show it everywhere, or choose Specific Screens to limit the campaign to particular screens. This gives you precise control over campaign placement within your app.
When to Show
The When to Show section controls the timing of your campaign. You can set it to appear a certain number of seconds after the app loads, or after the user scrolls a specific percentage of the screen. These settings help you deliver your campaign at the optimal moment for user engagement.
Step 3: Audience & Delivery
The Audience & Delivery step lets you define who will see your In-App campaign and how it will be delivered. This step ensures your campaign reaches the right users while controlling how often they see it.
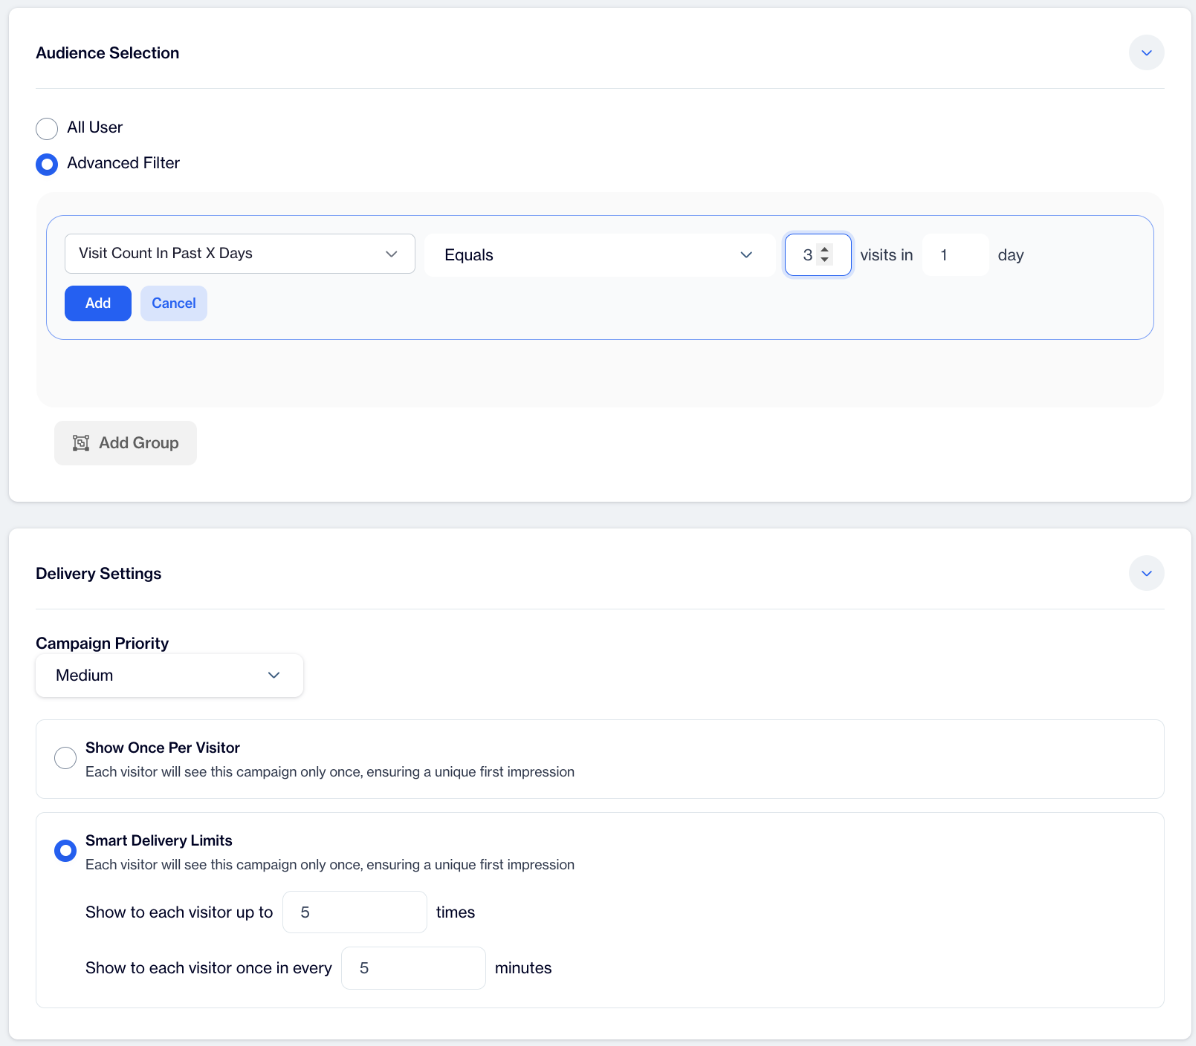
Audience & Delivery
Audience Selection
In the Audience Selection section, you can choose to show the campaign to all users or use the Advanced Filter to create specific segments. You can further refine your audience by adding filters or groups, giving you precise control over who receives your campaign.
Delivery Settings
The Delivery Settings section controls how the campaign is shown to users. You can set the Campaign Priority, which determines the order in which campaigns are displayed if multiple campaigns are active.
You can also choose Show Once Per Visitor to ensure each user sees the campaign only one time, creating a unique first impression. Smart Delivery Limits allow you to control repeat exposures. For example, you can set each visitor to see the campaign up to a certain number of times, or limit it to once within a specific time interval, like every five minutes. These settings help manage user experience and prevent overexposure to the campaign.
Step 4: Summary
The Summary step gives you a complete view of your In-App campaign before it goes live. All key settings are displayed in one place, so you can review and make sure everything is set correctly.
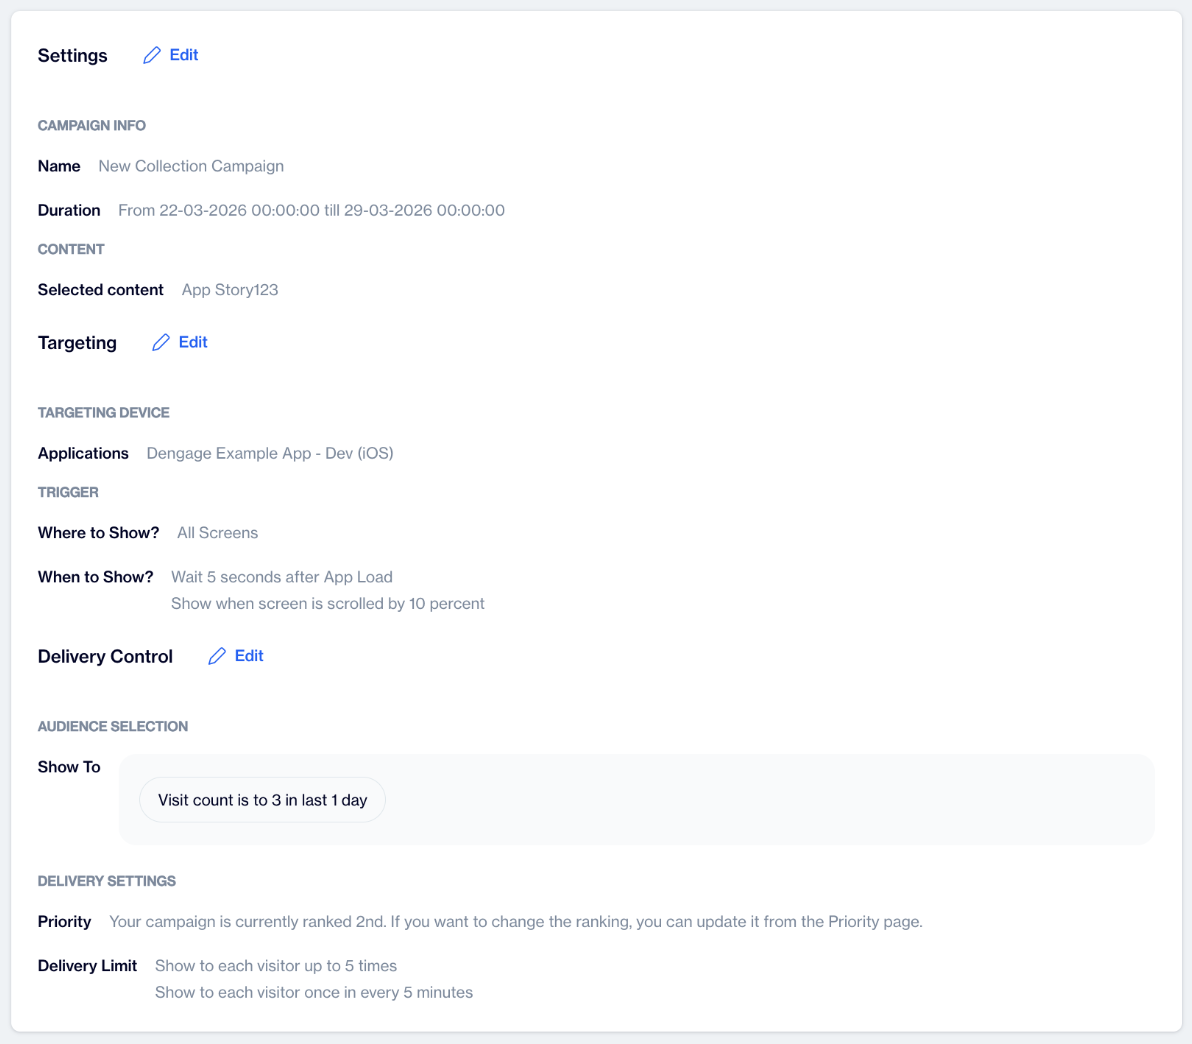
Summary
Settings
In the Settings section, you can review your campaign information and selected content. This includes the campaign name and its duration, showing when the campaign will start and end. You can also see the selected content that will be displayed to your app users.
Targeting
The Targeting section shows where and when your campaign will appear. You can review the selected application, the screens where the campaign will be displayed, and the trigger conditions such as showing after app load or based on scroll behavior. This helps you confirm that the campaign will appear in the right context.
Audience Selection
In the Audience Selection section, you can see which users will receive your campaign. This includes any filters or conditions applied to define your audience, helping you confirm that the campaign targets the correct user group.
Delivery Settings
The Delivery Settings section shows how the campaign will be delivered to users. You can review the campaign priority and delivery limits, including how many times a user will see the campaign and the time intervals between displays. This ensures the campaign is delivered as intended without overexposing users.
This final step helps you confidently review all campaign details before launching, making sure everything is set as intended.
The new step-by-step structure makes it easier to create and manage In-App campaigns. You can quickly configure your campaign and ensure it reaches the right users at the right time.
Updated 1 day ago