
Sending Whatsapp Marketing Messages
Welcome to the world of WhatsApp Marketing Messages, an innovative addition to our platform designed to revolutionize your marketing efforts. With WhatsApp Marketing Messages, you gain the power to effortlessly connect with your audience on a whole new level. WhatsApp, boasting billions of users worldwide, provides a dynamic platform for engagement. Whether you're nurturing leads, sharing promotions, or delivering exceptional customer support, this feature empowers you to create meaningful connections like never before.
In this guide, we'll start from the basics, providing you with essential insights and step-by-step instructions to help you navigate and harness the full potential of WhatsApp Marketing Messages for your marketing campaigns.
TipReach out to our technical support to activate this feature and enjoy WhatsApp marketing messages like never before.
Before Sending Marketing Messages
Integration with a Service Provider
On the D·Engage platform, integrating with an external service provider is a vital prerequisite for sending WhatsApp marketing messages, as WhatsApp is not natively supported within our services. This integration is a crucial step to enable WhatsApp marketing campaigns.
Information about Service ProvidersCurrently we are integrated with CM.com and Karix as solution partners for whatsapp service provider. As soon as new providers has been added to the platform will be announced.
- Navigate to Data Space > Integrations
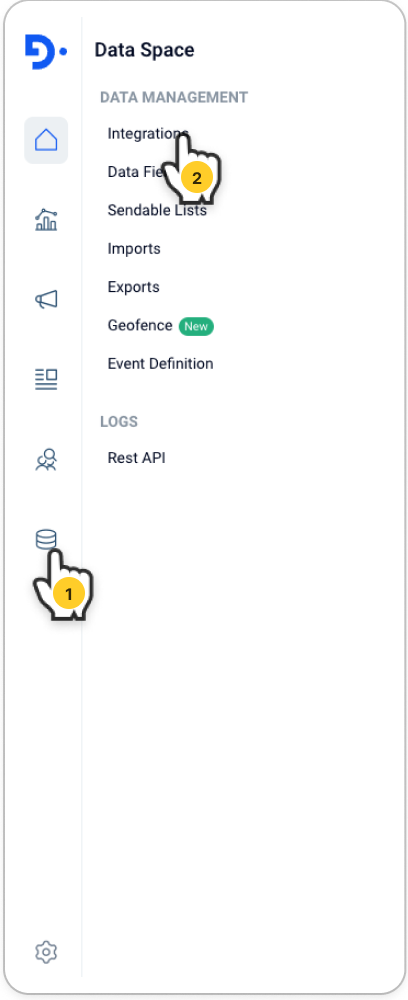
- Locate WhatsApp in the list and click the Connect button.

If the Connect button is not visibleThat means , WhatsApp is not activated yet for your account , would you please contact your Account Manager or our Technical Support team to Activate WhatsApp integration for your account.
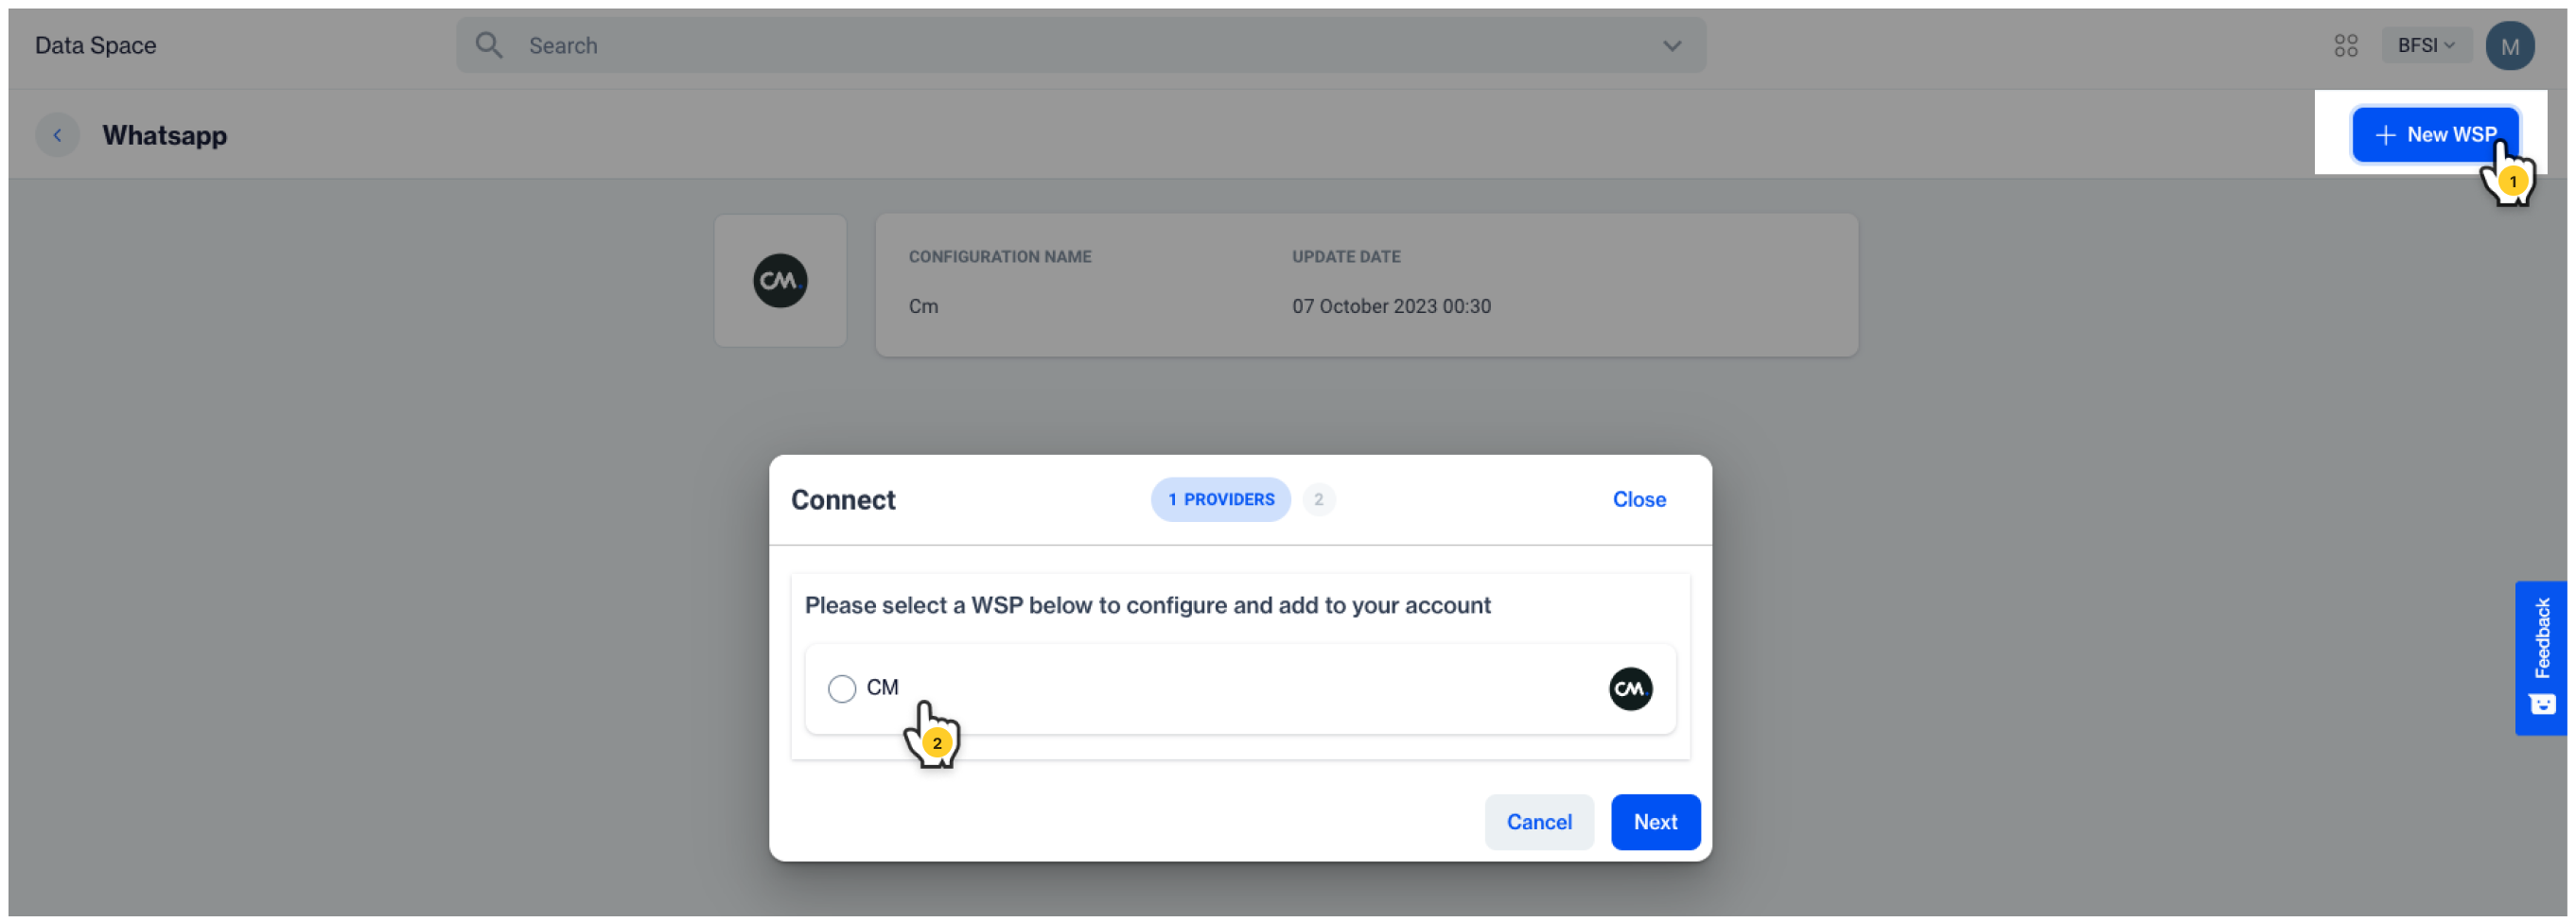
- Click on the "New WSP" button, then select your provider and click "Next" to proceed.
Integration Process for WhatsApp Service ProvidersBeyond this stage, the configuration steps will differ depending on your chosen WhatsApp Service Provider (WSP). Please refer to the relevant section below to complete your configuration.
Integration with Karix
- From the list of providers, select Karix.
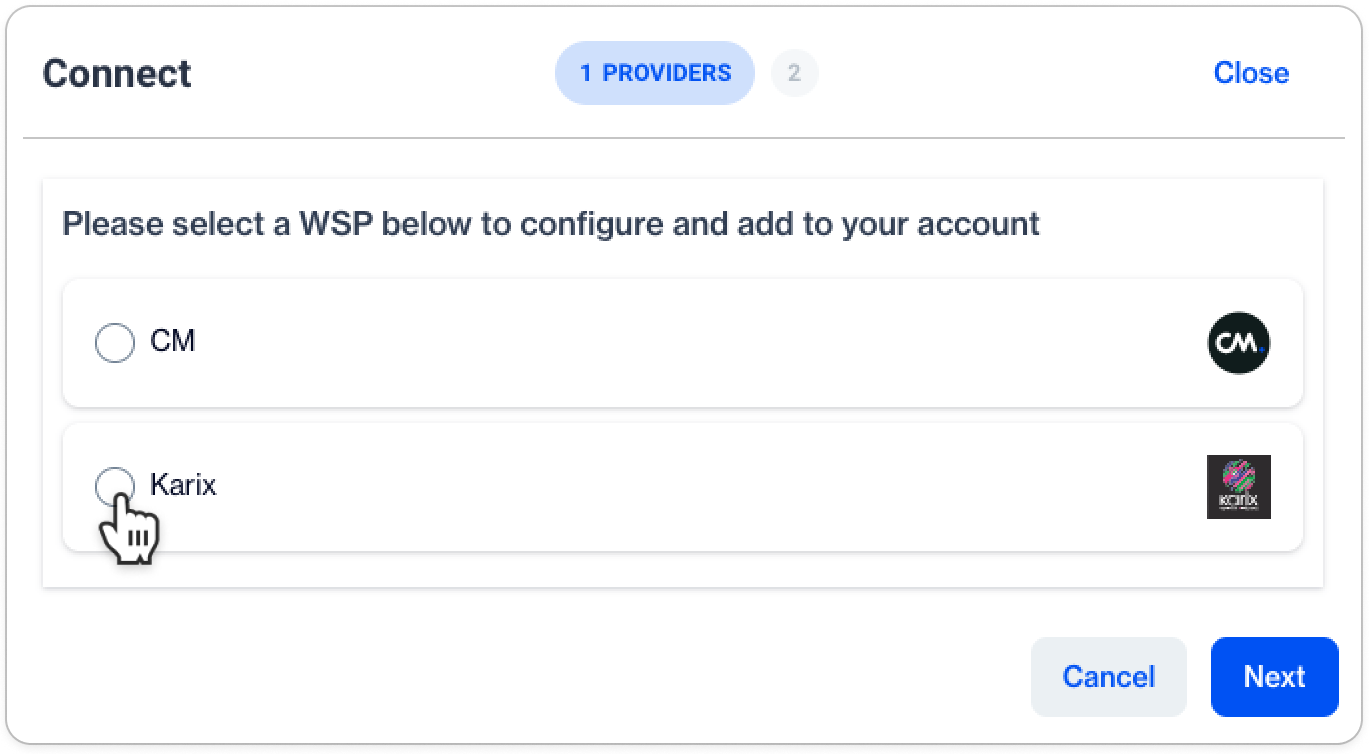
A configuration form will appear. Please follow the step-by-step guide below to fill in the necessary fields.
Obtaining WABA Id
- Login to your Karix Panel
- Navigate to WhatsApp Campaign

- Select the WABA Status
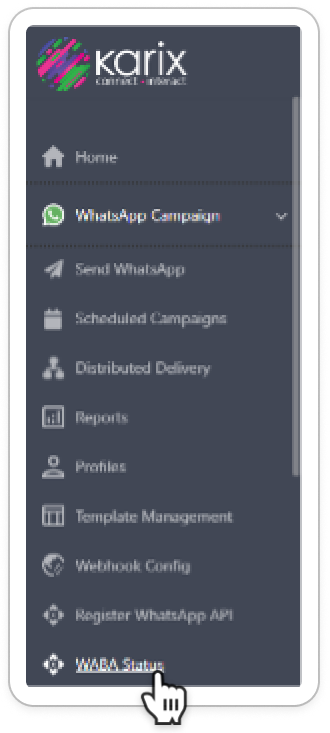
- From the data grid, Copy The WABA ID .
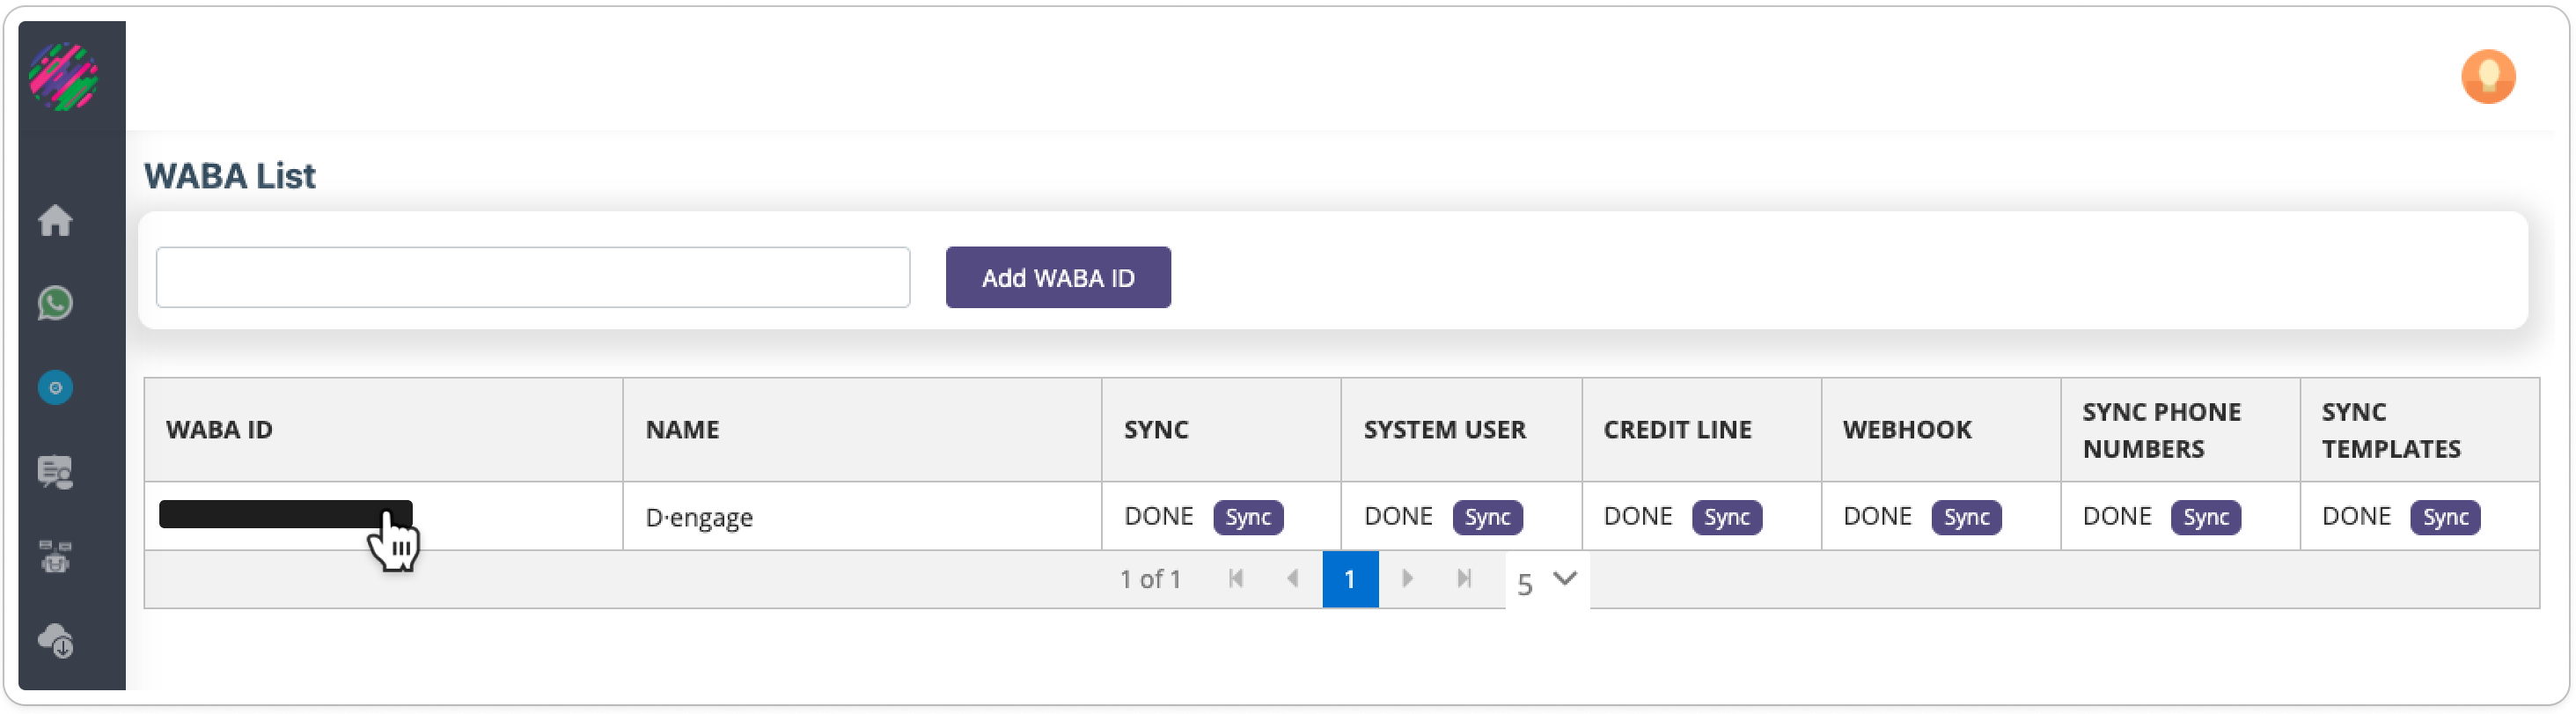
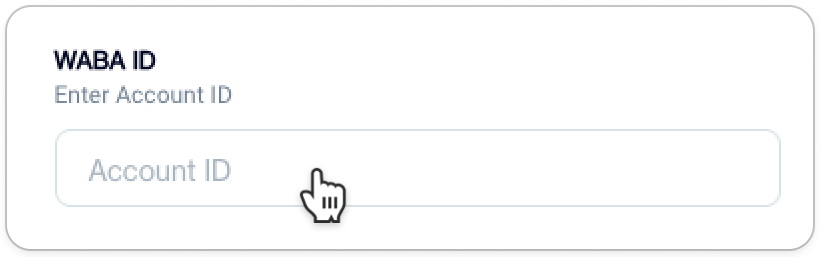
- In the WSP form, paste the WABA ID into the designated section.
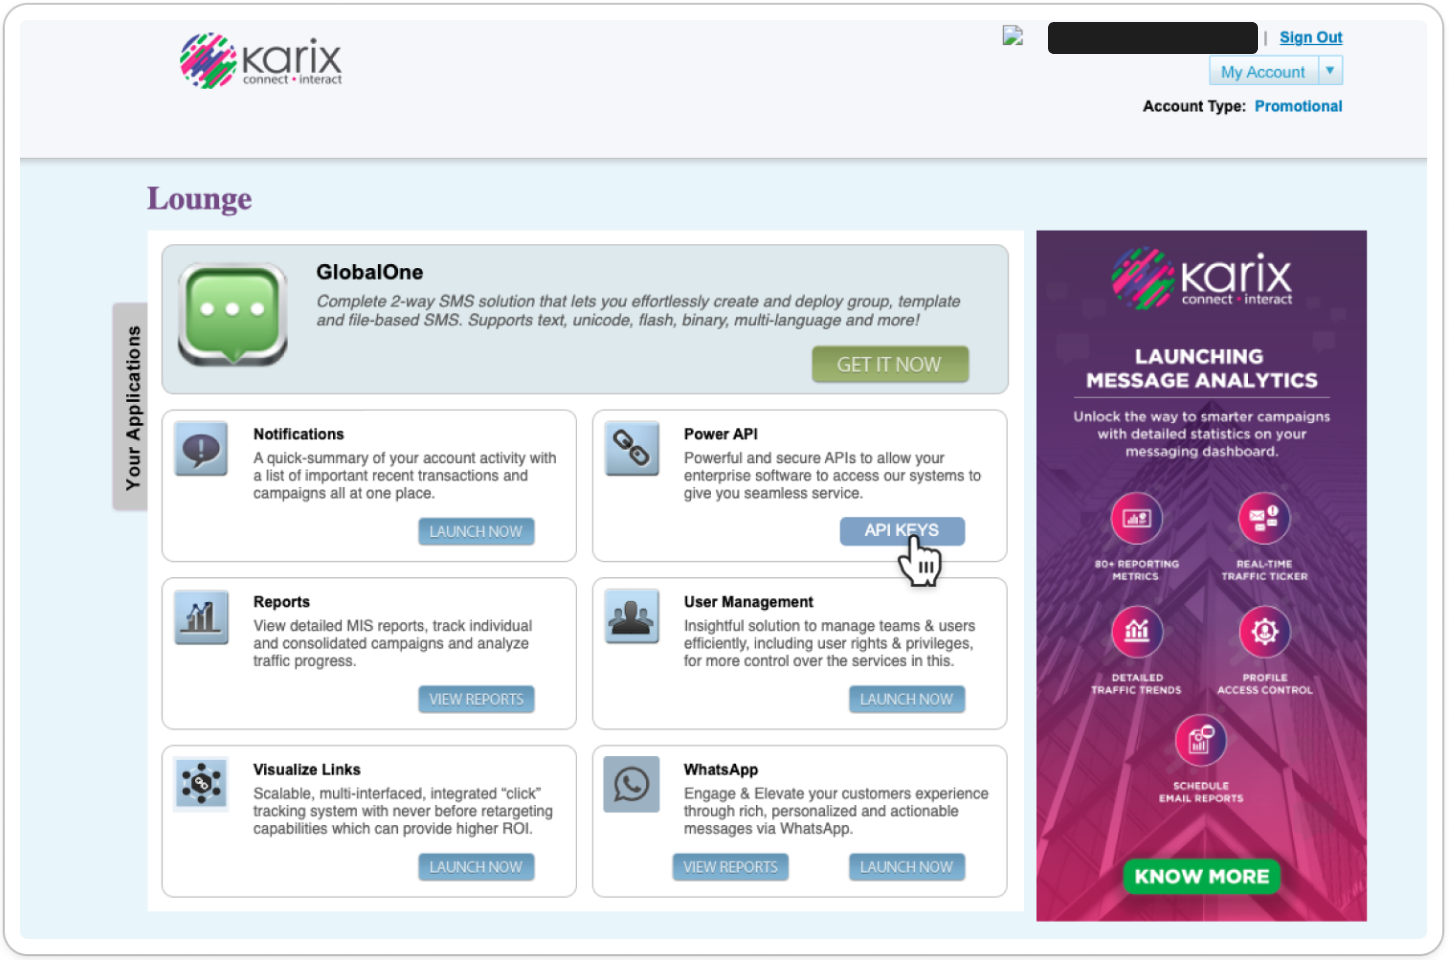
Obtaining Product Token[API KEYS]
- Access the Karix Lounge
- Under the Power API section, click on the API KEYS button.
- Reveal the API Key by clicking the Eye icon and copy it.
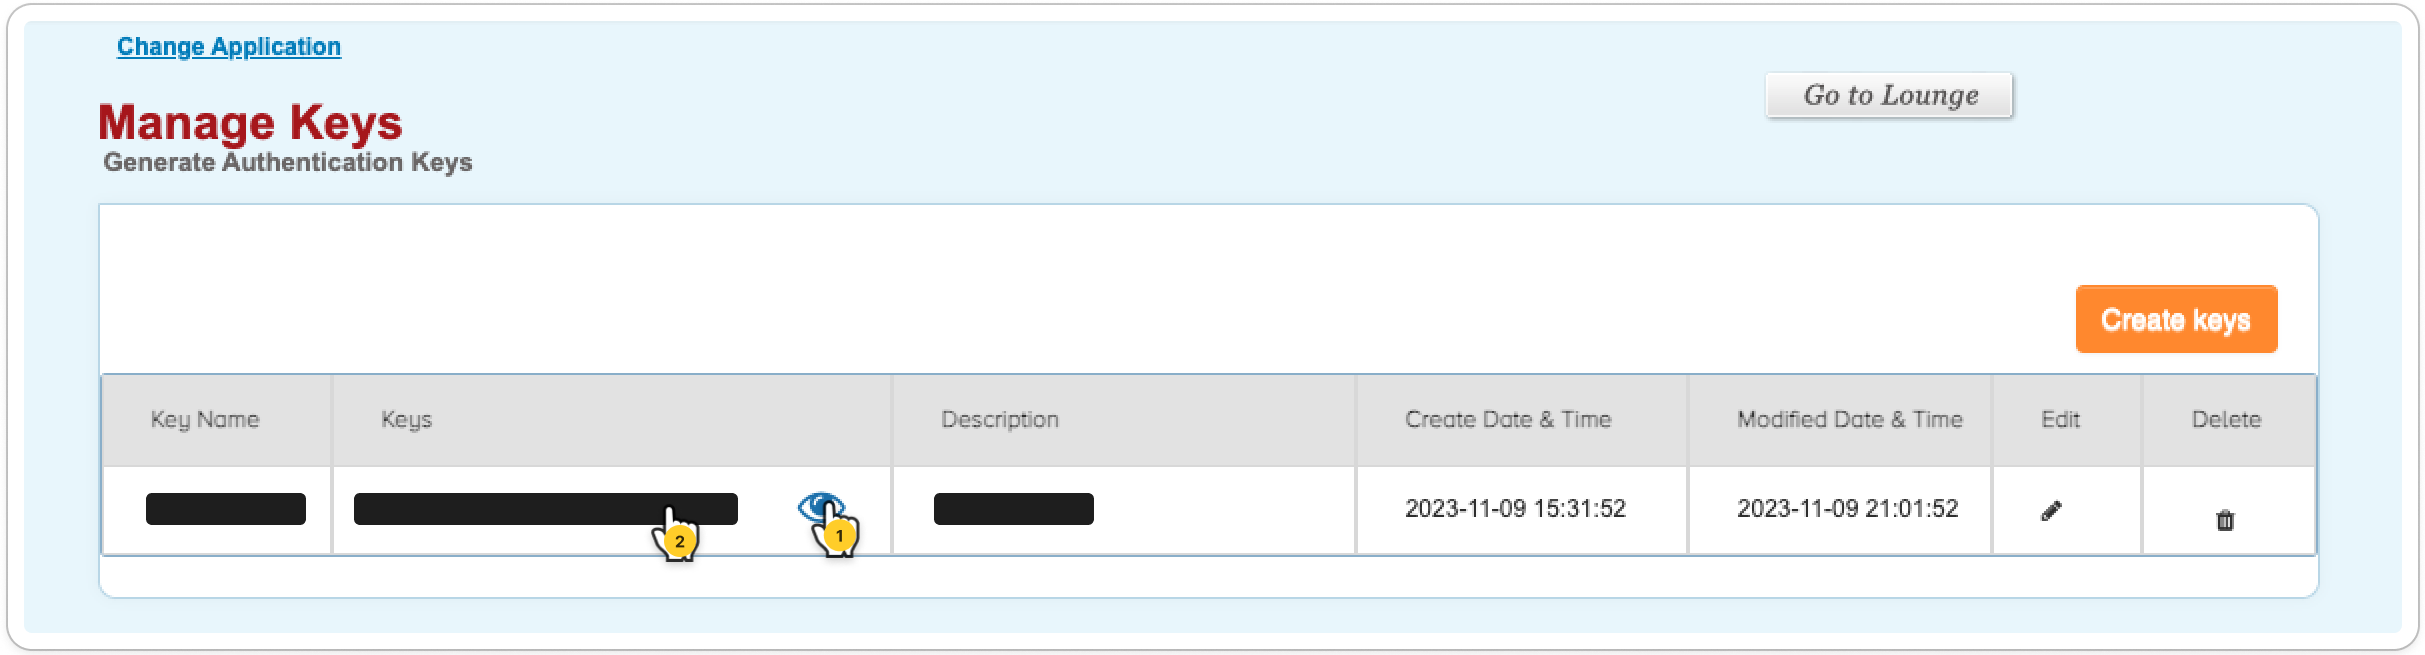
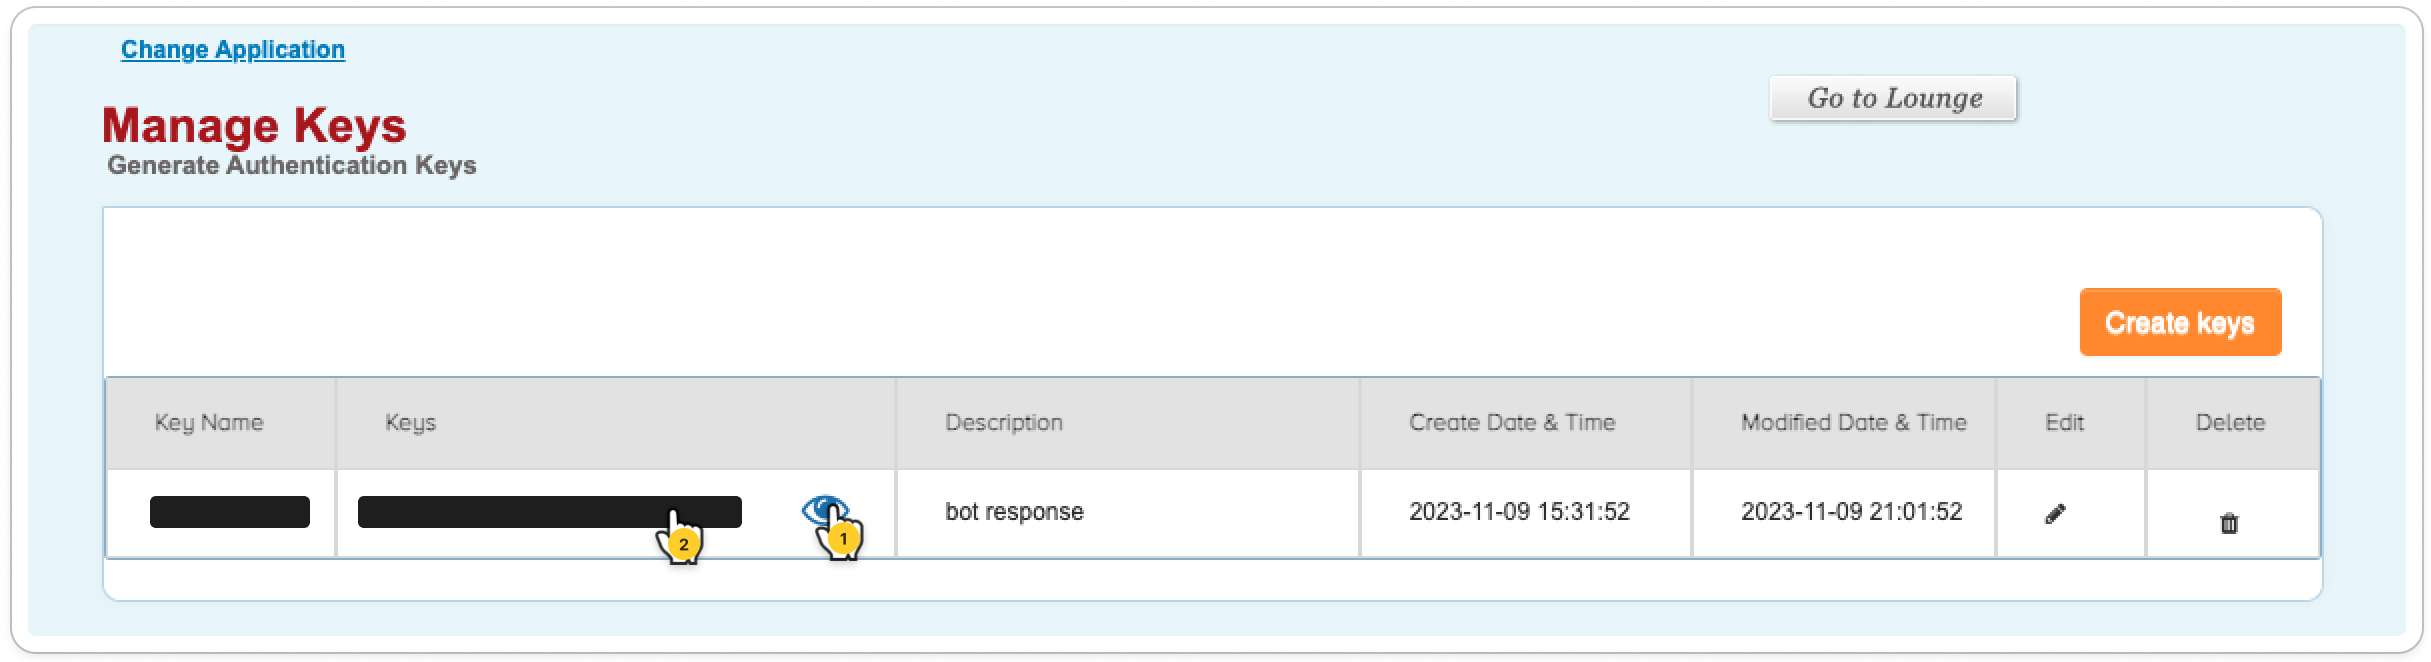
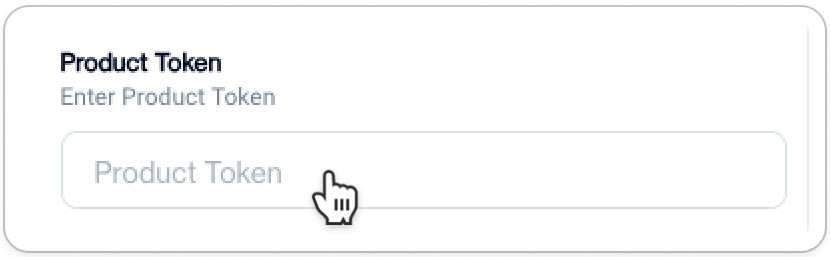
- Paste the copied ID into the Product Token [APIKEYS] section on the WSP form.
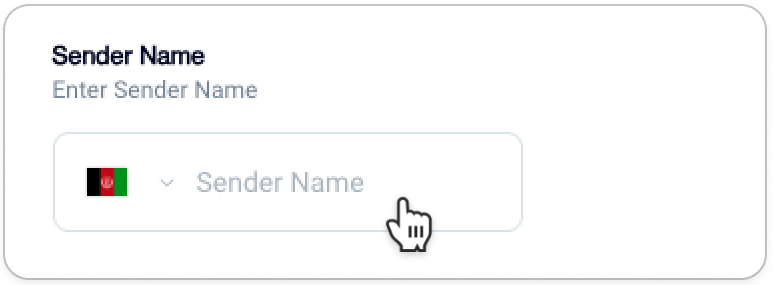
- Enter your WhatsApp Business Profile number as Sender Name in the provided field.
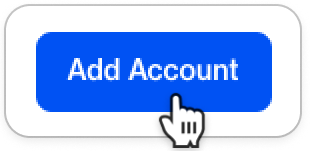
- To finalize the configuration, click the Add Account button.
Important Information on Message Tracking & Reporting
- For seamless integration of data from the Karix platform into D·Engage Send Reports, please initiate a request with our Technical Support Team. This step is crucial to ensure accurate and complete data transfer.
- Additionally, comprehensive reports are readily available directly from the Karix panel, providing an alternative source for detailed insights.
Integration CompleteYour D·Engage and Karix accounts are now connected. You're all set to send WhatsApp Marketing Messages through the registered WhatsApp Business Profile on Karix and receive detailed reports on your campaigns.
Integration with CM.com
- Provide a name for your configuration. This name will be used for selection when sending a campaign and can be any name of your choice.
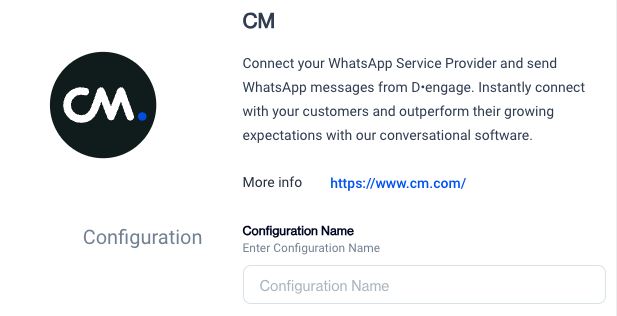
- Complete all the required information in the following sections.
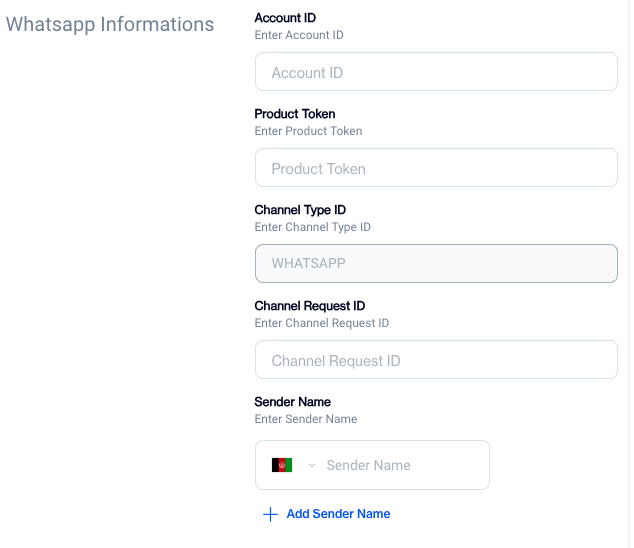
Sender Name is your WhatsApp Business Profile NumberTo complete the integration, the "Sender Name" field should be filled with your WhatsApp Business Profile Number. If you intend to add more than one Business Profile, click on the "Add Sender Name" button.
Integration CompleteYour D·Engage and CM.com accounts are now connected. You're all set to send WhatsApp Marketing Messages through the registered WhatsApp Business Profile on CM.com and receive detailed reports on your campaigns.
Approved Marketing Message Templates
Before you can send a WhatsApp Marketing Message, it's essential that your message template has been pre-approved by a Meta Reviewer. Below, we provide a general overview of the message elements for WhatsApp Marketing.
Header: This is usually the first part of the message that grabs the recipient's attention. It might contain a greeting or a brief introduction to the topic of the message.
- Media: WhatsApp allows for the inclusion of images, videos, and documents. Using media can make your message more engaging and can help illustrate your point more effectively.
- Text: You may use Text for your Header , and Text can include personalized tokens.
Body: This is the main content of the message. It provides detailed information about the offer, announcement, or any other topic you're addressing. It should be concise and to the point.
Interactive Elements: With the evolution of messaging platforms, there are now options to include interactive elements like buttons that can guide the user to take specific actions directly from the message.
- Call-to-Action (CTA): This is a crucial element that directs the recipient towards the next step you want them to take, such as "Click here," "Reply to this message," or "Visit our website."
- Quick Replies: Quick Replies are designed to collect inbound messages from customers. They enable you to steer conversations according to your organization's requirements. Chatbots utilize this feature to refine the services they offer and guide the conversation based on customer input.
Footer: This might contain contact details, legal disclaimers, or other secondary information. It's also common to include an opt-out option here for recipients who no longer wish to receive such messages.
Personalization Tokens: These are placeholders that can be replaced with personalized data for each recipient, such as their name or a specific offer tailored to them.
Importing & Managing WhatsApp Phone Numbers
Important WhatsApp Channel Opt-in DisclaimerPlease be aware that at D·Engage, we do not collect Opt-In messages for the WhatsApp channel. Opt-ins for the WhatsApp channel should be collected by your organization and must adhere to Meta guidelines. For detailed guidance, please refer to the official Meta Pages, WhatsApp Business Policy and Get Opt-ins for WhatsApp. Additionally, you can find valuable information in our partner guides, such as:
Let's delve into the database fields responsible for WhatsApp communication in more detail. In the master_contact table, three system columns are vital for WhatsApp communication management. Here's an overview of these columns:
| Colum Name | Description | Type | Values |
|---|---|---|---|
| whatsapp_number | This field stores the WhatsApp communication number for each contact. | Phone | |
| whatsapp_permission | Representing the permission status for WhatsApp Channel regarding the provided WhatsApp number. | Boolean | True or False |
| whatsapp_status | Denoting the status of the provided WhatsApp number | Text | A or P [A is Active , P is Passive ] |
It's crucial to populate all of these fields for every contact that should receive WhatsApp marketing messages
One of the critical prerequisites before sending messages is importing WhatsApp contact numbers. Below, we guide you through preparing a CSV file for data import, and we've included an example CSV file for your reference.
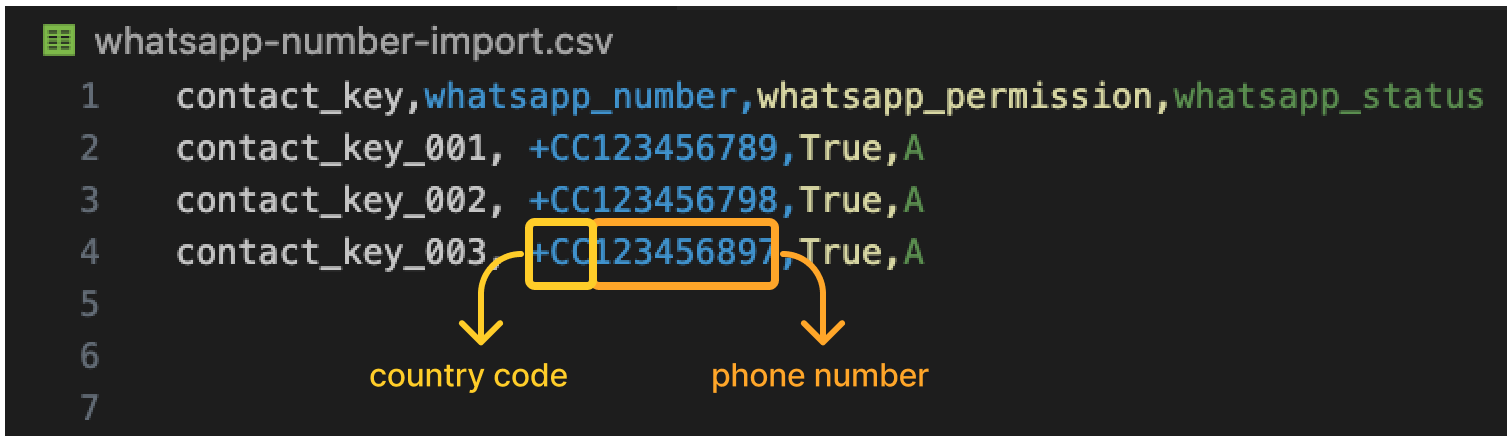
Important Note for Must Have Headers on CSV File
- **contact_key:**If the contact_key already exists in the master_contact table, the other fields will be added to the existing contact. If the provided contact_key is not found, a new contact will be created.
- whatsapp_number: This phone number will be used for marketing communications on the WhatsApp Channel.
- whatsapp_permission: This field indicates permission for the respective WhatsApp number. It should be set to True for a contact to enable message sending.
- whatsapp_status: This field specifies whether the WhatsApp number is Active or Passive. If left blank, the default value 'A' (Active) will be assigned.
Creating Campaign Flow with WhatsApp Send
Setting Up the Audience
In D·Engage, every campaign begins with defining a Target Audience. This step is vital for the success of your campaign. D·Engage offers robust data management and advanced filtering capabilities, empowering you to create microsegments and maximize your ROI with targeted offers.
Note on Segment CreationBoth Interactive and SQL segments are available options when defining your Audience. Whether you prefer leveraging Advanced Filtering options, combining them with grouping and logical elements, or utilizing your advanced SQL knowledge to create finely-tuned microsegments, the choice is yours. Consider which method best suits your needs!
💡 WhatsApp Marketing Audience Segmentation Tips
- Demographic Segmentation: You can segment your audience based on demographics such as age, gender, location, and language. For example, you might send different messages to male and female customers, or tailor your content for specific age groups.
- Behavioral Segmentation: Segment your audience based on their behavior, such as past purchases or interactions with your business. For example, you can send messages to customers who have abandoned their shopping carts, offering them discounts to complete their purchases.
- Transactional Segmentation: Send messages to customers who have recently made a purchase. You can use this segment to send order confirmations, shipping updates, and post-purchase follow-ups.
- Geographic Segmentation: If your business serves multiple locations, you can segment your audience by geographic region. This allows you to send location-specific offers or updates.
- Engagement Segmentation: Segment your audience based on their engagement with your previous messages. For example, you can send messages to highly engaged customers with exclusive offers, while re-engaging less active customers with reminders or incentives.
Important Note on Engagement SegmentationPlease be aware that engagement events for the WhatsApp channel have not been activated at this time. When updating your segmentation details, please note that WhatsApp Channel-based engagements cannot be selected.
- Product or Service Interest: Segment your audience based on their interests or preferences for specific products or services. This allows you to send targeted recommendations and promotions.
- Abandoned Cart Recovery: Create a segment for customers who have abandoned their shopping carts and send them personalized messages with incentives to complete their purchase.
- Loyalty Program Members: Send special messages to members of your loyalty program, offering them exclusive rewards or discounts.
- Birthday or Anniversary Messages: Create segments based on customers' birthdays or anniversaries and send them personalized greetings and offers.
- Event Reminders: If you host events or webinars, segment your audience based on their interest in attending and send them event reminders and details.
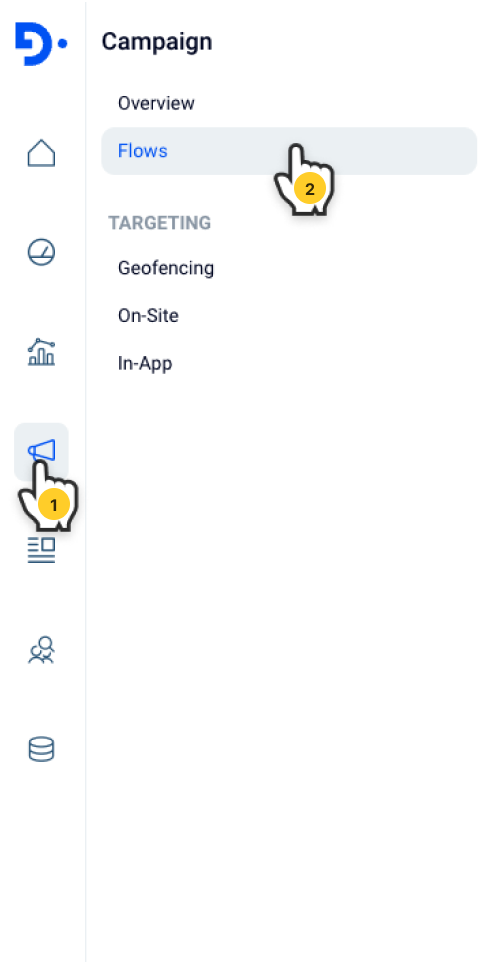
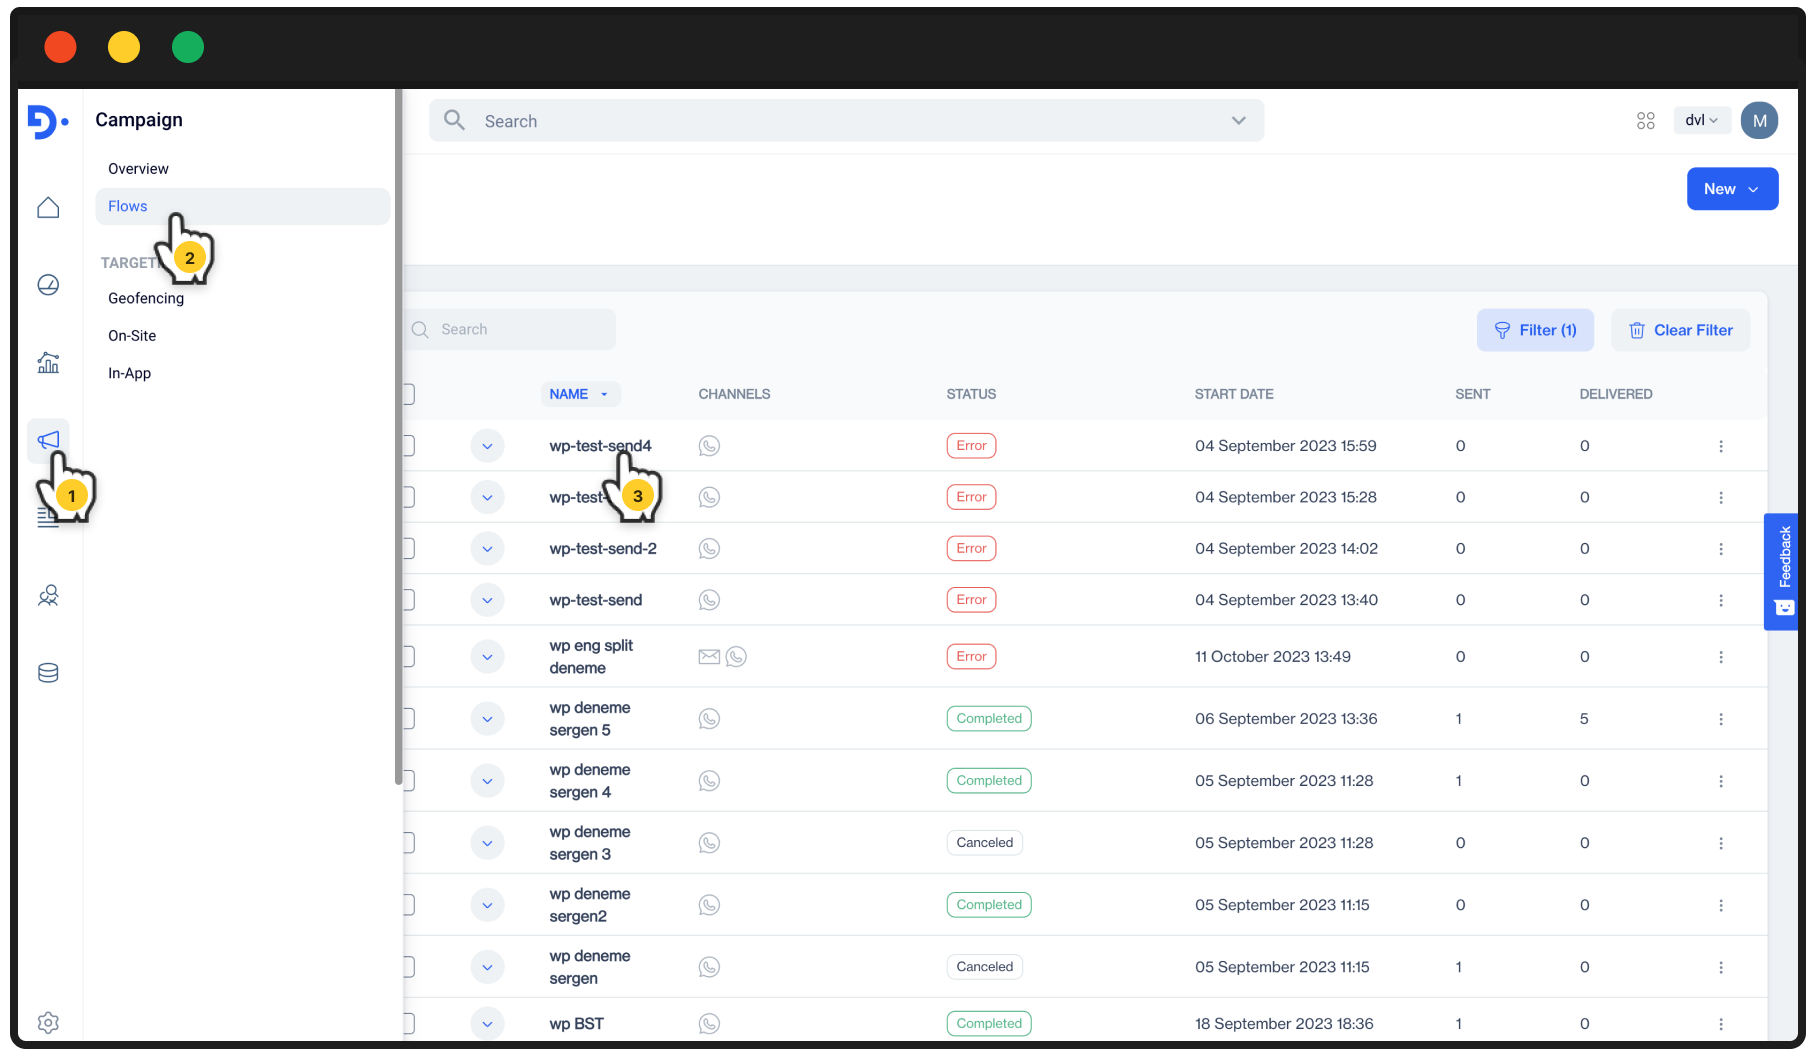
Creating Campaign Flow with WhatsApp Send Node
- Navigate to Campaign > Flows
- Give your flow a name, and optionally, add tags for reporting purposes or a description to share with your colleagues. Then, click Next to proceed.
- Click New and select either One Time or Recurring depending on your needs.
- Double-click on Audience to configure your audience.
Check AvailabilityUse the Calculate button to estimate how many WhatsApp numbers your message will reach after setting up your audience.
- Drag and drop the WhatsApp Send node from the left pane under Actions onto your flow. Double-click on it to start configuring your WhatsApp Send.
1️⃣ Account & Template
On this stage you need to select the Provider, Account and Template respectively.
- Select your WhatsApp provider and the associated account for sending your marketing message.
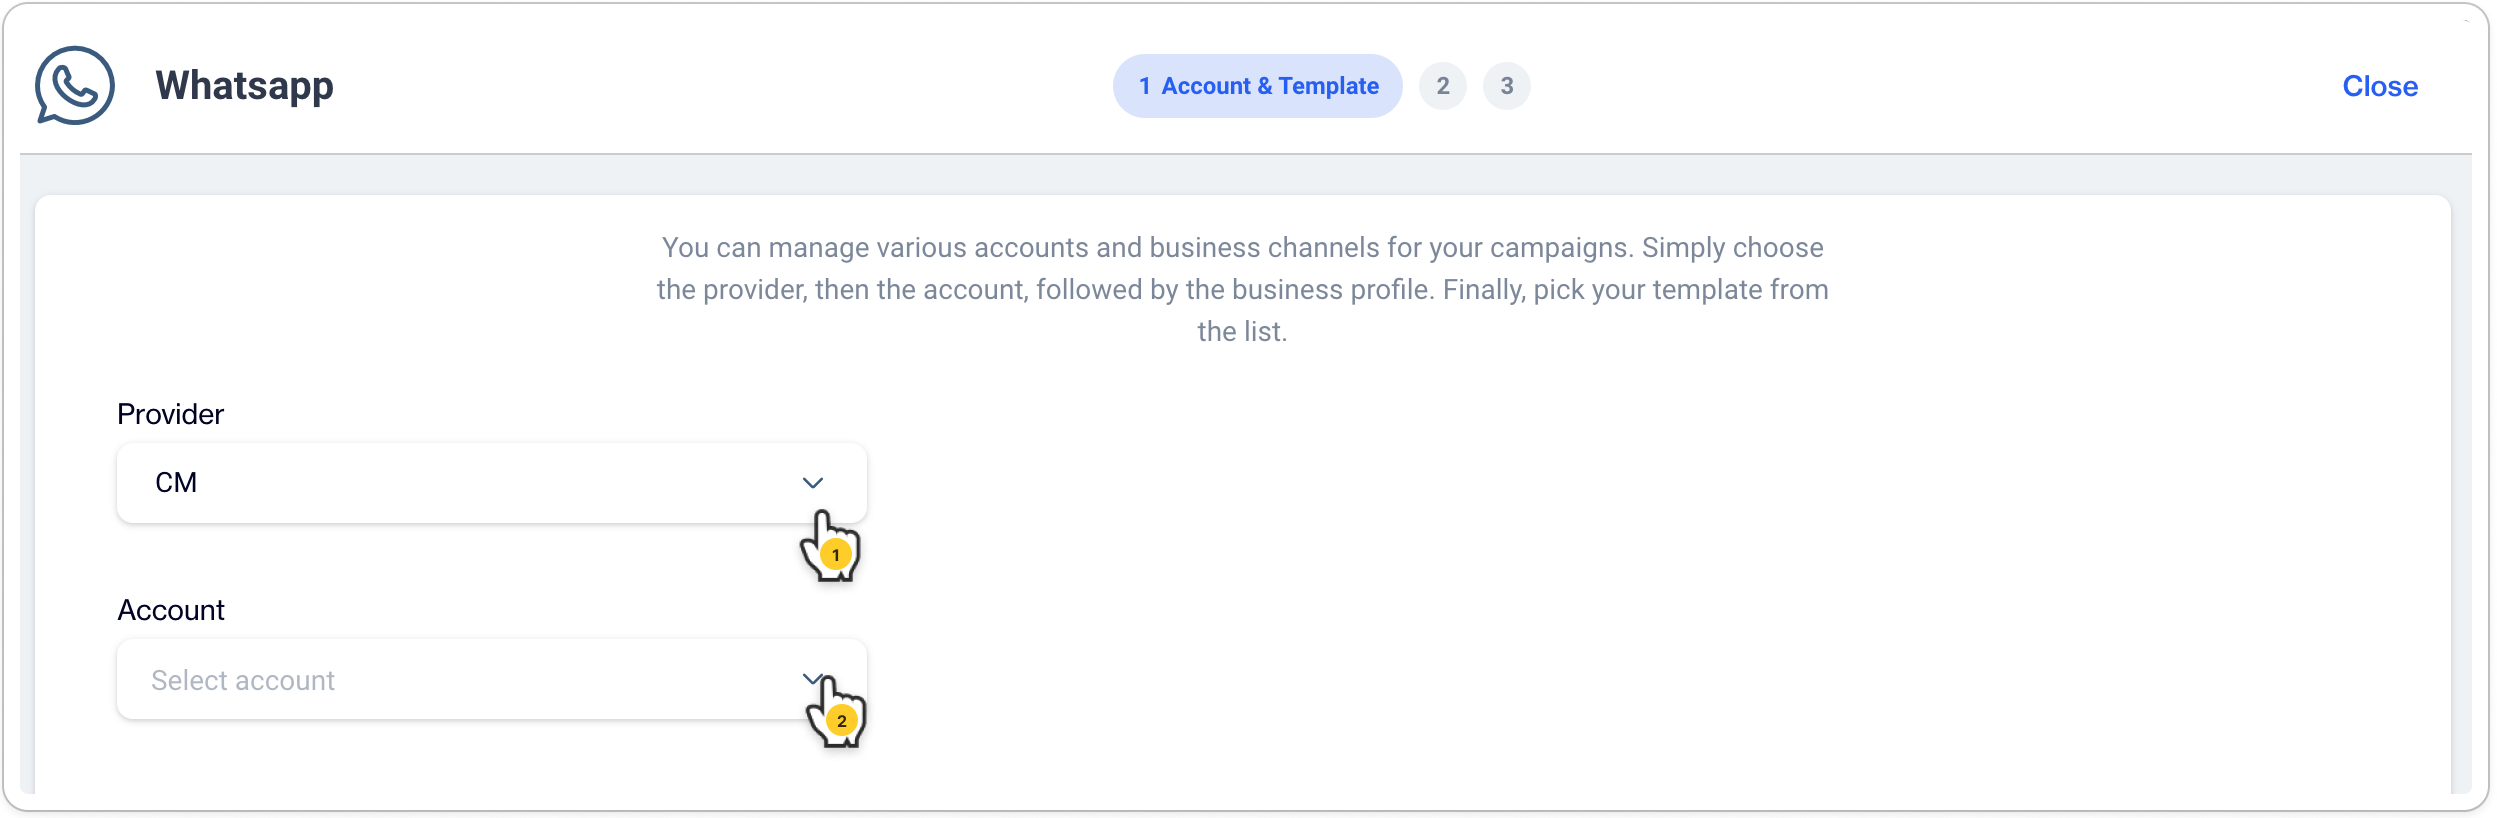
- Choose a sender address and select your template from the list. Click Next to proceed.

2️⃣ Message Details
On this stage you will map the Personalization Tokens that existed on your template onto Customization Tags.
- You can see the all Available languages by selecting from the the drop down menu. Click Set Customization to map the fields.
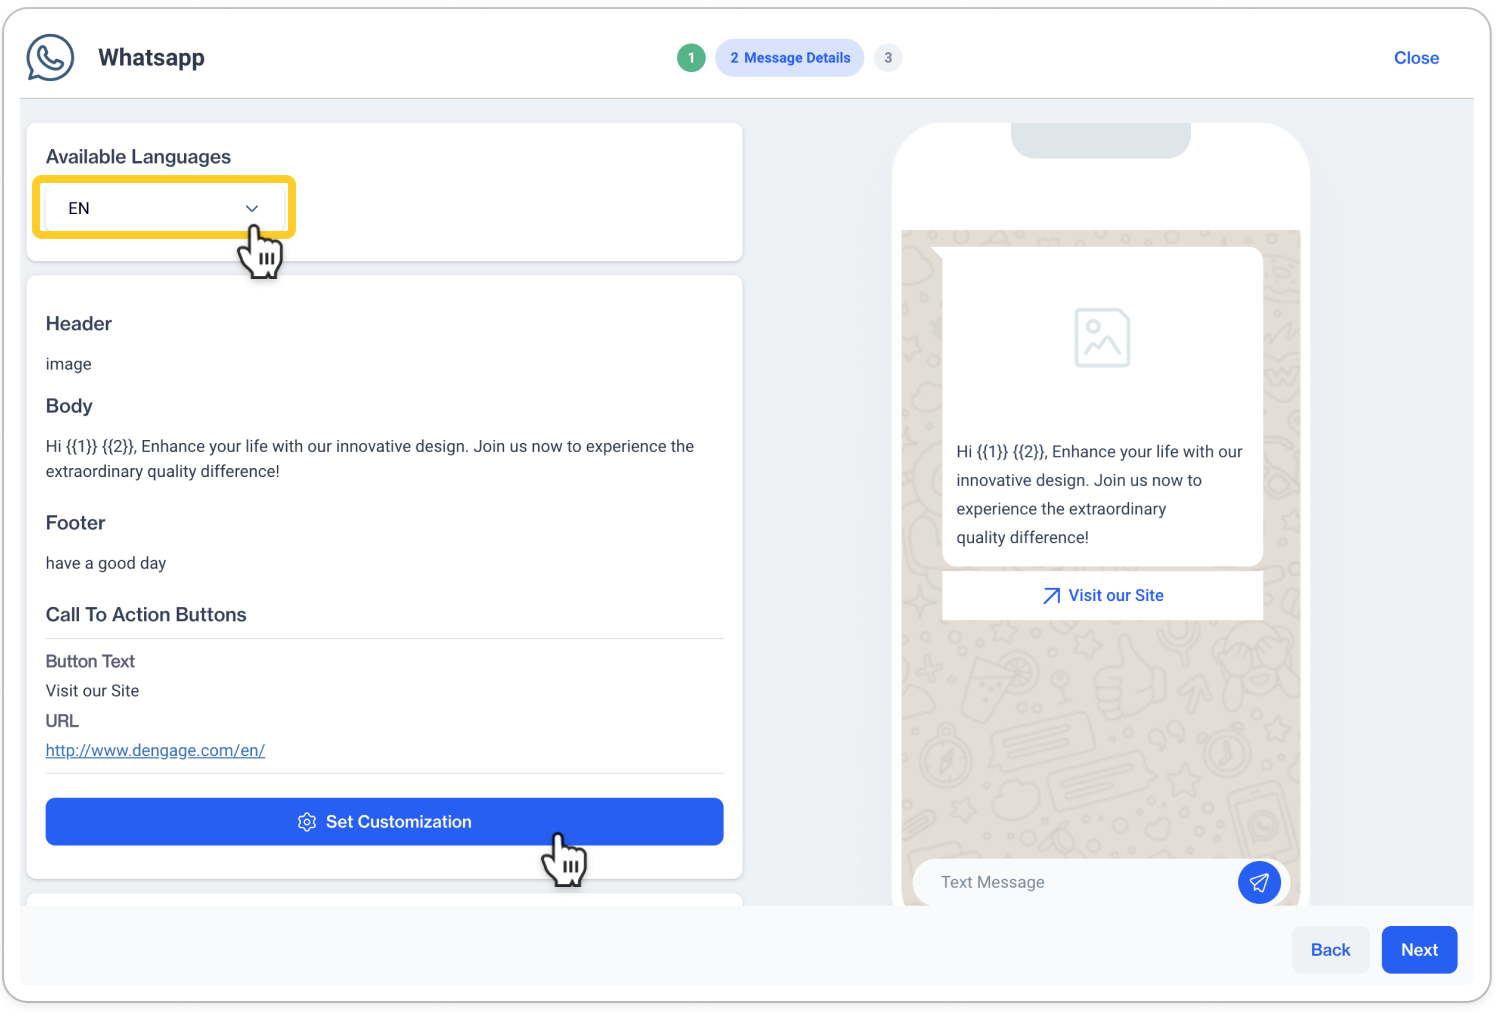
- Map all personalized tokens and select images (if applicable) to use as headers for each language. Fields are listed below.
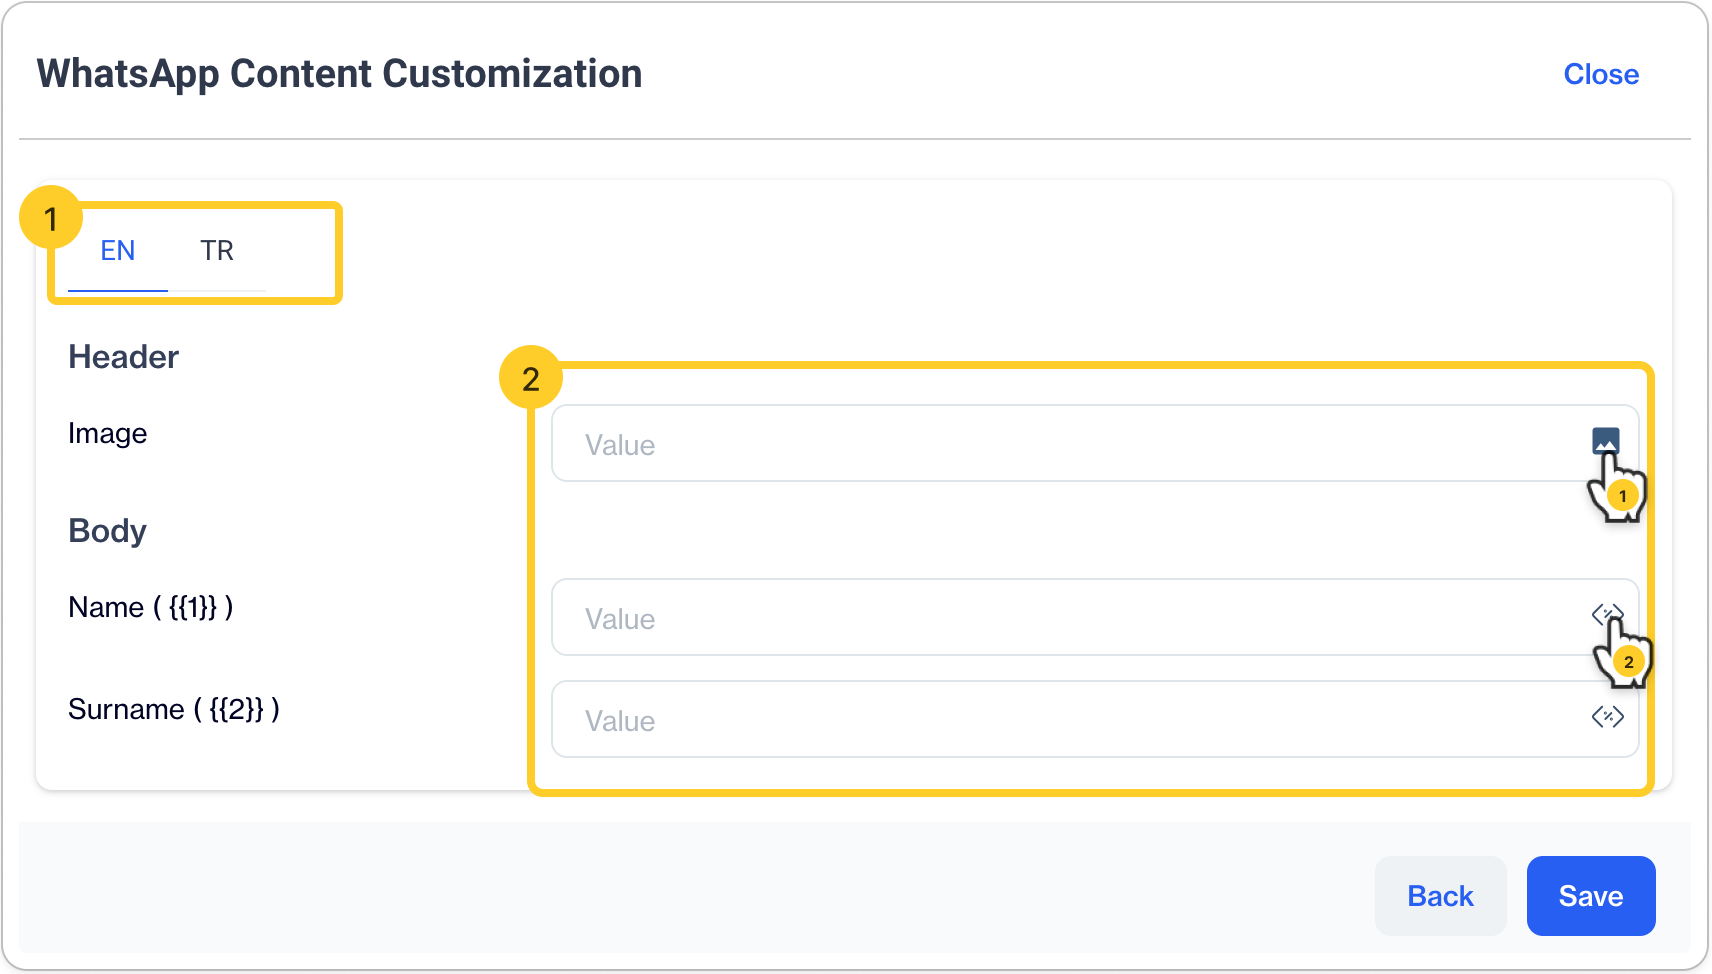
Available Languages [1] : Easily switch between available languages for configuring the template.
Personalization Tokens Mapping: Map all personalized tokens used in the template.
- The Images(any other document that used as header) should be selected from the file directory for each language.
- You can map with any corresponding customization tag that existed on your database schema.
Review & Approval
In this stage, review all the configurations you've made for this send.
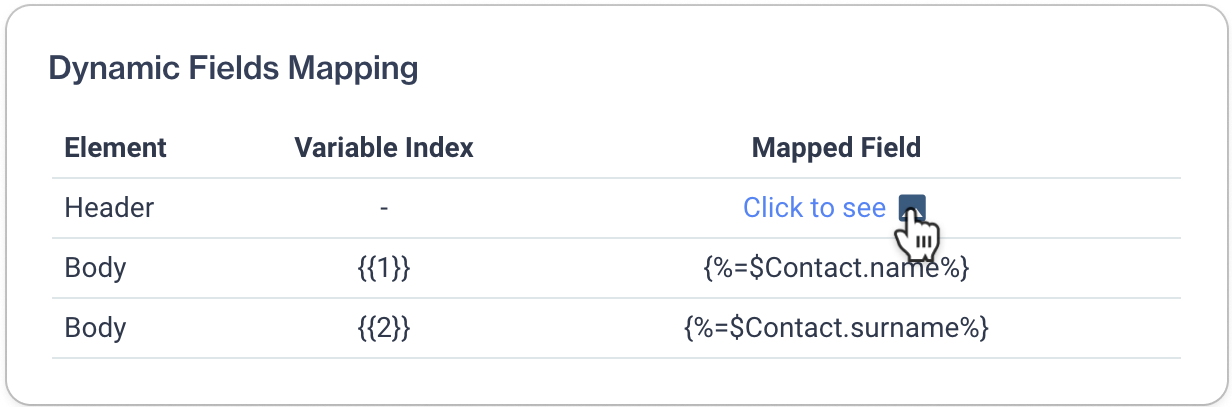
- Navigate between available languages using the dropdown selector.
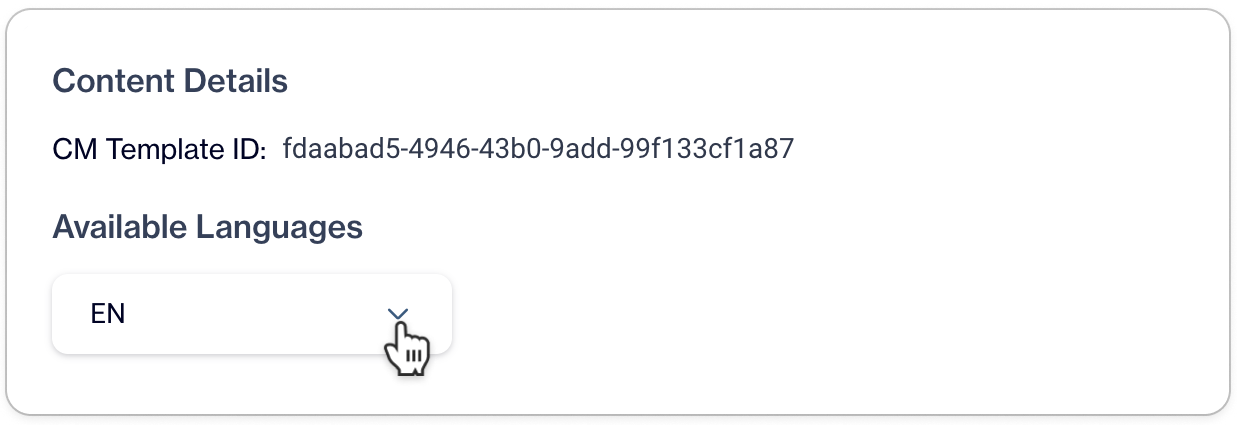
- Check how you've mapped corresponding dynamic fields in the template for each language. You can also review the images you've chosen for the send.
You are all set to send WhatsApp Marketing MessageAfter completed steps above , now you are able to send WhatsApp Marketing messages within your Campaign Flow. You can edit your configuration at any time before publishing your campaign. Remember to save your configurations as drafts before leaving the page.
Monitor your Performance
Important Note on Delivery Status Based Reporting
- WhatsApp does not provide feedback signals for users who choose not to share their read message status. Therefore, we are unable to report "Open" for delivered messages to users who have this setting.
- Additionally, please note that received messages are transmitted from various data centers and may not be entirely synchronous events. When analyzing WhatsApp channel performance, you may observe that the "Open" count exceeds the "Delivered" count.
Monitoring the performance of your WhatsApp Marketing sends is a crucial part of understanding customer behavior and engagement. In this section, you will learn how to monitor and analyze your WhatsApp Marketing campaigns effectively.
Individual Send Report
The Individual Send Report allows you to analyze the engagement results of your WhatsApp marketing messages. You can check the Delivery Rate and Open Rates to understand how your target audience is engaging with your messages.
- To access Individual Send Reports, navigate to Campaign > Flow, then select the campaign you want to monitor from the list.
Snap Shot of a WhatsApp Send
- To view a snapshot of a WhatsApp send, simply hover your mouse over it.
Send Report
- Click on View Report from the snapshot to access the send report.
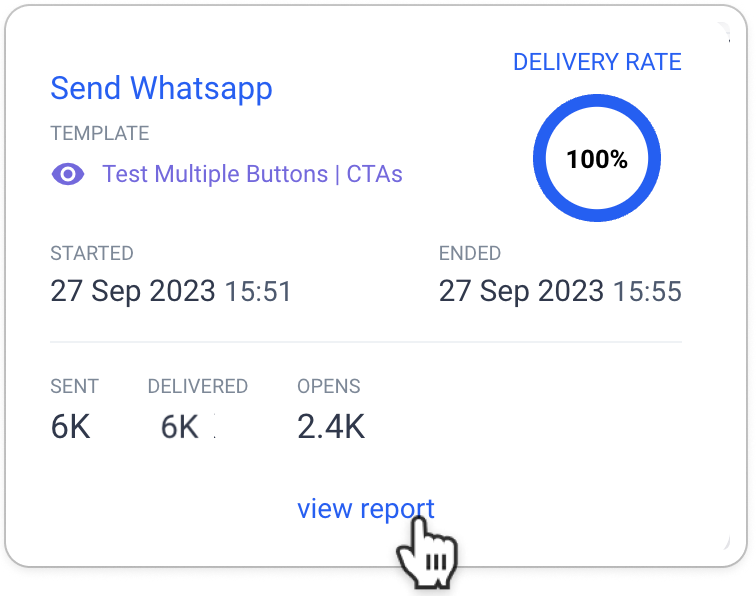
The send report provides information on Sent, Delivered, and Open statuses, along with available actions.
- You can click on the numbers per status to reach out to contacts based on their last action/status.

Overview
The Overview section allows you to see how your WhatsApp campaign performed compared to other channels within a specific time period.
- To access this information, go to Campaign > Overview
Available Actions:
- You can filter results by One Time or Recurring campaign types.
- set a time frame to compare channel performance.
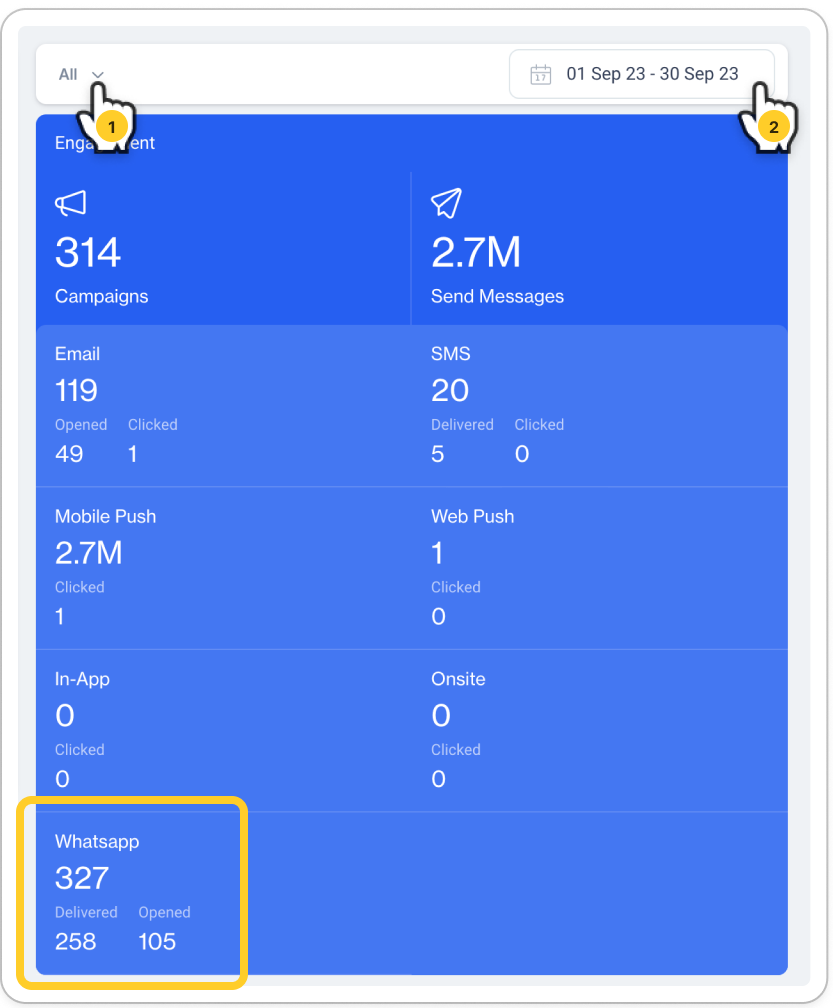
- WhatsApp channel performance, including Delivered and Opened counts, will be displayed in this section.
Campaign Report
The Campaign Report page provides an overall performance analysis of the WhatsApp Channel compared to other available channels, based on Sent and Impression counts.
- To access this report, navigate to Analytics > Campaign Report.
- Select a date interval to analyze overall performance.
Note that Impressions are calculated based on the Open status for the WhatsApp Channel.
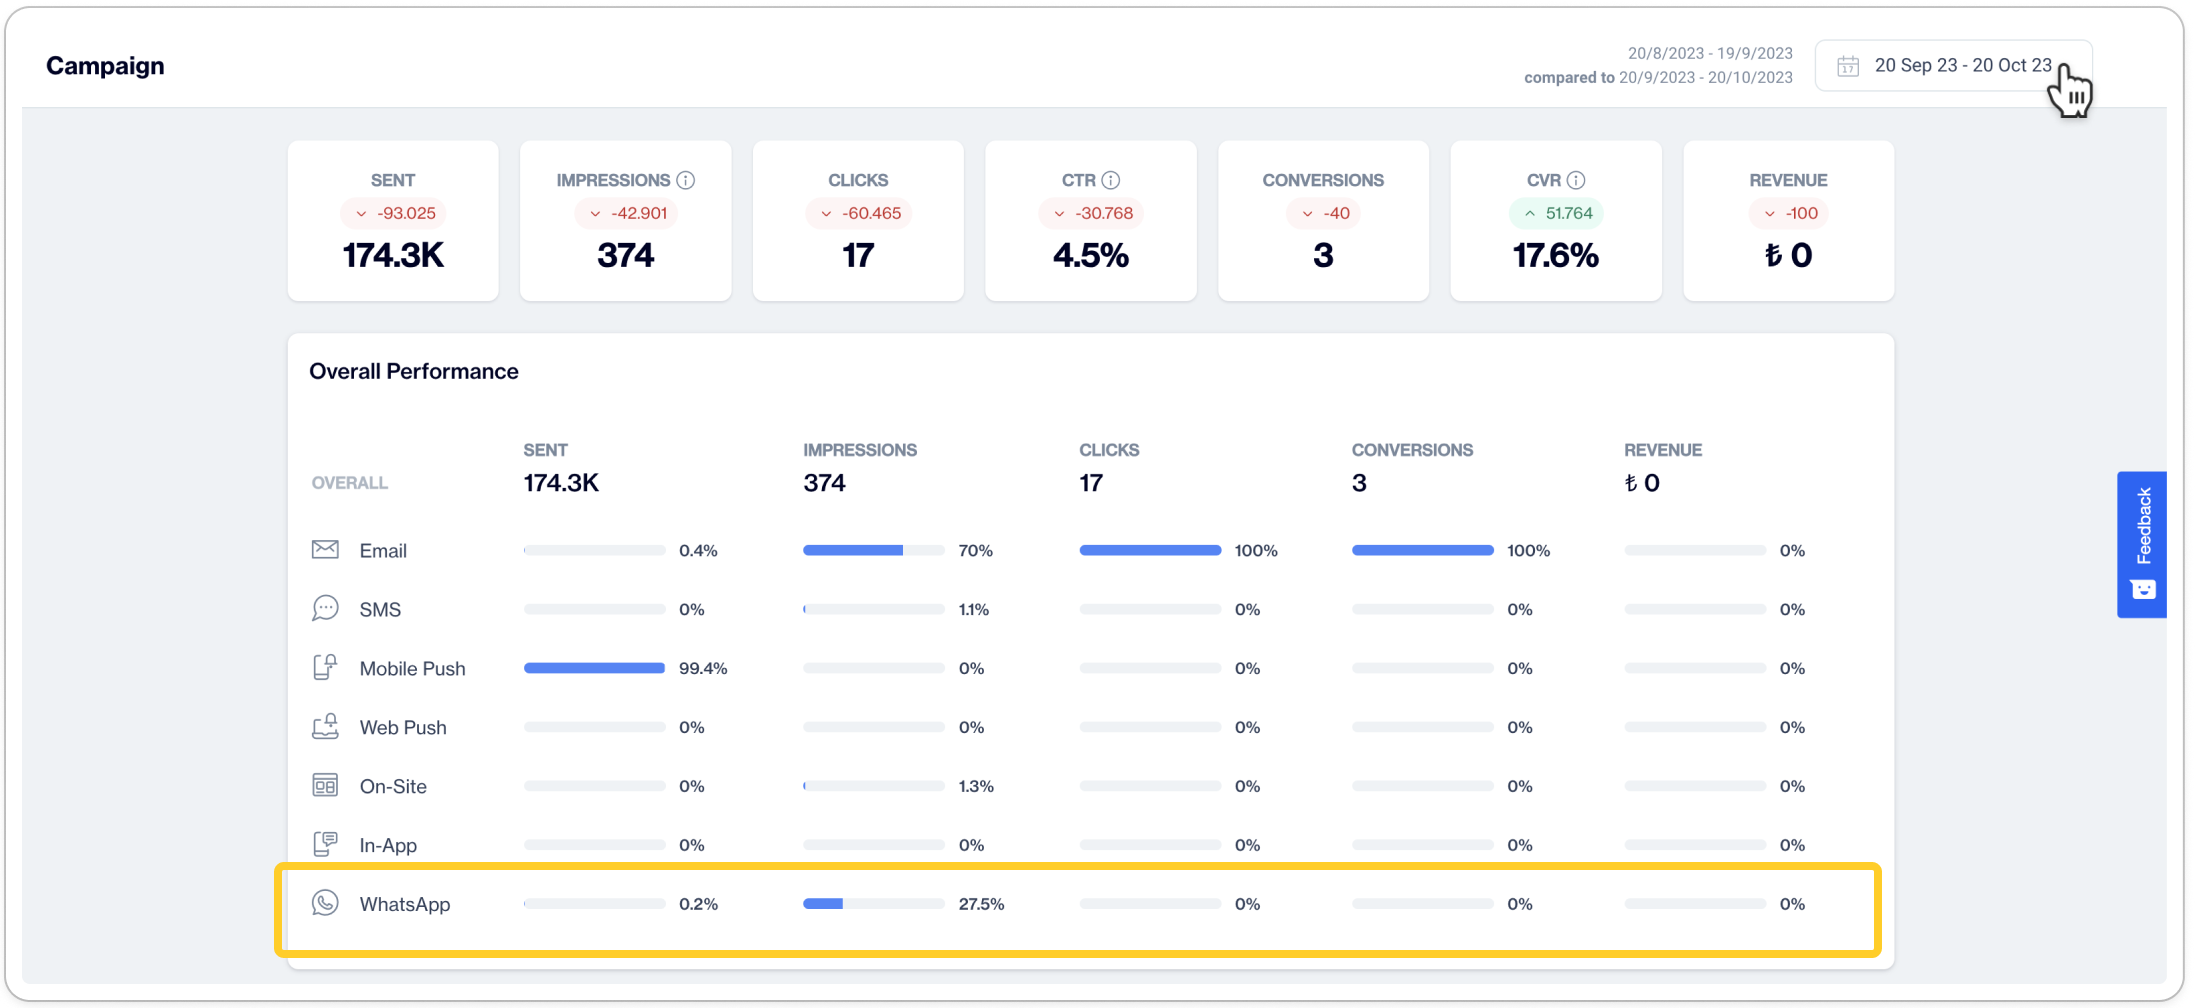
- Hover over the statistics bar to see the total number of Sent and Impressions.

- You can also filter the time series chart by WhatsApp Channel to view changes on a daily, weekly, and monthly basis for selected KPIs.

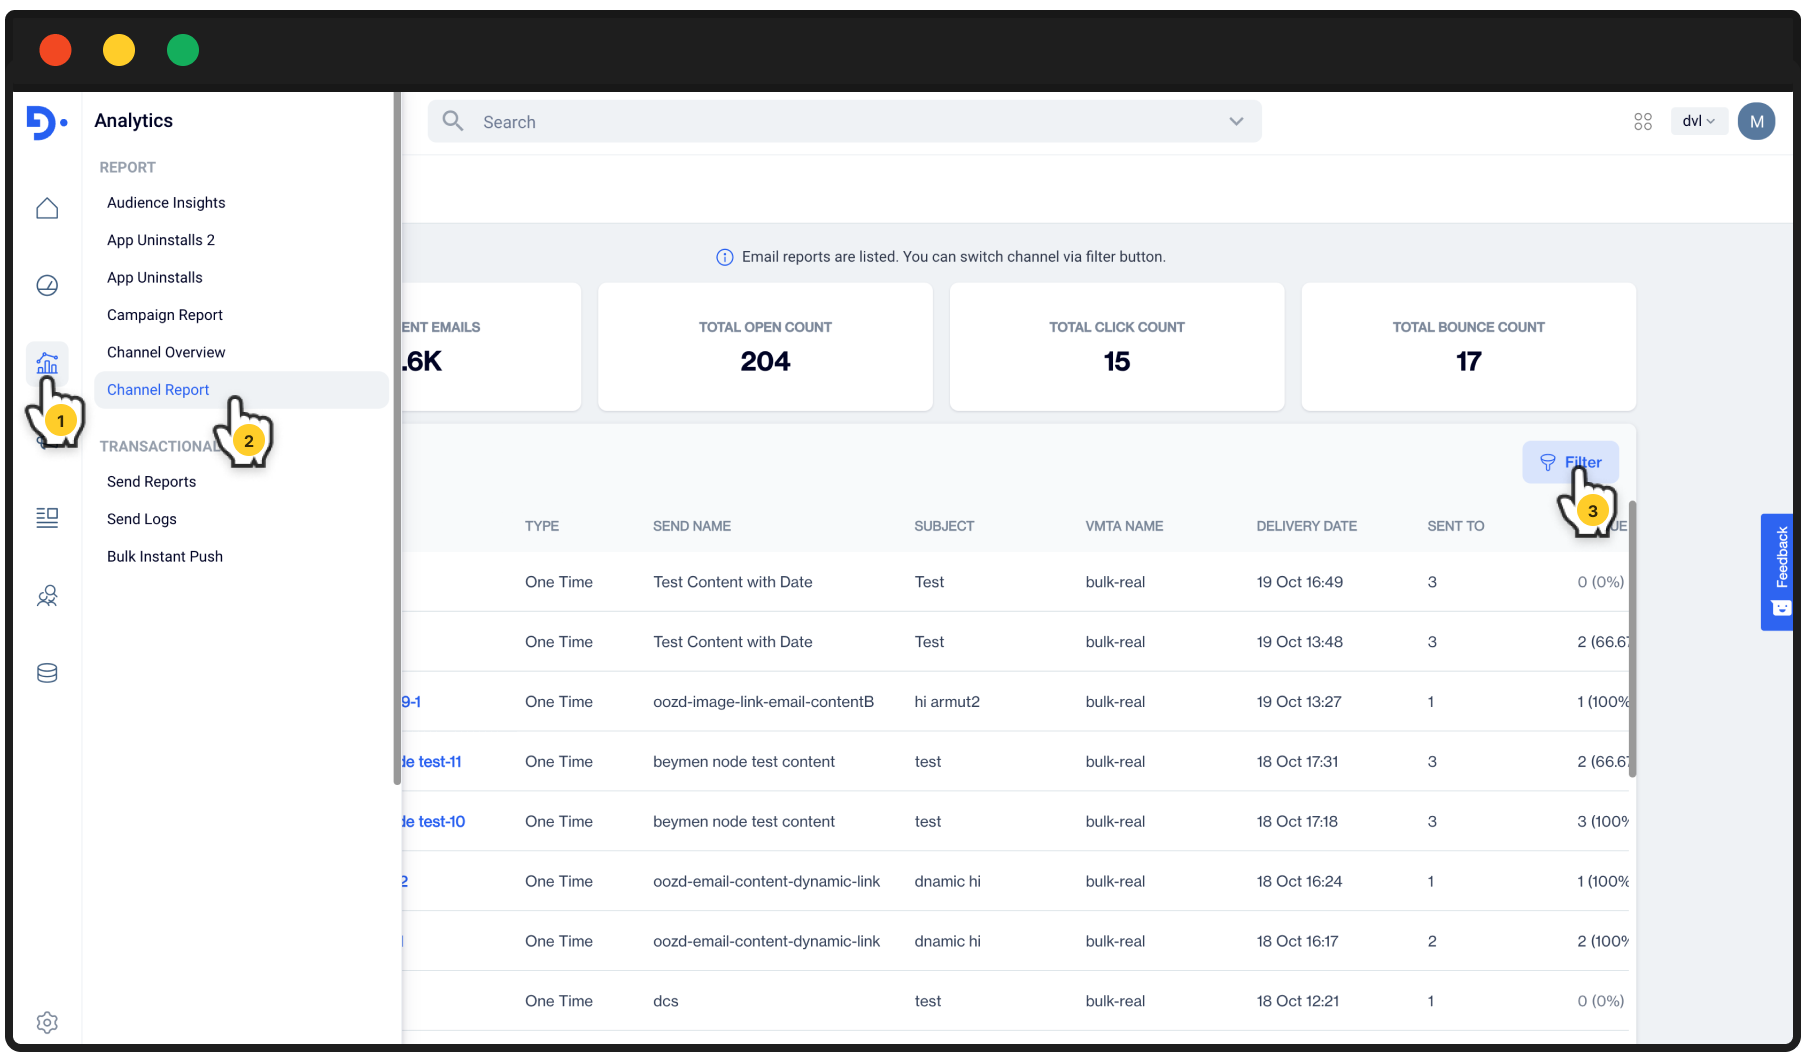
Channel Report
The Channel Report allows you to view reports for all sends made through any available channel within a given time frame.
- Navigate to Analytics > Channel Report, then click on Filter to filter results by the WhatsApp Channel.
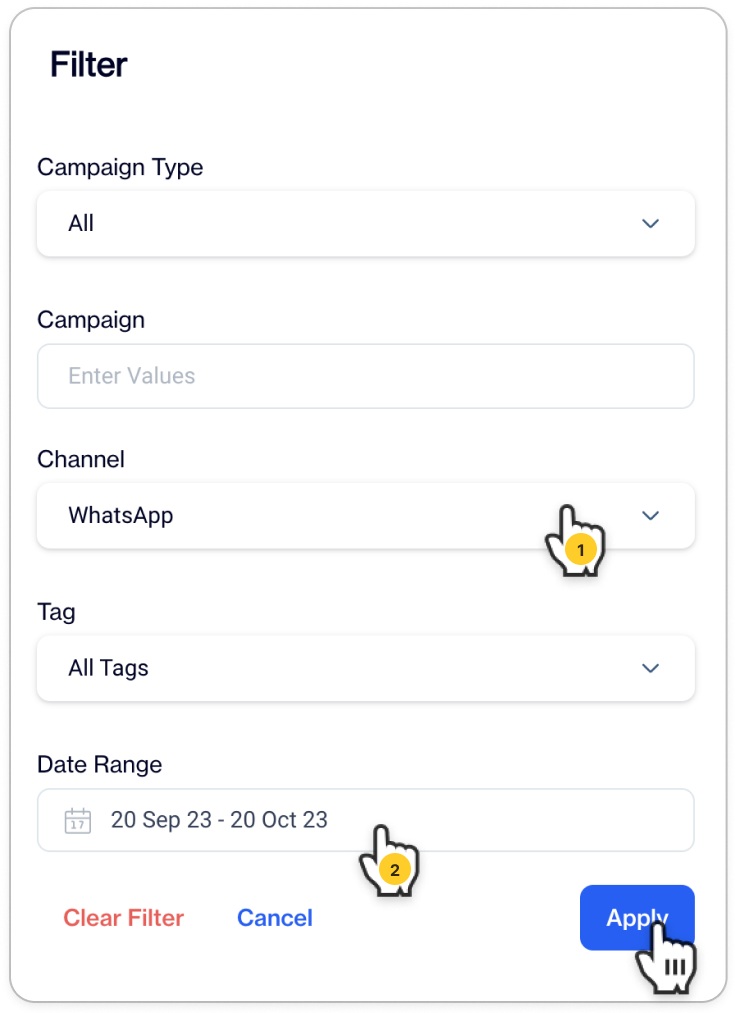
- Set the Channel as WhatsApp and adjust the date range as needed, ⚠️ By default, the time range is set to the last 30 days. Click Apply after made changes on your Filter Items.
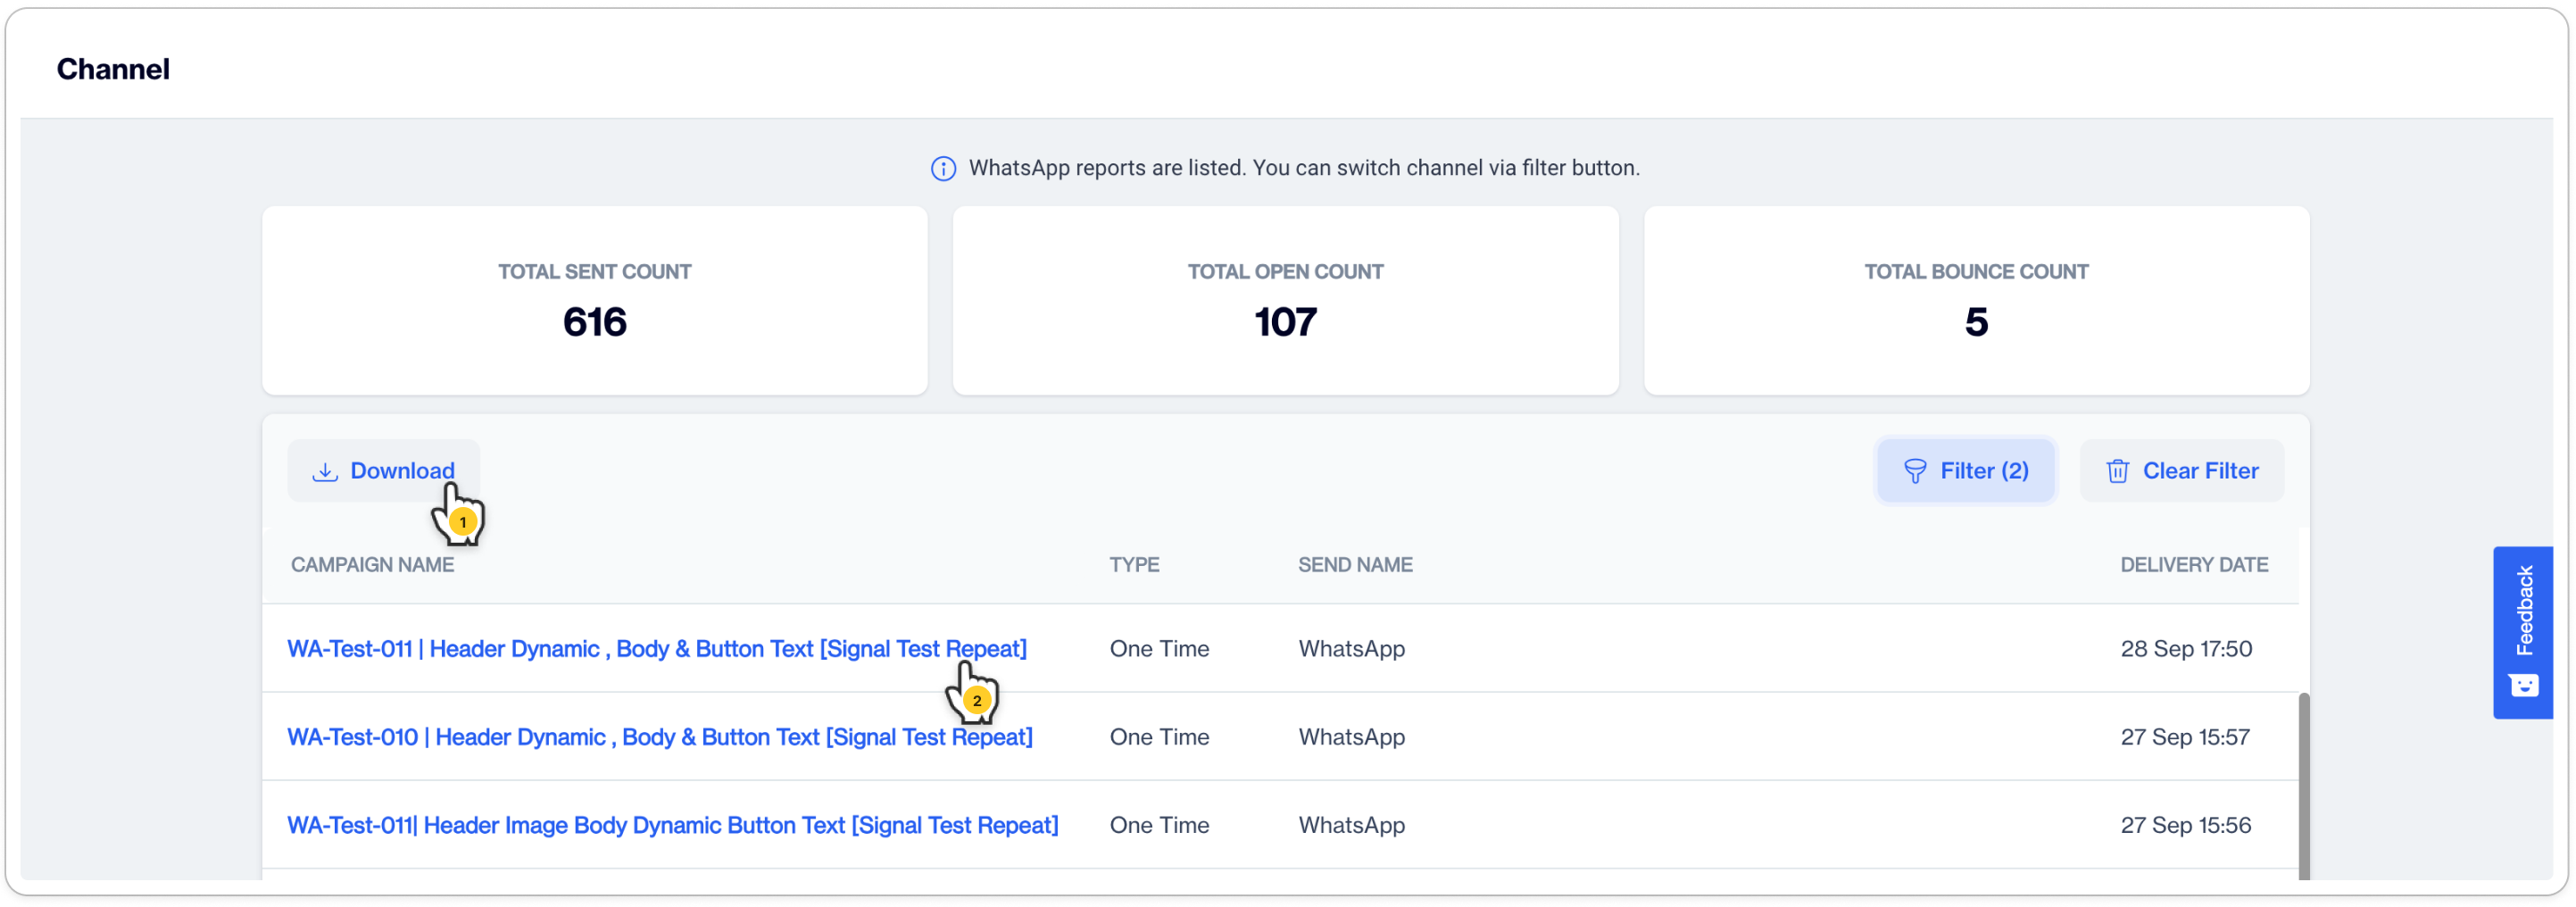
- The Total Sent Count , Total Open Count and Total Bounce count will be shown right after the filter applied. Alternatively;
- You Can Download the filtered results as csv file to your device
- Click on any send to access the Individual Send Report for detailed analysis.
Monitoring your WhatsApp Marketing performance using these reports will help you gain valuable insights and optimize your campaigns for better results.
Updated 1 day ago