
In-App
This section delineates the push function, enabling users to efficiently create In-App notifications using both a visual editor and an HTML editor. The visual editor offers user-friendly popups and banners with template support, while the HTML option allows you to customize the layout to align with your brand using code.
In-App Listing
When you select the "In App" menu from the list, the system displays a screen showing all available content. This screen lists the available In App content and includes an option to create new content. Additionally, the content is organized within a folder structure, allowing users to create new folders and add In App content to them.
-
Folders: In this section, folders display In App content, with each piece of content sorted into its designated folder. Users can create new folders and add content within them. Additionally, they can use options such as renaming folders, copying public IDs, moving items, and deleting folders to improve organization and management.
Folders' Actions: In this section, you'll discover the actions you can take regarding a folder!
-
Search Push: Users can utilize the system to search for any In App data from the listing.
-
Apply Filters: Filters provide you with the flexibility to personalize push notifications using several options. You can select languages and apply date-range filters based on both the updated date and creation date. Choosing the "Clear Filters" option will remove all applied filters. If you click on the cancel button, the pop-up will close.
-
Apply Sorting: Users can sort the In App listing by two columns: Name and Last Edited On. For the Name column, they can sort content in alphabetical or reverse alphabetical order. For the Last Edited On column, sorting options include ascending and descending order by date.
In-App
Listing Actions
- View: Clicking on In App will open its details, allowing you to update the In App detail as well.
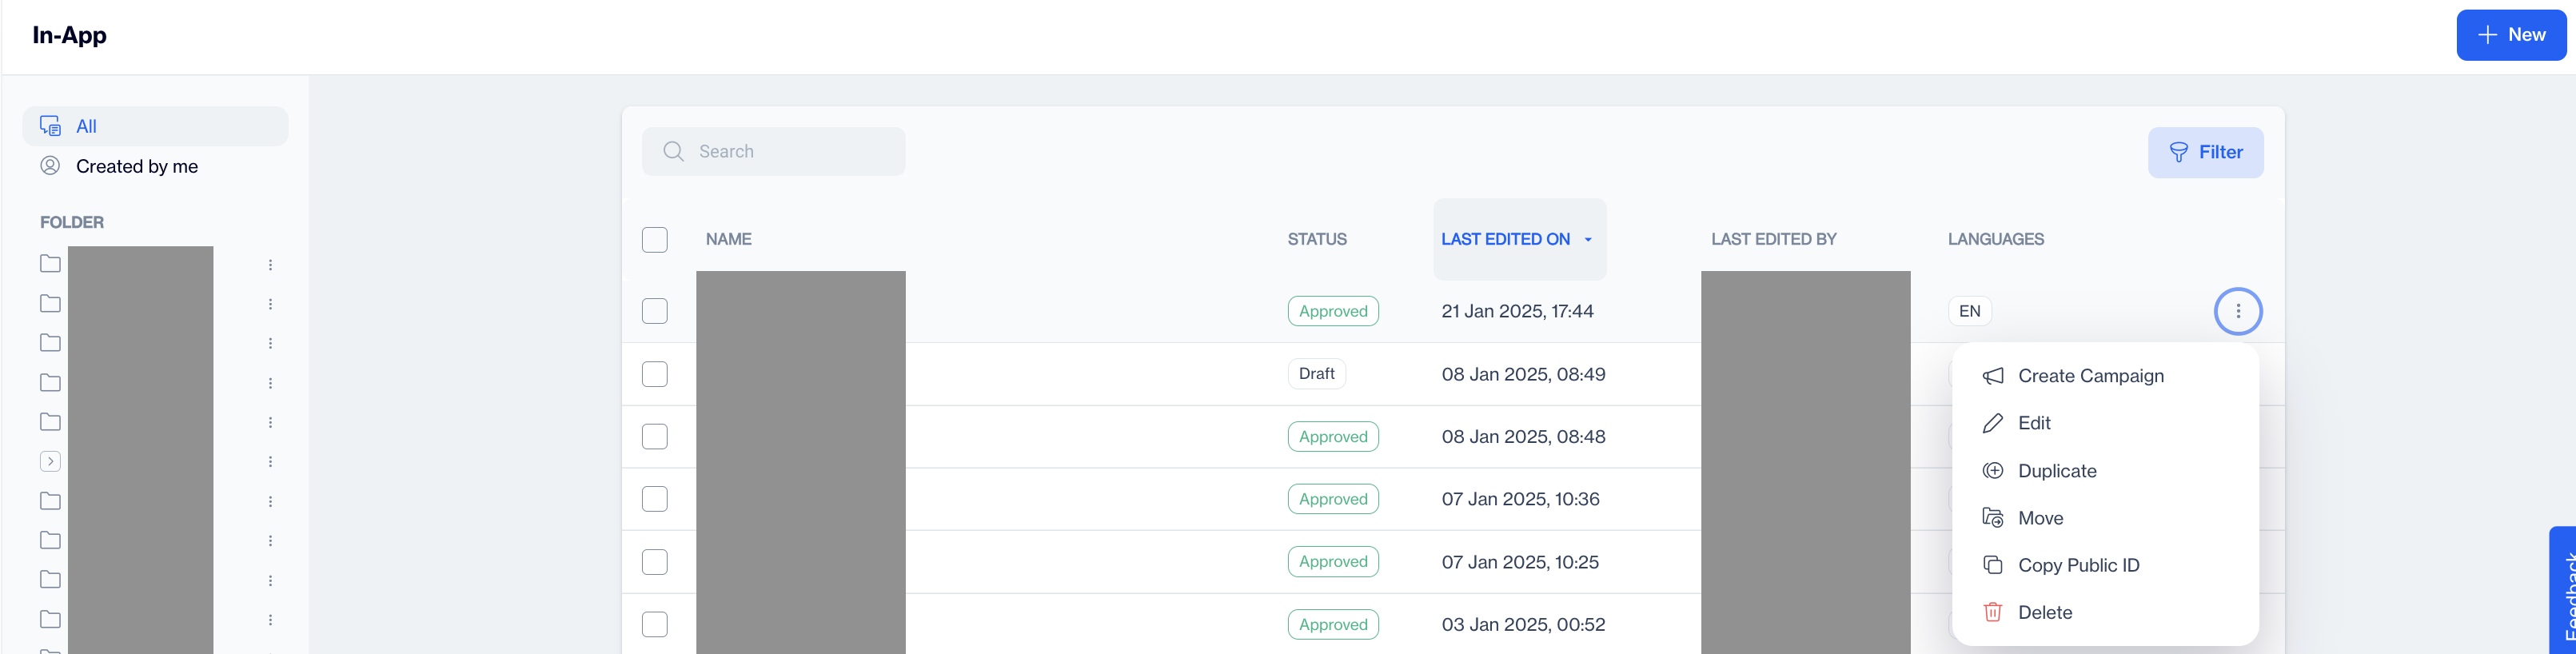
Actions: Clicking on the three dots next to any In App will open a menu of action items, which may include:
- Create Campaign: This option allows you to create a campaign for In App content. When you click the "Create Campaign" button, the system will initiate a wizard to complete the campaign.
- Edit: If you click on the edit option, the system will open the In App detail in the editable mode. You can edit the following fields:
Edit In App Name: Allows to edit the name of In App item.
In App Info: When you click on the info icon, the system will open the information of In App item.
More option: From the more options menu, you can duplicate or delete the template. Clicking on "Duplicate Template" will trigger a pop-up to duplicate the selected template. Similarly, clicking on "Delete" will prompt a pop-up to confirm the deletion process.
Test: When you click the Test button, a pop-up will appear as shown below, containing two buttons: "Send Test 'In App'" and "Show Another". Clicking on the "Send Test 'In App'" button will open another pop-up where you can select the "Predefined Audience" and "Type-in Contact Key".
Predefined Audience:Select a pre-defined audience from the dropdown.
Type-in Contact Key: Select the contact key from the dropdown.
Home Screen: Selected by default.
Another Screen: Select another screen from the available list.
After selecting an option and clicking the "Send Test 'In App'" button, the system will send the In-App test.
Content: This section provides details about the content. You can choose from layout options such as Pop-up, Banner, and Full Screen. Additionally, you can set the pop-up width and enable the option to dismiss it by touching outside. At the bottom, there are two tabs: HTML Editor and Preview. You can also switch to horizontal and full-screen views.
Edit Content (HTML Editor): This button allows you to update all content fields. When you click the Edit Content button, two options will appear: "Copy from Content" and "Create Blank Content." Both options convert all viewable data into an editable form. Afterward, the Edit Content button changes to the "Draft Content" button.
After the content is edited successfully
- Make any necessary changes and save it as a draft again for later use.
- Publish the content to make it ready for use in your email campaigns.
- Test provide facility to check what will be published.
Add Language: This option will present two choices: Copy from Content and Create Blank Content. When you select either option, a pop-up will appear, prompting you to select and apply a language.
Select Layout: This section allows you to choose between Pop-up, Banner, and Full Screen tabs. By selecting the Pop-up tab, you can edit the pop-up width and enable dismissal by touching outside. Choosing the Banner tab lets you set layout positions.
HTML Editor: This editor allows you to insert data in HTML format. You can switch between vertical and horizontal views, and also expand the editor to full screen.
Delete Draft: You can delete the draft by selecting this option.
- Edit (Visual Editor): This option allows you to edit the visual editor In App item. The following fields are available for editing, and you can modify all displayed options
- Duplicate: This option allows you to duplicate the In-App item from the listing.
- Move: You have the option to move the In-App item from one folder to another within the listing. Additionally, you can create a new folder and relocate In AIn-Apppp messages to it.
- Copy Public ID: This option allows you to copy the Public ID.
- Delete: When you click the delete option, a confirmation pop-up will appear.
In App Created by me
In this section, you'll discover all In App labeled as "Created by me." Here, users can explore and access the specifics of any In App item.
- Search In App Item: Users have the ability to search for any item within the system's listing.
- Apply Filters: Filters provide the flexibility to quickly access In App items. You can also select languages and apply date-range filters based on both the updated date and creation date. Choosing the "Clear Filters" option will remove all applied filters. If you click the cancel button, the pop-up will close.
- Apply Sorting: Users can sort the In App listing by the Name and Last Edited On columns. For the Name column, sorting options include alphabetical and reverse alphabetical order. For the Last Edited On column, sorting options include ascending and descending order based on dates.
Updated 20 days ago