
In-App Push Notification “Permission Prompt”
The Permission Prompt feature is designed to help companies secure push notification permissions from users who have downloaded their app but have not yet enabled notifications. This feature allows you to present a pop-up within the app to prompt users to grant permission for push notifications.
This two-step approach increases the chances of gaining notification permission by first showing an in-app request, followed by the system's native prompt. This method helps engage users before the system prompt, reducing the risk of losing future opportunities if they initially decline.
Navigating to Permission Prompt
- Navigate to the In-App Section:
- Go to Content > In App > New.
- Choose Visual Editor.
- Select a Modal Template:
- Within the Visual Editor, select the Modal Template.
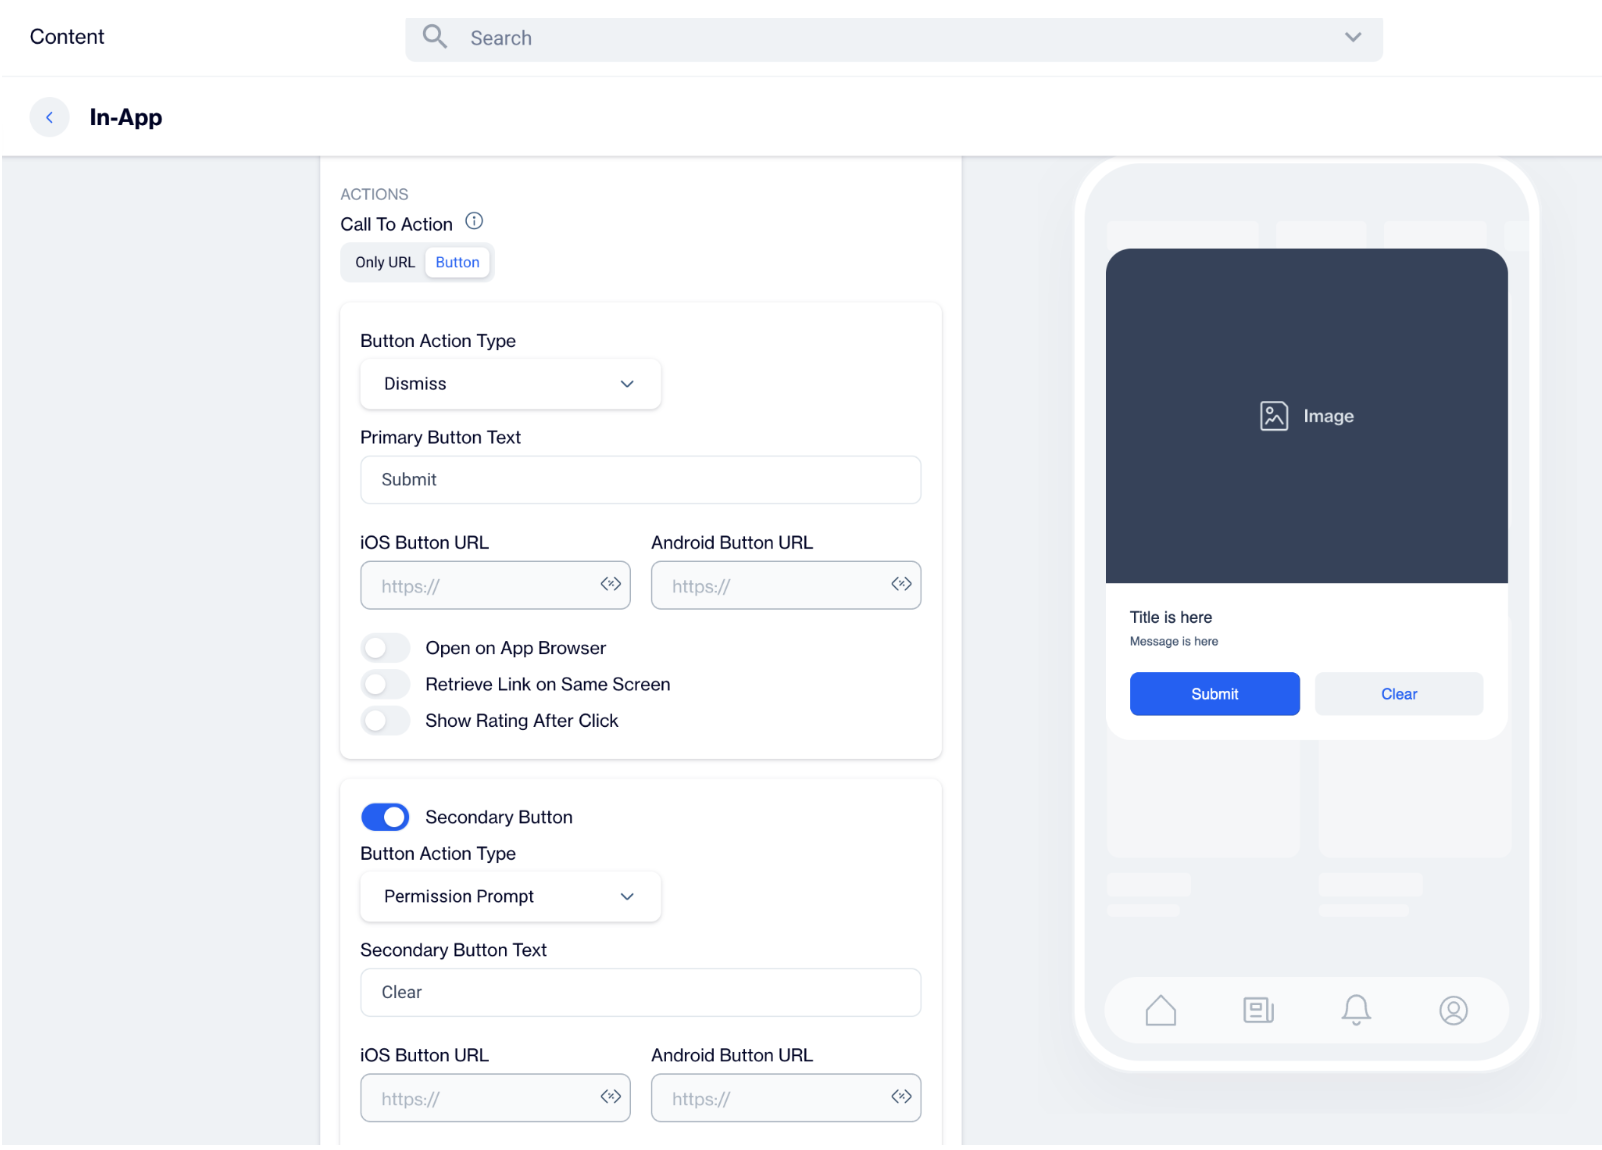
- Configure the Button Action:
- In the Actions section of the Modal Template, locate the Call to Action button.
- Under the Button Action Type dropdown menu, select Permission Prompt.
Creating a Permission Prompt
Step 1: Create an In-App Message
- Start by navigating to Content > In App > New and choose the Visual Editor.
- Select a Modal Template as your message type and layout. The modal template provides enough space to clearly explain the benefits of enabling push notifications and includes buttons for user interaction.
Step 2: Build Your Message
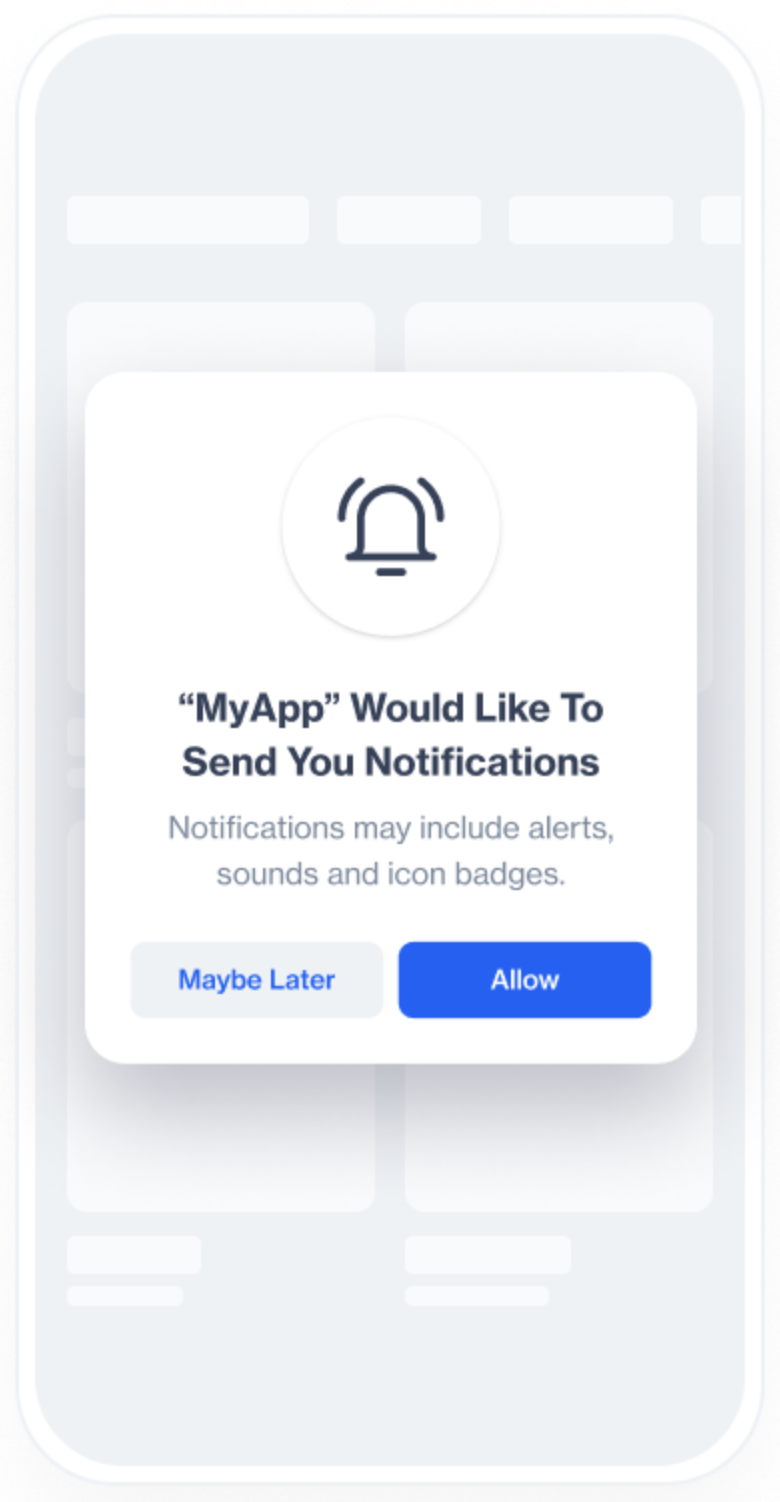
- In the message body, highlight the reasons why users should enable push notifications. Be clear and specific about the types of notifications you plan to send and the value they can offer.
- Example for a shopping app:
- "Stay updated with exclusive deals and product launches! Enable push notifications to never miss out on special offers."
- Example for a travel app:
- "Get real-time updates on your trips! Enable push notifications to receive flight alerts and travel tips directly to your device."
Step 3: Configure Button Action
Add Button Text: In your in-app message, label the buttons with clear, actionable text. Common choices are "Allow Notifications" for the primary button and "Dismiss" for the secondary button.
Define Button Actions:
- Button 1 : Set the action to "Dismiss." This option allows users to decline the prompt, closing the message without taking any further action.
- Button 2 : Set the action to "Permission Prompt." When users click this button, the SDK will check their current notification permission status.
Handling User Interaction:
- If the user clicks "Allow Notifications" and has not yet granted permission, the SDK will automatically guide them to their device's settings screen to enable push notifications for your app.
Permission Prompt
How Does the Permission Prompt Work?
- Triggering the Prompt:
- When the Permission Prompt button is clicked, the SDK checks the user’s current push notification permission status.
- If permission has already been granted, the SDK takes no further action.
- If permission has not been granted, the SDK will automatically navigate the user to the device's settings screen where they can enable push notifications.
- Test Scenario:
- Within the Dengage Sample App, create an In-App message with the Permission Prompt (Allow Notifications) button.
- When the user clicks the Allow notifications button, they are shown a message prompting them to enable push notifications. This action leads them to the Android or iOS notification settings screen.
- The user can then enable Show Notifications, granting the app permission to send push notifications.
Updated 9 days ago