
Applications
The Settings section in Dengage offers a variety of tools to manage and integrate different aspects of your account. One important feature is the ability to integrate applications within the platform. This functionality provides an overview of existing integrations, including details such as name, status, type, and the date of the most recent update. Additionally, you can easily create new application integrations to expand the capabilities of the platform. This integration feature helps streamline your operations and improve the flow of data between Dengage and other systems.
The Applications section within Settings > Integrations allows users to integrate iOS, Android, Huawei, and Website applications with the platform during the initial setup. Multiple websites or applications can be connected here.
Adding a New Application
To begin integration, click the New button and follow these steps:
Select Type
- Choose the application type:
- iOS
- Android
- Huawei
- Website
Even if Android and Huawei share the same code base, their tokens differ, requiring separate entries. Similarly, they have distinct application IDs during integration.
Creating an iOS Application

Creating an iOS Application
To integrate an iOS application, follow these steps:
-
Click the New button and select the type as iOS.
-
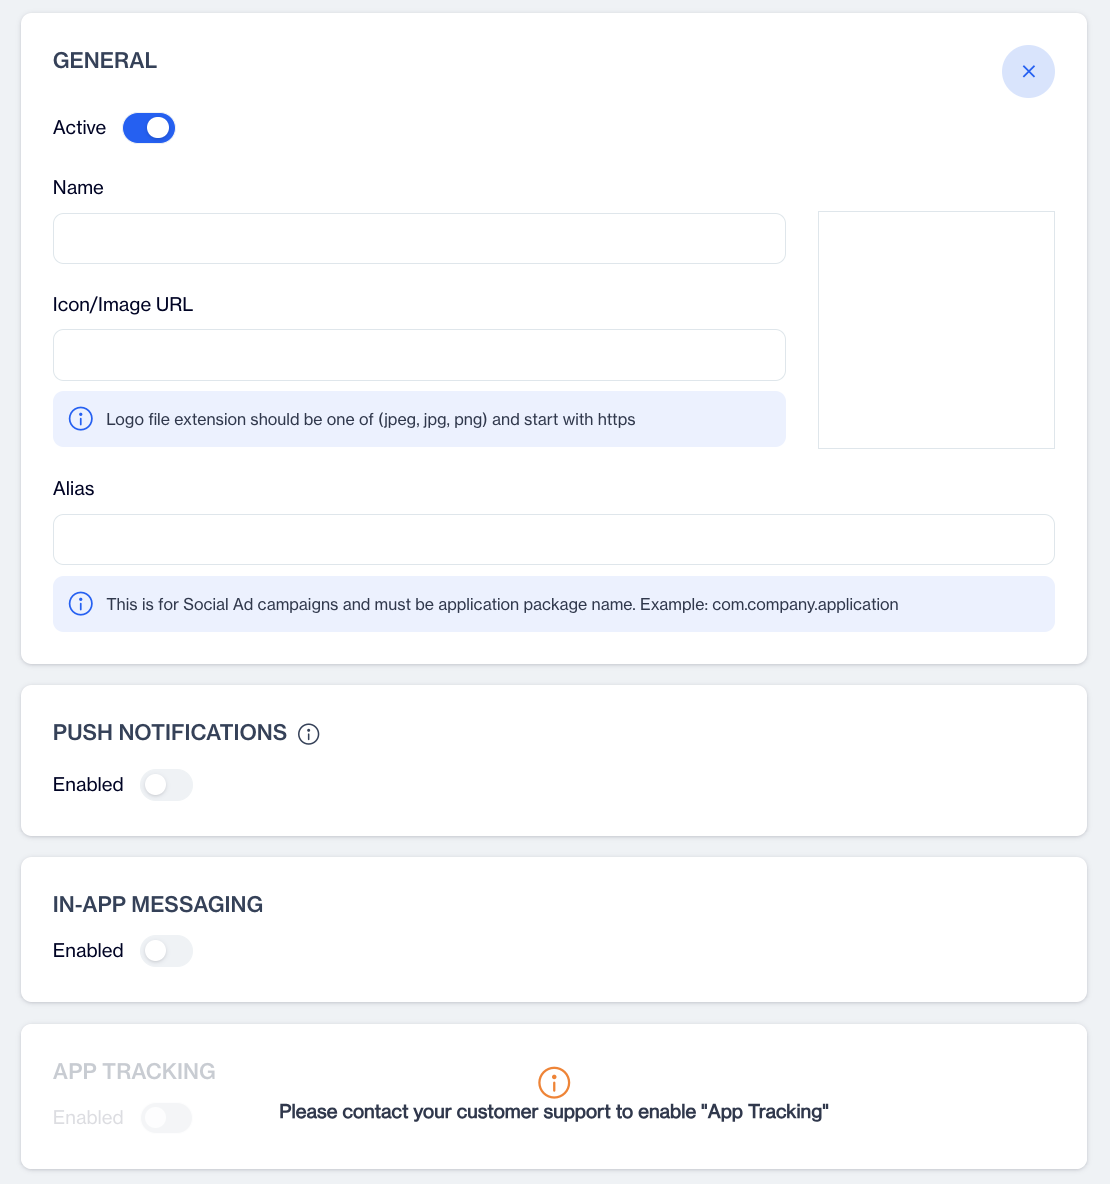
General Information
- Active: Use the toggle to activate or deactivate the application.
- Name: Enter the application name.
- Icon/Image URL: Provide the URL for the application icon/logo. The file must be in JPEG, JPG, or PNG format and start with https.
- Alias: Enter the application ID (e.g., 123456). This is required for social ad campaigns.
-
Push Notifications and In-App Messaging Toggles
- Enable or disable these features as needed.
- When Uninstall Tracking is enabled under Push Notification, a silent push is sent at night. Devices that have uninstalled the app are detected during the nightly calculation, and their statuses are updated accordingly.
Uninstall Tracking
-
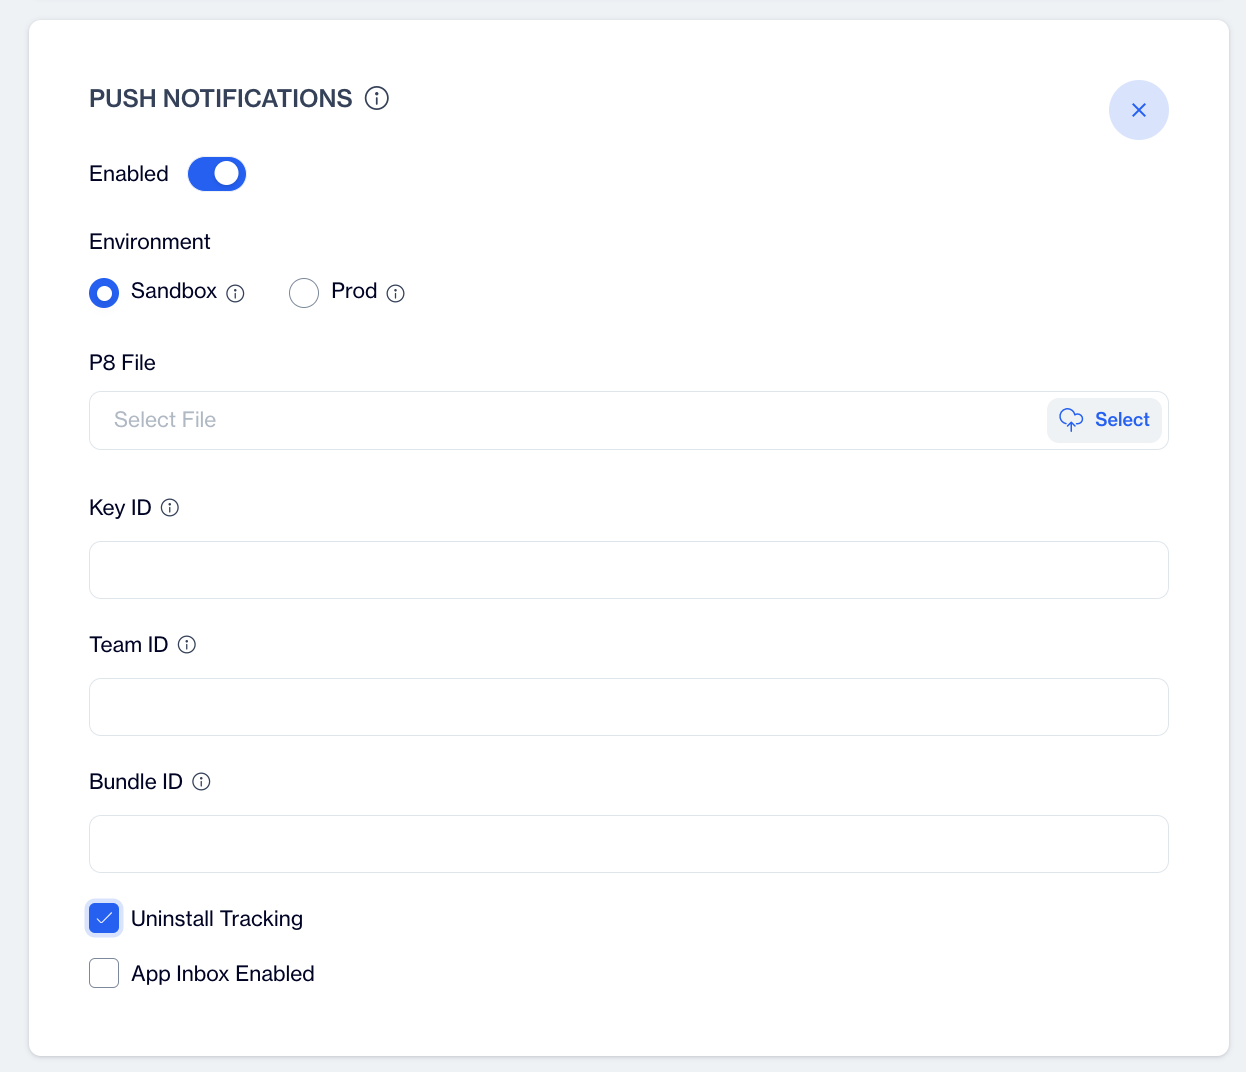
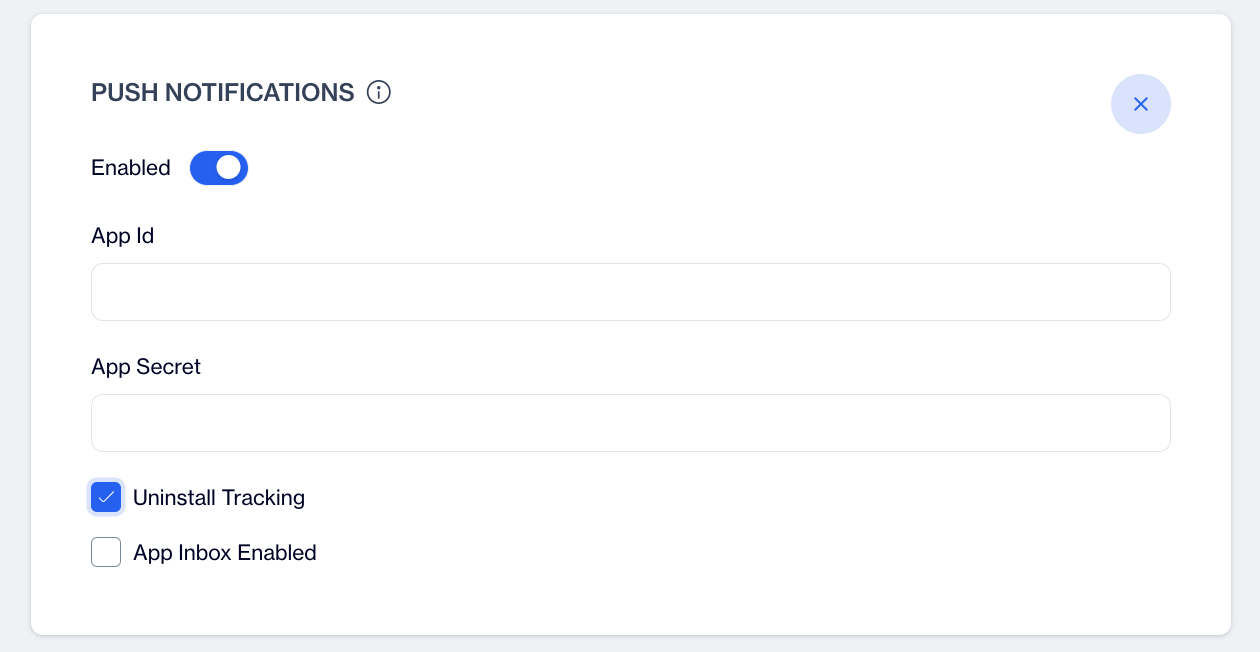
Push Notifications Setup
- Enabled: Toggle to activate push notifications.
- Environment:
- Choose Sandbox for apps downloaded from Xcode.
- Choose Prod for apps downloaded from App Store, TestFlight, Firebase, etc.
- Required Information:
- P8 File: Upload the private key file obtained from the Apple Developer portal.
- Key ID: Enter the identifier of the private key from the Apple Developer portal.
- Team ID: Provide the organization identifier (also called the Prefix or App Prefix) from the Apple Developer portal.
- Bundle ID: Enter the App ID or Bundle Identifier. This is used to map to the apns-topic HTTP header for targeting the specific application.
-
In-App Messaging
- The In-App Messaging section provides options to configure messaging frequency and intervals.
- Configuration Options:
- Enabled: Toggle to activate in-app messaging for the application.
- Minimum Interval for Fetching Messages:
- Specify the time interval for fetching new messages.
- Minimum Duration Between Displaying Messages:
- Set the minimum duration between consecutive message displays.
-
Additional Toggles
- Uninstall Tracking: Enable to track app uninstalls using silent push notifications.
- App Inbox Enabled: Enable to allow notifications to appear in the app inbox even if undelivered.
Editing an Existing iOS Application
When editing an existing iOS application by clicking on it, users will not see sensitive information such as IDs. These details, including the P8 File, Key ID, Team ID, and Bundle ID, must be re-entered. Ensure you have the required information readily available before making edits.
Creating an Android Application
Creating an Android Application
To integrate an Android application into the platform, follow these steps:
1. Click the New Button
- Navigate to the Applications section under Settings > Integrations.
- Click the New button and select the type as Android.
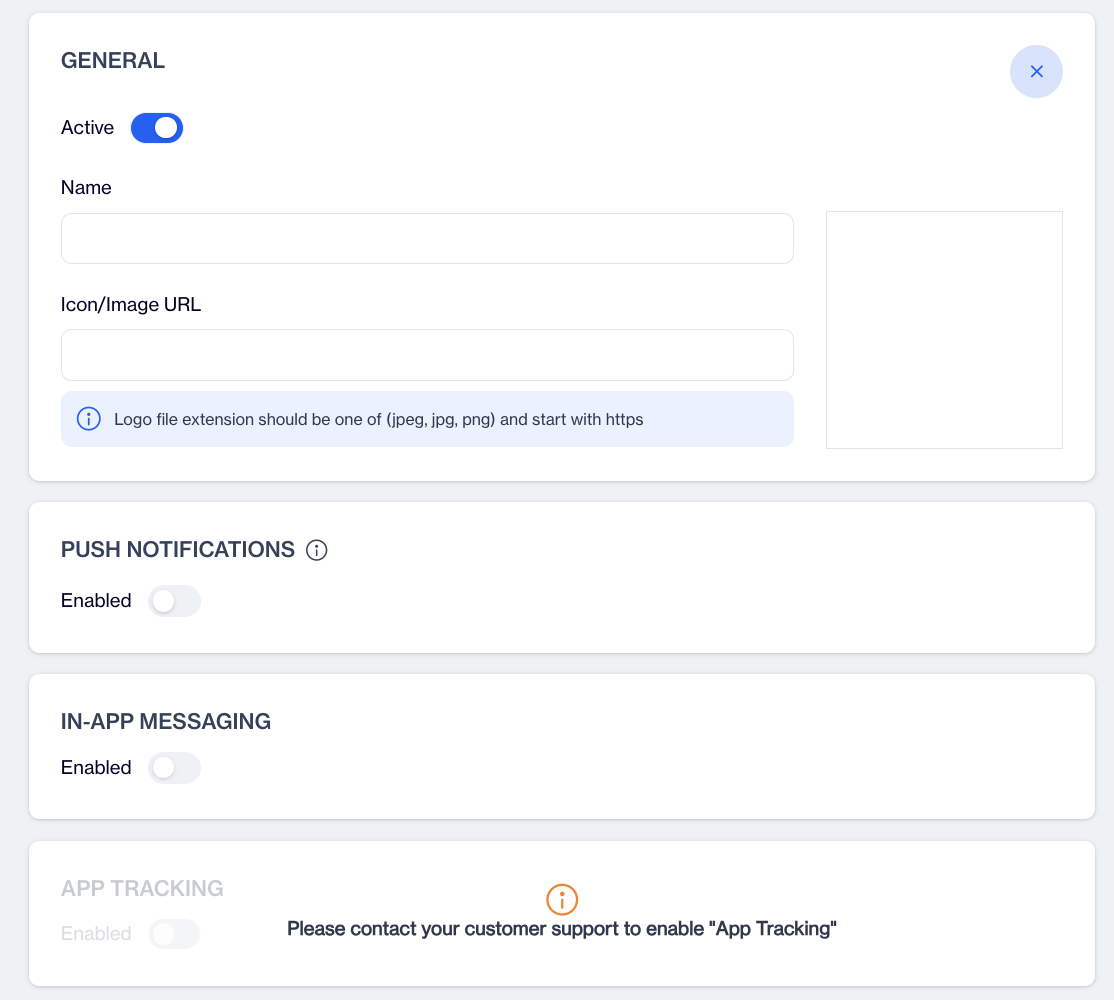
2. General Information
- Active: Use the toggle to activate or deactivate the application.
- Name: Enter the name of the application.
- Icon/Image URL: Provide the URL for the application icon or logo. Ensure the file format is JPEG, JPG, or PNG and that the URL starts with https.
- Alias: Enter the application ID (e.g., 123456). This ID is essential for social ad campaigns.
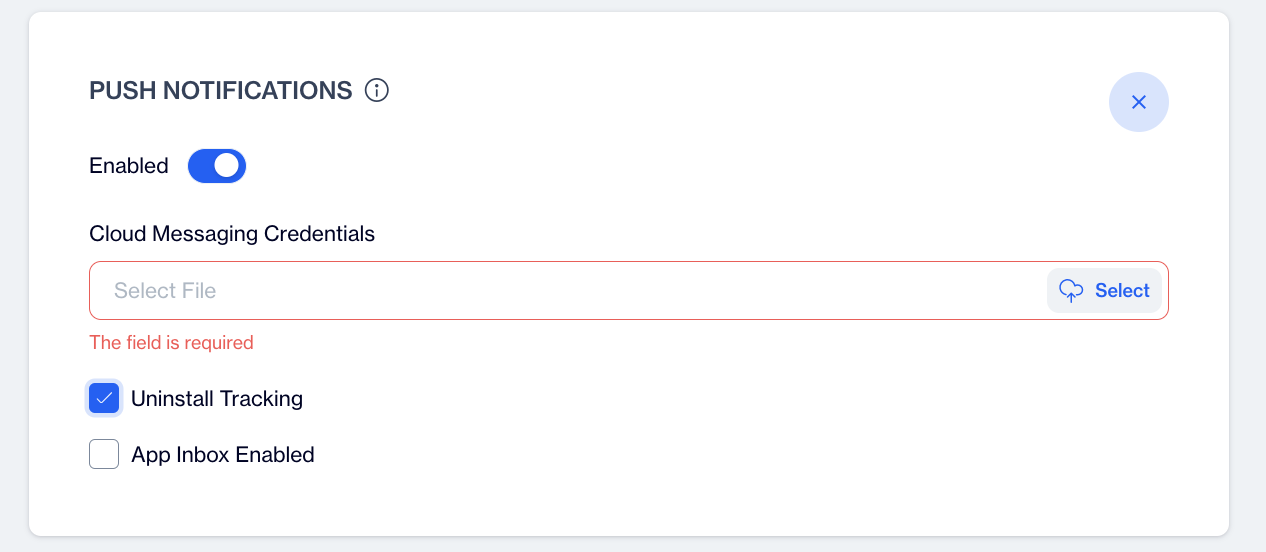
3. Push Notifications
- Enabled: Toggle to activate push notifications.
- Cloud Messaging Credentials: Upload the required JSON file for Firebase to enable push messaging capabilities.
- Uninstall Tracking: Toggle to enable tracking of app uninstalls via silent pushes.When Uninstall Tracking is enabled under Push Notification, a silent push is sent at night. Devices that have uninstalled the app are detected during the nightly calculation, and their statuses are updated accordingly.
Uninstall Tracking
- App Inbox Enabled: Toggle to allow push notifications to be stored in the in-app inbox, even if not delivered.
4. In-App Messaging
- Enabled: Toggle to activate in-app messaging.
- Minimum Interval for Fetching Messages: Specify the time (in minutes) between consecutive message fetches.
- Minimum Duration Between Displaying Messages: Set the time (in seconds) required between showing two messages.
5. App Tracking
This feature allows the platform to retrieve and send a list of installed packages from the operating system backend. It can be used to track whether specific applications are installed on a device.
- Enabled: Toggle to activate app tracking.
- Alias: Enter a unique alias for the application.
- Package Name: Enter the package name of the application to track.
- Add: Click this button to add more fields for entering additional aliases and package names. You can track up to 10 packages.
By following these steps, you can successfully integrate your Android application and configure it for advanced tracking and messaging capabilities.
Creating a Huawei Application
Creating a Huawei Application
To integrate a Huawei application into the platform, follow these steps:
-
Click the New Button
Navigate to the Applications section under Settings > Integrations.
Click the New button and select the type as Huawei. -
General Information
- Active: Use the toggle to activate or deactivate the application.
- Name: Enter the name of the application.
- Icon/Image URL: Provide the URL for the application icon or logo. Ensure the file format is JPEG, JPG, or PNG and that the URL starts with https.
-
Push Notifications
-
Enabled: Toggle to activate push notifications.
-
App ID: Enter the Huawei App ID for push notifications.
-
App Secret: Enter the Huawei App Secret.
-
Uninstall Tracking: Toggle to enable tracking of app uninstalls via silent pushes.When Uninstall Tracking is enabled under Push Notification, a silent push is sent at night. Devices that have uninstalled the app are detected during the nightly calculation, and their statuses are updated accordingly.
Uninstall Tracking
-
App Inbox Enabled: Toggle to allow push notifications to be stored in the in-app inbox, even if not delivered.
-
-
In-App Messaging
- Enabled: Toggle to activate in-app messaging.
- Minimum Interval for Fetching Messages: Specify the time (in minutes) between consecutive message fetches.
- Minimum Duration Between Displaying Messages: Set the time (in seconds) required between showing two messages.
-
App Tracking
This feature allows the platform to retrieve and send a list of installed packages from the operating system backend. It can be used to track whether specific applications are installed on a device.- Enabled: Toggle to activate app tracking.
- Alias: Enter a unique alias for the application.
- Package Name: Enter the package name of the application to track.
- Add: Click this button to add more fields for entering additional aliases and package names. You can track up to 10 packages.
By following these steps, you can successfully integrate your Huawei application and configure it for advanced tracking and messaging capabilities.
Creating a Web Application

Creating a Web Application
This guide provides step-by-step instructions for integrating a web application into the platform, focusing on key sections such as General, Push Notifications, On-Site Messaging, and Advanced Settings.
1.Click the New Button
Navigate to the Applications section under Settings > Integrations.
Click the New button and select the type as Web.
2.General
- Active: Toggle to activate or deactivate the application.
- Name: Enter the name of the application.
- Icon/Image URL: Provide the URL for the application icon. The icon must be square, have a minimum size of 256px and have HTTPS URL.
- Cross Frame Storage:
- Use this feature for sharing push tokens across multiple domains of the same site to make them behave as a single site.
- Important: If the integrated website blocks iframes via the Content Security Policy header, add *.dengagecdn.com to frame-src.
- Note: Enabling/disabling this later resets most historical browser cache data. Avoid changes after integration is complete.
- Main Domain URL: Specify the primary domain of the website.
- Add Domain: Use this button to add additional domains.
3. Push Notifications
Push notifications allow you to engage users directly through their browsers.
To activate this feature, toggle the Enabled button. The platform supports the Web Push API, allowing you to deliver notifications across supported browsers.
Prompt Type
You can choose between Slide and Banner prompt types. These determine how the notification request is visually displayed to users. Previews of each type are available under the settings menu.
Prompt Settings
Language support is available to display prompts in the user’s browser language. You can add multiple languages by copying content or creating new content from scratch. Advanced Prompt Settings lets you customize the appearance. You can adjust the position, layout, colors (main, background, border), font styles, and border settings. Title options include font size, weight, and bold formatting.
Show Native Prompt When Available: When enabled, the SDK will attempt to show the browser’s native notification prompt first. If unavailable, a custom prompt is displayed instead.
Show Prompt Automatically: You can configure the delay before showing the prompt (in seconds), the minimum number of page visits required, and wait times after users ignore or deny the prompt (in hours or days).
Show Notification Blocked Prompt: If users block notifications, you can display a custom prompt encouraging them to enable notifications. Settings include title, message, button options, and delay preferences.
Welcome Notifications:You can send a welcome message to users who grant notification permissions.
Safari : For Safari, additional configuration is required:
- Upload a P12 File and its Private Key.
- Provide the Website Push ID.
4. On-Site Messaging
- Enabled: Toggle to activate on-site messaging.
- Minimum Interval for Fetching Messages: Set time (minutes).
- Minimum Duration Between Displaying Messages: Set time (seconds).
- Trigger on SDK Load: Displays messages upon SDK initialization.
- Static Source Display: Uses an initiator file for iframes to bypass restrictions on data:text/html.
5.Advanced Settings
Advanced settings provide additional customization for your web application.
The Site Variables feature allows you to track key data, such as basket amounts, from your website. Select the data source from the dropdown menu (e.g., data layer or custom JavaScript). You can add descriptive names and text to clarify what each variable tracks.
For advanced JavaScript needs, click Edit JavaScript to open a code editor and write custom JS code that will run within the SDK.
Configure Your Website
After setting up your web application, configure your website to support push notifications:
- Upload File
- Download the Service Worker file provided in the platform.
- Upload it to the root directory of your website.
- Add Code to Site
- Insert the provided HTML code snippet into the section of your website’s code. This ensures proper integration of the SDK.
Updated 8 months ago