
Geofence
This section will guide you through the process of creating and managing geofence clusters, as well as understanding how geofences function in the background once users grant location permission.
A geofence is a virtual perimeter for a real-world geographic area. When grouped into a geofence cluster, multiple geofences can be managed together, making it easier to apply policies and deliver location-based push messages efficiently.
How Geofence Works
- When users allow location permission in your app, the SDK starts retrieving geofence data from the Dengage server.
- The app displays the standard system pop-up: “This app would like to use your location. Allow?”
- Once permission is granted:
- The SDK automatically fetches the geofence list every 15 minutes.
- If the device enters a registered geofence, a request is sent to the Dengage server, which then delivers a push notification to the user.
- Limits:
- Android: Can store up to 100 geofences locally, but Dengage uses 50 per app.
- iOS: Can monitor up to 20 geofences per app, and Dengage uses the available slots.
- App lifecycle:
- Geofence updates pause when the app is closed.
- Updates resume once the app is reopened.
- Accuracy
- Typical accuracy is in the 20–50m range.
- Best-case accuracy can be as precise as 5–10m.
- In rural areas or locations with limited signal, accuracy may degrade significantly, reaching up to several kilometers.
Refer to the Developer Guide for installation and permission request details.
Geofence Cluster
The main page is the listing of Geofence Clusters in the account.
1.Overview Geofence
- Name: The name of the geofence
- Status: The status of the geofence (Active or Inactive)
- Geofence: The number of users currently in the geofence
- Users Entered: The total number of users who have entered the geofence
- Campaign: The campaign associated with the geofence (if any)
- Created On: The date and time the geofence was created
- Created By: The name of the person who created the geofence
- Tracking: Shows if users are currently being tracked in the geofence
2.Search Bar: Enables users to search for specific content within the overview Geofence .
Filtering by Geofence NameThe search bar filters the displayed items based on the name of the Geofence.
3.+ New: Provides options for initiating a new Geofence creation process.
4.Filter : Allows users to filter the Geofence files based on various criteria
- Status: It allow us to tell the status of the entities we want to filter.
- Date Range: It allow us to filter according to the date and month.
- Clear Filter: It allow us to clear the filter any status or Date Range selected.
- Apply: There is a button allow us to apply filter according the above entities selected
How to Create a Geofence Cluster
This section explains how to create a Geofence cluster. Please hit +New button on the main page.
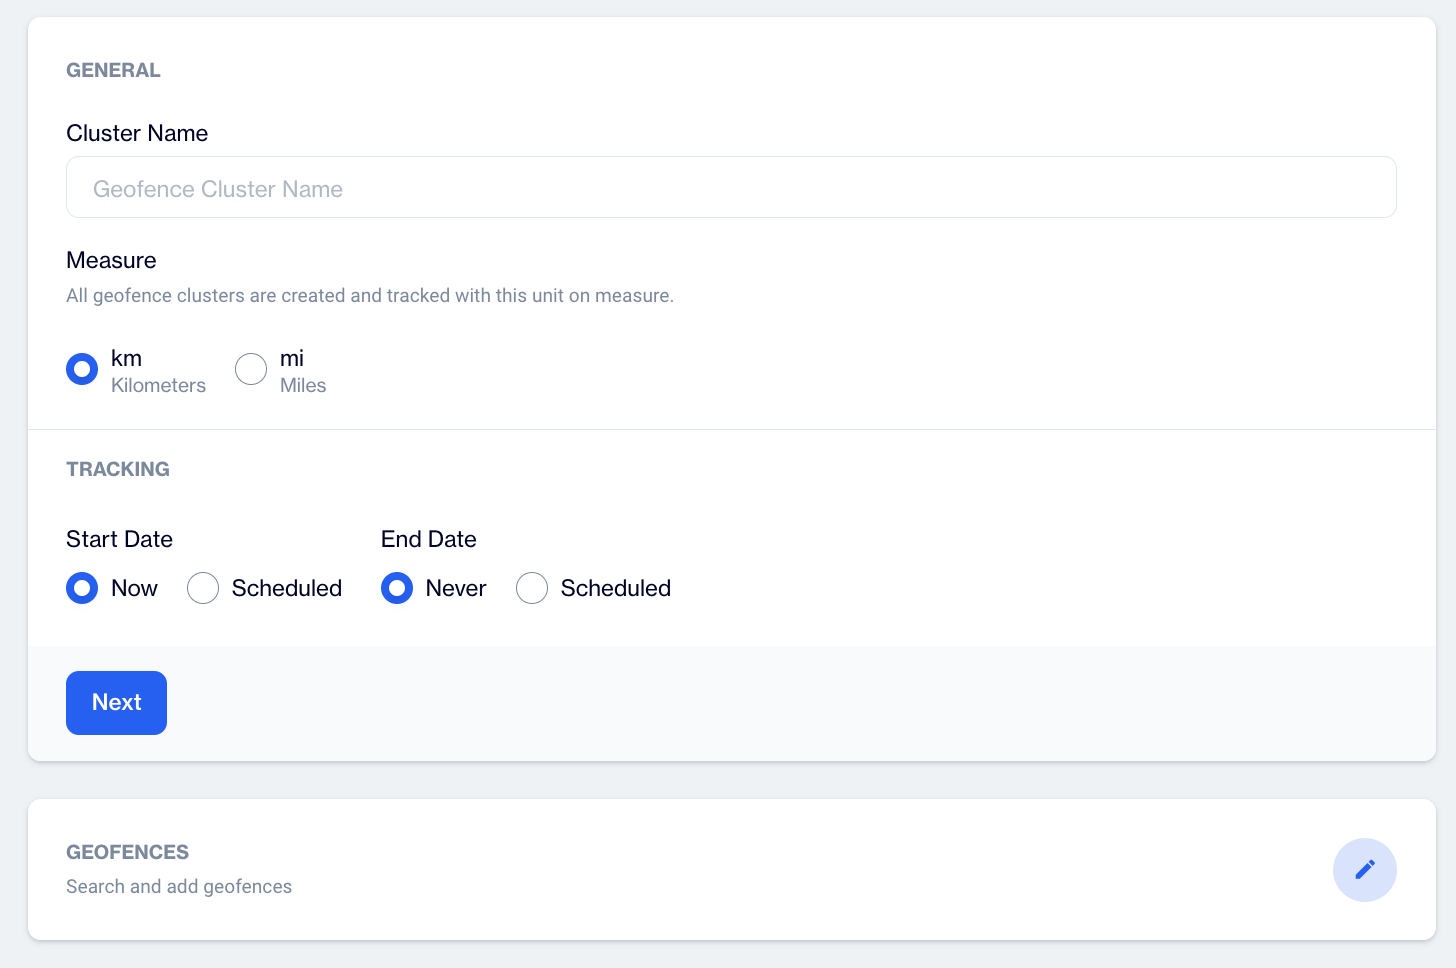
1.General
- Cluster Name: This field allows you to enter a name for the geofence cluster
- Measure: This field allows you to choose the unit of measurement for the geofence cluster in form of.
- km: Allow us to measure distance in kilometres.
- mi: Allow us to measure distance in miles.
2.Tracking
- Start Date: This field allows you to choose the start date for the geofence. You can choose
- Now: Allow us to select the present date.
- Scheduled: Allow us to schedule some specific date of your choice.
- End Date: This field allows you to choose the end date for the geofence. You can choose
- Never:Allow us to select the present date.
- Scheduled:Allow us to schedule some specific ending date of your choice.
3.Geofences: This field allows you to search for and add geofence selection area of your choice to the cluster.
4.Next: User can proceed to next section to select area on the map.
Geofence Configuration ReminderIf you haven't added a geofence area for the corresponding cluster, you will be automatically redirected to the geofence section, regardless of whether you have completed other entities. This ensures that the necessary geofence area settings are configured properly for the cluster.
Actions: Each geofence listing item will have a three-dot menu. When a user clicks on this icon, the system will provide the following actions:
- Edit: When the user clicks on the "Edit" option, the system displays the details in an editable form, including any newly added information.
- Pause: This option enables the user to pause the active geofence cluster. Upon clicking "Pause," the system will display a confirmation pop-up before changing the status from Active to Paused.
- Delete: Enables users to delete geofence clusters.
Geofence
How to Select an Area for a Geofence
This section explains how to select an area on the map for a geofence cluster.
1.Map Display:
- The map display shows the selected area on a map.
- Users can visually verify the area they have chosen and make adjustments as needed.
- The map interface allows users to zoom in and out and full screen view option for more precise area selection .
2.Search Bar: The search bar allows users to search for a specific location on the map.
3.Save: The save option allows users to confirm and save the selected area.
Enable Save Option After Creating Geofence ClusterThe Save option will be enabled only after you have successfully created a geofence cluster. This ensures that you have defined the necessary boundaries and measurements before saving your settings. Once you have established the cluster, you can proceed to save the configuration for future use
How to Associate Distance with Selected Area
After selecting a specific area on the map, you can associate the following properties with the selected area;
1.Name: Specify a name for the area you've selected.
2.Radius: The radius determines the extent of the area around the selected point.
Points To RememberAdditionally, you can establish more than one cluster within the selected area. This allows for better granularity and precise targeting, providing users with the ability to create complex geofencing areas with multiple distinct clusters.
Remember that the decision to use kilometers or miles for the distance measurement depends on the initial settings you have configured. Make sure your settings reflect your preferred units of measurement for an accurate representation of the selected area.
Cluster DistanceThe minimum distance for a cluster is 0.05 km or miles, depending on the selected unit
The maximum distance for a cluster is 100 km or miles, depending on the selected unit
3.Add: Use the "Add" option to confirm the area and its associated properties. Please note you need to Save Geofence cluster.
Updated 20 days ago