
Shopify

In just a few minutes, you can seamlessly connect your Shopify store to your D·engage account. This integration performs a one-way sync, transferring your product catalog, along with contact and order data, directly from your Shopify store to your D·engage account for both logged-in customers and guests.
You can leverage this data to send personalized follow-up emails, trigger automations based on behavioral data, create targeted micro-segments, define campaign conversion goals, and much more.
Shopify Store Integration with D·engageAfter setting up API credentials and regional settings, simply enable the D·engage extension via Shopify's theme customization. This integration enhances your marketing capabilities and customer engagement.
The shopify app is compatible with all plans of Shopify, including Shopify Plus.
Installation :
-
Ensure you are logged in to the Shopify store where you want to install the D·engage app, using an account with admin or app installation privileges.
-
To install the Shopify app, open the Dengage app on the Shopify app store available here: Shopify App Store
-
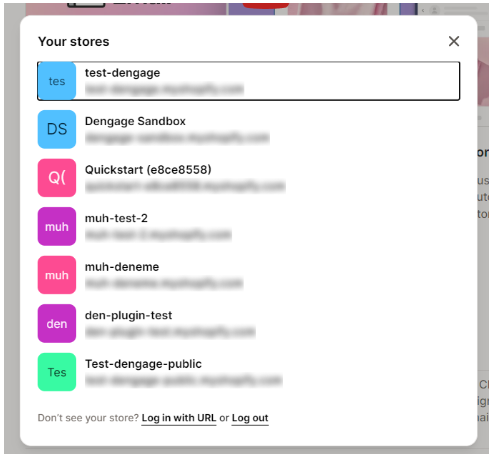
If you have multiple stores linked to a single account, select the store that you wish to install the Dengage app on as shown in the fig below.
-
You will now be redirected to your Shopify store and shown the following screen for installing the app. Click on the Install button here.
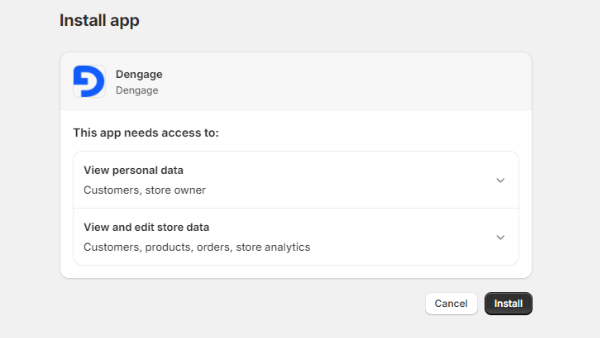
-
This will redirect you to the configurations page for the Dengage app.. Next, follow the guidelines in the Configuration section of this guide to configure the app.
Configuration:
Settings:
After installing the app, there are settings that need to be configured for it to function properly. You can configure the app immediately after installation or search for "D·engage" in the admin panel's search bar and open the D·engage app.
The settings page will appear as shown below after a fresh installation. Use the table to complete all the settings and then click "Save Settings."
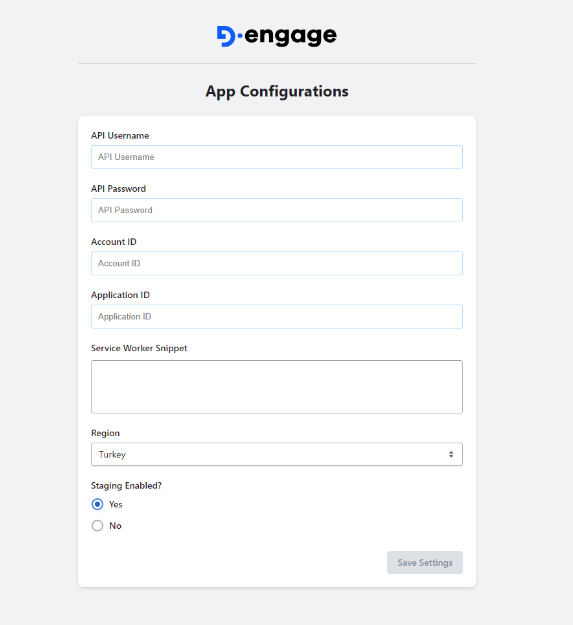
| Setting | Required | Description |
|---|---|---|
| API Username | YES | he username for the Dengage API User - should have permissions to read and write for Data Space and Transactional Push. This is available under Settings > API Users. |
| API Password | YES | The password for the Dengage API User - should have permissions to read and write for Data Space and Transactional Push. This is available under Settings > API Users. |
| Account ID | YES | The Dengage Account ID - this is used to sync events from the backend to the Dengage platform. This can be requested from the Dengage support team. |
| Application ID | YES | The Dengage Application ID for the app that you have created for your store in Dengage CDMP. This is available under Settings > Applications > Select the application you created for the Shopify store > More > Copy Public ID. |
| Service Worker Snippet | YES | The Dengage Service Worker snippet that will be used to enable service worker and web push functionality on the store. You can access this from Settings > Applications > Select the application you created for the Shopify store > Setup Guide > Download Service Worker File > Copy and paste the contents of the file. |
| Region | YES | This setting determines which API endpoints should be used when sending data to the Dengage platform. As best practice and for ideal performance, this should be set to the region closest to where your e-commerce website is hosted e.g. if it is hosted in Europe, this should be set to Europe. |
| Staging Enabled | YES | When set to Yes, data is sent to the Staging / Testing environment for Dengage. When going “Live”, this setting should be set to No. |
Enable the extension:
After configuring the settings for the D·engage app, the next step is to enable the D·engage extension to sync all e-commerce events with the D·engage platform. Follow these steps:
-
Log in to the Admin panel.
-
Navigate to Online Store > Themes.
-
Click Customize next to the current theme (or the theme you want to test the D·engage extension on).
-
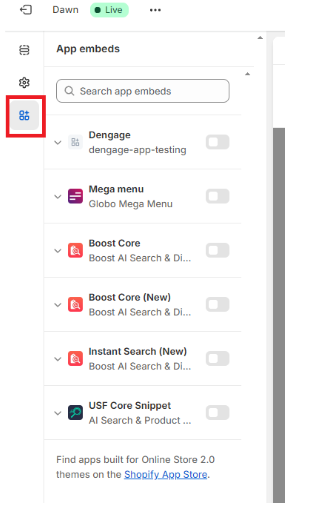
From the menu on the left-hand side, click App Embeds.
-
Click on the toggle next to the Dengage app embed to enable the extension.
-
Click on Save on the top right corner to save the settings and enable the extension.
IP Restriction:
The following IP addresses need to be whitelisted on Dengage (under Settings > API IP Restriction in order for data to sync as expected):
23.227.38.65
195.42.242.4
Updated 8 months ago