
An on-site message is a type of notification that appears directly on your website while visitors are actively browsing. Unlike scheduled messages, it doesn’t get sent at a fixed time. Instead, it shows up instantly during the user’s session.
Common formats include:
- Pop-ups (e.g., discount offers)
- Yes/No prompts (e.g., quick surveys)
- Banners (e.g., announcements or alerts)
No additional permissions are required to display on-site messages. They are ready to use as soon as you set them up.
Important Notes
- Created onsite messages will be stored in D·engage backend and will be served to web SDKs.
- On-site messages on the D·engage platform can be triggered by page loads.
- To display on-site messages, the pageView function must be called on every page load, unless you enable Initialize SDK on Load (see Advanced Settings below).
- If the website is a Single Page Application, please send pageView function on every page navigation.
dengage("pageView", {
    page_type: "product", // Can be anything. for example: home, category, cart, order, blog etc.
    product_id: '123', // If the page is a product page, you can pass Product Id like this.
    category_path: "Electronics > Laptop", // if the page is a category page, you can pass Category Path like this.
    price: 100.50, // if the page is a product page, you can pass Non-discounted Price of Product like this.
    discounted_price: 80.50, // if the page is a product page, you can pass Discounted Price of Product like this. If there is no discount you should pass the non-discounted price.
    stock_count: 1, // if the page is a product page, you can pass Stock Count of Product like this. If product has no stock you can pass 1 or 0 or do not pass this parameter.
    // ... extra columns in page_view_events table, can be added here
});
Alternatively you can pass page view event on the initialize function. This is useful for non Single-Page Application websites.
dengage("initialize", {
    pageView: {
        page_type: "product", // Can be anything. for example: home, category, cart, order, blog etc.
        product_id: '123', // If the page is a product page, you can pass Product Id like this.
        category_path: "Electronics > Laptop", // if the page is a category page, you can pass Category Path like this.
        price: 100.50, // if the page is a product page, you can pass Non-discounted Price of Product like this.
        discounted_price: 80.50, // if the page is a product page, you can pass Discounted Price of Product like this. If there is no discount you should pass the non-discounted price.
        stock_count: 1, // if the page is a product page, you can pass Stock Count of Product like this. If product has no stock you can pass 1 or 0 or do not pass this parameter.
        // ... extra columns in page_view_events table, can be added here
    }
    //... other initialize parameters can be added here
});
How to Enable Onsite Messaging
Go to Settings > Integrations > Applications > Create New (or select an existing Web Application) > Enable On-Site Messaging.
Enable Onsite Messaging
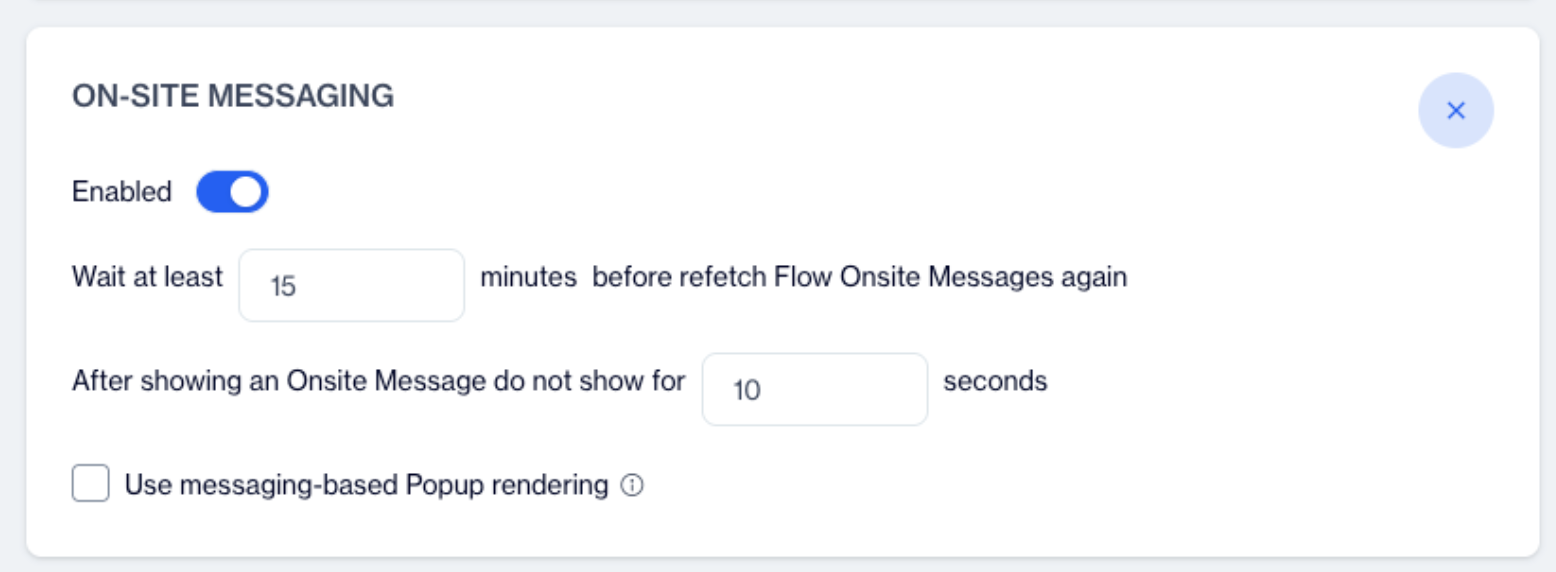
Onsite Message Configurations:
Wait at least X minutes before refetch Flow Onsite Messages again: WebSDK fetches Flow Onsite Messages for that user periodically and stores those messages on their browser. This defines the minimum wait time between Flow Onsite Message fetches.
After showing an Onsite Message do not show for X seconds: When there are multiple displayable Onsite Popup messages. They are going to be displayed back to back on each trigger. This value blocks back to back displaying with a global cooldown duration. You can define minimum wait time between Onsite Popup displays. Since showing popups back to back negatively affects user experience, we recommend defining this value at least 10 seconds.
Use messaging-based Popup rendering: We use iframes to display Onsite Popup Messages. When this feature is disabled SDK uses data: URL approach. If your site blocks this behavior via Content-Security Policy(CSP) header, you can enable this feature. When enabled SDK uses static URL with messaging.
If you are not going to use pageView calls, you should use the Trigger Page View on Initialize feature to trigger Onsite Message Displays. When this feature is enabled SDK triggers pageView without parameters internally on each initialization. You can do it on Settings > Integrations > Applications > Create New (or select an existing Web Application) > Advanced Settings > Enable “Trigger Page View on Initialize”
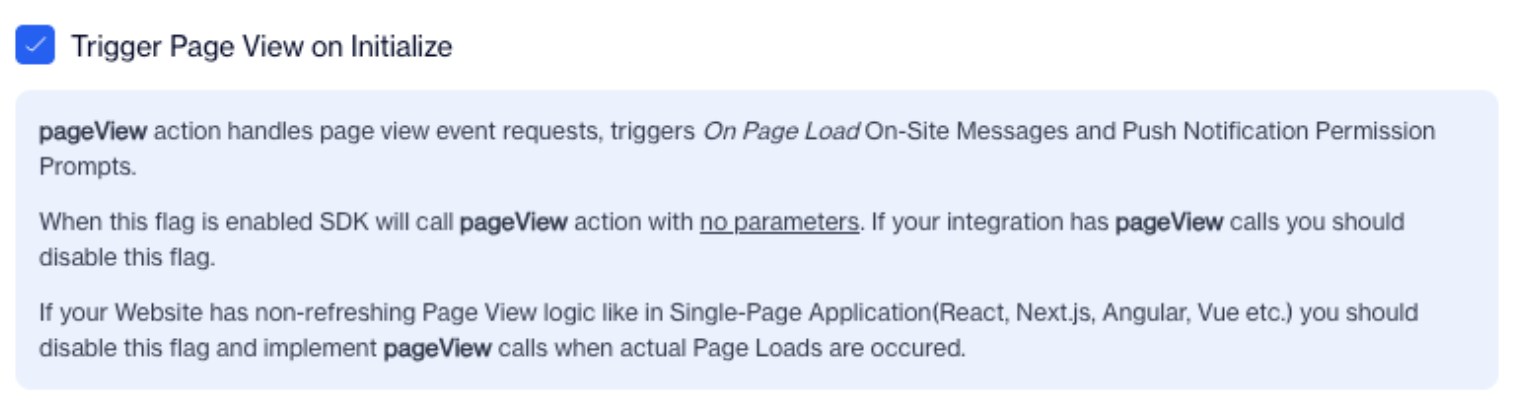
Trigger Page View on Initialize
Inline Target Selector
Features
Search
Selector scans all HTML nodes in page and finds the ones that contains search word on their class or id. Then lists the optimized query selectors for the found nodes. Queries are optimised by prioritising id queries and using tag when adding tag to it lowers the result count.
Example
For example, when searched with ‘container’ word, selector finds 5 nodes like these:
| tag | class | id | |
|---|---|---|---|
| div | container | ||
| section | container | ||
| div | container container-small | ||
| div | container container-small | main-container | |
| div | container | footer-container |
Direct query selectors of these nodes are will be like these:
| query | target count |
|---|---|
| .container | 5 |
| div.container | 4 |
| section.container | 1 |
| .container.container-small | 2 |
| #main-container | 1 |
| #footer-container | 1 |
Initial(Auto)
When overlay is initialized, selector automatically searches for nodes with initial search word. Initial search tries 5 times in 5 seconds since some HTML nodes can be removed or added after the page load.
Manual
Manual search is the same process with initial search without retry. It only searches once on button click.
Node Highlight
When search is complete. Selector adds an overlay to all selectable nodes with blue transparent color. Color turns green for targets of the selected query. When mouse hovered on highlighted overlays, queries that targets those nodes are highlighted with breathing background color change animation.
Confirmation
When clicked to Confirm Target button, selector sends a message to the Admin Panel with selected query and its target count. Then closes to site tab.