
Integrate D·engage SDK Using Google Tag Manager
If you are using Google Tag Manager (GTM) in your website, you can add D·engage Web SDK to your website by using GTM. For that, you have to create an application for your website on the Dengage Admin Panel.
Defining Application
In order to use D·engage Web SDK, you have to add an application for your website from the D·engage Admin Panel.
- Go to the “Settings” > "Integrations" , select “Applications” from the menu.
- Click “New” to add a new website application.
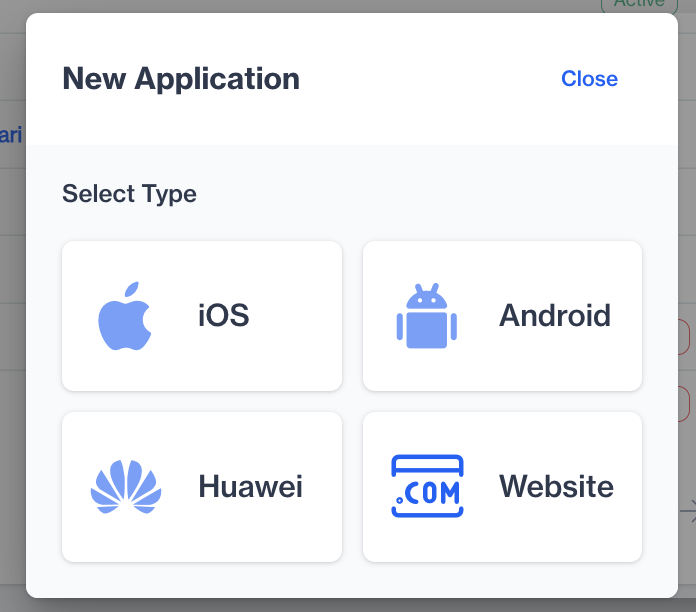
New Website
- Once you have filled out the information for the website, enable “Push Notifications” if you plan to use web push.
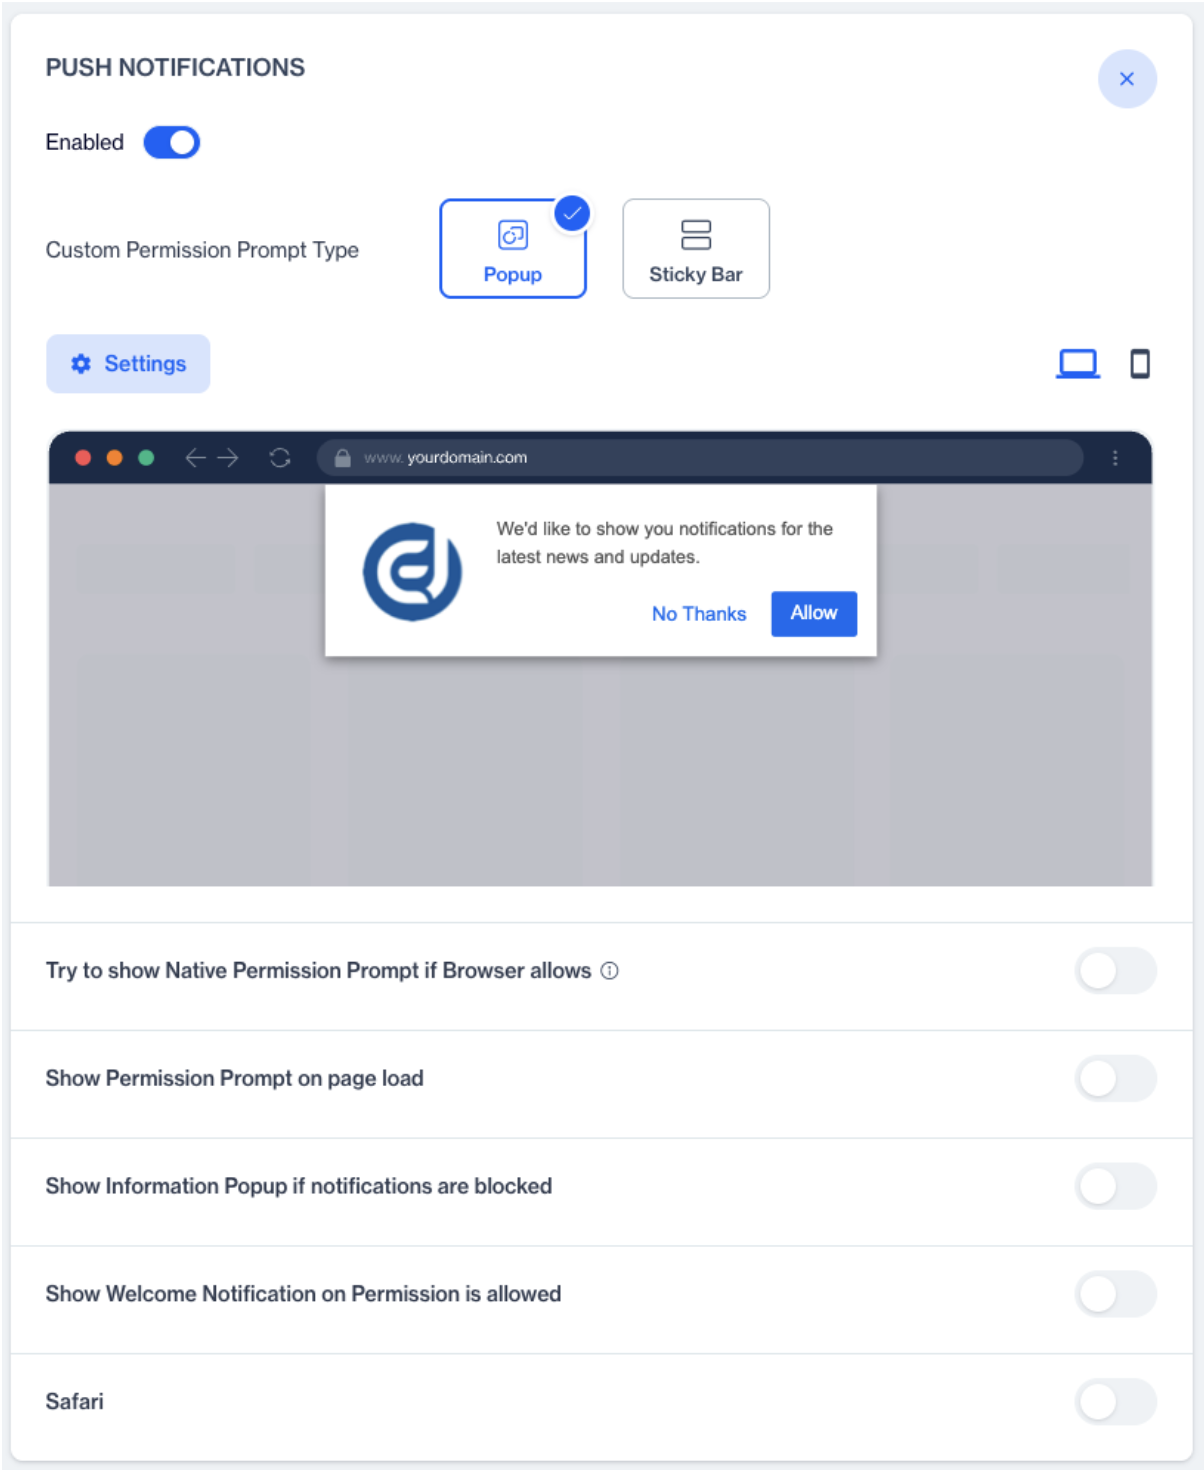
Push Notification
After saving the new website, you will be prompted with the SDK setup guide. You will see the HTML code you need to add to your website in a pop-up as shown below. This code will be used for the GTM tag configuration.
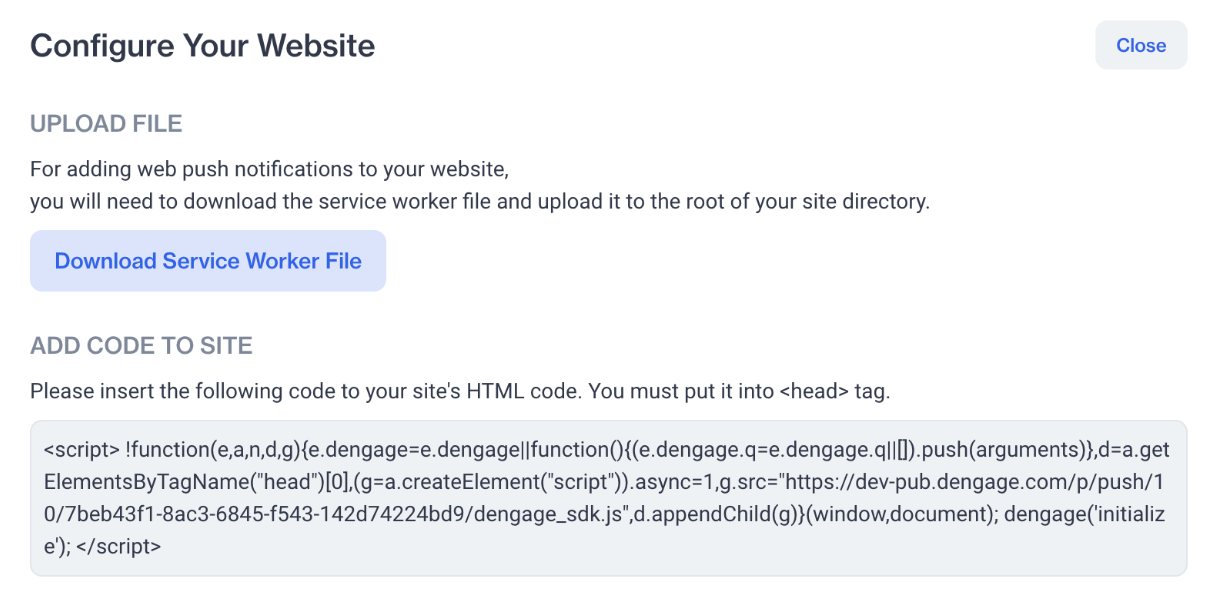
Code
You can access this information anytime by opening the More on the web application creation page and selecting Setup Guide.
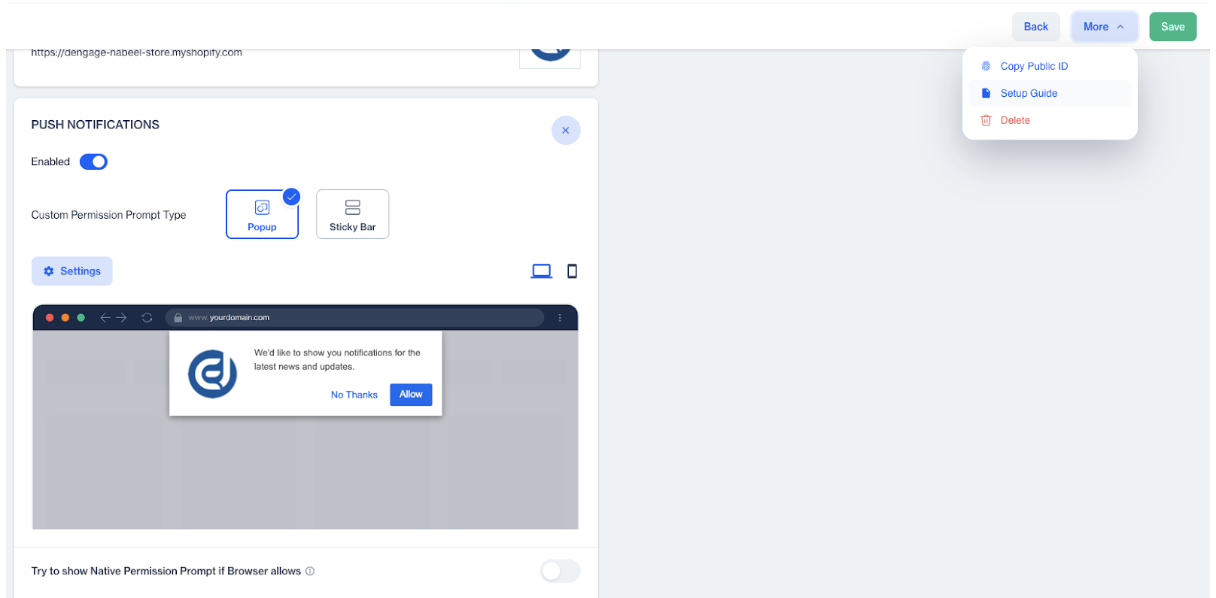
Setup Guide
Adding the D·engage SDK Tag
The HTML code you were given needs to be added as a tag in the Google Tag Manager.
- Open your GTM workspace and click “New Tag” to add the HTML code.

- Provide a tag name like “Dengage SDK” and then click “Tag Configuration”.
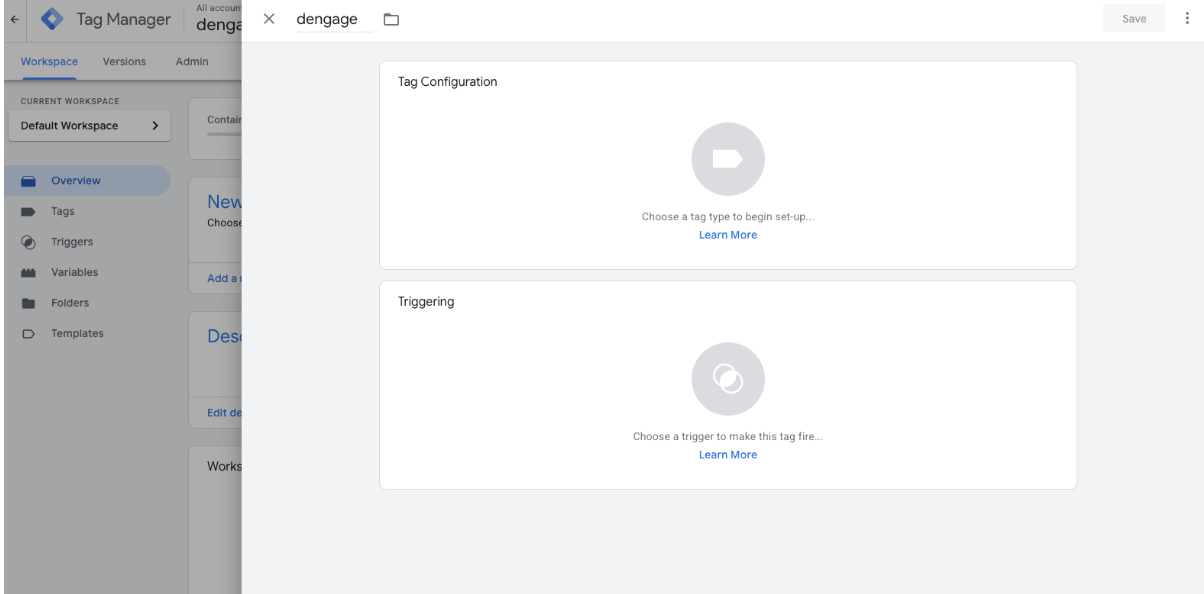
- Choose “Custom HTML” for tag type.

- Paste the HTML code and select “All Pages” for the trigger.

- Save the new tag. The D·engage SDK is now added to your website. However, to start using Web Push you must also add the service worker to your website and configure a prompt in the website definition page. For event collection, refer to the relevant section.
Adding the Service Worker (For Web Push)
To use Web Push, you must add the service worker file to your website. This cannot be done with GTM.
- Go to thewebsite definition page and select Setup Guide.
- Click “Download Service Worker” to download the service worker file.
- Upload this file to the root directory of your website.
This file must be available at the following URL: https://yourwebsite.com/dengage-webpush-sw.js
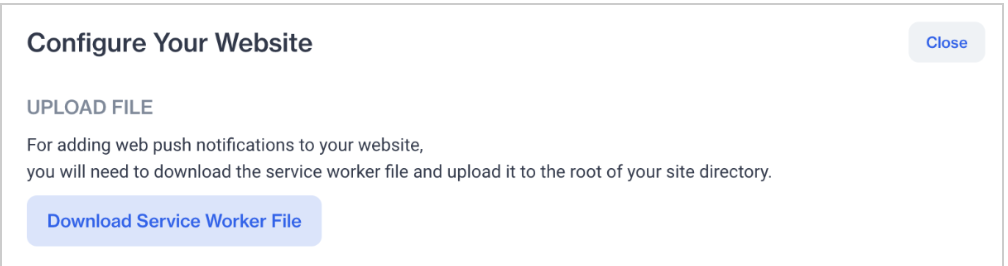
Download Service Worker File
How to Add Event Collection
In order to collect website events and use that data to create behavioral segments in D·engage you have to determine the type of events and data that needs to collected. Once you have determined that, you will need to create a “Big Data” table in D·engage. Collected events will be stored in this table. Multiple tables can be defined depending on your specific need.
Any type of event can be collected. The content and the structure of the events are completely flexible and can be changed according to unique business requirements. You will just need to define a table for events.
Once defined, all you have to do is to send the event data to these tables. D·engage SDK has only two functions for sending events: sendDeviceEvent and sendCustomEvent. In most cases, you will only need the sendDeviceEvent function.
1. Using User Information
If the user logs in or you already have user information, this means you have contact_key for that user. You can set this contact_key to link the user with their browser. There are two functions for getting and setting contact_key.
dengage('setContactKey', userId);
dengage('getContactKey', function(userId) {
     //use userId (contact_key) here
});
Dengage WebSDK generates its own device_id for each visitor and each browser. If you want to use your own identifier for device_id. You can pass it on the initialize method.
dengage('initialize', { deviceId: customDeviceId });Also if you have contact_key data at the start, you can pass it on the initialize method. You can still use the setContactKey method.
dengage('initialize', { contactKey: userId });And if you want to pass them together you can use it like this:
dengage('initialize', { deviceId: customDeviceId, contactKey: userId });Dengage WebSDK starts doing its tasks with the initialize method. When you pass user identifiers on the initialize, SDK uses the data you provided on its tasks from the start. Any task that requires these identifications are going to be correct and consistent from the start. If you have these identifiers before calling the initialize method we recommend using this approach.
2. Sending Device (Browser) Specific Events
You can use the sendDeviceEventfunction for sending events for the browser. These events are sent to a big data table defined in your D·engage account. The table must be linked to the master_device table. If you have set a contact_key for the browser, the collected events will automatically be associated with that user.
dengage(‘sendDeviceEvent’, tableName, dataObject[, callback]);
// for example if you have a table named "events"
// and events table has "key", "event_date", "event_name", "product_id" columns
// you just have to send the columns except "key" and "event_date", because those columns sent by the SDK

var eventData = {
  event_name: 'page_view',
  product_id: '12345'
};
dengage('sendDeviceEvent', 'events', eventData);
You can use these functions anywhere on your website code to send data. But if you want to use GTM to add these codes to your website. You can use multiple methods and this can be different for every website.
1. Using Existing dataLayer events
If you have existing events in the dataLayer, you can send those events to Dengage just by using GTM. You don’t have to do any code changes on your website.
If you have tags and triggers as shown below, you can use those triggers to create tags to send data to D·engage.

For every existing event sending tag , you have to create a corresponding tag that sends data to D·engage. You will be getting the required data from variables that are defined in the tag manager. You will be using two D·engage SDK functions for creating tags: sendDeviceEvent and setContactKey.
GTM variables can be used in tags with the double curly braces syntax. If you have a variable called “product id” you can use this value in your tags as {{ product id }}.
- Login / Logout Events
For a user login event, you must add a tag that sends the user id to the Dengage SDK. A user id is called a contact key in Dengage platform. For this action use the setContactKeyfunction.
dengage(‘setContactKey’, {{ user id }});Also, when a user logs out you can empty this value. This is optional.
dengage(‘setContactKey’, ‘’);- Other Events
Events other than login/logout can be sent using the sendDeviceEvent function.
For example if you have a transaction event and some variables related to this event like transactionId, transactionTotal, transactionTax, transactionShipping, you will be using a code as shown below:
dengage('sendDeviceEvent', ‘user_events’, {
    transaction_id: {{ transactionId }},
    transaction_total: {{ transactionTotal }},
    transaction_tax: {{ transactionTax }},
    transaction_shipping: {{ transactionShipping }}
});
Please note that the ‘user_events’ part is the table name that you have created as Big Data Table the D·engage Admin Panel.
2. Add D·engage Data to dataLayer
This method requires code changes in your website. Use this method if you previously have no data or events added to the dataLayer or you don’t want to use existing data.
If you want to use the dataLayer to send data to D·engage, you have to push relevant data to the dataLayer where that event has happened. You can give these events a common name like dengage_event and add a trigger in GTM.
Use a code as shown below where necessary:
dataLayer.push({
    event: ‘dengage_event’,
    dengage_table_name: ‘events’,
    dengage_event_data: {
        var1: ‘aaa’,
        var2: ‘bbb’,
    },
});
This added data will not be sent automatically to D·engage. In order to do that you have to add a tag in GTM. This tag requires two variables and a trigger.
- First go to the “Variables” menu and click “New”.
- Provide a variable name such as “Dengage event data” then choose “Data Layer Variable” as variable type.
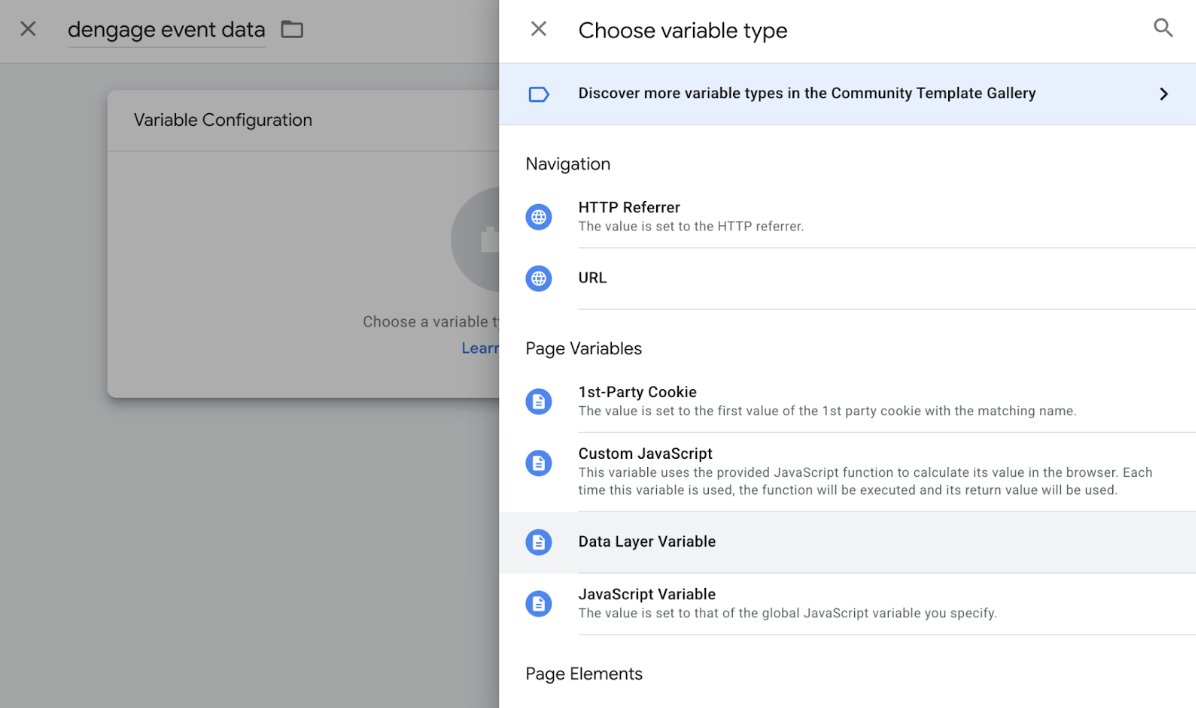
- Enter “‘dengage_event_data’” as variable name.

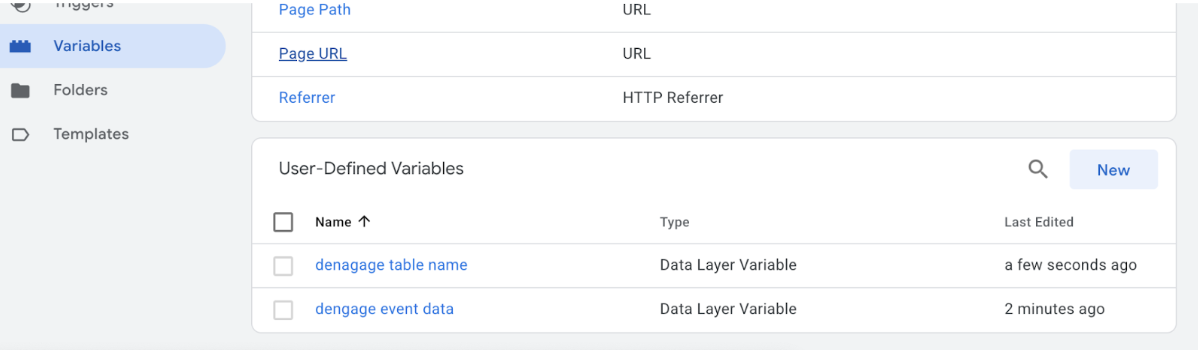
- Create another variable called “Dengage table name” using same steps. Use “dengage_table_name” as variable name. Result must be seen as shown below:
Once you have created variables, you will need to create a trigger for D·engage events.
- Select “Triggers” from the menu and click “New”.
- Enter “Dengage event” as the name and choose “Custom event” as trigger type.
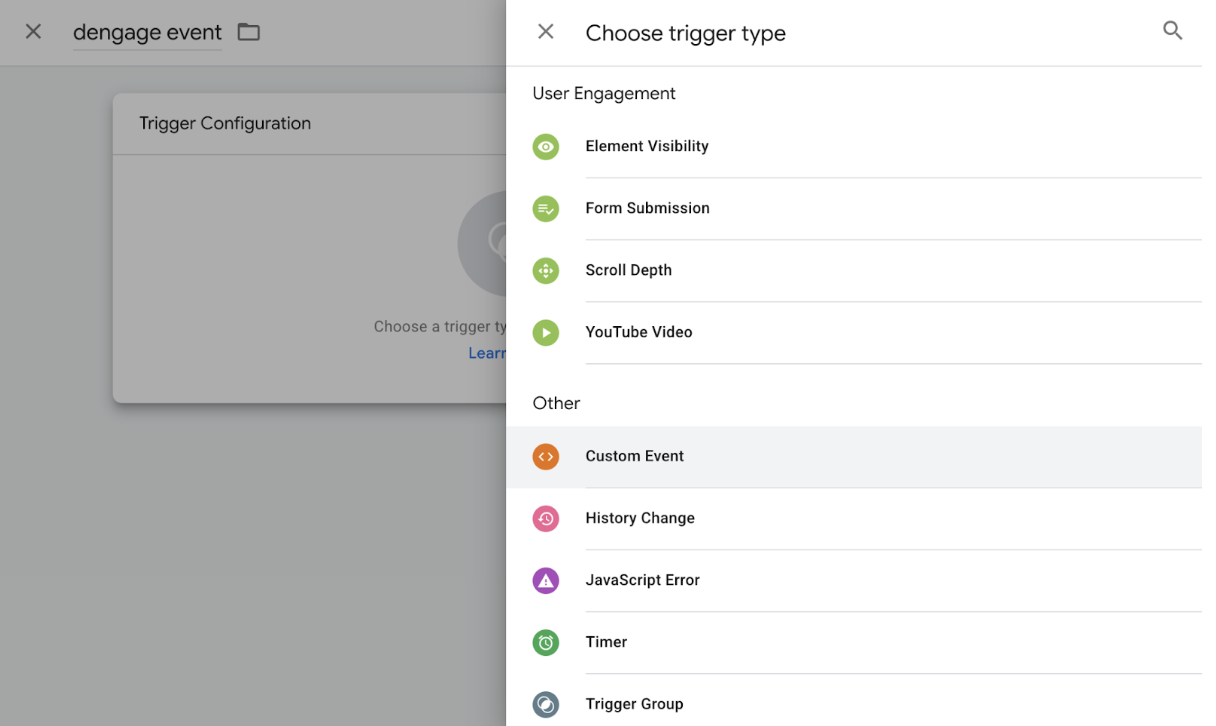
- Enter “dengage_event” as the event name.

- Navigate to the “Tags” menu and click “New”.
- Provide a name such as “Send dengage event” and select “Custom HTML” as tag type.
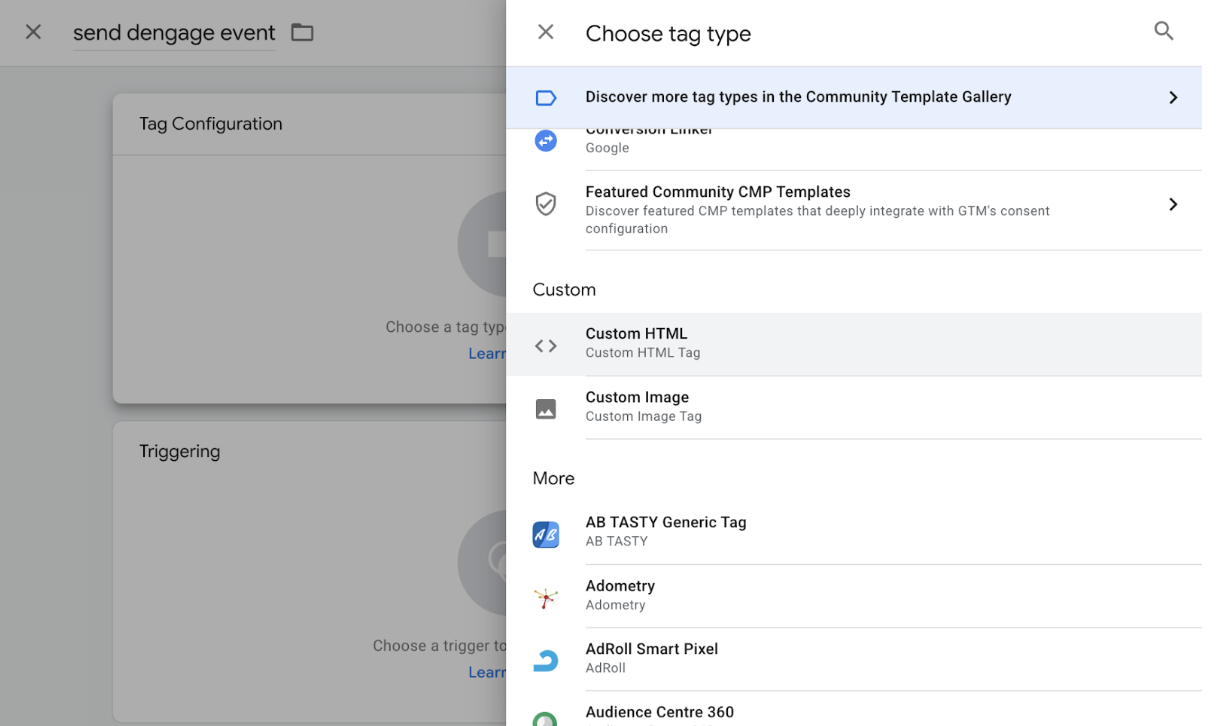
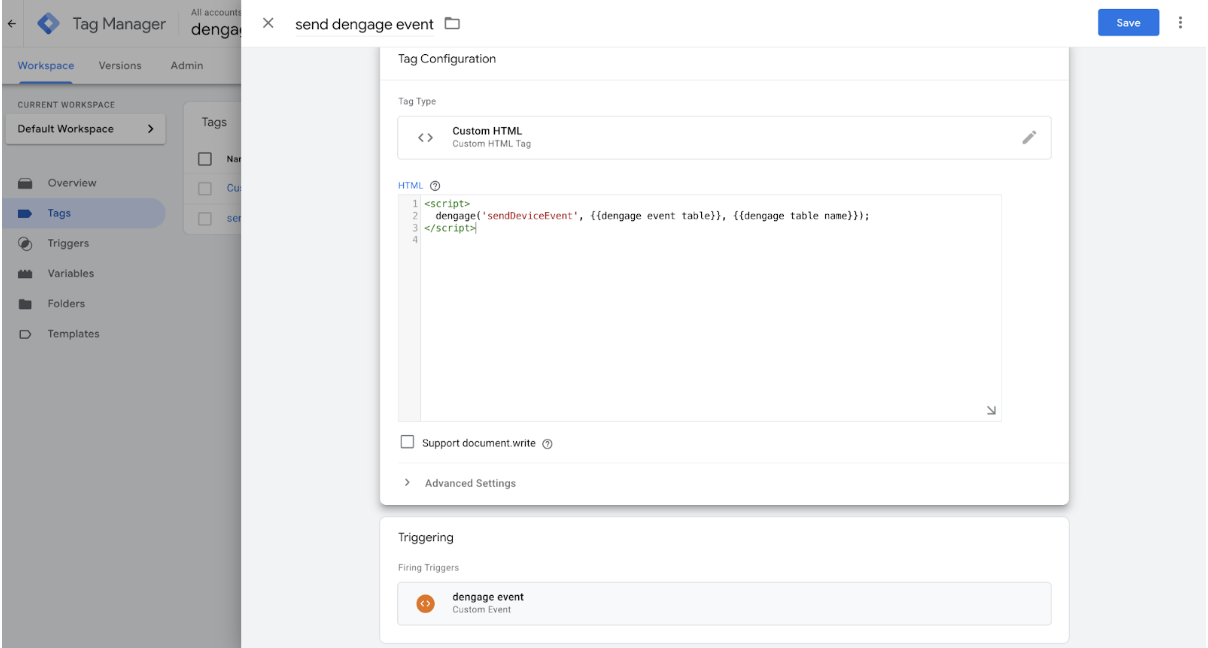
- Paste the code below and select “Dengage event” as trigger type.
Result must be seen as shown below:
After that, test this workspace to make sure everything works and then publish.